Divine Designs – Gingerbread House
Materials you will need • • • • • • • • •
Gingerbread House Designs from Divine Designs. Golden Brown Felt Fabric White Felt Red Cotton Fabric Sparkly White Fabric for windows Batting for each design so it is firm and stable. Heavy Weight Cut or Tear Away Stabilizer Embroidery threads as specified. Wonder Under or Spray adhesive.
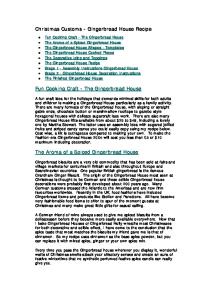
Making the Designs. The Gingerbread House is made up with a number of finished design pieces. Each design or part of the house is made entirely in the embroidery hoop and finished off with a satin stitch outline to keep everything tidy. The excess stabilizer is removed at the end and you are left with a number of finished designs as shown below.
Sewing the Design Pieces with Applique Embroidery. These designs are all made using the appliqué embroidery method. Following is a step by step guide for doing the appliqué. 1. Hoop stabilizer of your choice (as detailed below) 2. Follow the guideline for fabric and thread colors for each design square. 3. Sew the Appliqué Material outline when applicable. This will show you where to place your fabric. 4. Remove hoop from machine and cut fabric slightly larger then the Appliqué Material outline. Spray back of fabric lightly with spray glue. Place fabric with glue over Appliqué Material outline. Place hoop back on machine. 5. Sew Appliqué Position outline and then remove hoop again. 6. Carefully trim the material away from around the outline using fine scissors. Trim as close to the outline as you can but careful not to cut the stitching. Place hoop back on machine. 7. Continue to embroidery thread colors as specified. 8. Remove embroidery design from hoop, and trim excess stabilizer.
Which Stabilizer do you want to use? Heavy Cutaway. This stabilizer is the most firm, for a stable finish, but it does mean you have to trim the excess away very carefully from each piece, been careful not to cut the final white satin stitch outline of each square. This method will leave a little fringe, or border of stabilizer around each design piece, but this can be easily covered with braid at the end of your project.
Heavy Tearaway (or two sheets of lighter tearaway) This stabilizer is easier to remove, but depending on the type you use, you could have little white fringe of it left outside each design piece. This is the easiest option. Again, you can cover any left over stabilizer with braid at the end. Dissolvable Hoop two layers of dissolvable stabilizer to embroider the designs out on. Using this method, you have to wash the excess stabilizer away and this can mat your felt, and if you don’t rinse it out, can leave your pieces a little stiff and hard to sew. This method does give you a very tidy finish though. I use this stabilizer for the gingerbread boy and girl pieces.
The Thread and Appliqué Guide for Each Design Square Hoop stabilizer of your choice and embroider the designs needed for your project. You will receive a colour guide as follows with your instructions. There is a color guide shown here for one design only. In your instructions with your project, you will receive the same for all design pieces. Large House End 1. Appliqué Fabric (light brown felt fabric with batting) You need to have the batting underneath the felt. Use wonderunder or iron on batting to hold it in place underneath the background fabric. 2. Appliqué Position (don’t trim excess felt and batting yet, leave 1” square border around design.) 3. Dark Brown 4. Applique Fabric (shiny white fabric for windows) 5. Applique Position (trim fabric) 6. Applique Fabric (red fabric) 7. Applique Position (trim fabric) 8. Light Green 9. Green 10. Red 11. White 12. Bright Variegated Thread 1 (or color of your choice) 13. Bright Variegated Thread 2 (or color of your choice) 14. Red 15. White 16. Red 17. Dark Green 18. Appliqué Fabric (white felt for inside of fence. This felt will be placed on the underside of the embroidery hoop, with the right side facing down. Use wonderunder, or spray adhesive to keep in place. ) 19. Appliqué Position (trim excess white fabric from below the hoop, and excess brown felt and batting from above the hoop as left in step 20. White (white in bobbin)
Completing the Projects. Full Gingerbread House The full gingerbread house consists of two parts of the house that are joined together at the end. They are called Large House and Small House) (Large House) You will need to have completed 2 x Large House End, 1 x Large House Side, 2 x Large House Roof designs. Following is a guide for the layout of these designs to join them together to make the house. The coloured lines show you which sides join together to complete the house.
(Small House) You will need 1 x Small House End, 1 x Small House Side, 1 x Small House Door, 1 x SmallRoof1 and 1 x SmallRoof2 designs. Following is a guide for the layout of these designs to join them together to make the house. The coloured lines show you which sides join together to complete the house.
Now you should have two completed halves of the house. Use the following picture as a guide to show how they join together. The fluorescent green and yellow lines can be joined from the small house to large house. I didn’t need to sew or glue the fluorescent pink lines as they held firmly in place once everything else was joined.
The completed house will look like this. Note the angle the small house roof sits on the large house roof as shown in the picture below. Glue braid of your choice over all the edges if you wish to cover any messy lines.
Fence Sew out the fence design either once or twice (each time you get 3 fence lenths) Then join these fence pieces together at the seams by sewing or glueing the lines. If you have 6 lengths you can form a circular fence around the whole house. If you have 3 pieces, you can form a fence as shown below. Glue the hook side of Velcro to the end two fences and they can easily be joined to house sides where shown above.. Gingerbread Boys and Girls Sew out the designs on water soluble stabilizer and dissolve afterwards. Glue a little piece of the hook side of velcro to the back of each design, and they will be able to be easily stuck to the felt on the gingerbread house, and moved as you like. Alternatively glue a ribbon loop and use as Christmas Decorations.
Gift Baskets Following is a layout of the designs you need for the gift baskets. Sew all sides onto the base of the basket, and then join the edges. Finish off basket by adding handle to the top of the roof points. These designs are from the small house, but you would use the equivalent designs from the large house for a larger basket. For each basket you need 2 x house sides, 2 x house ends, and 1 x floor (choose small or large for all depending on which basket you are making) You then need one basket handle design.
The Completed Baskets.
Single Room House An additional project idea is to just sew out the single room house. If you choose to do this, complete all the large house designs and join together like you would a basket, but add the roof to it instead of the floor.
Joining the Pieces together. Now you have the layout of the designs you need, and the right amount of embroidered designs for your project, you need to join the pieces together. Each design is completed with a satin stitch outline, and depending on which stabilizer you used, this may be very tidy, or have some feathered edges. Some of the seams can be joined together on your machine. You can use an edge joining foot, or freehand zig zag stitch on your embroidery machine. Make the zig zag stitch 6.5mm wide and 0.5 long and use white thread.
Due to the 3D nature of this project, you can not join all the seams with your machine and will need some hot glue, or hand sewing to finish joining the rest of them together. Any messy edges can be easily covered with braid or eyelet lace. Following is a photo of the large house, as it is nearly completed. Just need to join a couple more seams together.
All Digitized Designs and Appliscape Projects are Copyrighted by Divine Designs and are only for use by the person who originally purchased the designs. Digitized designs are not to be shared, swapped, duplicated or sold in any way. Designs in there stitched out form can be used on personal items, gifts and items for resale. The digitized design itself remains the property of Divine Designs. The artwork for these designs was done by Lourdes S McClure and is also copyrighted. I hope you enjoy making this project. Any queries or comments please feel free to contact me. I am always more then happy to help. Do send those project photos through, I would love to see them. Many thanks Ananda Smith Divine Designs http://www.secretsof.com/content/83 mailto:
[email protected]