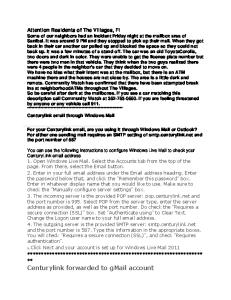
To Create a New Gmail Account: 1. The first step to creating your new gmail account will be to visit the Google homepage. If it isn’t set as your default page when you open your internet browser, enter www.google.com into your address bar. 2. Once you’re at the Google page, click on the Gmail tab located at the top of the page within the black border.
3. Once you’ve done this, you’ll be taken to the Gmail sign-in page. At the top right of this page, you’ll see a large red button that reads “Create An Account”. Click on this button to get started.
4. This will bring you to the account creation page. Here, you will be asked to provide your name, gender, birthdate, mobile phone number and a number of other pieces of identification. Beginning from the top-most field, you will be asked for your first and last name. This is what will be displayed as the sender’s name to the recipients of your email messages, so you’ll want to enter your first and last name. 5. Next will be your desired username. This is what your address will be, so for example in the attached image we have the example name John Smith. In this case, we have opted to use jsmith as the user name. This means that the email address for this account will be
[email protected].
6. Now, you will be asked to come up with a password for your Gmail account. You should choose a password that contains at least eight numbers or digits. It’s also important to include one capital letter as well as at least one digit to make your password more secure. Once you have chosen your password, you will be required to enter it again in the “Confirm your password” field. 7. Next you will be asked for your date of birth and gender. Beyond that, there is an optional field where you may enter your mobile phone number if you wish. If you choose to enter your phone number, you can have your mobile phone give you alerts when you receive new email messages and if your phone is internet ready you can also check your email through it. You can also use this feature to have your password sent directly to your mobile phone should you forget the password to log into your Gmail account. 8. There is an optional field to enter a current email address. If you already have another email account, you can use this feature to import contact lists and have a back-up address ready should anything happen to your Gmail account. 9. Now you will see a checkbox with the text “Prove You’re Not a Robot” above it. The first checkbox will allow you to skip the Captcha Image verification, although in order to skip this verification stage you will be required to enter your mobile phone number as mentioned above.
10. Now you must complete the Captcha Image verification step. There will be a large box with two words written in it, sometimes using fancy graphical styles. A lot of the time you will be given nonsense words and symbols. You will be required to type the two words as you see them in the text field in order to pass the verification. In this example, we were given the words Fstsee and feet.” Go ahead and enter the two words you are given into the text field.
11. There are two more checkboxes under the Captcha Image verification. The first is required of you to check and tells Google that you agree to their terms of service and privacy policy (which you can read if you click the words written in blue). The second checkbox is optional and is not
required if you do not wish to agree to it. Once you have filled out all the required text fields and clicked the appropriate checkboxes, it’s time to click on the blue button labeled “Next step”. 12. On the next page you will be asked to customize your email address. If you wish, you can change your display name here and even add a photo of yourself that others can view when reading your email messages. If you want to keep it simple, just click on the blue “Next step” button to advance. 13. That’s it! You’ll now be on the welcome screen and your email address has been created! This page will serve to remind you of your email address you have created, and you can now sign into your Gmail account to start sending emails.