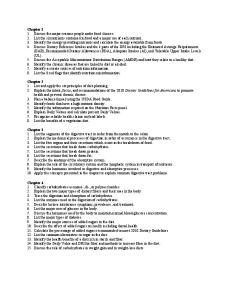
Chapter 3:
The Roadway
chapter contents Level B and C/Dirt Roads (Minimum Maintenance) 10 Characteristics of a Minimum Maintenance Road 10 Optimum T...
chapter contents Level B and C/Dirt Roads (Minimum Maintenance) 10 Characteristics of a Minimum Maintenance Road 10 Optimum Timing/Conditions for Maintenance 11 Maintenance Activities 11 Activities for Level B Roads 11 Activities for Level C Roads 11 Other Maintenance Activities 11 Granular Surfaced Roads 12 Characteristics of a Well-Maintained Gravel Road 13 Optimum Timing/Conditions for Maintenance 14 Spring 15 Summer 15 Fall 15 Winter 15 Definitions 15 Crown 15 Crust 16 Drainage 16 Riding Surface 16 Superelevation 16 Windrow 16 Maintenance Activities 16 Maintaining the Crown 17 Blading in Special Situations 21 Adding/Distributing Granular Material 23 Repairing Problem Areas 26 Providing Dust Control 30 Maintaining Gravel Alleyways and Streets 32 Purpose of Gravel Alley or Street Maintenance 32 Maintenance Activities 32 Asphalt Pavements Characteristics of a Well-Maintained Asphalt Pavement Optimum Timing/Conditions for Maintenance Activities Spring/Summer/Fall Winter
34 35 35 35 35
Asphalt Pavement Distresses Rutting Cracks Washboards Potholes Selecting a Maintenance Activity Maintenance Activities Routine Maintenance Surface Patching Full-Depth Repair Seal Coat Repair Hot Mix Asphalt Overlay For More Information
Level B and C/Dirt Roads (Minimum Maintenance) Some public roads in Iowa exist only to provide access to open land, like fields or cattle-grazing areas. Iowa Code allows county boards of supervisors to designate such roads as Area Service B (level B) or Area Service C (level C) roads (see figures 3–1 and 3–2). Counties are then obligated to provide only minimum maintenance (MM) on these roads. In the case of level C roads, counties can also restrict access. Boards of supervisors can designate level B and C roads through ordinance or resolution and generally do so only on the advice of the county engineer. Iowa has relatively few officially designated level B and C roads. Note: According to Iowa Code, all county roads not designated level B or C roads are Area Service A roads. Other than in the Code, however, the term Area Service A road is seldom used.
Characteristics of a Minimum Maintenance Road • County ordinances or resolutions regarding such roads are being followed. • Land owners adjacent to the roadway have access.
Figure 3–1. Access point for level B road (Linn Co.)
Figure 3–2. Access point for level C road (Linn Co.)
10
Local Roads Maintenance Workers’ Manual
THE ROADWAY– MINIMUM MAINTENANCE
CH.3
Optimum Timing/Conditions for Maintenance Follow your local policy. Generally, level B and C roads are not maintained on a routine basis. Do the work as you have time, preferably in the spring and fall because that is when farmers need to use these roads to access fields for planting and harvest. Be careful about performing maintenance when dirt roads are wet; your machinery may do more damage than good to the roadway if the roadbed is too moist.
Maintenance Activities The following maintenance activities are generally required by Iowa Code for level B and C roads:
Activities for Level B Roads • Install and maintain appropriate regulatory signs (for example, bridge postings). • Install and maintain signs at all access points from other public roads, warning of the reduced level of service.
Activities for Level C Roads • Install gates or other barriers to restrict access at all access points from other public roads. • Install and maintain appropriate regulatory signs (for example, bridge postings). • Install and maintain signs at all access points from other public roads, warning of the reduced level of service and restricted access. Who Is Responsible for Barriers? The Iowa Code requires adjoining landowners to maintain gates or other barriers that restrict access to level C roads. Barriers that are not adequately maintained by the landowner may be removed by the county, and the county is not obligated to replace them.
Other Maintenance Activities Other than maintenance required by the Iowa Code, counties need to provide only the minimum maintenance specified in applicable county ordinances to keep level B and C roads open to traffic. Check your agency’s ordinance or resolution for each specific road. The following services are generally not provided on a regular basis for level B and C roads: blading, snow and ice removal, application of road surface materials, crown maintenance, repairs, maintenance of uniform width, or inspections. Bridges on these roads are generally not maintained to carry legal loads, but should be posted as appropriate to advise of any load limitations. Local Roads Maintenance Workers’ Manual
11
CH. 3
THE ROADWAY– GRANULAR SURFACED ROADS
Granular Surfaced Roads
SAFETY Safety Tips for Maintaining Granular Surfaced Roads Always check with your supervisor and follow your agency’s safety policies and procedures. Suggested personal safety gear • Highly visible apparel
Advance preparations • Be properly trained and familiar with all equipment, especially motor graders. • Make sure an up-to-date first-aid kit, emergency contact information, and hand-held radios or cell phones are available at the work site. • Perform pre-use check of equipment including lights, blades, and hydraulic system, making sure there are approved and activated warning lights. • Make sure motor graders have orange flags attached to the end of the blade and slow-moving vehicle emblems attached to rear of the vehicle.
During operations • If road is open to traffic use proper temporary traffic control, including flaggers if needed, as described in the Iowa Traffic Control Devices and Pavement Markings: A Manual for Cities and Counties; in the MUTCD, part 6; and in your agency’s policies and procedures. • For more extensive repair activities, consider short-term road closures with proper signing. • Wear highly visibly apparel whenever out of vehicle. • Do not allow riders in motor graders. • Avoid backing large equipment and trucks without a spotter. • Remove all temporary traffic control devices immediately when no longer needed.
12
Local Roads Maintenance Workers’ Manual
THE ROADWAY– GRANULAR SURFACED ROADS
CH.3
An adequate crown and good drainage are critical for smooth, safe granular surfaced roads (generally called gravel or rock roads, no matter what kind of granular material, or aggregate, is on the surface). But gravel roads do not hold their shape well, even under normal traffic and weather conditions. Heavy loads, like some farm implements, and water from rain and melting snow and ice are especially hard on granular surfaced roads. Therefore, such roads must be regularly and properly maintained, as shown in figure 3–3. The primary objectives of maintenance on granular surfaced roads are to provide adequate water drainage away from the surface and a comfortable, safe riding surface for vehicles. Another objective on roads with high traffic volumes or adjacent to residential dwellings may be to control dust. Maintenance activities cover the traveled portion of the roadway through the shoulder. For a more thorough discussion of shoulder maintenance, see chapter 4.
Characteristics of a Well-Maintained Gravel Road A well-maintained granular surfaced road will have the following characteristics: • The road has a four to six percent crown with good crust and effective drainage. • Granular material is distributed at an even depth across the road. • Granular material is well graded (that is, an even distribution of fine and course materials). • There are no or few potholes, washboards, ruts, secondary ditches, or other problems.
If you can drain it, you can maintain it.
Figure 3–3. New granular surface (LTAP-SD) Local Roads Maintenance Workers’ Manual
13
CH. 3
THE ROADWAY– GRANULAR SURFACED ROADS
Optimum Timing/Conditions for Maintenance If possible, conduct maintenance operations on gravel roads when moisture is present. Soft, wet surface material is much easier to move, cut, and recompact than hard, dry material and makes it easier to cut out problems like potholes. In Iowa, moisture conditions are generally best for maintenance in the spring and fall. They are also good during the first two or three days after a summer rainfall. Some counties have regulations concerning adequate moisture levels for gravel road maintenance. Check with your supervisor, and follow your local policy.
In general, to determine if a gravel road is moist enough for routine maintenance activities squeeze a handful of the surface material. If it holds its shape, the material is moist enough. See figure 3–4. If it doesn’t hold its shape then it is not moist enough. See figure 3–5. Then pack the material against your other hand. If the other hand gets wet, the material is too wet.
Figure 3–4. Moisture test: wet
Figure 3–5. Moisture test: too dry
14
Local Roads Maintenance Workers’ Manual
THE ROADWAY– GRANULAR SURFACED ROADS
CH.3
Maintaining Dry or Frozen Gravel Roads Even if a gravel road is dry or frozen, some routine maintenance—for example, blading, regrading curve superelevations, repairing secondary drainage ruts, and removing vegetation—may be necessary. Check with your supervisor, and follow your city or county policy. The following times are just general guidelines.
Spring • Restore the crown early in the spring. • Repair problem areas such as potholes and washboarding. • Avoid operating heavy equipment on saturated roads and in “frost boil” locations.
Summer • Replace surface materials. • Maintenance grading—restoring proper superelevation on curves, cutting vegetation, etc.—may be necessary, even in dry conditions.
After each rain, start blading at a different location on your roadway route so that you will eventually cover the entire area. Do not go in the same direction on your route every time.
• Apply dust control to selected locations; check your local policy.
Fall • Perform final blading before winter and prepare for snow removal. • Double-check for windrows and remove them.
Winter • Suspend routine blading when freezing conditions persist. • Conduct snow removal activities when needed.
Definitions Crown
Be aware that littleused gravel roads and gravel roads with dead ends are frequent targets of illegal dumping, especially if they appear to be poorly maintained. Don’t ignore those roadway segments.
An adequate, A-shaped crown is important for drainage. A four to six percent crown is generally optimum.* If a gravel road has too little crown, water from rain or melted snow will collect on the road surface and soften the crust, which can lead to severe rutting and potholes under traffic. If there is too much crown, motorists may drive in the middle of the road because they feel as if their vehicles might slip off the road, especially when snow or ice is present. Situations may exist in which less than four percent or more than six percent crown is desirable. Always follow your agency’s policy.
* The actual crown will vary, depending on roadway width. In general, wider
roads require more crown than narrower roads. Some sources (e.g., South Dakota’s Gravel Roads Maintenance and Design Manual) suggest a four percent crown. This book suggests five percent as an average. Local Roads Maintenance Workers’ Manual
15
CH. 3
THE ROADWAY– GRANULAR SURFACED ROADS
Crust The crust is the top two or three inches of roadway that has been compacted into a dense, tight mass with an almost impervious surface. An adequate crust requires a good blend of stone, sand, and fine particles. See figure 3–6. Aggregates with too few fines will not form a crust, and excess fines will make the road slick in wet weather. Fractured or crushed stone is preferred to round gravel because the fractured surfaces will lock together. The crust material must be compacted at optimum moisture content—not too much, not too little—in order for the fines and larger materials to bond adequately.
Drainage Drainage is the process of moving surplus groundwater or surface water by gravity or pumping. Water flows wherever gravity takes it. Roads need good drainage to accommodate the flow of water away from the center of the road. Otherwise, water will pool on or below the road surface, weakening the crust and causing the formation of potholes, washboards, or other problems. A road with poor drainage will eventually require major reshaping and extensive maintenance. Maintaining good drainage on granular surfaced roads is achieved by properly constructing and maintaining the crown and crust.
Riding Surface Riding surface is the smoothness or roughness motorists feel in the road. Maintaining a smooth, safe riding surface is achieved by properly constructing and maintaining the crown and crust, uniformly distributing appropriate granular materials, and eliminating potholes, washboards, and other surface problems.
Superelevation At a curve, superelevation is the banking or sloping of a road upward from the inside of the curve to the outside. A proper superelevation enables vehicles to maintain a consistent speed through the curve. (The banked ends of racing tracks represent an exaggerated super elevation.) See Blading at Curves later in this chapter. Note: Not all curves must be superelevated. Check with your supervisor.
Windrow A windrow is formed by excess granular material left along the length of the shoulder, usually after blading. Windrows may cause secondary ditches to form, which can lead to erosion. Also, if a vehicle strays into a windrow, the driver may lose control.
Maintenance Activities A primary maintenance activity is to maintain the crown and provide effective surface drainage. This can require special care in special situations, like intersections, railroad crossings, etc. Other activities include adding new materials and repairing problem areas.
16
Local Roads Maintenance Workers’ Manual
THE ROADWAY– GRANULAR SURFACED ROADS
CH.3
Maintaining the Crown Maintain the crown as a straight line from shoulder to centerline. The cross section should look much like the pitch of a roof, or a flat A shape. See figure 3–6. Blade the crown to the final desired slope so that, after adding new material and resurfacing, there will be a uniform layer of granular material on the road. Cross slope is based on approximately one-half inch rise per foot, or about five percent from the edge of the roadway to the center. Cross slopes commonly range from four to six percent. On newer grades with higher traffic counts, the slope should approach six percent because the crown tends to get “beaten out” of the road under traffic. By using a slope meter, as in figure 3–7, the operator can measure the crown slope. Sophisticated electronic slope controls are also available for motor graders.
Figure 3–6. The cross section
figure 3-6 The Cross Section
Figure 3–7. Slope meter Local Roads Maintenance Workers’ Manual
17
CH. 3
THE ROADWAY– GRANULAR SURFACED ROADS
The road in figure 3–8 does not have adequate crown, and water sits on the road after a rainfall or snow melt.
While you’re operating the motor grader, you may be able to use a cup of coffee to estimate the road’s slope. Set the cup on a flat surface, and eyeball the angle between the surface of the coffee and the rim of the cup. (A slope meter should be your final guide.)
Make sure the roadway edge is the same height as (not lower than) the top of the foreslope to the ditch, as shown in figure 3–9. This is critical for preventing the formation of secondary ditches.
Figure 3–8. Poor crown shape (LTAP-SD)
Figure 3–9. Foreslope height (LTAP-SD)
18
Local Roads Maintenance Workers’ Manual
THE ROADWAY– GRANULAR SURFACED ROADS
CH.3
Adjust the angle and position of the moldboard, depending on the job at hand. For most blading purposes, rotate the moldboard to a horizontal angle of about 30 to 45 degrees. See figure 3–10. To cut out ridges, washboards, and potholes, put the moldboard in the cut position. See figures 3–11 and 3–12. Be sure to put enough pressure on the blade to maintain your cut.
Figure 3–10. Angle of the moldboard (Adapted from LTAP-SD)
Angle of the Moldboard
Moldboard Blade angle
Figure 3–11. Moldboard in the cut position for regular grading
Blade
Figure 3–12. Moldboard in the cut position for regular grading noit(Adapted ca gniggfrom ard nLTAP-SD) i draobdloM ,41-3 Local Roads Maintenance Workers’ Manual
19
CH. 3
THE ROADWAY– GRANULAR SURFACED ROADS
For heavier grading, tilt the moldboard back. See figure 3–13. To create a compaction roll that smoothes the road and helps shape the crown, tilt the moldboard forward until the blade is perpendicular to the road. See figures 3–14 and 3–15. Move and roll the aggregate in a mixing action away from the shoulder and toward the center of the road. To bring fine materials back across the road, the blade should be in the “float” position (if that feature exists on your grader). That is, there should be no down pressure except the weight of the blade. To do this, simply turn off the pressure to the blade.
Moldboard
Blade angle
Blade
Figure 3–13. Moldboard tilted backward for heavier grading or more aggressive cutting (Adapted from LTAP-SD)
gnipahser rof drawkcab detlit draobdloM ,61-3
Moldboard
Blade angle Blade Figure 3–15. Moldboard tilted forward for smoothing Figure 3–14. Moldboard tilted forward for smoothing (Adapted from LTAP-SD)
noitca gniggard teg ot drawrof detlit draobdloM ,31-3
20
Local Roads Maintenance Workers’ Manual
THE ROADWAY– GRANULAR SURFACED ROADS
CH.3
Blading in Special Situations Take special care at driveways, curves, railroad crossings, and bridges.
Blading at Driveways On a road with driveways, blade the road at a constant grade, then go back and fix the driveway areas by grading to a low point at the ditch line in the driveway. See figure 3–16. Leaving a windrow across a driveway may cause small vehicles to get stuck. Leaving a windrow on a hill will cause a secondary ditch to form, resulting in erosion in the roadway surface. See figure 3–17.
Figure 3–16. Driveway meets the road
Figure 3–17. Windrow forming a secondary ditch Local Roads Maintenance Workers’ Manual
21
CH. 3
THE ROADWAY– GRANULAR SURFACED ROADS
Blading at Curves In general, there should be little or no crown in a curve. If the curve is to be superelevated, use the following procedure: As you approach the curve, transition from crown to superelevation, beginning about 250 feet before the curve. As you leave the curve, transition back to a regular crown about 250 feet after the curve. A commonly accepted maximum superelevation on gravel roads is approximately six percent. A superelevation higher than six percent can be dangerous, especially where snow and ice can make roadways slippery. A higher superelevation also tends to cause aggregate to migrate to the bottom of the slope, or the inside of the curve.
You will have a nearperfect superelevation if you merely extend the five-percent cross slope from the inside of the curve across the entire width of the roadway. See figure 3–18.
Figure 3–18. Normal crown (top) and superelevation (bottom)
figure 3-20, Normal Crown and Superelevation
22
Local Roads Maintenance Workers’ Manual
THE ROADWAY– GRANULAR SURFACED ROADS
CH.3
Blading at Railroad Crossings At railroad crossings, zero out the crown on both sides of the crossing for a distance of 20–30 feet. Be careful not to blade aggregate onto the rails, which could cause a train to derail. After blading, brush all loose aggregate off the track.
Blading at Bridges Bridge approaches may need more frequent attention than other parts of the roadway because they are difficult to drain and the subbase beneath the crust is prone to settling, leaving potholes in the approach. If a bridge deck is crowned, gradually reduce the road crown to match the bridge crown. If the bridge does not have a crown, gradually zero out the road crown to meet the elevation of the bridge deck. Take care not to drag too much rock onto the bridge deck during blading operations.
Adding/Distributing Granular Material The granular surface material is gradually knocked off, carried off, or ground up (this is especially true with soft limestone) by traffic. Adding new material to gravel roads is therefore a regular maintenance activity. Before adding new material, prepare the road surface by scarifying it lightly to ensure a good bond and to blend the old and new materials together. See figure 3–19. Be careful not to cut out the crust when scarifying.
Figure 3–19. Lightly scarifying
Local Roads Maintenance Workers’ Manual
23
CH. 3
THE ROADWAY– GRANULAR SURFACED ROADS
When the new material is delivered by truck, it should be placed as uniformly as possible on the road. See figure 3–20. Then use the motor grader blade to distribute the material uniformly across the roadway. Be sure to maintain proper crown. After all the granular material is spread evenly over the roadway, normal traffic will generally compact the crust. However, if rollers are available, create a hard crust by compacting the surface with rollers. You may need to add water during this operation. See figures 3–21 and 3–22.
Figure 3–20. Placing new material on the roadway (LTAP-SD)
Figure 3–21. Adding water (optional) (LTAP-SD)
24
Local Roads Maintenance Workers’ Manual
THE ROADWAY– GRANULAR SURFACED ROADS
CH.3
Spreading New Material New rock is normally delivered to the roadway in trucks. To spread the material uniformly, the truck driver should strategically dump the rock while the truck is rolling. Here’s how: First, set the tailgate chains on the dump body to control the rate of spread, maintaining a gap of approximately 9 to 15 inches. As you approach the area needing rock, begin raising the dump body. At the appropriate location, trip the tailgate and continue raising the dump body, traveling at the appropriate speed for the desired rate of discharge. See figure 3–20. When the load is fully discharged, lower the dump body, allow the tailgate to engage, and head for your next load. Achieving the proper speed and tailgate setting is largely a matter of experience and feel. Skilled dump truck drivers usually watch their RPM meter instead of their speedometer.
Storage Windrows: Follow Your Local Policy After new material has been delivered to the site, it may be useful to use the grader to move it to the side of the road for short-term (one day or less) storage until you can spread it evenly across the road. Storing material temporarily like this keeps it out of the way of traffic, making it easier for vehicles to use the road while you’re blading. It also promotes mixing of the old and new materials. However, never store material at the side of the road for any length of time; see the problems associated with windrows, described on page 16. Some counties and cities prohibit the use of storage windrows. Consult your supervisor before using this technique.
Figure 3–22. Compacting the new material (optional) (LTAP-SD) Local Roads Maintenance Workers’ Manual
25
CH. 3
THE ROADWAY– GRANULAR SURFACED ROADS
Repairing Problem Areas Do not simply fill problem areas (potholes and wash boarding) with more granular material. Doing so can become very expensive. It also results in nonuniform levels of granular material across the road, causing the problems to reappear quickly.
Secondary Ditches Secondary ditches are a common problem in a granular surfaced road. They generally form when vegetation or windrows obstruct the flow of water from the roadway to the ditch as the top of the foreslope. Motor grader blading can inadvertently create secondary ditches if the operator is not careful. See figure 3–23. Prevent the formation of windrows by blading carefully and maintaining the edge of the road level with the shoulder and/or the top of the foreslope. Be careful not to dig a ditch with the end of the blade. Secondary ditches should be corrected as soon as possible after a rainfall. Also correct secondary ditches in the spring when there is little vegetation and plenty of moisture. Create a new crown, making sure that the edges of the road are level with the top of the foreslope so that water can flow directly off the road down the foreslope and into the ditch.
Figure 3–23. Secondary ditch (LTAP-SD)
26
Local Roads Maintenance Workers’ Manual
THE ROADWAY– GRANULAR SURFACED ROADS
CH.3
Corrugation/Washboarding Washboarding may occur under any of the following conditions: • Where traffic frequently starts and stops; for example, at intersections. This generally creates a series of close ridges in the road. See figure 3–24. • When the motor grader is driven too fast during blading. Driving too fast may cause the blade to bounce and cut ridges at an angle across the road. It can also cause the grader to “duck walk”: One end of the blade catches the ground while the other end rises above the ground, and then the second end will get caught in the ground while the first rises.) • If there are too many large particles and not enough fines, then the large particles may roll together creating piles or washboards. • Where drainage rills or rivulets form on super elevation curves, and where drainage across the road cause erosion. • Where crust or crown is inadequate and good drainage is not provided. See figure 3–8. To prevent washboarding, drive at three to five miles per hour and follow good maintenance practices regarding material size and distribution, moisture, and compaction. To correct corrugation and prevent it from recurring, you must cut it out of the road. Reconstruct the location, carefully remixing and compacting fine and course materials. You will usually have to make about four passes with the grader to get to the bottom of the corrugated area and blend the material adequately. See figure 3–25. Adequate moisture content is critical. See figures 3–24 and 3–25.
Figure 3–24. Washboarding (LTAP-SD) Local Roads Maintenance Workers’ Manual
27
CH. 3
THE ROADWAY– GRANULAR SURFACED ROADS
Potholes
Start-stop locations on steep hills may be especially prone to washboarding. In such locations, it may be helpful to reduce the top size of your aggregate. Finer material knits together better and may help reduce the formation of washboards.
Potholes are caused by poor drainage and occur where water pools. See figure 3–26. Prevent potholes by maintaining adequate crown on the roadway. Perform temporary repairs of potholes by filling them with aggregate. Such repairs will not last long. For a permanent repair, locate and fix drainage problems related to the potholes, then restore the area by cutting out the potholes, placing additional granular material, and blading and compacting the surface.
Rutting Rutting may be caused by poor drainage. See figure 3–27. Sometimes it occurs in the center of the road when traffic in both directions uses the middle of the road as a tire lane which moves the surface material in that area, creating a rut. To prevent rutting, make sure the crown is between four and six percent, there is an even distribution of material sizes, and the material is spread at an even depth and appropriately compacted with adequate moisture content. To correct rutting and prevent it from recurring, cut out the potholes, placing additional granular material, and blading and compacting the surface. When cutting out large potholes, corrugations, or ruts you may need to use your scarifier in order to cut deep into the crust and remove the surface defect. See figure 3–19.
figure 3-32, Cutting out a washboard
Figure 3–25. Cutting out a washboard (Adapted from LTAP-SD)
28
Local Roads Maintenance Workers’ Manual
figure 3-31, Cutting out a washboard
THE ROADWAY– GRANULAR SURFACED ROADS
CH.3
Figure 3–26. Potholes (LTAP-SD)
Figure 3–27. Rutting
Local Roads Maintenance Workers’ Manual
29
CH. 3
THE ROADWAY– GRANULAR SURFACED ROADS
Providing Dust Control All granular surfaced roads, whether natural gravel or crushed stone, will produce dust under traffic. The amount of moisture in the area has a great effect on the amount of dust. The quality of granular material also has a major impact. Limestone develops the most dust. Glacial gravel, with highly plastic clay, is less prone to developing dust. Applying dust control products on higher-volume granular surfaced roads may be cost effective. In addition to reducing dust, such products can help keep small granular particles on the road and prevent larger stones from being moved to the side of the road, thus reducing the need for blading.
Applying Dust Control Products (or dust stabilizers) Following are some general tips:
If potholes or other surface defects appear after dust control material has been applied, you may need to blade the road for safety reasons. Check with your supervisor.
• Make sure the road has a uniform crown (between four and six percent) and good drainage. • Do not compact the road surface before application. In fact, scarify a minimum of one to two inches of the road surface, leaving a uniform depth of loose material across the road. • Do not apply if rain is forecast. Rain will wash away your product and you may have to reapply . • If you are using a new product, you may want to start by treating a 500– 1,000-foot test section. This will allow you to see how the product works before applying it to the entire roadway. • Select an application rate and stick to it throughout the entire application process. This will leave you with a consistent roadway. • Treat one side of the road and then immediately treat the other side to achieve a consistent application. • After application, immediately open the road to traffic. Traffic will pack the product into the road surface material. • Some manufacturers of dust control products recommend not blading the surface at all after applying their products. Blading will break the bond that the product has made with the gravel on the roadway.
Moisture Considerations To be effective, dust control materials should be applied when the road surface material is moist. (See the rule of thumb on page 14.) The optimum moisture level is 13 to 18 percent. Figure 3–28 shows a roadway with this amount of moisture.
Kinds of Dust Control Materials The most common types of dust stabilizers used on roadways are chlorides, resins, natural clays, and soybean oil. Chlorides are the most common dust control materials. Calcium chlorides come in a flake or a liquid form and are very effective if properly used.
30
Local Roads Maintenance Workers’ Manual
THE ROADWAY– GRANULAR SURFACED ROADS
CH.3
Magnesium chloride is available in a liquid form and is very effective if properly used. Never apply chlorides to dry gravel. Moisture is necessary to help the chlorides penetrate the road surface and coat the granular material. Without moisture, chlorides aren’t effective, and you will have to reapply. Resins (lignin or tree sap) are available under various commercial names. They work best when incorporated into the gravel surface. They provide cohesion to bind particles together. Natural clays like bentonite will still develop dust in dry weather. They are somewhat difficult to transport and to mix with granular surface material. Soybean (or other vegetable) oil penetrates a gravel surface and provides a light bonding of the gravel that effectively reduces dust. However, vegetable oils tend to harden and may make the roadway more difficult to maintain.
Motor Oil is Not for Dust Control It is illegal to use motor oil or used crankcase oil as dust control material. These waste products have heavy metals and other hazardous materials in them and may pollute the environment. If you see oil on the road, notify your supervisor. Rejuvenating Dust Control Treatments Calcium chloride and magnesium chloride are water friendly. After a rain, you can do touch-up maintenance on a gravel road treated with chlorides, and the dust-control properties will be rejuvenated. The same is not true for roads treated with resins, clays, and vegetable oils.
Figure 3–28. Adquate moisture for applying dust control material Local Roads Maintenance Workers’ Manual
31
CH. 3
THE ROADWAY– GRANULAR SURFACED ROADS
Maintaining Gravel Alleyways and Streets Some communities (especially those with older, established neighborhoods) have gravel alleyways that accommodate off-street parking, access to garages, and access for waste pickup and utility repairs. Some communities also have gravel streets, where the drainage is managed through side ditches along the length of the street. Gravel streets are more common where traffic volumes and speeds are very low and where there is little if any truck traffic.
Purpose of Gravel Alley or Street Maintenance Like rural gravel roads, gravel alleyways and streets require regular maintenance. Generally, the purpose of urban gravel-way maintenance is to do one or more of the following: • Remove moderate to severe potholes. • Replace surface material that has washed out. • Control or restore the surface elevation and drainage features. • Provide dust control. Watch for Obstacles Equipment operators maintaining city streets and alleyways are often working in confined areas, sometimes in the vicinity of parked vehicles or other obstacles. In such situations, take extra care. Be aware of your surroundings. What’s an Appropriate Crown? The crown on urban gravel streets is generally lower, about two to three percent. The crown on gravel alleyways will likely be even less due to limited space.
Maintenance Activities In many ways, maintaining gravel alleys and streets is similar to maintaining rural gravel roads. The following information highlights special considerations for urban settings.
Pre-Maintenance Activities • Locate all manholes, intakes, and other conflicting utility features. • To keep rock out of the storm sewer system, remove intake grates and cover the opening with fabric, plastic, or wood. (Hold the covering in place with the grate.) • Locate potential obstacles to avoid during maintenance activities. Such obstacles may include the following: - Parked vehicles - Overhead wires, cables, and branches - Telephone poles - Garbage cans
32
Local Roads Maintenance Workers’ Manual
THE ROADWAY– GRANULAR SURFACED ROADS
CH.3
Maintenance Activities • On narrow gravel streets and alleyways, you may have to lay material under the grader, between the wheels, so that material does not end up in lawns. (Have a plan for retrieving the windrow.) • When adding material to an alleyway, take care not to drastically raise the elevation of the final surface, which could force rain water or runoff into garages and back yards. • When applying any dust control material to the new gravel, blend the dust control material into the gravel with the blading action. • After shaping the final surface profile with the grader, roll the edges with either the grader or with truck tires. This compacts the flow line and gives a more finished look to the street or alleyway. • Use shovels or brooms to clean alley approaches of residual rock.
Follow-Up Activities When maintenance activities are finished, remove the protective coverings from intakes, clean the intake area, and replace the grates.
Local Roads Maintenance Workers’ Manual
33
CH. 3
THE ROADWAY– ASPHALT ROADS
Asphalt Pavements
SAFETY Safety Tips for Maintaining Asphalt Surfaced Roads Always check with your supervisor and follow your agency’s safety policies and procedures. Suggested personal safety gear • Hard hat (if visiting an asphalt production plant) • Heavy gloves • Hard-toed footwear for working around hot asphalt • Ear protection (for working around noisy equipment like jack hammers) • Safety glasses with side shields • Highly visible apparel
Advance preparations • Be properly trained and familiar with all equipment and materials. • Know procedures for emergency treatment of burns from hot asphalt. • Be trained in avoiding heat-related illnesses, like heat exhaustion. • Make sure an up-to-date first-aid kit, emergency contact information, and hand-held radios or cell phones are available at the work site.
During operations • If road is open to traffic use proper temporary traffic control, including flagger(s) if needed, as described in the Iowa Traffic Control Devices and Pavement Markings: A Manual for Cities and Counties; in the MUTCD, part 6; and in your agency’s policies and procedures. • Consider temporary road closures if traffic can be diverted. • Wear highly visible apparel when you’re not in a vehicle. • Be aware of and take steps to avoid heat-related problems like heat stress and exhaustion. • Follow manufacturer recommendations and use caution when heating and using asphalt materials. • Do not park work vehicles or equipment on both sides of the road. • Be aware of construction equipment, especially backing trucks, paver, and rollers. • Ensure that all obstructions and unneeded temporary traffic control are removed from the road well before darkness. • Use proper lifting techniques or request assistance to lift heavy objects. • Workers should be provided periodic breaks and rest room accommodations. • Remove all temporary traffic control immediately when no longer needed.
34
Local Roads Maintenance Workers’ Manual
THE ROADWAY– ASPHALT ROADS
CH.3
Traditional maintenance treatments for hot-mix asphalt (HMA, or simply asphalt) roads include sweeping, crack sealing, pothole patching, full-depth patching, and thin maintenance surfaces like seal coats and asphalt overlays. A well-maintained asphalt roadway is shown in figure 3–29.
Characteristics of a Well-Maintained Asphalt Pavement • The roadway cross slope provides effective drainage. • There are no unsealed cracks, alligator cracks, potholes, washboards, or ruts. • Little to no ponding follows rain and/or ice melt. • Surface water does not move to the subgrade.
Optimum Timing/Conditions for Maintenance Activities Conduct maintenance operations on asphalt roads under dry to drying weather conditions. Water and asphalt are never a good combination.
Spring/Summer/Fall Most asphalt maintenance activities can be conducted during the spring, summer, or fall. Conditions may vary so check the material manufacturer’s instructions before applying.
Winter Asphalt maintenance is seldom done during the winter. (Normally only cold mix is placed for the purpose of managing potholes during the winter.)
Conduct road inspections for drainage during or immediately following rainfall. Problems with drainage, sealed and unsealed cracks, and ponding of petroleum byproducts can be readily identified immediately. Cracks are very prominent as the pavement surface is drying.
Asphalt Pavement Distresses Typical distresses include ruts, cracks, washboards, and potholes.
Rutting Ruts are surface depressions that run parallel to traffic and are located in the wheel path. See figure 3–30. Causes vary. If the pavement has risen around the edges of the rut, the rut is most likely caused by a poor mix. The uplift is a result of traffic pushing the asphalt to the edges of the wheel paths. If there are longitudinal cracks in the rut, the rut is most likely caused by structural failure of the subbase. The pavement is being pushed down onto the base or subbase. If the rut is not accompanied by uplift on the edges or longitudinal cracking, the rut is a result of poor compaction during construction and the vehicle loading has compacted the asphalt. Progressive rutting (rutting that continues to grow deeper and wider) is a result of poor subbase, very poor mix, or road design that is inadequate for actual loads. If progressive rutting is present, use of a slurry seal or micro-surfacing should be avoided until the ruts become dormant or no longer grow.
Figure 3–30. Rutting on an asphalt street
36
Local Roads Maintenance Workers’ Manual
THE ROADWAY– ASPHALT ROADS
CH.3
Cracks Cracks develop over time due to flexing pavement and temperature changes that cause expansion and contraction. Cracks allow water to move through the pavement and infiltrate the pavement base and subbase. Infiltrated water decreases the load carrying capacity of the base and subbase. If not repaired or prevented, this cracking effect will grow, leading to deformation of the pavement, potholes, and ultimately the degradation of the pavement surface.
Fatigue Cracking Fatigue cracks are a series of interconnected cracks in early stages of development that occur in areas subjected to repeated traffic loadings such as the wheel paths. See figures 3–31 and 3–32. These cracks develop into manysided, sharp-angled pieces, usually less than one foot long on the longest side. In later stages, the cracks characteristically develop with an alligator scale pattern.
Block Cracking Block cracking is a pattern of cracks that divides the pavement into approximately rectangular pieces. See figure 3–33. Rectangular blocks range in size from approximately 1 to 100 square feet.
Alligator Cracking Alligator cracks are interconnected cracks that have the appearance of alligator scales. See figure 3–34. Alligator cracking is typically found in wheel paths and is normally accompanied by rutting. Alligator cracks form in areas of repeated traffic loads that cause high stress in the bottom of the pavement. This stress cracks the pavement and the cracks propagate to the surface. The surface cracks begin with hairline longitudinal cracks and, as the pavement ages, the cracks begin to interconnect.
Figure 3–33. Block cracking (CCEE/ISU)
Figure 3–34. Alligator cracking (CCEE/ISU)
38
Local Roads Maintenance Workers’ Manual
THE ROADWAY– ASPHALT ROADS
CH.3
Reflection Cracks Reflection cracks are cracks in an overlay that have “reflected” upward from cracks or joints in the pavement below. See figure 3–35.
Washboards Washboards are a series of ruts in the road running transverse to the road. See figure 3–36.
Figure 3–35. Reflection cracking (CCEE/ISU)
Figure 3–36. Washboards (CCEE/ISU) Local Roads Maintenance Workers’ Manual
39
CH. 3
THE ROADWAY– ASPHALT ROADS
Potholes Potholes are bowl-shaped holes of various sizes in the pavement surface, with a minimum width of three inches. See figure 3–37. For purposes of classification, low-severity potholes are less than one inch deep, moderate potholes are from one to two inches deep, and high severity potholes are greater than two inches deep. One way potholes form is when water becomes trapped beneath the pavement surface. (Water can infiltrate through cracks or poor drainage.) In the winter, the sub-surface water freezes and expands upward against the pavement. This action creates a void under the pavement, and vehicle loads are not transferred to the base and subbase. Vehicles add more stress until the pavement surface collapses into a hole. The hole grows as traffic breaks the edges of it.
Figure 3–37. Pothole in asphalt pavement (CCEE/ISU)
40
Local Roads Maintenance Workers’ Manual
THE ROADWAY– ASPHALT ROADS
CH.3
Selecting a Maintenance Activity A key to effective asphalt pavement maintenance is to first identify the pavement distresses (described above) and then determine the most effective maintenance activity. See table 3–1. Selecting the most effective maintenance activity involves several factors: 1. Type and extent of distress 2. Roadway classification and traffic volumes 3. Cost of treatment 4. Availability of qualified staff and/or contractors 5. Availability of quality materials 6. Time of year for maintenance Reviewing the records of the road will also aid in selecting the most effective maintenance activity. Records should include the following: 1. Routine maintenance activities 2. Pavement base and subbase design 3. Pavement section boundaries 4. Pavement age 5. Type and extent of previous maintenance treatments 6. Traffic volumes 7. Environmental impacts
Table 3–1. Distresses and Maintenance Activities for Asphalt Pavements
Maintenance Activities Distresses
Routine Maintenance Crack Sealing
Surface Patching
Ruts Cracks
Seal Coat Repair
X X X X
HMA Overlay X
X
Washboards Potholes
Full-Depth Repair
X X
X
Local Roads Maintenance Workers’ Manual
41
CH. 3
THE ROADWAY– ASPHALT ROADS
Maintenance Activities Routine Maintenance The goal of routine maintenance is to prevent or delay pavement distresses. Routine maintenance includes regular street sweeping and crack sealing.
Street Sweeping Sweeping removes dried, caked mud, abrasives, and other debris from the road surface. Clean road surfaces help keep drains clean, make travel safer for bicyclists, and ensure good surface drainage.
Crack Sealing Crack sealing prevents water from infiltrating through the pavement into the base and subbase. Typically the public works or secondary road department rents equipment for crack sealing every other year or as needed. Seal cracks in the spring or fall when temperatures are moderately cool and the pavement cracks are open. The work can usually be accomplished within a month’s time. The following instructions are general guidelines. Check with your supervisor, and follow your local policy. Preparing for Sealing Follow these preparation guidelines: 1. Rout or saw-cut cracks to provide clean, uniform surfaces for sealant to adhere to and a reservoir for sealant.
See Safety Tips on page 34.
2. Use an air compressor and an air wand to clean cracks of dirt, dust, and remnants from sawing or routing. Contamination in a pavement crack will cause poor sealant bonding. Applying the Sealant After all cracks are blown clean, seal the cracks: 1. Apply sealant at a temperature of 350°– 410°F with the delivery hose and wand of the melter applicator. Take appropriate safety precautions when handling this hot material. 2. Pour an even bead of sealant into the crack no higher than ½ inch above the pavement surface. If it’s higher, it could be damaged by snow plows or street cleaning equipment, and it may flow over the pavement surface. 8 3. To remove excess sealant, run a U-shaped squeegee or sealing shoe over the bead to flatten the sealant over the crack, move the sealant to the bottom of the crack, and remove excess sealant. The squeegee creates a U-shaped seal, allowing for contraction and expansion of the pavement during pavement temperature changes. See figure 3–38.
4. Keep traffic off the newly crack sealed surface. This will minimize tracking of material and allow for maximum adhesion to the surface. On occasions where this is not feasible, a light coating of sand spread over the sealant will act as a blotter and allow opening the street to traffic sooner.
42
Local Roads Maintenance Workers’ Manual
THE ROADWAY– ASPHALT ROADS
CH.3
Surface Patching Surface patching is an interim repair using all-weather asphalt materials. See figure 3–39.
Figure 3–38. Crack sealing (CCEE/ISU)
Surface patch
Full-depth repair
Figure 3–39. Surface patch and full-depth repair (CCEE/ISU) Local Roads Maintenance Workers’ Manual
43
CH. 3
THE ROADWAY– ASPHALT ROADS
Before patching, correct drainage problems that likely caused the pothole formation, in order to prevent recurrence. Ensure a proper base is in place. Patch with an all-season patch material. This material will work well in most conditions, including wet. In fact it is preferable to wash out the area to be patched to avoid having a dusty surface. See figure 3–40.
Figure 3–40. Procedure for placing surface patch
44
Local Roads Maintenance Workers’ Manual
THE ROADWAY– ASPHALT ROADS
CH.3
Preparing for Surface Patching Follow these preparation guidelines: 1. Make sure warning lights attached to vehicles are on and in proper working order. 2. Use a shovel, broom, air hose, or mechanical sweeper to clean the area to be patched. It must be clean and free of water, debris, and other loose material before patching.
See Safety Tips on page 34.
Placing the Patch After the area to be patched is clean, place the surface patch. 1. Fill the pothole with patching material until it is slightly higher than the surrounding surface area. 2. Smooth the area with a shovel or lute, leaving the patch slightly higher than the adjacent surface. 3. Compact the patch using a hand tamper, truck tire, or vibratory roller. The patch should now be consolidated and flush with the pavement surface. 4. Clean the area of any residual debris and haul it away.
Alternative Patching Materials
If deterioration is 25 percent or less of the total pavement thickness, apply a surface patch. If deterioration is more than 25 percent of the total pavement thickness, apply a fulldepth repair.
Commercial products are available for cold-weather pavement patching and for use in adverse weather conditions. Such products cure rapidly and have good flexibility for withstanding extreme changes in temperature. Before applying these products, make sure pavement is frost free, dry, and free of coatings, dirt, oil, or other contaminants. Saw cut the perimeter of the patch to a minimum depth of ½ inch. Remove loose and deterioriated pavement.
Local Roads Maintenance Workers’ Manual
45
CH. 3
THE ROADWAY– ASPHALT ROADS
Full-Depth Repair This is a permanent repair for distresses larger and/or deeper than surface degradation. It involves removing and replacing the distressed section of the slab, from top to bottom. See figures 3–39 and 3–41.
Figure 3–41. Procedure for full-depth asphalt repair
HMA full depth patch
46
Local Roads Maintenance Workers’ Manual
THE ROADWAY– ASPHALT ROADS
CH.3
Preparing for Full-Depth Asphalt Repair 1. Make sure the warning lights attached to vehicles are on and in proper working order. 2. Clean and dry the surface before removing deformed pavement material.
See Safety Tips on page 34.
Placing a Full-Depth Repair Full-depth patching should be done in lifts, or layers, of 2½ inches maximum. 1. Saw cut around the area. 2. Remove material with a jack hammer, picks, shovels, broom, air hose, or mechanical sweeper. 3. Apply a tack coat to the edges of the existing pavement. 4. Replace in lifts, or layers, of 2½ inches maximum. 5. Compact with a vibratory roller. 6. Reapply pavement markings if appropriate. 7. Allow traffic to drive on repair when the new asphalt is cool enough to touch.
Seal Coat Repair A seal coat is an application of an asphalt binder followed by an application of aggregate. A seal coat fills cracks and low spots, waterproofs the surface, and provides a wearing course for traffic. Seal coats are also known as chip seals, tar and rock (informal description), oil and rock, and surface seal. A good seal coat will have the following characteristics: • An adequate crown (slope) on the roadway for good drainage. • Few unsealed cracks, alligator cracking, potholes, or ruts. • Little to no dust during or immediately after application. • A smooth tight surface with little or no bleeding or raveling. (Bleeding of asphalt binder to the pavement surface may be caused by a too-rich binder or too high application rate of binder. Raveling—a rough, pitted surface due to loss of aggregate—may be caused by damage from traffic or road equipment, oxidation of the surface, or poor design.)
Materials The two materials used for seal coats are binder (asphalt) and aggregate. See figure 3–42. Binders consist of asphalt cutbacks or asphalt emulsions. Asphalt cutbacks are a mixture of asphalt binder with a cutter (naptha or kerosene). Once applied, the cutter evaporates leaving the asphalt binder behind. Asphalt emulsions are mixtures of asphalt binder, water, and a surfactant soap. The soap suspends the asphalt in the water until application. The water then evaporates leaving behind the asphalt binder. See figure 3–43. Aggregates normally used for seal coats are quartzite, limestone, and pea gravel. See figure 3–44.
Local Roads Maintenance Workers’ Manual
47
CH. 3
THE ROADWAY– ASPHALT ROADS
Figure 3–42. Asphalt binder and aggregate are used for seal coats (CCEE/ISU)
Figure 3–43. Binder (CCEE/ISU)
Figure 3–44. Gravel aggregate (CCEE/ISU)
48
Local Roads Maintenance Workers’ Manual
THE ROADWAY– ASPHALT ROADS
CH.3
Optimum Timing/Conditions for Applying Seal Coats A new seal coat should be placed before structural distresses have occurred in the existing asphalt pavement or on a properly prepared stone base. Application should take place during the hottest and driest months of the summer. The binders used for seal coat construction cure faster in hot, dry weather. Seal coat construction is normally not planned past September 15, when temperatures begin to drop and the likelihood of rain increases. Seal coating should be delayed if wind speeds are high. The wind affects the spray pattern from the distributor truck and can blow dust and other debris on the uncovered binder. Wind will also cause the binder to cure faster, decreasing the time available between binder application and aggregate application.
Preparing for Seal Coat Application 1. Complete pre-seal coating activities, like crack sealing or patching. 2. Ensure all equipment is on site and functioning properly (check the equipment manuals): • • • • •
See Safety Tips on page 34.
Street sweeper Distributor truck Chip spreader Pneumatic tire roller Dump trucks for aggregate hauling
3. Ensure the materials are on site. The aggregate should be clean. 4. Sweep and clean the pavement to remove debris. See figure 3–45. Remove vegetation from cracks. 5. Cover utility access lids with construction paper so the material does not adhere to the lid.
Figure 3–45. Cleaning the existing pavement surface (CCEE/ISU) Local Roads Maintenance Workers’ Manual
49
CH. 3
THE ROADWAY– ASPHALT ROADS
Placing a Seal Coat 1. Spray the pavement with the binder. • Use roofing paper to make a sharp line across the pavement when starting and stopping application. • Align the binder application with the center line of the road. Align the nozzles and set the spray bar height as appropriate. See figure 3–46. • If using a slow setting emulsion, spray approaches or intersection radii first. If using a rapid setting emulsion, spray approaches and radii after the main road. • Apply only as much emulsion as the chip spreader will be able to cover with a load of aggregate. Calibrate this distance by measuring the distance the chip spreader travels on one load of aggregate. 2. In general, apply the aggregate before the binder has set, usually within two to three minutes after it has been applied or before the surface has turned black.
Figure 3–46. Spray bar coverage (CCEE/ISU)
50
Local Roads Maintenance Workers’ Manual
THE ROADWAY– ASPHALT ROADS
CH.3
A simple test for making sure the binder has not set is to throw chips across the binder. If the chips bounce, the binder has set and the chips won’t adhere. If the chips stick to the binder, it is time to apply the aggregate. See figure 3–47. However, if the binder begins to form a wave in front of the aggregate spreader, wait briefly for the binder to set up a little. (Binder waves cause corrugations in the seal coat.)
Figure 3–47. Test for binder set (CCEE/ISU)
3. Roll the aggregate with a pneumatic tire roller closely behind the chip (aggregate) spreader. See figure 3–48. • Make two to four passes on a 24-foot wide roadway. • Do not start and stop the roller quickly. This will cause diffraction of the surface. 4. The following day, sweep up excess unbound aggregate.
Application rates Application rates will vary, depending on materials used and the condition of the surface. The following rates are guidelines: Binder = 0.25–0.3 gal/yd2. If the pavement is smooth with few voids, the application rate is less. If the pavement is rough with lots of voids, the application rate is higher. The amount of applied should be approximately 50 to 70 percent of the thickness of the aggregate. Aggregate = 15–30 lb/yd2. If the aggregate is not covering the binder, increase the aggregate application rate. If excess aggregate is visible, decrease the aggregate application rate. (Excessive aggregate fly rock (unbound aggregate) will be kicked up by traffic and may damage vehicles. Excessive fly rock leads to additional cleanup, dust, and haul-away costs.)
To check for proper binder application rate, remove a few stones that have been embedded in the binder by the pneumatic roller. About 50–70 percent of the aggregate should be covered with the binder. See figure 3–49. If the tires on the chip spreader or roller are picking up aggregate, there’s too much binder for the amount of aggregate. Check the binder application rate or increase the aggregate application rate.
Figure 3–49. Binder application rate (CCEE/ISU)
figure 3- , Binder application rate
Seal Coat Operations The distributor truck driver ensures that • The traffic control is in place. • The aggregate is on site. • The distributor truck is properly functioning with all of the nozzles properly aligned and cleaned and the spray bar at the right height. • The pavement has been swept. • Other equipment (chip spreader, roller, and aggregate truck) is on site and is prepared to begin construction.
52
Local Roads Maintenance Workers’ Manual
THE ROADWAY– ASPHALT ROADS
CH.3
During construction the distributor truck driver • Maintains a proper distance in front of the chip spreader. • Records the emulsion left in tank. The chip spreader operator ensures that • The gates are properly opened and aligned in order to apply a uniform aggregate spread. • The belts, feeds, and augers are working properly. During construction the chip spreader operator • Maintains communication with the distributor truck operator. • Tells the distributor truck operator when to stop because the chip spreader is running out of aggregate. This will prevent areas of binder from sitting too long. • Watches the application to assure the application is consistent and there are no streaks. • Makes sure aggregate is clean and free of debris. The pneumatic tire roller operator ensures that the tires are at the specified air pressure, typically 45 psi or higher. During construction the roller operator • Checks to see if too much binder has been applied, causing the seal coat to bleed, or if not enough binder has been applied, causing the aggregate not to stick to the pavement.
Everyone is responsible for quality control.
• Checks to see if the proper amount of chips are applied evenly over the surface. • Makes sure the roller is not changing directions too quickly, causing the aggregate to come unbound from the binder. Foremen/worker ensure that • The distributor application is consistent and not streaky. • The chip spreader has a consistent application rate and is applying the aggregate roughly one pebble thick. If the aggregate is piling up in front of the aggregate fall, the application rate should be reduced.
Cleaning Up 1. Pick up all construction signs the next work day after the seal coat has been installed. 2. Clean the work zone and each driveway and parking area of debris.
Local Roads Maintenance Workers’ Manual
53
CH. 3
THE ROADWAY– ASPHALT ROADS
Hot Mix Asphalt Overlay A hot mix asphalt overlay is a new layer of asphalt over an existing asphalt pavement prepared stone base. Overlays can protect and add some strength to the existing pavement structure, reduce the rate of deterioration, and reduce deficiencies like ride quality. Overlays should not be applied to seriously distressed pavement systems.
Preparing for a Hot Mix Asphalt Overlay 1. Grind two-inch to zero wedges at both start and stop points at the first lateral joint. 2. Lay tack paper and cold mix ramps.
See Safety Tips on page 34.
3. Take special care to ensure that drainage will be maintained (e.g., bevel grind cross streets at flow lines). 4. Remove loose material and water from deteriorated areas. Clean, patch, and compact. (See Full-Depth Repair on page 46.) 5. Replace any failed areas of curb. 6. Make sure all manholes and intakes are working properly. 7. Count the number of risers and lids needed for manholes, water, gas, and monument castings. Inventory, check for fit, and place on site the day before the overlay is to be installed. Other possible preparations: 8. Notify residents in advance when preparation work and overlay will be performed on their street. 9. Cut back low hanging limbs that equipment may break loose and that may contaminate the overlay material.
Day Before the Overlay 1. Sweep the street. Remove any grass and water in pavement cracks. 2. Telephone the asphalt plant and let them know your tonnage requirements. Keep them aware of any major breakdowns that force you to stop paving.
Placing the Hot Mix Asphalt Overlay 1. Have all traffic control and construction signs up and in place. 2. Spray the paving machine with release agent and heat the screed to operating temperature. 3. Remove cold mix ramps and paper. 4. After the street has been cleaned, apply a tack coat at the proper rate so as to avoid pushing or shoving the mat. 5. Contact the plant and have trucks loaded and dispatched to the project. 6. Identify areas where leveling courses need to be placed to fill in low spots, and pave as needed. 7. Make sure all risers and lids are in place.
54
Local Roads Maintenance Workers’ Manual
THE ROADWAY– ASPHALT ROADS
8. At the beginning of the overlay section, set up the paver to run the finish course. Set the heated screed on lath to gain prior mat elevation. 9. Get all paver personnel in position with their tools. 10. Back the truck up to the paver. When contact is made, raise the truck box before the tailgate is tripped to deliver the mix to the paver hopper. This dumping procedure will cause the mix to slide against the tailgate. Upon tripping the gate, the mix will flood the hopper and reduce the amount of segregation that appears behind the screed. 11. If the truck needs to be pulled away from the paver after loading (due to incline or some other reason), before the paver starts, make sure the mix has not spilled on the street and piled up in front of the paver tracks. Remove any spills. Otherwise the paver will ride on this material, and the pavement surface will be irregular. 12. During paving, the hopper on the paving machine should be full at all times to ensure a constant flow of materials to the screed. In addition, the augers that move the mix in front of the screed should be turning most of the time so that the mix is uniform in density before compaction. 13. Compaction is accomplished with a rubber-tired roller (breakdown roller) and a steel-wheeled roller (finish roller). The rubber-tired roller provides energy to compact the mix; it should be as close as possible behind the lay-down machine but not so close that the mix is rutted or disturbed. The finish roller removes the wheel tracks left by the rubbertired roller and should be as close as possible behind it without tearing the surface. 14. After paving and rolling operations have concluded, barricade the street to allow for cure time overnight. Notify police, fire, and transit of closure. 15. Schedule the overlay to be sand sealed at the end of the construction season.
Cleaning Up 1. Pick up all construction signs the next work day after the overlay has been installed. 2. Clean the work zone and each driveway and parking area of debris and excess asphalt.
For More Information A series of pamphlets called Pavement Preservation Checklist Series developed by the Foundation for Pavement Preservation and the Federal Highway Administration provide useful information on the construction of seal coats and other thin maintenance surfaces. The pamphlets also define various quality control techniques for different surfaces and include quality control checklists. The pamphlets are available from the Iowa LTAP library. Contact 515-294-9481, [email protected].
CH.3
Asphalt Depth Asphalt will densify approximately 20 percent after compaction. So if the layer being placed is to be 2 inches thick, the mix passing out from under the screed should be about 2½ inches deep to allow for compaction. Laying Asphalt on Curb Edge Laying asphalt on the curb edge takes more hand work than the pass down the crown of the roadway. Most driveways need a wedge placed at the opening to keep water from ponding. When constructing theses wedges, the correct amount of hot mix must be added to force water past the drive. The upper edge of the wedge should be squared off and tapped with a lute, then compacted before the mix cools. Estimating Tonnage On the final finish course pass, the supervisor needs to be aware of the tonnage going through the paver and the distance the paver travels per load. This will help in estimating the tonnage of the last truck load for the project.
Local Roads Maintenance Workers’ Manual
55
CH. 3
THE ROADWAY– CONCRETE PAVEMENT
Concrete Pavements
SAFETY Safety Tips for Maintaining Concrete Surfaces Always check with your supervisor and follow your agency’s safety policies and procedures. Suggested personal safety gear • Hard hat • Safety glasses with side shields to protect eyes • Ear plugs or muffs (for use around jack hammers or other noisy equipment) • Protective gloves for handling fresh concrete, to avoid skin irritation • Heavy boots with hard-toe protection • Rubber boots if you’ll be standing in fresh concrete • Highly visible apparel
Advance preparations • Be properly trained and familiar with all equipment. • Make sure an up-to-date first-aid kit, emergency contact information, and hand-held radios or cell phones are available at the work site. • Be trained in avoiding heat-related illnesses, like heat exhaustion.
During operations • If road is open to traffic use proper temporary traffic control, including flaggers if needed, as described in the Iowa Traffic Control Devices and Pavement Markings: A Manual for Cities and Counties; in the MUTCD, part 6; and in your agency’s policies and procedures. • Wear highly visible apparel when not in a vehicle. • Do not park vehicles and equipment on both sides of the road. • Be aware of and take steps to avoid heat-related problems like heat stress and exhaustion. • Use proper lifting techniques or request assistance to lift heavy objects. • Workers on foot should always be aware of backing equipment. • Workers should be provided periodic breaks and rest room accommodations. • If you are filling cracks and joints on concrete pavement, also refer to safety tips for asphalt. • Remove all temporary traffic control immediately when no longer needed.
56
Local Roads Maintenance Workers’ Manual
THE ROADWAY– CONCRETE PAVEMENT
CH.3
Traditional maintenance treatments for portland cement concrete (PCC, or simply concrete) pavements include routine sweeping and cleaning, joint and crack sealing, temporary (asphalt) repair, joint repair, mud jacking, and surface and full-depth repairs.
Characteristics of a Well-Maintained Concrete Pavement • The roadway cross slope provides effective drainage. • There are no unsealed cracks or unsealed joints. • Little to no standing water follows rain and/or ice melt. • Adjacent concrete sections settle evenly.
Optimum Timing/Conditions The timing for full- or partial-depth patching depends on the condition of the subgrade that the concrete will be placed on and the temperature. Patching should not be conducted when air temperature is below freezing. If the newly placed concrete is frozen, it will lose its strength. See winter on the following page. The subgrade cannot be saturated or frozen, and it must be compacted and within moisture tolerances. Some counties have guidelines for allowable moisture content and air and ground temperatures for placing concrete pavement. Check with your supervisor. If properly protected from the elements, concrete can be placed in most environmental conditions.
Spring/Summer/Fall Concrete should never be placed on frozen or saturated subgrade. It should never be placed in weather conditions that would allow it to freeze.
Most types of concrete maintenance treatments can be placed during the spring, summer, or fall. Conditions for maintenance vary according to the treatment type, subgrade type, and subgrade conditions.
Winter Concrete patching can be done in the winter. Fresh concrete needs to be protected from frost and freezing until it gains the required strength. Practically speaking, this means that the subgrade and the concrete adjacent to the patch must not be frozen. If the air temperature is expected to fall below 40°F in the 72 hours following paving, the American Concrete Pavement Association recommends covering the new pavement with insulating blankets, mats, or foam sheets.
Concrete Distresses Cracks Cracks develop or expand over time due to temperature changes that cause expansion and contraction. Some cracks are part of the construction process (e.g., cracks that form at joints), and some develop randomly as the pavement is stressed. Cracks allow water to infiltrate the pavement base and subbase, potentially decreasing the pavement’s load-carrying capacity. If not repaired or prevented, this cracking effect will grow, leading to deformation of the pavement and ultimately the degradation of the pavement surface. Cracks that develop because of pavement stresses include transverse cracks, longitudinal cracks, D cracks, and map cracking.
Transverse Cracks Transverse cracks run across the pavement, perpendicular to the shoulder. See figure 3–51.
Longitudinal Cracks Longitudinal cracks run parallel to the shoulder. See figure 3–52.
D Cracks D cracking occurs at slab corners where longitudinal and transverse joints intersect. The failure is due to poor quality aggregate in the original concrete mixture. See figure 3–53.
Map Cracking Map cracking is a pattern of interconnected random cracks that indicate failure in the subbase. See figure 3–54.
Figure 3–53. High-severity D cracks (FHWA) Local Roads Maintenance Workers’ Manual
59
CH. 3
THE ROADWAY– CONCRETE PAVEMENT
Joint Deterioration/Spalling Joints are sawed in new pavement to induce cracking at desired locations. This helps relieve stresses and prevents random cracking. Joint deterioration like spalling is caused when water and debris fill the joint space, putting pressure on the concrete. See figure 3–55.
Blowups Blowups are the upward movement of the pavement surface at transverse joints or cracks, generally during hot weather. They are generally caused by a buildup of pressure in the pavement, which causes the panels on each side of a joint to rise. Blowups can be quick and violent. The concrete surrounding a blowup is often shattered, and pavement pieces may be thrown several feet. See figure 3–56.
Scaling Scaling is the deterioration of the upper concrete slab surface, normally ½8 to ½-inch deep, and may occur anywhere on the pavement. It may be caused by deicing chemicals or by inadequate application of curing compound. See figure 3–57.
Figure 3–55. Spalling (FHWA)
Figure 3–56. Blowup (FHWA)
60
Local Roads Maintenance Workers’ Manual
Figure 3–57. Scaling (FHWA)
THE ROADWAY– CONCRETE PAVEMENT
CH.3
Pavement Settlement Slabs sometimes settle, particularly bridge approach panels. A slab with tilted or uneven panels may indicate that subbase materials have migrated from beneath the slab.
Faulting Faulting is a difference in elevation across a joint or crack. This is caused by the settlement of one or both of the slabs or by rocking of the slabs as traffic moves across the joint or crack. See figure 3–58.
Pumping Pumping is the seeping or ejection of water and subbase from beneath the pavement through cracks. In some cases, detectable deposits of fine material eroded (pumped) from the support layers are left on the pavement or shoulder surface and stain the surface.
Corner Breaks A corner portion of the slab may separate from the slab along a crack that intersects the adjacent transverse and longitudinal joints at an approximately 45-degree angle. The length of the sides varies and may extend up to one-half the width of the slab on each side of the corner. See figure 3–59.
Pavement Failure A pavement is considered to have failed when the deterioration of the pavement becomes so severe that the only option for repair is to remove and replace the slab.
Figure 3–59. Corner break (FHWA)
Figure 3–58. Faulting (FHWA)
Local Roads Maintenance Workers’ Manual
61
CH. 3
THE ROADWAY– CONCRETE PAVEMENT
Maintenance Activities Maintenance activities include routine maintenance, temporary repairs, joint repairs, joint and crack sealing, mud jacking, surface patching, and full-depth patching. See table 3–2.
Routine Maintenance The goal of routine maintenance is to prevent or delay pavement distresses. Routine maintenance generally includes regular street sweeping and joint/ crack sealing. Check with your supervisor, and follow your local policy.
Street Sweeping Sweeping removes dried, caked mud, abrasives, and other debris from the road surface. See figure 3–60. Clean road surfaces help keep drains clean and make travel safer for bicyclists. See HMA comment for drainage.
Joint/Crack Sealing Joints in concrete pavement are usually sealed during the construction process. Periodically, they will need to be cleaned and resealed to keep them free of water and sediment and to protect the subgrade from water intrusion. Random cracks, too, may need to be sealed or resealed. The following instructions apply to both joints and random cracks in concrete pavements. The work will generally be done on an as-needed basis. It is usually completed in the spring or fall when temperatures are moderately cool and the joints are open. The following instructions are general guidelines. For example, you may or may not be instructed to use backer rods. Check with your supervisor, and follow your local policy. Table 3–2. Distresses and Maintenance Activities for Concrete Pavements
Maintenance Activities Routine Maintenance
Distresses
Joint/Crack Sealing Cracks
X
Joint Deterioration/Spalling
X
Surface Patching
Temporary Repair
Joint Repair
Mud Jacking
X X
Blowups
X
X
Scaling
X
X
X
Pavement Settlement
X
X
Faulting
X
X
Pumping
X
Corner Breaks
X
X X
Pavement Failure
62
Full-Depth Repair
Local Roads Maintenance Workers’ Manual
THE ROADWAY– CONCRETE PAVEMENT
CH.3
Preparing for Joint/Crack Filling 1. Rout or saw-cut joints to remove existing sealant and other materials and to provide clean, uniform surfaces for filler to adhere to and a reservoir for sealant. Rout joints to a width of ¾8 to ½ inch and a depth of ¾ to 1 inch, per your supervisor’s instructions. See figure 3–61. 2. In some agencies, you may then be instructed to sandblast the joints.
See Safety Tips on page 56.
3. Use an air compressor and an air wand to clean joints of dirt, dust, and remnants from sawing/routing and sandblasting. Contamination in a joint will cause poor sealant bonding. See figure 3–62.
For the sealant to adhere adequately, the surfaces of the joint must be completely clean and dry. Run your finger along the joint wall to test for cleanliness and dryness.
Figure 3–60. Street sweeper (WDM)
Figure 3–61. Routing cracks (WDM)
Figure 3–62. Cleaning joints before applying sealant (WDM) Local Roads Maintenance Workers’ Manual
63
CH. 3
THE ROADWAY– CONCRETE PAVEMENT
Applying the sealant After all joints are clean, finish the process (see figure 3–63): 1. If using backer rods in joints, place the rod to the proper depth to ensure the correct shape of the sealant reservoir. On road surfaces where grinding is planned at a later date, the backer rod and sealant should be installed so that the sealant is approximately ¼ inch below the road surface after grinding is complete. 2. Apply sealant according to specifications and the manufacturer’s recommendations. The joint will be filled with a concave ( ) bead. The shape factor generally ranges from 1:2 to 2:1, depending mainly on the elasticity of the sealant material. Be guided by the type of material and its specifications on determining the proper shape factor.
Temporary (Asphalt) Repair For areas experiencing scaling, faulting, pumping, or blowups, a temporary repair using asphalt may be appropriate: 1. Blow out joints with compressed air.
See Safety Tips on page 56.
2. Remove broken concrete and square up the sides of the area. 3. Apply a tack coat. 4. Place an asphalt wedge and compact it.
Joint Repair For corner breaks, spalling, and D cracking, repair the area using a concrete mix: 1. Saw cut, break out, and remove loose material, leaving the faces of the removal vertical. A cutting torch or saw may be necessary for cutting pavement reinforcement. Normally the steel network is not reestablished. 2. Clean the hole with compressed air to remove moisture and debris. 3. Fill the hole with concrete mix, normally delivered by a ready-mix operation. 4. Consolidate the mix with a vibrator.
8
Figure 3–63. Joint with backer rod and filler
64
Local Roads Maintenance Workers’ Manual
THE ROADWAY– CONCRETE PAVEMENT
CH.3
5. Screed and finish the surface, but do not add free water. (Adding free water to the surface dilutes the cement paste, and the surface is likely to scale off in the near future.) 6. Cure the concrete by covering with plastic, wet burlap, or a liquid curing compound. The burlap should be kept wet until the initial concrete strength is developed.
Mud Jacking Mud jacking raises and adjusts a slab that has settled. Workable material is forced through holes drilled in the concrete slab. The material exerts sufficient pressure on the lower side of the slab to raise it before the material has traveled beyond the desired area. 1. Examine the site and determine low spots by using line or elevation levels as appropriate. Look for the points of water intrusion into the pavement and where the subbase material has been deposited. 2. Drill approximately 2-inch diameter core holes through the concrete slab at selected locations, or use preformed holes or previously drilled holes as appropriate. 3. Starting at the downhill portion of the void and working up, begin pumping the mud jack mix into the predrilled holes. As the mixture raises the slab to the desired elevation or the void fills to capacity, move uphill to the next set of drill holes. It’s important to lift the slab uniformly to avoid cracking it.
See Safety Tips on page 56.
4. Plug each hole temporarily once the hose is removed. Use a plastic plug or a burlap bag until the mixture has cured. 5. After the entire slab area has been adjusted to grade, clean out each hole and refill with a fast-setting cement grout. 6. Reseal any cracks and joints.
Blowup Repair Blowups often occur at the end of the day, and a temporary asphalt patch may be initially applied. Later a crew will return and perform a full-depth patch. When the permanent repairs are made, it is important that room be left for future pavement expansion or there will likely be another blowup at the same location.
Iowa One Call: It’s the Law Iowa law requires that anyone planning any form of excavation must contact the Iowa One Call notification system (1-800-292-8989) at least 48 hours in advance so that utilities can be located and marked. Always consult your supervisor before conducting any excavation, which may includemudjacking and full-depth repair.
Local Roads Maintenance Workers’ Manual
65
CH. 3
THE ROADWAY– CONCRETE PAVEMENT
Surface Patching Apply a surface patch to repair corner breaks, scaling, D cracking, and construction joint deterioration where the depth of deterioration is no more than 25 percent of the total pavement thickness. See figure 3–64.
Figure 3–64. Concrete surface patching
66
Local Roads Maintenance Workers’ Manual
THE ROADWAY– CONCRETE PAVEMENT
CH.3
1. Mark the area to be patched two to three inches outside the damaged area. 2. Remove surface concrete with light- to medium-weight hammers to avoid damaging the sound concrete on the bottom layer of the pavement slab. 3. Sandblast exposed concrete and clean the area with compressed air.
See Safety Tips on page 56.
4. For other than pre-cast, place a form for reestablishing the shoulder edge. 5. In reinforced pavement (except for pre-cast repair) reestablish the reinforcement by overlapping and tying or welding with either a doubleface 4-inch weld or a single-face 8-inch weld. 6. Brush in cement or epoxy grout. 7. Place low-slump concrete with adequate mechanical vibratory screeds. 8. Texture and cure the concrete. 9. Apply a double application of white pigmented curing compound.
If deterioration is 25 percent or less of the total pavement thickness, apply a surface patch. If deterioration is more than 25 percent of the total pavement thickness, apply a fulldepth repair.
Local Roads Maintenance Workers’ Manual
67
CH. 3
THE ROADWAY– CONCRETE PAVEMENT
Full-Depth Repair Apply a full-depth repair for corner breaks, scaling, D cracking, construction joint deterioration, and localized distresses where the depth of the deterioration is greater than 25 percent of the total pavement thickness or covers a large area. See figure 3–65.
Figure 3–65. Concrete full-depth repair
68
Local Roads Maintenance Workers’ Manual
THE ROADWAY– CONCRETE PAVEMENT
CH.3
1. Mark the area to be patched two to three inches outside the damaged area. 2. Saw cut and remove full depth of concrete slab without damaging adjacent concrete. See figure 3–66. 3. Remove any unsound base or subbase. If a pre-cast slab is to be used, the base or subbase needs to be restored and compacted. If a serious drainage problem exists, it should be corrected as with transverse, lateral subdrain, etc.
See Safety Tips on page 56.
4. Other than pre-cast, place a form for reestablishing shoulder edge. 5. Sandblast exposed concrete and clean area with compressed air. 6. Use coated dowel bars and deformed rebars for load transfer in all fulldepth repairs. 7. Place low-slump concrete with adequate mechanical vibratory screeds. See figure 3–67. 8. Texture and cure the concrete.
Figure 3–66. Removing full depth of slab (WDM)
Figure 3–67. Vibratory screed (WDM) Local Roads Maintenance Workers’ Manual
69
CH. 3
THE ROADWAY– CONCRETE PAVEMENT
BIBLIOGRAPHY American Association of State Highway and Transportation Officials (AASHTO). 1997. Highway Safety Design and Operations Guide. Washington, DC: American Association of State Highway and Transportation Officials. Andrle, S.J., K. Knapp, T.J. McDonald, and D.E. Smith. 2001. Iowa Traffic Control Devices and Pavement Markings: A Manual for Cities and Counties. Iowa DOT Project TR-441. Ames, IA: Center for Transportation Research and Education. Bolander, P. and A. Yamada. 1999. Dust Palliative Selection and Application Guide. Final Report. 9977-1207-SDTDC. San Dimas, CA: United States Department of Agriculture, Forest Service, San Dimas Technology and Development Center. Federal Highway Administration (FHWA). 2003. Manual on Uniform Traffic Control Devices (MUTCD) for Streets and Highways. 3rd Ed. Washington, DC: United States Department of Transportation, Federal Highway Administration. Iowa One Call (IOC). 2006. Iowa One Call Home. http://iowaonecall.com/index. php. Lunsford, G.B. and J.P. Mahoney. 2001. Dust Control on Low Volume Roads: A Review of Techniques and Chemicals Used. Final Report. FHWA LT-01002. Washington, DC: United States Department of Transportation, Federal Highway Administration, Local Technical Assistance Program. Miller, J.S. and W.Y. Bellinger. 2003. Distress Identification Manual for LongTerm Pavement Performance. 4th Ed. FHWA-RD-03-031. Washington, DC: Federal Highway Administration. Skorseth, K. and A.A. Selim. 2000. Gravel Roads Maintenance and Design Manual. Washington, DC: Federal Highway Administration and South Dakota Local Transportation Assistance Program. Transportation Research Board (TRB). 1991. Hot-Mix Asphalt Paving Handbook. Washington, DC: Transportation Research Board. Walker, D. 1989. Concrete PASER (Pavement Surface Evaluation and Rating) Manual. Madison, WI: Wisconsin Transportation Information Center. Walker, D. 1989. Gravel PASER (Pavement Surface Evaluation and Rating) Manual. Madison, WI: Wisconsin Transportation Information Center. Walker, D. 2001. Sealcoat PASER (Pavement Surface Evaluation and Rating) Manual. Madison, WI: Wisconsin Transportation Information Center. Walker, D. 2001. Unimproved Roads PASER (Pavement Surface Evaluation and Rating) Manual. Madison, WI: Wisconsin Transportation Information Center. Walker, D. 2002. Asphalt PASER (Pavement Surface Evaluation and Rating) Manual. Madison, WI: Wisconsin Transportation Information Center.