Practical Panoramic Radiography William C. Scarfe, BDS, FRACDS; Gail F. Williamson, RDH, MS Continuing Education Units: 3 hours
Online Course: www.dentalcare.com/en-US/dental-education/continuing-education/ce71/ce71.aspx Disclaimer: Participants must always be aware of the hazards of using limited knowledge in integrating new techniques or procedures into their practice. Only sound evidence-based dentistry should be used in patient therapy.
The primary focus of this continuing education course is to broaden awareness of panoramic radiographic technique, error recognition and error correction.
Conflict of Interest Disclosure Statement
• The authors report no conflicts of interest associated with this course.
ADA CERP
The Procter & Gamble Company is an ADA CERP Recognized Provider. ADA CERP is a service of the American Dental Association to assist dental professionals in identifying quality providers of continuing dental education. ADA CERP does not approve or endorse individual courses or instructors, nor does it imply acceptance of credit hours by boards of dentistry. Concerns or complaints about a CE provider may be directed to the provider or to ADA CERP at: http://www.ada.org/cerp
1 Crest® Oral-B® at dentalcare.com Continuing Education Course, Revised November 17, 2015
Approved PACE Program Provider
The Procter & Gamble Company is designated as an Approved PACE Program Provider by the Academy of General Dentistry. The formal continuing education programs of this program provider are accepted by AGD for Fellowship, Mastership, and Membership Maintenance Credit. Approval does not imply acceptance by a state or provincial board of dentistry or AGD endorsement. The current term of approval extends from 8/1/2013 to 7/31/2017. Provider ID# 211886
Overview
Panoramic radiographic technique, error recognition and error correction are the primary focus of this course. The components involved in the optimal production of a panoramic image will be outlined. A technique for acquiring an image on any panoramic machine will be presented. Interpretation of the panoramic image will include basic anatomic structures as well as the identification and correction of imaging errors. Finally a checklist for the assessment of unacceptable images will also be presented incorporating the appearance of artifacts from errors in processing, patient preparation or technique related problems. This course is provided to test the participant’s understanding of common errors and their correction in an effort to improve image quality.
Learning Objectives
Upon completion of this course, the dental professional should be able to: • Review the selection criteria and the indications for panoramic imaging. • Compare and contrast panoramic and intraoral imaging. • Outline the advantages and limitations of panoramic radiography. • Compare and contrast digital panoramic imaging to film-based panoramic radiography. • Describe the concepts involved in panoramic image formation. • Outline the procedures required for correct machine and patient preparation, patient positioning and panoramic unit operation. • Become familiar with anatomic structures that are recorded on panoramic images. • Identify and propose corrective action for common panoramic image errors. • Demonstrate ability to recognize and correct common errors via a self-assessment exercise.
Course Contents
• Image Projection Slit Radiography • Operational Basics Equipment • Steps in Taking a Panoramic Exposure Preparation - Film-based Machine Preparation - Patient Preparation Patient Positioning and Exposure Processing and Identification • Image Evaluation Features of an Ideal Panoramic Radiograph • Identifying Panoramic Errors Stepwise Approach to Panoramic Technique Assessment • Patient Positioning Errors Incorrect Head Orientation Tissue Projection Errors
• Indications for Panoramic Imaging • Comparisons to Intraoral Radiography Equipment Differences Exposure Factors • X-ray Source and Other Factors Panoramic X-ray Machines Image Receptors Film Processing Considerations Quality Assurance Patient Preparation Patient Protection Dose Comparisons • Patient Positioning Requirements Midsagittal Plane Occlusal Plane Anteroposterior Plane Pre-exposure Instructions
2 Crest® Oral-B® at dentalcare.com Continuing Education Course, Revised November 17, 2015
• • • •
Shoulder–Receptor/X-ray Head Interference Errors Conclusion Course Test References About the Author
examined in isolation. They also found that clinical factors obtained from the patient history and examination modestly improved the chances of a high diagnostic yield from panoramic images. The clinical factors identified as the best predictors of useful diagnostic yield included clinical suspicion of teeth with periapical pathology, partially erupted teeth, evident carious lesions, dentition (dentate, partially dentate, edentulous), presence of crowns and suspected unerupted teeth.
Indications for Panoramic Imaging
Selection criteria guidelines are recommendations developed to assist the dentist in the appropriate prescription of dental radiographs. In 2012, the American Dental Association (ADA) and the Food and Drug Administration (FDA) revised these recommendations, updating the previous version published in 2004.1 In the updated version, the use of panoramic examinations in combination with posterior bitewings is provided as an option for imaging new patients in the child (transitional dentition), adolescent and adult categories. The application of the guidelines should be based on a clinical examination with consideration given to the patient’s signs, symptoms and oral/medical histories, as well as vulnerability to environmental factors that may affect oral health.1 The resultant diagnostic information should help the dentist determine the type of imaging needed, if any, and its frequency. Dentists should prescribe radiographs only when they expect that the additional diagnostic information will affect patient care. In addition, panoramic imaging may be appropriate in the assessment of growth and development, craniofacial trauma, third molars, implants, and the initial evaluation of edentulous ridges and temporomandibular joint disorders.
Therefore, it is prudent for the dentist to follow selection criteria guidelines so that the selected survey, whether intraoral, panoramic or a combination thereof, is appropriate for the patient and will produce a high yield result. Finally, panoramic imaging is a useful alternative technique for imaging patients with severe gag reflexes when the receptor cannot be tolerated in the posterior regions of the mouth.
Comparisons to Intraoral Radiography
While panoramic radiography has several features in common with intraoral radiography, important differences exist in the operation of the equipment and the technique used. Equipment Differences Panoramic units differ from intraoral units in the following ways: exposure factors, image receptor, x-ray source, patient positioning and image projection. Exposure Factors Both intraoral and panoramic x-rays machines have the following exposure factor controls: milliamperage, kilovoltage and time. The primary difference between the two types of quipment is the control of exposure parameters. Intraoral x-ray units usually have fixed mA and kVp controls while the exposure is altered by adjusting the time for specific intraoral projections. Panoramic unit exposure is controlled by adjusting complimentary parameters; the exposure time is fixed while the kVp and the mA are adjusted according to patient size, stature and bone density. Although the principles of operation are identical, the exposure control panel is more complex in its format.
By comparison, intraoral periapical and bitewing surveys are preferred for caries detection, identification of periapical pathology and the detection of periodontal lesions with furcation involvement. A full mouth intraoral radiographic survey is preferred when the patient has clinical evidence of generalized oral disease or a history of extensive dental treatment.1 Panoramic radiographs alone or in combination with bitewings radiographs are commonly used for routine screening of all new adult patients. In 2002, Rushton et al. questioned this approach.2,3 They found that approximately one-fifth of patients received no benefit from indiscriminate use of panoramic radiography. This proportion increased to one-fourth when asymptomatic patients were
• Milliamperage (mA) Control – regulates the low voltage electrical supply by adjusting the number of electrons flowing in the electrical
3 Crest® Oral-B® at dentalcare.com Continuing Education Course, Revised November 17, 2015
circuit. Altering the milliamperage setting influences the quantity of x-rays produced and image density or darkness. A 20% difference is required to visibly alter image density. • Kilovoltage (kVp) Control – regulates the high voltage electrical circuit by adjusting the potential difference between the electrodes. Altering the kilovoltage setting influences the quality or penetration of the x-rays produced and image contrast or differences in density. A 5% difference is required to visibly alter image density. • Time Control – regulates the period of time over which electrons are released from the cathode. Altering the time setting influences the quantity of x-rays and image density or darkness in intraoral radiography. The exposure time in panoramic imaging is fixed for a specific unit and the entire exposure cycle ranges from 16 to 20 seconds in length.
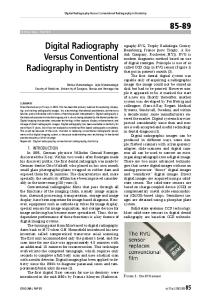
Figure 2. Digital Unit. Source: 2009 Proline Panoramic XC, Planmeca
Image Receptors
X-ray Source and Other Factors
Digital Image Receptors Panoramic systems are available that use either linear array charge-coupled device (CCD) detectors or photostimulable phosphor plate (PSP) receptors. CCD and PSP receptors are used for intraoral radiography as well but with altered sizes and receptor design. The digital panoramic imaging method is comparable to conventional panoramic radiography but the receptor, processing, display, storage and transmission capabilities differ from film-based imaging.4 Both types of digital image receptors and film will produce diagnostic results.
Panoramic X-ray Machines
Direct Digital Image Receptors CCD linear array design arranges the CCD detectors in a grid with the same vertical dimension as panoramic film but only a few pixels wide. The vertical sensor is moved around the patient opposite to the x-ray source and captures the image one vertical line at a time. In the subsequent photographs, a CCD sensor system is used to capture the image. To initiate the process, a patient file must be created in the computer software system. The patient is aligned in the same head positions as required in film-based panoramic machines. The computer processes the image as it is acquired and the image is displayed on the computer monitor in real time. The image is archived in the patient database. The acquired imaged can be viewed in
Figure 1. Digital Unit Control Panel. Source: 2009 Proline Panoramic XC, Planmeca
Intraoral x-ray units have a round or rectangular x-ray collimator with the projected beam being slightly larger than the intraoral receptor. In comparison, panoramic x-ray units have a narrow vertical slit aperture. With intraoral units, the vertical and horizontal angle of the PID (position indicating device) is adjusted for each projection and centered over the film. The panoramic x-ray tubehead is fixed at a negative angle (approximately -10°) and rotates behind the patient’s head during the exposure cycle.
4 Crest® Oral-B® at dentalcare.com Continuing Education Course, Revised November 17, 2015
different ways through the application of software enhancement tools.
intensified by a photomultiplier tube and converted into digital data. PSP plates are reusable but must be exposed to light to erase remnant energy. Recent developments include faster plate scanning and erasure of the plate during the scanning process. It is important to scan the exposed plate without delay as white light or delayed scanning can degrade the result.5,6 PSP imaging is considered an indirect digital imaging method because the data is captured in an analog format like film and converted into digital data via the scanning process.
Direct Digital Panoramic Imaging
The obvious advantage of digital panoramic imaging, particularly direct digital panoramic imaging, is elimination of the darkroom including machine cleaning and maintenance, chemical handling and solution change as well as related processing errors. Other advantages include time-saving, electronic image storage, the ability to enhance the captured image with various tools such as density, contrast, measurement and image reversal manipulations and teleradiography capabilities for the purposes of consultation or referral.
Figure 3.
However, the image quality remains dependent upon proper patient preparation, patient positioning and exposure selection to produce optimal results and to avoid retakes. Film-based Panoramic Imaging Film used for panoramic radiography is more sensitive and packaged differently than intraoral film. The film is either 5” or 6” x 12” (15 x 30 cm) in size. Since the film does not have protective outer wrappings, it must be housed in a cassette holder during exposure. Cassette holders are rigid or flexible configurations with intensifying screens on the internal walls. Screens have a crystalline phosphor layer that produces visible light when exposed to x-rays. The phosphor layer overlays the reflective layer, which reflects the light back to the film and both are coated onto a firm plastic base. A protective layer covers the phosphor layer to reduce damage and wear.
Figure 4.
Figure 5.
Photostimulable Phosphor Plate (PSP) PSP sensors consist of a rare earth phosphor, barium europium fluorohalide, coated onto a polyester base. PSP plates are inserted into a cassette just like film but without the intensifying screens. The image is captured on the phosphor plate and the energy is stored on the plate until it released during a laser scanning process. When a helium-neon laser beam scans the PSP plate, the energy is released in the form of blue florescent light. The emitted light is captured,
Intensifying screens intensify the effect of a single x ray photon by converting it into many light rays. It is the combination of x-rays and light rays that produce the latent image and reduce exposure to the patient. The color of the light emitted by the screens is related to the type of phosphor. Rare earth elements
5 Crest® Oral-B® at dentalcare.com Continuing Education Course, Revised November 17, 2015
Figure 6. Cassette: Intensifying Open cassette showing screen (white) Screen: Diagrammatic and film surfaces cross-section of screen
Figure 7.
such as lanthanum or gadolinium fluoresce a lime green light and currently are the preferred screen material. Screen film is packaged in boxes containing 50-100 films and must be handled in a darkroom. A single film is loaded between the screens, the cassette is latched closed prior to leaving the darkroom and the cassette is placed into a cassette holder. The screen film type and intensifying screen fluorescence must be matched to produce a diagnostic image. Film Processing Considerations Screen film is more sensitive than intraoral film so darkroom conditions must be optimal. The darkroom should be white light tight with GBX-2 (red) safelight filters on the safelight lamps mounted at least 4 feet from the work surface. Quality image processing is dependent on the strength, volume and temperature of the processing chemistry. Properly maintained and replenished solutions at the recommended time and temperature are mandatory. Optimal performance depends on daily, weekly and monthly roller/unit cleaning and solution replenishment or change. In addition, special chemical formulations are needed for processing films at higher temperatures and to accommodate roller transport of the film.
Figure 8.
and film with extreme care so as to not cause white light exposure or handling artifacts. Quality Assurance To ensure consistent high quality panoramic images, a quality assurance program should be in place and carried out by qualified dental personnel. Radiographic quality assurance procedures include regular testing, planned monitoring and scheduled maintenance of x-ray equipment, darkroom conditions, film processing and image receptors. X-ray machines should be inspected periodically for x-ray output, kilovoltage calibration, half value layer, timer accuracy, milliamperage reproducibility, and collimation as required by state law. Operators must be qualified and credentialed according to state regulations.
Daylight loader automatic processing systems are not safe for panoramic film loading and processing. The amber screen is not sufficient to remove the spectra of light to which the film is most sensitive and results in film fog. In addition, the internal workspace is usually not adequate for convenient and proper handling of the cassette during film unloading and reloading procedures. If a daylight loader processor is used, it is best to close the amber screen and handle the cassette
The darkroom should be evaluated on a monthly basis to eliminate any white light leaks and to ensure proper safelight conditions. The coin test is an effective method for determining whether or not darkroom conditions are optimal. These
6 Crest® Oral-B® at dentalcare.com Continuing Education Course, Revised November 17, 2015
procedures will prevent film fog which darkens and degrades the radiographic image. Film processing solutions should be evaluated on a daily basis prior to processing patient films to correct problems or any chemical deficiencies. Commercial test tools and metal stepwedge devices are available to produce test films for this purpose. Solution replenishment, proper time-temperature regimens and regular processor cleaning and solution change are important factors in the production of quality radiographic images. Figures 9 & 10. Removal of metallic head and neck objects.
Panoramic film must be stored properly in a cool, dry environment away from chemical fumes and an x-ray source. After the film box has been opened, it is best to place the open end of the film envelope into the box away from the lid. This practice will help avoid film fog and unwanted darkening of one end of the film. Cassettes should be inspected for damage and the intensifying screens cleaned on a regular basis. Commercial screen cleaning products with an anti-static agent are available to complete this task.
necklaces, napkin chains, barrettes, hairpins, intraoral prostheses and hearing aids must be removed. The clinician should take care to safely store these items and return them to the patient when the procedure is complete. Patient Protection The clinician should explain the procedural steps to the patient prior to machine entry and head positioning so the patient can anticipate what will happen next and not be alarmed by the mechanical function of the panoramic machine. The clinician should place the panoramic lead apron fully clearing the back of the neck region; high in front, low in back. Note that the panoramic lead apron has a poncho-type configuration different from lead shields used in intraoral radiography. The preferred panoramic lead (or lead-equivalent) apron has a front and back panel of the same length. If the panoramic lead apron has front and back panels of different length, it is best to place the long panel on the patient’s back and the short panel in the front because the x-ray beam enters from behind the patient’s head. Do Not Use a THYROID COLLAR. The use of a thyroid collar or improper lead apron placement will block the x-ray beam and prevent imaging of structures at or near the midline. The clinician must keep in mind that the x-ray beam enters from behind the patient’s head in a lingual to labial direction.
It is recommended that a retake log be maintained to help monitor the number of retakes and the errors committed. Identification of recurring errors indicates a need for continuing education and in-service staff training. The American Academy of Oral and Maxillofacial Radiology has published several articles7,8 that provide guidance in the assessment of and compliance with recommended quality assurance procedures and radiation safety measures. Patient Preparation Regardless of technique, the patient must be prepared prior to the procedure. The first step is to explain the general aspects of the procedure to the patient. Additional pre-exposure instructions are necessary to avoid the production of unwanted artifacts and ensure patient cooperation. For intraoral radiography, the patient must be instructed to remove facial jewelry in the beam path (for instance, nose rings or large earrings), eyeglasses and intraoral prostheses. In addition with panoramic radiography, all metallic objects from the head and neck region must be removed including those items described above (Figures 10 & 11). Examples include tongue rings,
The purpose of the lead apron is to reduce the somatic exposure of radiosensitive tissues and minimize genetic exposure to the reproductive organs. In the head and neck region the most radiosensitive tissues are the thyroid and
7 Crest® Oral-B® at dentalcare.com Continuing Education Course, Revised November 17, 2015
Figure 14.
salivary glands and the hemopoetic tissues of the bone marrow located in the mandible and the sternum. Because of the nature of the panoramic exposure, both the salivary glands and mandible are irradiated; therefore the role of the lead apron is to provide maximum shielding of the remaining radiosensitive organs. In addition, it should be remembered that the x-ray beam is directed from behind the patient’s head and directed slightly upwards. Hence the greatest risk to these tissues is from scatter radiation.
Figure 11. Panoramic Lead Apron with full length front and back panel.
Dose Comparisons Exposure from diagnostic imaging is often compared to environmental exposure from naturally occurring radiation and other artificial sources such as consumer products. Collectively these natural and artificial sources are described as background radiation. A typical four-film bitewing survey using PSP receptors or F speed film and rectangular collimation is equivalent to approximately a half day of background radiation.9 More commonly, D speed film and round collimation are used for bitewing imaging with a background radiation equivalent of 2 days. By comparison, a panoramic survey is equivalent to approximately a half to full day of background radiation depending on the machine and background radiation standards.9 Unlike intraoral digital imaging, the use of digital receptors for panoramic imaging does not result in significant dose reduction compared to film-based panoramic systems using rare earth intensifying screens.10,11
Figure 12. Panoramic lead apron with long front and short back panel.
Patient Positioning Requirements
The basic head alignment used in panoramic imaging is comparable to the recommended head position for maxillary periapical and bitewing radiographs. The patient’s head should be adjusted so that the midsagittal plane is perpendicular to the floor and the occlusal plane is parallel to the floor.
Figure 13. Intraoral lead apron with thyroid collar.
8 Crest® Oral-B® at dentalcare.com Continuing Education Course, Revised November 17, 2015
However, with panoramic imaging several additional alignment planes are necessary to achieve a consistent result. The patient’s head must be centered in three different planes in order to uniformly record the maxillofacial complex. The head alignment planes include the midsagittal, occlusal and the anteroposterior. Each will be discussed below. Midsagittal Plane The midsagittal (horizontal) plane is positioned perpendicular or at a right angle to the floor and centered right to left. Many machines display a vertical alignment light or mirror to adjust the alignment of the midsagittal plane so that the right and left sides of dental arches are equally displayed.
Figure 15. Midsagittal Plane
Occlusal Plane The plane of occlusion (vertical plane) is positioned parallel to the floor. The Frankfort plane (superior border of the external auditory meatus to the infraorbital rim), Tragal-canthus plane (tab in ear to outer corner of the eye), and the Ala-tragus (corner of nose to tab in the ear) plane are used to align the vertical position of the head as well. Some machines provide a horizontal alignment light to help assess the proper vertical position of the head. Anteroposterior Plane Anteroposterior (forward-backward) plane is aligned with a specific landmark that varies among panoramic machines. In this instance the AP is aligned between the maxillary lateral incisor and canine contact. Some panoramic machines automatically adjust the AP position for the operator.
Figure 16. Frankfort and Occlusal Plane
Pre-exposure Instructions Because panoramic radiography requires patients to be stable for greater than 15 seconds during exposure, several additional instructions need to be provided to the patient. These include positioning of the tongue and lips and remaining still during the entire exposure cycle.
Image Projection
Panoramic radiography is based on the principles of tomography and slitradiography. Tomography is a body-sectioning technique involving the simultaneous movement of the x-ray tubehead and film cassette in opposite directions to produce an image at a depth of tissue. Slit
Figure 17. Anteroposterior Plane
9 Crest® Oral-B® at dentalcare.com Continuing Education Course, Revised November 17, 2015
radiography involves the acquisition of an image of a large structure by the scanning movement of a slit beam. These two processes produce a curved focal trough that theoretically corresponds to the average jaw shape. The anterior part of the layer is unavoidably narrower than the posterior part of the layer. Therefore, some patient’s jaws will not match the predetermined form of the image layer. Correct patient positioning is essential for optimal results. Generally speaking, image distortion occurs when structures are positioned anterior (narrows and blurs), posterior (widens and blurs) or a combination thereof relative to the focal trough (Figure 18A and B).
Figure 18A.
Slit Radiography The side of the patient’s dental arches closest to the film is recorded in focus while the side closest to the x-ray source is blurred out of focus (Figure 19). The x-ray source has a vertical slit aperture and directs the x-ray beam in a lingual to labial direction through the structures. Panoramic machines vary in style but operate according to the principles outlined above. Some models allow the patient to sit-down and while in others the patient stands. The resulting image is uniformly magnified (due to the long objectreceptor distance) with some premolar contact overlapping. However, this technique produces reasonably good overall representations of the teeth and surrounding anatomical structures.
Figure 18B. Resultant curved image layer that corresponds to arch shape. Malpositioning relative to the focal trough alters structures most significantly in width. (Figure 18B)
Operational Basics Equipment Panoramic x-ray machines are composed of an exposure control panel, a C-arm and a patient positioning device. • Control panel and exposure switch – The control panel contains the on/off switch, program control selector, exposure selectors (milliamperage control, kilovoltage control), x-ray emission signal and may contain the exposure switch.
Figure 19. Schematic diagram of simple panoramic motion incorporating slit beam radiography and linked motion of x-ray tubehead and receptor.
The complexity of the control panel increases with the incorporation of features such as multiple program options and automatic exposure control (AEC) features.
10 Crest® Oral-B® at dentalcare.com Continuing Education Course, Revised November 17, 2015
Figure 22. Flexible cassette being mounted on drum shaped receptor assembly.
Figure 20. OP100 Example of full feature exposure control (OP100; Instrumentarium Imaging). Control panel also acts as the exposure switch.
Figure 21. PC1000 Example of limited feature exposure control (PC1000; Panoramic Corp.) this machine has only two programs and no AEC feature. The exposure “dead man” switch is separate.
Figure 23. Rigid cassette being mounted on flat receptor assembly.
can be either curved or flat and are inserted into a similarly shaped receptor assembly. • Patient Positioning Device – The radiographer must be familiar with the operation of the patient positioning device as it is this apparatus that is used to position the patient’s head into the focal trough of the machine.
Legend: 1=On/off switch (PC1000 only) 2 = Program Control Selectors 3 = kVp control 4 = kVp display 5 = x-ray emission light OP100 Only: 6 = Exposure switch 7 = Panoramic exposure modes 8 = mA display 9 = AEC adjustment.
• C-arm (x-ray tubehead/receptor assembly) – The relationship of the x-ray tubehead is fixed spatially to the receptor assembly by a fixed C-arm support. The panoramic x-ray tubehead is similar to a dental tubehead; however, unlike the dental tubehead there is both pre- and post patient linear collimation to provide a slit beam. The receptor assembly must accept either a flexible cassette or rigid cassette. A flexible cassette is mounted on a drum. Rigid cassettes
Figure 24. Head Positioning Device Source: PC1000, Panoramic Corp.
11 Crest® Oral-B® at dentalcare.com Continuing Education Course, Revised November 17, 2015
is easy to insert the film between the intensifying screen and plastic holder. Flexible cassettes are opened by removing one tab of the Velcro fastener whereas rigid cassettes have a mechanical “snap” lock device.
Figure 25. Bite Block
This device comprises a head holder and a chin rest/bite block. The chin rest/bite block is used to stabilize the patient’s dentition in the anteroposterior direction whereas the head holder is used to stabilize the orientation of the patient’s head in both the vertical and horizontal planes.
Figure 26. Loading film into flexible cassette
Steps in Taking a Panoramic Exposure Preparation Before a patient can be positioned in the panoramic unit, it is important that both the machine and patient are prepared prior to exposure.
Figure 27. Loading film into rigid cassette
Film-based Machine Preparation Load the film into the cassette – This must be performed in the darkroom. Because the panoramic film incorporates special dyes that make it more sensitive to the light emitted by the intensifying screen, this film (also called “indirect exposure” film) is more sensitive to the darkroom safelight. Therefore, after a film is removed from the container, the lid should be replaced immediately. The operator now has a reasonable time (approximately 2 min.) to place the film into the cassette without producing film fog.
Load the cassette into the receptor assembly – If a flexible cassette is used this is loaded onto the receptor assembly by securing the Velcro end to the drum and carefully wrapping the cassette around the curved surface ensuring that the lower edge of the cassette is butted against the rim of the drum. The other end of the cassette is secured to the central shaft of the receptor assembly with a Velcro tab. Rigid cassettes are easier to load into the receptor assembly and are guided by rails and secured into position by locks. However, this does not prevent rigid cassettes from being inserted back to front or upside down. Therefore, rigid cassettes will often have some annotation on one side providing guidance as to their correct insertion.
Unlike rigid cassettes in which they are attached, intensifying screens are easily removed from flexible cassettes. Special care must therefore be taken when flexible cassettes are used as it
12 Crest® Oral-B® at dentalcare.com Continuing Education Course, Revised November 17, 2015
Figure 28. Stages in loading a flexible cassette onto a receptor assembly: Wrapping cassette around drum
Figure 31. PC1000 unit This image indicates that the PC1000 unit has panoramic and TMJ modes and is selected for taking a panoramic from the right side.
Figure 29. Stages in loading a flexible cassette onto a receptor assembly: Attaching cassette with Velcro tab
Figure 30. Inserting a rigid cassette into a receptor assembly: Note: the writing on the top of the cassette indicates its correct orientation. Figure 32. OP100 unit This image shows the OP100 unit with more panoramic options, depicted by the dental arch diagrams. The unit is selected for a regular dental arch.
Set the program mode on the panoramic unit – Even the simplest panoramic units can be used in a variety of modes. It is important that the operator ensure that the correct mode is selected prior to patient exposure. Examples of the program mode controls on two panoramic units:
Set the exposure – For most panoramic units patient exposure is adjusted by alteration of the kilovoltage (kVp). This adjustment should be based on the physical stature of the patient. Basic guidelines follow that assist the clinician in this decision-making process. While the operator should follow the general guidelines recommended by the manufacturer, consideration needs to be given to the patient size, thickness of tissues, presence of teeth and bone density characteristics. Patients that are considered above the norm in each of these characteristics
13 Crest® Oral-B® at dentalcare.com Continuing Education Course, Revised November 17, 2015
would require an increase in the kVp setting while patients below the norm would indicate a decrease. If the unit is manually adjusted an exposure chart is available in the user’s manual. For manually adjusted panoramic units it is necessary and mandated by law that an exposure chart be posted adjacent to the exposure control.
Figure 35.
Figure 36.
Figure 37. Figure 38. Stages in the assembly and insertion of a reusable bite block. The image at the far right shows the chin rest attachment with a partially edentulous bite block.
Figure 33.
Position machine slightly higher than patient’s chin – Prior to patient preparation the approximate height of the patient should be determined and the chin rest adjusted to be slightly higher than the patient’s chin. When the patient attempts to bite in the grooves of the bite block (see 2a. Patient Positioning and Exposure – a. Bite in bite block) they must therefore raise their head. It is easier to adjust the vertical position of the patient’s head downwards from this position than to force the head up with the action of the panoramic unit. Figure 34. Example of exposure chart and simple exposure control mechanism adjusting kVp according to patient characteristics.
Assemble and insert bite block – Bite blocks can be either disposable or designed to be reused. Disposable bite blocks are usually made of a material that is unable to be autoclaved. Reusable bite blocks are either chemically sterilized or autoclavable. Often they will come as two components; a chin rest attachment and the bite block proper. Before they are inserted into the chin rest they are usually assembled and covered with a protective barrier.
Figure 39. Panoramic unit adjusted higher than the patient’s chin such that the patient must raise their head to bite in the bite block.
14 Crest® Oral-B® at dentalcare.com Continuing Education Course, Revised November 17, 2015
Patient Preparation Place the lead apron on the patient – The use of the lead apron on dental patients is regulated by state statute and may be mandatory.
finally the patient’s napkin (“bib”) chain. These items are capable of producing artifacts on the image both directly and indirectly, such as “ghost” projection or secondary images all potentially interfering with diagnosis.
Lead aprons are available in many designs including the “poncho” and “coat”, however regardless of the type, the apron should be raised at the front of the patient rather than the raised over the shoulder. In this manner the lead apron affords greatest protection to the sternum, thyroid and gonads.
Although not required by law, many practices post signs adjacent to the panoramic unit as a reminder to both operators and patient’s for the need to remove such items prior to exposure.
Figure 42. Figure 40. Correct placement of a lead apron on the patient.
Figure 43. Example of sign and patient compliance with instructions to remove metallic objects prior to exposure.
Patient Positioning and Exposure Bite in the bite block – While this direction may seem simple, most patients will require some guidance as to what they are to do. The overriding principle is that the lower dentition must be stabilized by the grooves. This groove is coincident with the middle plane of the anterior portion of the focal trough and is the mechanism by which the anteroposterior position of the head is stabilized.
Figure 41. Correct storage of a lead apron.
Remove metallic objects – Before x-ray exposure it is necessary to remove all metallic objects in the head and neck region including eyeglasses, facial jewelry and especially necklaces, ear rings, tongue rings, prosthetic devices that may incorporate metals such as hearing aids and
Stages in correct positioning of patient in bite block:
15 Crest® Oral-B® at dentalcare.com Continuing Education Course, Revised November 17, 2015
Figure 44. a.) Raise chin and rest on chin support.
Figure 47.
While the teeth are engaged in the bite block, the panoramic unit should be raised or lowered such that the lateral reference line referred to in the manufacturer’s instructions is parallel to an external reference plane. This external reference plane can be the floor but more commonly the external plane is located on the head holding device. More sophisticated units use adjustable light beams to assist the operator in orientating the patient’s head. Once the patient’s reference line has been adjusted to coincide with the external reference plane, many units will also have a forehead support that can be moved and secured to prevent patient head movement in the vertical plane.
Figure 45. b.) Ask the patient to open their mouth slightly; slowly lower chin support and simultaneously raise bite block and engage the lower anterior teeth.
Figure 46. c.) Finally ask the patient to close gently on top of the bite block and slide into the upper groove.
Adjust head position vertically – The vertical orientation of the head can be described according to the relative position of one of four possible lateral reference lines (Figure 47). Refer to the manufacturer’s instructions for the specific reference line for the panoramic unit being used.
Figure 48. Panoramic unit (PC1000, Panoramic Corp.) with external reference guides on lateral head holders.
16 Crest® Oral-B® at dentalcare.com Continuing Education Course, Revised November 17, 2015
Figure 52. Partial line assisted horizontal positioning. Figure 49. Panoramic unit (OP100, Instrumentarium Imaging) with light beam reference guides projected onto the patient’s face.
Have the patient shuffle forward and hold the hand supports – Because of the design of the panoramic unit, the natural tendency for patients when asked to put their head in the head holder is to thrust it forward. While the head can be correctly position in the head holder in this position, this results in the extension of the cervical spine. Because of the nature of the x-ray beam projecting upwards from below the shoulder and through the back of the patient’s head, this position provides a greater depth of soft tissue of the neck with an increase in midline opacity on the resultant image. To reduce this effect, the patient should be requested to shuffle or step forward approximately half a pace. This action straightens the cervical spine in relation to the projected x-ray beam and minimizes midline image artifacts. Many panoramic units provide bilateral handgrips not only to minimize patient movement during the exposure, but also to assist in positioning the body and the neck further anteriorly prior to exposure.
Adjust head position horizontally – Correct positioning with respect to the horizontal plane minimizes differential left or right distortion and can be accomplished by visual assessment of the tilt and rotation of the patient’s head from behind and correction with the assistance of lateral head side guides. In some panoramic units this is further facilitated with the use of a midsagittal reference light or line superimposed on the frontal head support. In both cases the patient is asked to assist in head positioning by looking at their reflection in the anteriorly mounted mirror and adjusting the position of their head such that the line equally divides their face.
Figure 50. Figure 51. Reference light assisted horizontal positioning.
Figure 53. Correct head position but with neck extended.
17 Crest® Oral-B® at dentalcare.com Continuing Education Course, Revised November 17, 2015
keep it there throughout the exposure of the patient. It has been suggested that to assist in tongue placement, the patient should be asked to swallow. Unfortunately the end phase of swallowing is that the tongue drops to the floor of the mouth. Therefore this instruction is not recommended. According to Rushton et al.,12 while failure of the patient to place their tongue in the correct position is the most common technical fault (71.9%) it rarely results in an image being unacceptable (0.1%). Figure 54. Correct head and neck position after “panoramic shuffle” with straightening of the spine.
Check shoulder and receptor clearance – Prior to exposure, the clinician must check to be sure that the receptor and x-ray source can clear the patient’s shoulders. If the patient has a short neck and/or heavy shoulders, contact is likely with possible stoppage of machine rotation. Steps must be taken to prevent contact. One approach is to instruct the patient to lower the right shoulder down during machine rotation to clear the receptor. Other possible strategies include instructing the patient to bend the right knee to lower the entire right side, or to hold the handlebars underhanded or cross-handed rather than over-handed or seat the patient so the hands and the arms can hang down on each side to relax the shoulders. A combination of these strategies may be necessary to clear the shoulders and facilitate smooth machine rotation. If the x-ray source and receptor fail to rotate, only a portion of the jaws will be imaged or the patient may move in response to the shoulder contact. Note that the cassette clears the shoulder in the pictures above.
Figure 55. Lips Open
Figure 56. Lips Closed
Exposure and patient dismissal – According to law, when a panoramic exposure is made on a patient the operator must ensure that a) they are in a position to observe the patient throughout the entire exposure b) be either 2 meters (approximately 6 feet) from the patient or if closer than 2 meters, behind a barrier.
Ask the patient to close lips and hold tongue on the roof of their mouth – During the previous stages the patient’s facial musculature will tend to assume a relaxed position. This results in the lips around the bite block being open and the tongue dropping to the floor of the mouth. Immediately prior to exposure the patient should be requested to close their lips and place their tongue on the roof of their mouth or slightly behind the front of their top teeth and
Immediately prior to exposure the patient should be informed that the panoramic unit will move in front of them and take approximately 20 seconds to complete the rotation. The patient should also
18 Crest® Oral-B® at dentalcare.com Continuing Education Course, Revised November 17, 2015
be reminded to keep their lips together and press the tongue against the roof of their mouth for the entire exposure. Patient exposure is achieved by depressing the exposure button and keeping it depressed throughout the entire rotation of the panoramic unit until it comes to a complete stop. The exposure control is a “deadman” switch. This means that release of the button will terminate not only the exposure of the patient to x-radiation but the rotational motion. Exposure should be terminated if the patient moves markedly at the beginning of the exposure. This can be either due to the spontaneous patient motion (e.g. cough, sneeze) or due to shoulder interference with the rotational motion of the C-arm.
Figure 58. The film should be “fed” into the processor slot and the engagement of the rollers on the film confirmed by a positive tug.
Identification – It is required by law that all radiographs be identified. Only the patient’s name, chart or record number, and date of the radiographic examination should be on the label. Labeling can be performed either indelibly or with removable labels. Indelible labeling is performed after film exposure and prior to film developing. Some panoramic machines have labeling programs that image the patient’s name, date and record number directly onto the film during exposure or just prior to processing.
Immediately after exposure, the operator should release the head supports and ask the patient to slowly back away from the head holder. The patient should then be asked to remain in the area while the film is being processed. Only after the radiograph has been determined to be diagnostically acceptable should the patient be dismissed.
Figure 57. Correct operator procedure for patient exposure.
Figure 59. Indelible labeling using an “auto” labeler prior to film processing.
Processing and Identification Processing – The cassette should be transported to the darkroom, the exposed film removed and placed into the automatic processor. To avoid fingerprint artifacts, it is best to handle the exposed film on the edges rather than the film surface.
Figure 60. Use of adhesive removable labeling strip attached to film after processing.
19 Crest® Oral-B® at dentalcare.com Continuing Education Course, Revised November 17, 2015
Image Evaluation
obstruction of the structure from view: • Condyle of the TMJ • Mandibular/maxillary anterior region • Mandibular ramus
An ideal panoramic radiograph should be free from errors related to technique or film manipulation.
Figure 63 demonstrates three of the most common reasons for retakes – neither the condyle of the TMJ, the mandibular anterior region nor the mandibular ramus are visualized on this radiograph. In this particular case it is because the patient’s head is tilted too far down during exposure. Figure 61. Ideal Panoramic Radiograph.
However in reality many panoramic films are not ideal and present minor but acceptable errors.
Figure 63. Figure 62. Panoramic with acceptable error. Patient is twisted or rotated as evidenced by the discrepancy in dimension between left and right ramus width and dentition. However, this does not interfere with its diagnostic acceptability and does not require a retake.
Figure 64 demonstrates three further reasons for retakes; poor visualization of the maxillary anterior region, coverage of structures due to the presence of ghost images and/or labels. In this particular case the patient is positioned too far backward and has their head tilted too far up (as evidenced by the reverse or frown occlusal plane). These positioning errors place the maxillary anterior region out of the focal trough and produces excessive ghosting of the amalgam restorations of the opposite side.
However there are certain specific critical errors that result in images that fail to fulfill the criteria for an acceptable panoramic image. These errors are critical because they usually necessitate re-exposure of the patient. The principle technical criterion for acceptance of a panoramic radiograph is that it should adequately image all of the structures of the maxillofacial region. If any of the structures are not present, either because it is not covered or obscured, then it should be re-taken. It should be remembered that the patient pays for the interpretation and subsequent diagnosis generated from the panoramic and not the procedure itself. Specific exclusionary criteria include the inability to visualize any of the following either due to the structure not being imaged on the film or
Figure 64.
20 Crest® Oral-B® at dentalcare.com Continuing Education Course, Revised November 17, 2015
Features of an Ideal Panoramic Radiograph Before we learn how to correct for poor technique, we should first be able to recognize the features that make for a good panoramic radiograph. There are two general features that distinguish this panoramic from a poor one – they are adequate exposure and correct anatomic representation. Figure 67. Example of an overexposed panoramic radiograph.
Figure 65. Example of an excellent edentulous panoramic radiograph with adequate exposure and correct anatomic representation. Figure 68. Example of an overexposed panoramic radiograph:
• Adequate exposure – An assessment of adequate exposure implies that there is adequate density and contrast to recognize anatomic features. Density – The ideal density should be such that structures are not obstructed by areas of darkness i.e. areas of “burn out” or areas that are too light i.e. areas of “white out”. Visually this can be assessed by looking at the mandibular parasymphyseal area and region associated with the apices of the maxillary teeth. In the maxilla this is most evident when the tongue is not held in position during panoramic exposure. Excessive or inadequate density can lead to failure to detect features such as unerupted and impacted teeth or even pathology.
Figure 69. Images demonstrating how excessive exposure can lead to failure to detect pathologic features. Figure 68 is a digitally enhanced version of the left overexposed panoramic radiograph and clearly demonstrates the appearance of a radiolucent region causing expansion and thinning of the inferior cortex of the right mandible – features that were not evident on the original.
Figure 66. Regions on a panoramic radiograph to look at to determine adequate density. Figure 70. Example of an underexposed panoramic radiograph:
21 Crest® Oral-B® at dentalcare.com Continuing Education Course, Revised November 17, 2015
features can be used to determine anatomic accuracy including: - The condyles are on film – Usually in the upper outer sextant and at same level. - Palate and ghost images of palate should be above the apices of the maxillary teeth, running through the lower portion of the maxillary sinus. - Ramus width should be very similar on both left and right sides.
Figure 71. Images demonstrating how inadequate exposure can lead to failure to detect pathologic features. Figure 71 is a digitally enhanced version and clearly demonstrates the appearance of an impacted mandibular right third molar that was not readily apparent on the original (Figure 70). This enhancement also clearly demonstrates a large pericoronal pathology that seems to involve the right second mandibular molar.
• Contrast – The second element of adequate exposure assessment is contrast. This can best be assessed by determining if the interface between the enamel and the dentine can be seen, usually in the molar region. This is particularly important in areas where there are multiple overlapping structures. Inadequate contrast can lead to failure to detect features such as unerupted and impacted teeth.
Figure 73. Anatomic features to be compared in the assessment of panoramic anatomic accuracy.
Panoramic anatomy – A reference for anatomic structures commonly observed on panoramic radiographs appears below. Many of these structures are mentioned in the prior text and in the subsequent discussion of common errors.
Figure 72. Assessment of contrast in panoramic radiograph.
• Anatomically representative – A panoramic should be a good representation of the maxillofacial structures that it images. This means that there is adequate coverage of the osseous structures and that they are represented with some degree of accuracy. To determine correct anatomic representation, a visual assessment of the panoramic radiograph should be performed for accuracy of both anatomic structures and the dentition. Anatomic assessment – A number of
Figure 74.
22 Crest® Oral-B® at dentalcare.com Continuing Education Course, Revised November 17, 2015
Identifying Panoramic Errors
Features of the Dentition – A number of visual features of the dentition can be used to assess whether the teeth, particularly the anterior teeth are positioned correctly within the focal trough: - No or slight upward curve of teeth - No tooth size discrepancy on left or right side - Anterior teeth in focus (see pulp canal clearly) - Anterior teeth shape “normal” - Not too narrow or too wide - Premolars will always overlap due to inherent x-ray beam projection to the arch of the teeth in this region.
A number of authors indicate that the quality of panoramic radiographs taken either in an institutional setting,13 in general dental practice or submitted to third party insurance providers14 is low. While the majority of radiographs are acceptable, the largest study indicates that up to 1/3rd are diagnostically unacceptable. (Table 1) provides the top 5 technical and processing faults observed in all radiographs and provides the top 5 reasons for diagnostically unacceptable panoramic radiographs.12 Stepwise Approach to Panoramic Technique Assessment Now let’s develop a stepwise approach to analyze and identify panoramic errors. Panoramic errors result in image presentations that may be due to either screen/film handling errors, technique errors or a combination of both. 1. Screen/film handling errors • Film or cassette loading – Incorrectly loading film in the cassette or the cassette into the
Figure 75. Features of the dentition to be compared in the assessment of panoramic anatomic accuracy.
Table 1. Top 5 Panoramic Errors by Category.
23 Crest® Oral-B® at dentalcare.com Continuing Education Course, Revised November 17, 2015
cassette carrier results in a generalized or localized change in image density. Reversed cassette loading is a relatively common artifact associated with rigid cassettes resulting in the appearance of radiopaque “springs” on the image. While this error in and of itself does not require a retake, this error has the potential for serious misinterpretation as often left and right radiopaque markers are built within the cassette. This results in the L marker appearing on the right side and vice versa. Therefore care must be taken to re-label the radiograph.
Figure 78. Inadequate cassette sealing
Intensifying screen reversal produces an image with overall greatly reduced radiodensity (very light). The image may have a peripheral margin that corresponds to the peripheral binding of the intensifying screen. As intensifying screens only function on one side, if positioned backwards (i.e., flipped) and inserted into the cassette they will not function to expose the panoramic film. This error is more apt to occur using the flexible cassette system after screens are removed.
Figure 76.
Figure 79. Figure 77. Spring artifacts only result from reversed cassette loading of rigid cassettes. Carefully examination may also reveal the outline of the plastic hinge or locking device. In this particular example there is also a conical shaped artifact on the lower left side of the image that is due to the imaging of the lead apron.
Inadequate cassette sealing or a split cassette seam results in the presence of areas of darkness extending from the periphery. This appearance can be either a linear streak, multiple areas along the edge of the radiograph or almost the entire image and are due to exposure or light fogging of the film.
Figure 80. Example of intensifying screen reversal artifact (Figure 79). A static electric artifact is also observable superimposed on the left mandibular ramus. The intensifying screen (Figure 80) in the flexible cassette clearly indicates the correct orientation of the screen.
24 Crest® Oral-B® at dentalcare.com Continuing Education Course, Revised November 17, 2015
• Processing of the film and associated darkroom errors The whole gamut of processing errors is possible as with intraoral radiography and includes inadequate development, chemical contamination and film overlap.
Figure 83.
Figure 81. Example of a panoramic radiograph showing multiple radiolucent areas due to contamination with developer solution, which appears black.
Figure 84. Panoramic radiograph demonstrating imaging effects due to scratches in the intensifying screen and film crimping (shown in Figure 84).
• Static electricity – A common effect seen on panoramic radiographs is static electricity. This usually presents as a divergent, branchlike or “lightning” pattern. This effect is due to the physical action (friction) and resultant transfer of electrons, between the film and intensifying screen on insertion or removal from the cassette or on removal of the film from the film box. While this effect occurs most often on cold damp days, it is more likely to occur with panoramic systems that use a flexible plastic cassette and necessitate the insertion of a film between the intensifying screens.
Figure 82. Example of a panoramic radiograph showing multiple radiopaque areas due to contamination with fixer solution, which appears white.
• Transport Transport errors are associated with the physical handling of the film and include: Film crimping – Crimping of the film can occur prior to exposure as the film is removed from the box or after exposure, when it is removed from the cassette. Scratches in intensifying screens – Intensifying screens do not last indefinitely and as they are made of plastic are prone to warp and crack with time. This cracking is usually peripherally and presents as peripheral opaque crazing lines.
Figure 85. Characteristic static electricity panoramic artifact.
25 Crest® Oral-B® at dentalcare.com Continuing Education Course, Revised November 17, 2015
2. Technique Errors Technique errors can result from difficulties encountered from each of the three stages in panoramic technique: a. Patient Preparation The features of these errors on radiographs are characteristic and are therefore usually readily self-diagnostic. • Metallic artifacts – The most common patient preparation error is failure to remove metallic or radiodense objects – This causes two problems: First they produce an opaque outline of themselves, usually providing a telltale indication of the error.
plane compared to the original. An example of this occurring to normal anatomic structures is the angle of the mandible projected to the other side or the two lines of the palate. Ghosting of metallic objects however may produce unacceptable coverage of structures. To prevent such artifacts the patient must always be instructed to remove all items in the head and neck region prior to positioning of the patient.
Figure 87. Glasses
Figure 86. This image illustrates the telltale signs of leaving a number of metallic objects on the patient – earrings, glasses and a neck chain.
Second they may produce so-called “ghost images” of themselves. Ghost imaging is a normal component of the panoramic projection and occurs when an object is penetrated twice by the x-ray beam. Structures or objects that are located posterior to (behind) the center of rotation and the x-ray source tend to be ghosted onto the contralateral side of the image. Ghost images have particular, recognizable characteristics that are viewable on the panoramic film. - The ghost image has the same general shape of the original but does not produce a mirror image. - The ghost image appears on the opposite side of the radiograph compared to the original. - The ghost image appears in a higher position than the original. - The ghost image appears magnified and unsharp (blurred) more in the vertical plane than the horizontal
Figure 88. Earrings
Figure 89. Hairclip
Figure 90. Necklace or Napkin Chain Examples of images produced when metallic or radiodense objects are not removed prior to patient exposure.
26 Crest® Oral-B® at dentalcare.com Continuing Education Course, Revised November 17, 2015
• Lead apron – The second most common patient preparation error is incorrect placement of the lead apron. This produces a characteristic radiopaque domed or wedge-shaped artifact that also obscures diagnostic information associated with the mandible. Correct positioning of the lead apron involves ensuring that the apron is not placed too high up the patients back prior to exposure.
b. Machine Preparation The second category of errors involves factors associated with the panoramic equipment that may lead to poor image formation. • Incorrect Exposure – The most common machine variable error occurs with selection of the incorrect exposure setting – usually kVp. Kilovoltage settings that are too high produce dark images while low kVp settings result in light images. Correction of this type of error usually involves a retake at a kVp that is either 5% above, in the case of an underexposed radiograph, or 5% below, in the case of an overexposed radiograph, the initial setting. In the case of digital radiography, only overexposures can be corrected with use of image software. A severely underexposed image does not contain all of the information in the first place and density manipulation will not improve the image quality.
Figure 91. Example of lead apron artifact.
• Thyroid collar – Because of the nature of the projection beam in panoramic radiography, in effect coming up and over the shoulder of the patient, thyroid collars are not to be used. If it is placed on the patient it produces a characteristic appearance bilaterally – a radiopaque cone shaped artifact centrally located which obscures diagnostic information particularly in the mandible.
Figure 94.
Figure 92.
Figure 95. The two examples here show the effect of overexposure (Figure 94) and underexposure (Figure 95) on the panoramic image.
• Incomplete exposure – Another error occurs principally with panoramic units that use a flexible cassette attached to a rotating drum. If the drum is not re-aligned at the correct start position after attachment of the cassette, only a partial image will be obtained. In addition, a partial image can be produced if the operator lets go of the
Figure 93. Examples of thyroid collar artifact.
27 Crest® Oral-B® at dentalcare.com Continuing Education Course, Revised November 17, 2015
exposure button prior to completion of the entire exposure cycle.
c. Patient Positioning The second component of technique error analysis is the determination of patient positioning errors. This is of critical importance because even small patient positioning errors can produce effects that can obscure areas of the image and result in the loss of diagnostic information. Technique errors can be easily recognized by careful analysis of the position, relationship of structures, unsharpness and distortion in a panoramic radiograph. The visual effects of incorrect patient positioning on the image may be described according to whether they affect anatomic representation or features of the dentition. • Dentition features Occlusal plane slope – A convex curve of the smile line indicates that the patient’s head is tilted too far down whereas a concave line indicates that the head is tilted too far up.
Figure 96.
Figure 97. The two examples above show incomplete exposure due to the effect of incorrect drum alignment.
• Incorrect program selection – An error that may occur principally with panoramic units that allow various program options, is failure to change the program after the previous patient. This results in exposure of the patient using the previous program choice.
Figure 100. Convex occlusal plane
Figure 98. Figure 101. Concave occlusal plane
Tooth crown and root visibility – All the crowns and root tips should be in focus. This indicates that the dentition is within the focal trough. The most important area to assess is the anterior region, where the focal trough is inherently narrow.
Figure 99. The two examples above show the effect of incorrect program selection. The image in Figure 98 resulted from using a child exposure program, limiting the field of exposure posteriorly. Figure 99 is due to the use of an orthogonal program segmenting the anterior and posterior dentition without coverage of the ramus and TMJ.
28 Crest® Oral-B® at dentalcare.com Continuing Education Course, Revised November 17, 2015
3. Shoulder–Receptor/X-ray Head Interference
Figure 102.
Incorrect Head Orientation Incorrect Head Orientation – There are three possible planes in which the patient’s head may be positioned incorrectly: 1) Anteroposterior, 2) Vertical and 3) Horizontal. Incorrect positioning in each plane produces characteristic effects. Of course there is the possibility of multiple errors in more than one plane – this will produce multiple and sometimes compounding effects and in this instance have are referred to as “compound” errors. The analysis of positioning errors therefore involves stepwise recognition of the radiographic features associated with each planar discrepancy.
Figure 103. If the teeth in the anterior region are in focus, the enamel of the teeth is demonstrated and the pulp canals within the teeth can be identified.
• Anterior plane discrepancies – Essentially alter the position of the teeth, especially the anterior teeth in the focal trough. The two possible options are that the patient is positioned either too far forward or too far backward. Too far forward – Anterior positioning of the patient too far forward occurs either due to patient slipping forward, sucking the bite block or not using a bite block.
• Anatomic features Condylar position – The condyle should be positioned such that it is positioned in the center of the right and left outer regions of the panoramic image.
Figure 105.
Figure 104.
- Prevention of this error first necessitates that a bite block is used; secondly it requires that the patient’s anterior teeth are placed in an end-to-end position in the bite block. Prevention of subsequent patient movement can be aided by adjustment of the forehead support, when available, to prevent the patient from sliding forward. - The effect of positioning the patient too far forward is to position structures that are normally within the focal trough, like the anterior dentition, further anteriorly and
Spine position – The spine should not overlap the ramus of the mandible, which is indicative of the patient not assuming a correct upright standing or sitting position.
Patient Positioning Errors
There are three sub-categories of errors that result from poor patient positioning technique: 1. Incorrect head orientation 2. Tissue projection errors
29 Crest® Oral-B® at dentalcare.com Continuing Education Course, Revised November 17, 2015
out of focus and to bring more posterior structures, like the spine, nasal fossa and maxillary sinus into the focal trough and therefore more in focus. - The most obvious effects however are those on the dentition, which include: a. Blurring of the anterior teeth b. Narrowing of the anterior teeth c. Unsharpness d. Pronounced premolars overlap
Too far backward – Posterior positioning of the patient too far back usually occurs when the patient’s teeth are not biting on the bite block. The patient may suck the bite block rather than bite it.
Figure 109. Figure 106.
- Prevention of this error, as with anterior positioning errors, necessitates that a bite block is used; secondly it requires that the patient’s anterior teeth are placed in an end-to-end position in the bite block. - The principle effect of positioning the patient too far back is to position structures that are normally within the focal trough, like the anterior dentition, further posteriorly and out of focus. The principal visual anatomic effects are widening of the entire image, ghosting of the mandible, and blurring of the turbinates (nasal conchae) across the sinus. - Another effect is to bring part of the molar dentition into the crossover region of the panoramic x-ray beam and increase the possibility of ghost artifacts from the mandibular angle and ramus. - The most obvious effects however are those on the dentition, which include: a. Wide, unsharp image of the anterior teeth with the teeth more difficult to see b. Widened crowns c. Roots cut off (fuzzed out)
Figure 107. Panoramic radiograph (schematic in Figure 107) demonstrating visual effects on image with patient’s head positioned too far forward during exposure: Spine superimposed over the ramus area, nasal fossa and maxillary sinus become clearly evident. Effects on the dentition however are the most noticeable with narrowing and blurring of the anterior teeth.
Figure 108. Panoramic radiograph demonstrating visual effects on image with patient’s head positioned too far forward during exposure: In this instance a bite block was not used and most probably contributed to poor patient positioning.
30 Crest® Oral-B® at dentalcare.com Continuing Education Course, Revised November 17, 2015
- This error can be prevented by ensuring the midsagittal reference line of the panoramic unit coincides with the patient’s midline and that this line is perpendicular to the floor. Prevention of patient movement can be facilitated by adjustment of the lateral head supports to stabilize the patient and prevent movement during exposure. - The principle effect of mal-positioning the patient is to off set more lateral and posterior structures, like the posterior dentition and ramus, with respect to the focal trough and x-ray beam projection. a. Twisting – The most obvious image effects from the patient “twisting” within the machine are anatomic. Most noticeably: 1. The width of ramus on one side reduces (closer to the film) and becomes closer to the spine. 2. The width of the ramus on other side increases (farther away) and is further away from the spine – it may also be off the image. 3. The conchae on the side opposite the twisting are more pronounced. 4. The maxillary sinus and nasal fossa of the same side as the twisting become more noticeable.
Figure 110.
Figure 111. Panoramic radiograph (schematic in Figure 111) showing effects of positioning the patient’s head too far back – widening of the entire image, loss of the posterior ramus of the mandible (right), accentuated ghosting of the mandible, and blurring of the turbinates across the sinus. Note the obvious effects on the dentition with pronounced widening of the anterior teeth.
Horizontal plane discrepancies – Essentially alter the position of the teeth and jaws on one side relative to the path of the effective rotation center and x-ray beam projection. The two possible options are that the patient is a.) twisted with respect to the machine, or b.) that their head is tilted. Both result because the midsagittal plane of the patient is not correctly aligned at the time of exposure. It may also result from patient movement during exposure. This can occur more often with children as they may have a tendency to “follow” the cassette during exposure and hence move.
Figure 112. Tilted
While the anterior teeth remain relatively normal, there are two secondary effects on the dentition: 1. The first is that tooth size increases posteriorly on the side opposite to the direction of head tilt and, 2. Secondly, there appears to be increased overlapping of contacts on the opposite side of the tilt.
Figure 113. Twisted
31 Crest® Oral-B® at dentalcare.com Continuing Education Course, Revised November 17, 2015
b. Tilting – The principle effect of tilting the patient is to create artifacts in the dentition and ramus superoinferiorly. The most obvious image effects are also anatomic. Most noticeably: 1. The lower border of the mandible slopes markedly on the side to which the head is tilted. 2. The mandible also appears elongated and tilted up.
Figure 114.
The effects of tilting on the dentition include: 1. A reduction in the size of the teeth on the tilted side. 2. A greater overlap of the teeth on the opposite side. 3. Canting (sloping) of the occlusal plane towards the tilted side. Figure 115. Panoramic radiograph (schematic in Figure 115) demonstrating the effects of twisting – Elongation of left mandible, reduction in size of teeth on opposite side, occlusal plane canting and pronounced tooth overlap on the same side.
Twisting not only produces a distorted image that may be more difficult to interpret, this error can create pseudopathology. An interesting feature sometimes visualized on radiographs is a triangular radiopacity apparently located within the maxillary sinus.
Figure 117.
Figure 118. Panoramic radiograph (schematic on right) demonstrating the effects of tilting.
Figure 116. Panoramic radiograph showing triangular radiopacity within left maxillary sinus. Note a large discrepancy between the mandibular ramus width with the left side and the side with the pathology, being much wider than the right. This object within the sinus is merely another representation of the left zygomatic process of the maxilla. This structure assumes this appearance, due to the twisting of the patient’s head, because is now at right angles to the projected x-ray beam.
Vertical plane discrepancies – Essentially alter the relative position of the occlusal plane of the teeth and condyles of the mandible. The possible options are that the patient’s chin positioned too far up, too far down or that it is not positioned on the chin rest (when this is used to position the patient). Vertical errors occur when the patient’s head
32 Crest® Oral-B® at dentalcare.com Continuing Education Course, Revised November 17, 2015
is incorrectly positioned superiorly inferiorly in the machine. The instructions in the manufacturer’s manual may vary in which plane is used to adjust the patient’s head up or down. Some suggest using the ala-tragal line (a line between the side of the nose and the tragus of the ear); some use the canthomeatal line (a line between the outer part of the eye and the tragus); others use the Frankfort horizontal (a line between the lower part of the eye and the tragus). Even some use the occlusal plane as a reference.
Figure 120.
Practically vertical errors result from nonalignment of the lateral reference plane of the patient’s head parallel to the lateral side indicator.
Figure 121. Panoramic radiograph (schematic in Figure 121) demonstrating the effects of positioning the head too far up.
Prevention of this error can be accomplished by ensuring that the patient’s horizontal reference line is parallel to the floor or the lateral reference markers. Alignment markers are either located on the lateral side indicator (as is indicated in this example) or may be present as thin light markers. Prevention of patient movement can also be aided by adjustment of the lateral head supports to stabilize the patient and prevent movement during exposure. - Head tilted too high – The first possibility is that the patient’s head is positioned too high or tilted up.
- Head tilted too low – The second possibility is that the patient’s head is positioned tilted too far down. The principle effect of tilting the chin down is to position more of the maxillae into the focal trough, align the maxillary teeth and to bring less of the lower anterior mandibular area into the focal trough. The anatomic effects of positioning the head too far down can be severe and may necessitate retaking the radiograph.
Figure 119.
Figure 122.
a. Most noticeably, the TMJs are positioned higher and in many cases off the image. b. Secondly the hyoid bone comes into the doubling diamond and forms a single widened line
33 Crest® Oral-B® at dentalcare.com Continuing Education Course, Revised November 17, 2015
c. Finally the anterior mandible is usually unsharp or fuzzy
There are usually minimal effects of this positioning error on the dentition, however the possibility of movement and horizontal or vertical errors as previously described increases because the chin is no longer stabilized by the lower support. This leads to the possibility of distortion, overlapping and unsharpness of the anterior teeth in particular.
Dentition effects are probably the most visually obvious and include: a. Severe curvature of the occlusal plane producing a “Jack-O-Lantern” effect and, b. Lack of definition of the lower incisors and pronounced foreshortening of the roots of these teeth.
Figure 125. Panoramic radiograph (cropped and zoomed on right) demonstrating the effects of positioning the head off the chin rest. Note that in addition the patient is positioned too far forward. Figure 123.
Tissue Projection Errors Tissue Projection Errors – The second category of technical errors in panoramic radiography are tissue projection errors or those due to tissue superimposition. There are two errors possible: a. Hard Tissue Projection Errors • Spine – The first hard tissue error can occur when the patient assumes the “head extended” position. One of the final instructions to patients before panoramic exposure is that they should move their feet slightly forward into the machine – a sort of “panoramic shuffle”. This has the effect of straightening the cervical spine of the patient. If the patient is not instructed to do this they will often assume a head projected position. This is because of the natural tendency of patient’s is to put their head forward into the panoramic head holding apparatus rather than physically moving their head and their body. The positioning effect of this is that the spine assumes a more oblique position with respect to the x-ray beam and attenuates (absorbs) more x-rays.
Figure 124. Panoramic radiograph (schematic in Figure 124) demonstrating the effects of positioning the head too far down.
- Chin not on chin rest – The third possibility is that the patient’s chin is lifted from the chin rest. This is usually because the initial height at which the machine is set is lower than the height required. Often a patient will stoop to enter a panoramic machine but once they are positioned and immediately before exposure will straighten themselves up. The main visual effect of the chin being lifted from the chin rest is to create an image with a shift of anatomic structures superiorly. This may result in the top of the sinus and the condyles being cut off.
34 Crest® Oral-B® at dentalcare.com Continuing Education Course, Revised November 17, 2015
Figure 129.
• Patient Movement – The second hard tissue error can occur when the patient moves during an exposure. Because the panoramic exposure is of the order of between 16 to 20 seconds, the possibility exists that a patient may move during the exposure. Prevention of this error can be aided by continuing to inform the patient, throughout the exposure, of the progress of the unit around their head while instructing the patient to remain still. Movement produces characteristic anatomic effects by stretching or breaking the image in the zone of movement. This may lead to the appearance of a “false” fracture. Appreciation of this artifact is important in the assessment of patients reporting with maxillofacial injury.15 Additional presentations may result from double imaging or loss of segments. Another characteristic effect is the appearance of a dent in the lower border of the mandible.
Figure 126. Head Projected
Figure 127. Head Projected
• The most obvious anatomic feature of head projection is the superimposition of the spine on the ramus of the mandible and the production of a more ghost images. The most characteristic ghost image is of the spine and it appears as a central midline radiopacity that broadens inferiorly. In addition, because of poor contrast, the dentition may be difficult to visualize because of this superimposed ghost image radiopacity.
Figure 130.
Figure 131. Panoramic radiograph (schematic in Figure 131) showing the effect patient movement on the image. Note the discontinuity of the left lower border of the mandible and distortion of dentition and palate immediately superiorly.
Figure 128. Panoramic radiograph (schematic in Figure 129) showing the effect of the spine on the anterior of the image with slumping of the patient.
35 Crest® Oral-B® at dentalcare.com Continuing Education Course, Revised November 17, 2015
• The effect of patient movement on the dentition can be subtle – and contribute to what could be called “motion microdontia.”
the exposure does not produce any anatomic effects but does have some consequences to the visibility of the dentition.
Figure 134.
Figure 133. Figure 132. In this image (cropped and zoomed on right) notice that in the midline anterior region, tooth # 8 in the maxilla is extremely narrow and suggests that the patient may have a central incisor that is a microdont. On further examination it can be see that tooth # 26 in the mandibular arc, directly below # 8 is also a microdont. Further clues to this appearance being due to a motion artifact are revealed by comparing the anatomy above and below the teeth with the opposite side. This is especially apparent in the relative width of the ala or soft tissue shadow of the nose.
Figure 135. Panoramic radiograph (schematic in Figure 135) showing the effect of not placing the tongue on the roof of the mouth on the image.
b. Soft Tissue Projection Errors • Tongue Drop – The second tissue projection error can result from soft tissue artifacts associated with either the tongue not being placed on the palate during the exposure or the lips not being closed. These errors occur when the patient is not instructed to place their tongue on the roof of their mouth during the entire exposure and to keep their lips together. The principal effect of this is to produce areas of relative radiolucency associated with the oro and naso pharyngeal airspaces, which can obscure visualization. This occurs because panoramic x-ray beam exposure is designed to be sufficient to transmit through both the hard and soft tissues of the maxillofacial region.
• While failure to position the tongue on the roof of the mouth is perhaps one of the most common technique errors, it is rarely the cause for a re-take. However the effect can be accentuated in two situations when the patient is edentulous and when the patient is positioned too far forward. Failure to place the tongue on the roof of the mouth may also create apparent “apical pathology.”
This is particularly evident with underexposed radiographs where the features of the maxilla in particular are obscured by the radiolucency created by the incorrect position of the tongue and radiopacity of the palatal hard and soft tissue.
Figure 136. This image demonstrates the effect that a relaxation in tongue position during panoramic exposure can produce. Notice that in the maxillary midline there appears to be a radiolucent, cyst-like radiolucency that has expanded inferiorly below the alveolar bone. Closer examination reveals that the uppermost part of this lesion is shaped n a gradual curve – this curve represents the top of the palate and is the tell tail sign that this “lesion” has been created because the patient’s tongue dropped during the exposure.
Prevention of this error can be aided by continuing to instruct the patient, throughout the entire exposure, to keep their tongue on the roof of their mouth. Failure to place the tongue on the roof of the palate throughout
36 Crest® Oral-B® at dentalcare.com Continuing Education Course, Revised November 17, 2015
• Lips not closed – The second soft tissue error results from the lips not being closed throughout the exposure. While there are no anatomic effects of this error, it can also contribute to “burnt out“ of the crowns of the anterior teeth or be responsible for increased radiolucency over the maxillary anterior region that could be interpreted as apparent anterior bone loss. Figure 139. Shoulder contact on the patient’s right caused the machine to stop resulting in an incomplete or partial image.
Figure 137.
Figure 140. X-ray head stuck on neck/shoulder stopping rotation and causing repeated exposure of sane area (black band).
Figure 138. Panoramic radiograph (schematic in Figure 138) demonstrating the effect that occurs when the lips are not closed during exposure resulting in an area of increased radiodensity in the maxillary anterior region resembling bone loss. In addition notice the bilateral curvilinear lines that result from the soft tissue of the cheeks.
Figure 141. Shoulder contact on the patient’s right side caused the patient to move in response.
Shoulder–Receptor/X-ray Head Interference Errors
Conclusion
In summary, errors in panoramic radiography can be attributable to a variety of errors but most commonly technical errors. Technical errors involve considerations of: • Patient Preparation • Machine Preparation • Patient Positioning
Shoulder–Receptor/X-ray Head Interference Errors – The third category of technical errors in panoramic radiography involves shoulder and receptor contact due to short neck and/or thick shoulder anatomy and lack of clearance between the shoulder and the receptor and/or x-ray head. Contact may result in improper machine rotation, patient movement, image artifacts or partial image production.
Patient positioning errors can result from incorrect anteroposterior, horizontal or vertical positioning errors, hard or soft tissue projection errors or shoulder-receptor/x-ray head interference errors.
37 Crest® Oral-B® at dentalcare.com Continuing Education Course, Revised November 17, 2015
When prescribed according to selection criteria, panoramic radiographs provide important additional diagnostic information. While the basic underlying principles of radiography apply to panoramic and intraoral imaging, important differences exist between the two modalities. Recognition of these differences can assist the clinician in consistently producing images of
acceptable diagnostic quality. Panoramic imaging is a complex process requiring machine and patient preparation prior to patient positioning and subsequent exposure. Each panoramic image should be assessed according to specific criteria to ensure quality results are produced. The clinician must recognize the common presentations of errors and know how to correct them.
38 Crest® Oral-B® at dentalcare.com Continuing Education Course, Revised November 17, 2015
Course Test Preview
To receive Continuing Education credit for this course, you must complete the online test. Please go to: www.dentalcare.com/en-US/dental-education/continuing-education/ce71/ce71-test.aspx 1.
Which selection below correctly describes the image distortion produced when the patient’s midsagittal plane is not centered? a. The occlusal plane forms a frown-like configuration. b. The entire image is magnified and does not fit on the receptor. c. A triangular-shaped radiopacity is produced in the midline. d. One side of the image is narrowed and the other side is widened.
2.
Examine this panoramic image carefully. What correction does the clinician need to make to improve the diagnostic quality of the image?
a. b. c. d.
Realign the dental midline. Adjust the vertical placement of the patient’s head. Instruct the patient to bite end-to-end in the biteblock groove. Straighten the patient’s cervical spine.
3.
A variety of artifacts can be produced on panoramic images when the clinician does not pay attention to technical details. Which of the following scenarios would produce radiopaque artifacts? a. Head and neck jewelry not removed prior to exposure. b. Patient’s tongue was not placed flat against the hard palate. c. X-ray head or receptor contact with the shoulder during exposure. d. Improper closure of the cassette allowing light leaks onto the film.
4.
Which of the following selections is NOT an accurate description of the focal trough? a. Predetermined layer of structures. b. Sometimes referred to as the image layer. c. Located between the film cassette and x-ray source. d. Trough is narrower in the posterior and wider in the anterior.
39 Crest® Oral-B® at dentalcare.com Continuing Education Course, Revised November 17, 2015
5.
When the patient’s head is positioned too far backward, the clinician will observe all of the following manifestations except one. Which one is the exception? a. Image is too large and does not fit on the film. b. Anterior teeth on both arches are involved most often. c. The structures on one side will be narrower than the other. d. Structures appear wider and very blurred compared to normal.
6.
Which of the following phrases is NOT consistent with production of panoramic ghost images? a. Magnified and unsharp appearance. b. Same general shape as original object. c. Location is higher than original object. d. Appear on same side as the original object.
7.
What type of distortion will the clinician observe if the patient’s head is positioned too far upward? a. The hard palate is superimposed over maxillary teeth apices. b. The occlusal plane will display a grin-like configuration. c. The posterior teeth will appear narrowed and blurred. d. The hyoid bone will superimpose over the mandible.
8.
Which of the following selections is NOT an accurate description of panoramic x-ray machines? a. X-ray source is aligned at a -10º angulation. b. Operator can adjust time but not the kVp and mA. c. Aperture of the x-ray source is a very narrow vertical slit. d. Cassette rotates in front of the patient’s face during exposure.
9.
What error would cause of the production of a wedge-shaped radiopaque artifact near the midline in panoramic radiography? a. The patient did not place his/her tongue against the hard palate. b. The lead apron was placed too high up on the back of the patient’s neck. c. The operator let go of the exposure switch momentarily during the procedure. d. The patient’s spinal column was slumped and obscured the image in the midline.
10. Which of the following is NOT an accurate description of intensifying screens? a. Located on the internal surfaces of an open film cassette. b. Composed of phosphor crystals that fluoresce upon x-ray exposure. c. Film size and sensitivity is paired with screen size and fluorescence. d. Reflecting layer directs the light produced toward the screen base. 11. Which of the following problems would produce a high-density panoramic image? a. Low processing temperature. b. White light leaks in the darkroom. c. Inadequate solution replenishment. d. Underestimation of patient size & stature. 12. When determining ideal panoramic image density, which of the following is the best region to examine to assess adequate density? a. Dentinoenamel junction on molars. b. Mandibular parasymphyseal area. c. Maxillary sinus cavity anatomy. d. Gonial angle of the mandible.
40 Crest® Oral-B® at dentalcare.com Continuing Education Course, Revised November 17, 2015
13. When the patient’s head is positioned too far downward, which of the following manifestations will the clinician observe on the radiographic image? a. The occlusal plane will display a big grin or jack-o-lantern configuration. b. The maxillary and mandibular anterior teeth will appear blurred and widened. c. One side of the arches will appear widened and the other side will be narrowed. d. A pyramid-shaped radiopacity appears superimposed over the patient’s midline. 14. Which of the following selections is NOT correct about panoramic imaging? a. Unit requires pre-cleaning, disinfection and barrier placement. b. A thyroid collar is used to protect the neck during film exposure. c. The object-receptor distance is greater compared to intraoral radiography. d. Objects like earrings can produce ghost images on the panoramic film. 15. Of the following criteria which one is NOT associated with a diagnostic panoramic radiographic image? a. Slight smile or downward curve of the occlusal plane. b. Clear view of the interproximal surfaces of all of the teeth. c. Symmetrical display of the anatomic structures right to left. d. Entire maxilla, mandible and temporomandibular joints displayed. 16. What type of error is produced when the head plane is tilted to one side? a. Excessive ghosting of the cervical spine and ramus occurs. b. The mandibular anterior teeth are blurred and foreshortened. c. The maxillary and mandibular anterior teeth are blurred and widened. d. The occlusal plane is canted and the size of the teeth is reduced on one side. 17. Which of the following selections is NOT correct about panoramic imaging? a. The side closest to the receptor is the one recorded in focus on the image. b. The x-ray beam rotates behind the patient’s head as the receptor rotates in front. c. The x-ray beam travels in a labial to lingual direction just like in intraoral imaging. d. The operator aligns the patient’s head according to specific anatomical planes. 18. A number of visual features of the dentition can be used to assess whether the teeth are positioned correctly within the focal trough. Which of the following is NOT a visual assessment feature? a. Anterior teeth shape “normal” in width. b. A grin or pronounced upward curve of teeth. c. No tooth size discrepancy on left or right side. d. Anterior teeth in focus with pulp canal clearly seen.
41 Crest® Oral-B® at dentalcare.com Continuing Education Course, Revised November 17, 2015
19. Panoramic radiographic images are recommended in all of the following clinical situations except _______________. a. evaluation of the mixed dentition b. examination of edentulous alveolar ridges c. evaluation of periodontal furcation involvement d. evaluation of third molar teeth development and position 20. What is the anatomic structure identified by the arrow on this panoramic image?
a. b. c. d.
maxillary sinus hard palate orbit of the eye nasal fossa
42 Crest® Oral-B® at dentalcare.com Continuing Education Course, Revised November 17, 2015
References
1. American Dental Association and Food and Drug Administration. Dental radiographic examinations: Recommendations for patient selection and limiting exposure. American Dental Association Council on Scientific Affairs and U.S. Department of Health and Human Services, Food and Drug Administration. Revised 2012. Accessed October 06, 2015. 2. Rushton VE, Horner K, Worthington HV. Routine panoramic radiography of new adult patients in general dental practice: relevance of diagnostic yield to treatment and identification of radiographic selection criteria. Oral Surg Oral Med Oral Pathol Oral Radiol Endod. 2002 Apr;93(4):488-95. 3. Rushton VE, Horner K, Worthington HV. Screening panoramic radiography of new adult patients: diagnostic yield when combined with bitewing radiography and identification of selection criteria. Br Dent J. 2002 Mar 9;192(5):275-279. 4. Parks ET, Williamson GF. Digital radiography: an overview. J Contemp Dent Pract. 2002 Nov 15;3(4):23-39. 5. Martins MG, Haiter Neto F, Whaites EJ. Analysis of digital images acquired using different phosphor storage plates (PSPs) subjected to varying reading times and storage conditions. Dentomaxillofac Radiol. 2003 May;32(3):186-90. 6. Goren AD, Lundeen RC, Deahl ST 2nd, et al. Updated quality assurance self-assessment exercise in intraoral and panoramic radiography. American Academy of Oral and Maxillofacial Radiology, Radiology Practice Committee. Oral Surg Oral Med Oral Pathol Oral Radiol Endod. 2000 Mar;89(3):369-74. 7. Goren AD, Lundeen RC, Deahl ST 2nd, et al. Common errors in panoramic radiography of edentulous patients. J Prosthodont. 1994 Jun;3(2):68-73. 8. White SC, Heslop EW, Hollender LG, et al. Common positioning and technical errors in panoramic radiography. J Am Dent Assoc. 1986 Sep;113(3):422-6. 9. White SC, Pharoah MJ. Oral radiology: principles and interpretation, 6th ed. St. Louis, Mo.: Mosby 2009. 10. Ludlow JB, Davies-Ludlow LE, White SC. Patient risk related to common dental radiographic examinations: the impact of 2007 International Commission on Radiological Protection recommendations regarding dose calculation. J Am Dent Assoc. 2008 Sep;139(9):1237-43. 11. Lee GS, Kim JS, Seo YS, et al. Effective dose from direct and indirect digital panoramic units. Imaging Sci Dent. 2013 Jun;43(2):77-84. 12. Rushton VE, Horner K, Worthington HV. The quality of panoramic radiographs in a sample of general dental practices. Br Dent J. 1999 Jun 26;186(12):630-633. 13. Brezden NA, Brooks SL. Evaluation of panoramic dental radiographs taken in private practice. Oral Surg Oral Med Oral Pathol. 1987 May;63(5):617-621. 14. Courter BJ. Pseudofractures of the mandible secondary to motion artifact. Am J Emerg Med. 1994 Jan;12(1):88-89.
43 Crest® Oral-B® at dentalcare.com Continuing Education Course, Revised November 17, 2015
About the Authors William C. Scarfe, BDS, FRACDS Dr. Scarfe is a Diplomate of the American Board of Oral and Maxillofacial Radiology and registered as a Specialist Oral and Maxillofacial Radiologist in the Commonwealth of Kentucky. He is a Fellow of the Royal Australasian College of Dental Surgeons, a Fellow of the International Team for Implantology (ITI) and current Scientific Editor of the Oral Radiology Section of Oral Surgery, Oral Pathology, Oral Medicine and, Oral Radiology. Dr. Scarfe has published extensively on cone beam computed tomography (CBCT) including recent consensus statements on general and specific use guidelines and discipline specific applications of cone beam computed tomography. He has presented internationally as well as nationally and is active in research on the clinical applications of CBCT imaging. He is co-Director of a University-based intramural private practice in CBCT imaging since 2004. Professor and Director, Radiology and Imaging Sciences Department of Surgical/Hospital Dentistry University of Louisville School of Dentistry 501 South Preston Street Louisville, KY 40292 Email:
[email protected] Gail F. Williamson, RDH, MS Gail Williamson is a Professor of Dental Diagnostic Sciences at Indiana University School of Dentistry and currently serves as Director of Faculty Enhancement in the Office of Faculty Affairs. A veteran teacher, Prof. Williamson has received numerous awards for teaching excellence during her academic career. She is a co-author of several Radiology textbooks and author/co-author of multiple book chapters and articles. She presents continuing education courses on topics in Oral and Maxillofacial Radiology nationally and internationally. Professor Department of Oral Pathology, Medicine & Radiology Indiana University School of Dentistry 1121 West Michigan Street Indianapolis, IN 46220 Email:
[email protected]
44 Crest® Oral-B® at dentalcare.com Continuing Education Course, Revised November 17, 2015