Zeiss Ultra-60 Field Emission Scanning Electron Microscope (FE-SEM) Procedure Special Restrictions •
You must log into the touch screen first before attempting to use the tool.
•
Always use the specimen exchange procedure to load and unload samples. If a sample breaks or becomes stuck in the specimen chamber, notify staff immediately. Do not attempt unassisted removal!
•
If the red OFF button light or the yellow STANDBY button light is illuminated on the middle of the Zeiss SEM tool, do not attempt to start / use the tool. Contact staff immediately.
•
Always turn on the chamber camera before attempting to raise the stage. Failure to observe the interior of the specimen chamber may result in damage to the SEM and the sample. Never adjust x, y, rotate, or tilt if there is a chance that the sample may touch the objective lens cap. Do not approach the pole piece closer than 4mm as determined by focusing and obtaining the working distance *on the tallest point on the sample holder* in the In-Lens detector view.
•
When screwing the sample exchange rod into the sample holder, do not overtighten.
•
There is an insertable four-quadrant backscatter detector on the system. It must always be retracted when not in use.
Safety Precautions •
Do not remove any components or cover panels for the instrument at all, during use or any other time.
•
The maximum allowed accelerating voltage is 20kV.
•
Keep the table that the microscope is on and the monitor table clear of junk to avoid image shaking and/or potential heat hazards
•
No food or drink in the lab!
•
Do not bump the specimen exchange rod or apply pressure that may bend the rod.
Safe Operating Procedures
A. This is a vacuum system. Your hands have oil on them that will get on the equipment and cause outgasing and other problems with the system. B. To avoid contamination: 1. Do not touch anything (sample holders, your stubs, etc) you put in the chamber with your bare hands 2. Do not touch the chamber with bare hands. 3. Do not touch the load rod (it has vacuum grease on it) 4. Do not touch your body while wearing gloves as this will get oil and particles on your gloves and contaminate the chamber. 5. Your sample must be clean and dry. C. Avoiding damage to SEM 1. Think before you do anything. 2. If you tilt the stage, you must look in the chamber view before you move it. 3. You must get an image with the SE2 detector before you decrease the working distance. D. The Emergency Stop button for the stage is on the joystick console. Be sure you know the location of this button! E. If you violate any of these rules you will not be allowed to use the Ultra60. Mounting Samples A. You must mount your sample on a stub! You are NOT allowed to mount your sample directly to any sample holder! B. You may mount your samples with the provided double sided copper tape, carbon tape, carbon dots, or carbon adhesive / paste. If you use the paste, you must apply it to the surface of the stub first. After putting your sample on the paste, you need to put it under the infrared / heat lamp for 10 minutes.
C. Only standard semiconductor materials are allowed. Semiconductor (electrically conducting) wafers with or without CURED photoresist or polymer. All metals, glass, quartz, sapphire. D. NO liquids or gels! E. NO Biological specimens of any type without prior approval by the staff. F. NO powders are allowed without prior approval by the staff and they must be prepared in a specific way BEFORE putting them in the system. G. Check height of stub. If stub is long, use metal clippers to cut stub to correct length. H. After mounting sample on stub, get sample holder from Zeiss cabinet. I.
Put stub in sample holder
J.
Use supplied red A4 torque wrench to turn set screw on holder until snug. If not able to locate said torque wrench, use a hex key. Screw for the center position of the nine-stub holder is located on the top of the edge on the side rather than in the middle. Do not over tighten as this will strip the set screws.
K. Turn sample holder upside down to make sure that stub is in place. Make sure to put hand under holder to catch stub in case it falls. Loading/Unloading Sample A. Stage position
1. Click on the desktop icon labeled SmartSEM User Interface 2. Log on with your username and password. 3. Check if the stage is in the exchange position. I.
Click the Stage tab in the SEM control panel on the right side of the screen to show the coordinates of the stage.
II.
There is a file named Exchange.txt on the desktop that shows the six coordinates for the exchange position.
III.
If the coordinates of the stage do not match the coordinates in the Exchange.txt file, left-click on the coordinate that needs to be moved under the Stage Go-To and enter the correct value.
IV.
You must use the exchange macro or else you will get a stage touch alarm and you will have to initialize the stage.
V.
Your sample must fit into the load-lock.
VI.
Have your sample mounted BEFORE you open the load lock!
2. Load lock control panel I.
When a button is pressed the green light will be on. When the button is cleared (off) the green light is off.
3. Load sample I. II.
Press PURGE button. Wait 30 seconds Pull open load lock door until it latches open.
III.
Slide sample holder onto dovetail. Make sure the threaded hole in the sample holder is pointing toward the load rod.
IV.
Pull load lock door back a little, lift latch, close load lock door.
V.
Push and hold load lock door closed, Press PUMP button. Listen to vacuum pump to make sure the load lock door is sealed! If it is not sealed, the pump will continue to make a loud noise instead of becoming quiet after thirty seconds.
VI.
Press OPEN button. When the load lock reaches vacuum the gate valve to the chamber will open. This happens when the red light labeled Wait is off and the green light labeled Proceed is on
VII.
The rod must be in the home position before the gate valve will open. This means that it should be pulled all the way back and the amber light labeled Rod Status must be solid amber, e.g. not blinking.
VIII.
The PUMP button and the OPEN button must both be pressed to turn on the light inside the chamber and to open the gate valve.
IX.
Move the sample holder so it is in line with the load rod. There is a detent at the correct position.
4. Load rod (Do not touch the load rod with your bare hands! Do not bend the load rod!) I.
Pull the load rod back a little, lift the load rod latch.
II.
Push the load rod toward the sample holder and screw the load rod into the sample holder. Do not push the sample holder off of the dovetail rail before you screw in the load rod!
III.
Push the load rod forward until it stops. Push the sample holder onto the stage. There should be ~1.5cm of rod sticking out.
IV.
Make sure the sample holder is all the way on the stage.
V.
Unscrew the load rod and pull the load rod back. When you begin to pull the load rod, keep turning the load rod to make sure the load rod disengages from the sample holder.
VI.
Pull the load rod all the way back and latch the load rod.
5. Close Load lock I.
Turn off the OPEN button.
II.
Turn on the CLOSE button.
III.
Turn off the CLOSE button.
IV.
Turn off the PUMP button.
6. Exchange I.
On the control keyboard, press the exchange button.
II.
The system will ask the question "Do you want to use the STEM detector?" The answer is always NO.
III.
The system will then ask the question "Have you loaded a tall sample holder?" The answer is always YES.
7. Observe I.
Watch your sample move to the center of the chamber in the camera view. If it looks like your sample will hit something, hit the BREAK (stage stop) button!
8. Unload Sample I. II.
Click the exchange button on the keyboard. The system will ask you "Do you really want to remove your sample?" Click Yes.
III.
You do not have to lower the stage, turn off the EHT (gun), or anything else. The stage will move to the exchange position, the EHT will turn off, and the column chamber valve will close.
IV.
Check the coordinates of the stage to check if the stage is in the exchange position. I.
Click the Stage tab in the SEM control panel to show the coordinates of the stage.
II.
There is a file named Exchange.txt on the desktop that shows the coordinates for the exchange position.
III.
If the coordinates of the stage do not match the coordinates in the Exchange.txt file, left-click on the coordinate that needs to be moved and enter the correct value.
IV.
For the SAME joystick movement, the stage may move in DIFFERENT directions depending on whether you are looking at the image from the chamber camera or the image from the SEM!
V.
Study the pictures in the table labeled "Stage movement versus Joystick Movement"!
VI.
If you crash the stage into the pole piece because you forgot which way the stage moves, you will not be allowed to use the Ultra60 and your advisor will be billed for the repair cost.
SEM Operation A. Electron Gun 1. The Electron Gun should always be on. If the Electron Gun is not on, contact a staff member. Do *not* use the system. B. EHT 1. The exchange macro automatically sets the EHT to 5KV. 2. You can turn on the EHT only when the chamber isolation valve is open (and the Electron Gun is on). 3. In general, lower EHT is better. The Ultra60 can operate with an EHT of 100 Volts! You should start with an EHT of 2KV - 5KV. 4. Below 2KV the working distance is very limited.
C. Coarse/Fine 1. You can change the sensitivity of the panel by switching to coarse mode or fine mode. You can switch modes by clicking the Coarse or Fine status indicator on the window on the lower right of the screen or you can press the TAB key when the image window is in focus. D. Focus 1. Use Focus knob to change working distance until image is in focus 2. You must get an image with the SE2 detector before raising the height of the stage I.
First, go to brightness and contrast via clicking on the Line Scan checkbox under the Scanning tab. Adjust Brightness and contrast so that line is in window.
II.
Then adjust line scan to look like this:
III.
Change detector from SE2 to In-Lens by going to the Detectors tab and selecting Signal A=InLens from the drop down menu
IV.
Then adjust brightness and contrast again via the Line Scan checkbox under the Scanning tab.
V.
Raise the stage height to twenty centimeters below the pole piece (two fingers)
VI.
Adjust focus again to appropriate working distance as above
VII.
Slowly adjust stage upwards *from camera view only* and each time go back to detector view to determine actual working distance (WD) by focusing on the tallest feature on your sample. The WD is defined as the distance from the *TALLEST* point on your sample to the bottom of the pole piece
VIII.
THE MINIMUM ALLOWED WORKING DISTANCE FROM THE POLE PIECE IS 4MM!!! No user may go closer than this.
B. Aperture Alignment
1. Use Reduced Raster. 2. Press the WOBBLE button 3. The wobble magnitude is adjustable 4. You want to eliminate any translation of the image (X-axis or Y-axis movement, the wobble image will always "pulsate"). 5. Make sure image rotation is off! C. Stigmation 1. Use Reduced Raster. 2. Stigmation at less than 2Kx is not useful. 3. Choose a "round" feature. Focus so the feature looks "round" and not stretched. Adjust the stigmation so the feature looks sharp. 4. The correct procedure is to adjust stigmation in one axis, then the other axis, and then readjust the focus. Repeat until there is no more improvement. D. Scanning E. Four-Quadrant BackScatter Detector (QBSD) – you must be trained by the staff in order to use this detector! Do not use without permission!
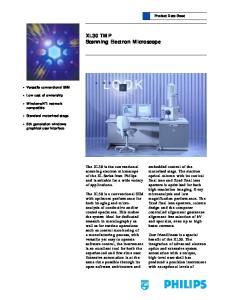
If you come up to use the system and the following shows up in the chamber camera view (e.g. the long thin metal segment inserted directly underneath the pole piece), you must retract the QBSD as someone else left it inserted.
The QBSD detector can be retracted by going to the back of the machine (behind the loadlock) and retracting the rod shown in red (shown in the home or retracted position)
1. Noise Reduction I.
Pixel Average I.
II.
This gives each pixel the longest continuous exposure to the electron beam.
Line Average I.
II.
Frame Average I.
II.
This gives each pixel the shortest continuous exposure to the electron beam.
N is the number of lines or frames that are averaged together to produce the image.
2. Image Resolution
I.
You can choose from 512x384, 1024x768, 2048x1536, 3072x2304. I.
You must select the resolution BEFORE you begin your scan. Most people use 1024x768.
2. Scan Speed I.
Slower usually gives better resolution but takes longer and is more sensitive to noise. Typical scan speeds for image capture are in the range of 6-7.
2. There are several important options in the save window. I.
The file name.
II.
You can make the SEM add a number to the file name. The number will automatically increase for each image you save.
III.
The SEM can save image parameters in the tiff file header. You must specify which parameters to include! The default is NO parameters! You should include: I.
Magnification
II.
EHT
III.
Date
IV.
Signal
V.
Working Distance (WD)
2. Always use TIF or PNG format! JPG is a "lossy" compression format and you will LOSE resolution if you use JPG! If TIF files are too big, use PNG. PNG is a lossless compression format. If you use JPG format you should not be using this SEM! 3. You can create new directories for your images. Problems A. Load lock control panel does not respond. 1. Make sure column isolation valve is closed! 2. Click left mouse button on ignore B. Macro error message
C. Load rod does not screw into sample holder when unloading sample. 1. Check stage coordinates!!! I.
If tilt angle is not zero, then:
II.
Click left mouse button on Stage on menu bar
III.
Click left mouse button on Stage Control
IV.
Click left mouse button on set Limits
V.
Double click left mouse button on T Lower Limit
VI.
Enter -10 degrees.
VII.
Close all stage control windows
VIII.
Click left mouse button on Exchange icon again and repeat unload procedure. Check stage coordinates.
B. STAGE TOUCH! 1. If you have a stage touch error, you MUST report this to Eric Woods. We have configured the software to write a file to the server if there is a stage touch. If you get a stage touch error and you do not report it, your SEM access will be terminated with extreme prejudice. C. Stage freezes. 1. Try Initialize Stage, which is found under the Stage menu on the menu bar 2. CAUTION: You MUST watch the stage! If the stage looks like it is going to hit anything, press the stage stop button! 3. If this does not work you must contact a staff member! D. Stage does not go to exchange position or stage is not in exchange position when you start using the system: 1. CAUTION: If you do not use the exchange macro to load/unload a sample you will get a stage touch alarm and you will have to initialize the stage! E. Stage still does not go to exchange position: 1. Stage > Initialize 2. Press Exchange again
F. EM Server closes (crashes) 1. Logoff Smart SEM 2. Login to Smart SEM G. Screen goes black. Check the following: 1. Did this happen while you were scanning a sample? 2. Can you switch to the chamber camera? 3. If the answer to I is yes and II is no this is probably an L-REM failure. 4. You must contact a staff member. B. Gun shuts down. 1. Call staff C. If the exchange macro is not working properly, contact staff. They may tell you to follow the following procedure to load & unload your sample. Do not do this without contacting the staff. Zeiss manual load/unload procedure To load sample 1. Make sure stage is at exchange position (63.5, 151.398, 5.8, 0, 52, and 0). If not, adjust coordinates appropriately. 2. Load sample onto stage using load arm 3. Make sure load arm is in home position. 4. Viewing the chamber scope, position the stage with joystick manually under the pole piece. You can also go to stage, store/recall, and then $Std_center. 5. Using the side panel pullout on the left of the SEM controls- Select "Airlock" Open Column Chamber Valve here. 6. Use EHT button on lower right portion of screen to turn EHT on.
To unload sample 1. Use EHT button on lower right portion of screen to turn EHT off 2.
Move sample to center coordinates.
3. Go back to Airlock window - Close Column Chamber Valve vacuum tab and manually close the column chamber valve. 4. Make sure chamber scope is on(On Airlock - Select Specimen Change Button) 5. Are you sure you want to remove the sample? YES Sample is in the exchange position. Remove / load sample via the airlock, then press 'OK' 6. Unload sample from chamber using load arm. Have you loaded another sample? Select No