Version 4.0
Bridge Talk User’s Guide
Document Number 81100300 Rev C July 2005
Copyright 2005, Avaya Inc. All Rights Reserved Notice Every effort was made to ensure that the information in this document was complete and accurate at the time of printing. However, information is subject to change. Warranty Avaya provides a limited warranty on the Product. Refer to your customer sales agreement to establish the terms of the limited warranty. In addition, Avaya’s standard warranty language as well as information regarding support for the Product, while under warranty, is available through the following web site: http://www.avaya.com/support,
[email protected], or
[email protected]. Disclaimer Avaya is not responsible for any modifications, additions or deletions to the original published version of this documentation unless such modifications, additions or deletions were performed by Avaya. Customer and/or End User agree to indemnify and hold harmless Avaya, Avaya's agents, servants and employees against all claims, lawsuits, demands and judgments arising out of, or in connection with, subsequent modifications, additions or deletions to this documentation to the extent made by the Customer or End User. How to Get Help For additional support telephone numbers, go to the Avaya support Web site: http://www.avaya.com/support. If you are: • Within the United States, click the Escalation Contacts link. Then click the appropriate link for the type of support you need. • Outside the United States, click the Escalation Contacts link. Then click the International Services link that includes telephone numbers for the international Centers of Excellence. Providing Telecommunications Security Telecommunications security (of voice, data, and/or video communications) is the prevention of any type of intrusion to (that is, either unauthorized or malicious access to or use of) your company's telecommunications equipment by some party. Your company's “telecommunications equipment” includes both this Avaya product and any other voice/data/video equipment that could be accessed via this Avaya product (that is, “networked equipment”). An “outside party” is anyone who is not a corporate employee, agent, subcontractor, or is not working on your company's behalf. Whereas, a “malicious party” is anyone (including someone who may be otherwise authorized) who accesses your telecommunications equipment with either malicious or mischievous intent. Such intrusions may be either to/through synchronous (time-multiplexed and/or circuit-based), or asynchronous (character-, message-, or packet-based) equipment, or interfaces for reasons of: • Utilization (of capabilities special to the accessed equipment) • Theft (such as, of intellectual property, financial assets, or toll facility access) • Eavesdropping (privacy invasions to humans) • Mischief (troubling, but apparently innocuous, tampering) • Harm (such as harmful tampering, data loss or alteration, regardless of motive or intent) Be aware that there may be a risk of unauthorized intrusions associated with your system and/or its networked equipment. Also realize that, if such an intrusion should occur, it could result in a variety of losses to your company (including but not limited to, human/data privacy, intellectual property, material assets, financial resources, labor costs, and/or legal costs). Responsibility for Your Company’s Telecommunications Security The final responsibility for securing both this system and its networked equipment rests with you - Avaya’s customer system administrator, your telecommunications peers, and your managers. Base the fulfillment of your responsibility on acquired knowledge and resources from a variety of sources including but not limited to: • Installation documents • System administration documents • Security documents • Hardware-/software-based security tools • Shared information between you and your peers • Telecommunications security experts
To prevent intrusions to your telecommunications equipment, you and your peers should carefully program and configure: • Your Avaya-provided telecommunications systems and their interfaces • Your Avaya-provided software applications, as well as their underlying hardware/software platforms and interfaces • Any other equipment networked to your Avaya products TCP/IP Facilities Customers may experience differences in product performance, reliability and security depending upon network configurations/design and topologies, even when the product performs as warranted. Standards Compliance Avaya Inc. is not responsible for any radio or television interference caused by unauthorized modifications of this equipment or the substitution or attachment of connecting cables and equipment other than those specified by Avaya Inc. The correction of interference caused by such unauthorized modifications, substitution or attachment will be the responsibility of the user. Pursuant to Part 15 of the Federal Communications Commission (FCC) Rules, the user is cautioned that changes or modifications not expressly approved by Avaya Inc. could void the user’s authority to operate this equipment. Product Safety Standards This product complies with and conforms to the following international Product Safety standards as applicable: Safety of Information Technology Equipment, IEC 60950, 3rd Edition, or IEC 60950-1, 1st Edition, including all relevant national deviations as listed in Compliance with IEC for Electrical Equipment (IECEE) CB-96A. Safety of Information Technology Equipment, CAN/CSA-C22.2 No. 60950-00 / UL 60950, 3rd Edition, or CAN/CSA-C22.2 No. 60950-1-03 / UL 60950-1. Safety Requirements for Customer Equipment, ACA Technical Standard (TS) 001 - 1997. One or more of the following Mexican national standards, as applicable: NOM 001 SCFI 1993, NOM SCFI 016 1993, NOM 019 SCFI 1998. The equipment described in this document may contain Class 1 LASER Device(s). These devices comply with the following standards: • EN 60825-1, Edition 1.1, 1998-01 • 21 CFR 1040.10 and CFR 1040.11. The LASER devices used in Avaya equipment typically operate within the following parameters: Typical Center Wavelength
Maximum Output Power
830 nm - 860 nm
-1.5 dBm
1270 nm - 1360 nm
-3.0 dBm
1540 nm - 1570 nm
5.0 dBm
Luokan 1 Laserlaite Klass 1 Laser Apparat Use of controls or adjustments or performance of procedures other than those specified herein may result in hazardous radiation exposures. Contact your Avaya representative for more laser product information. Electromagnetic Compatibility (EMC) Standards This product complies with and conforms to the following international EMC standards and all relevant national deviations: Limits and Methods of Measurement of Radio Interference of Information Technology Equipment, CISPR 22:1997 and EN55022:1998. Information Technology Equipment - Immunity Characteristics - Limits and Methods of Measurement, CISPR 24:1997 and EN55024:1998, including: • Electrostatic Discharge (ESD) IEC 61000-4-2 • Radiated Immunity IEC 61000-4-3 • Electrical Fast Transient IEC 61000-4-4 • Lightning Effects IEC 61000-4-5 • Conducted Immunity IEC 61000-4-6 • Mains Frequency Magnetic Field IEC 61000-4-8 • Voltage Dips and Variations IEC 61000-4-11 Power Line Emissions, IEC 61000-3-2: Electromagnetic compatibility (EMC) - Part 3-2: Limits - Limits for harmonic current emissions. Power Line Emissions, IEC 61000-3-3: Electromagnetic compatibility (EMC) - Part 3-3: Limits - Limitation of voltage changes, voltage fluctuations and flicker in public low-voltage supply systems.
Federal Communications Commission Statement Part 15: Note: This equipment has been tested and found to comply with the limits for a Class A digital device, pursuant to Part 15 of the FCC Rules. These limits are designed to provide reasonable protection against harmful interference when the equipment is operated in a commercial environment. This equipment generates, uses, and can radiate radio frequency energy and, if not installed and used in accordance with the instruction manual, may cause harmful interference to radio communications. Operation of this equipment in a residential area is likely to cause harmful interference in which case the user will be required to correct the interference at his own expense. Part 68: Answer-Supervision Signaling Allowing this equipment to be operated in a manner that does not provide proper answer-supervision signaling is in violation of Part 68 rules. This equipment returns answer-supervision signals to the public switched network when: • answered by the called station, • answered by the attendant, or • routed to a recorded announcement that can be administered by the customer premises equipment (CPE) user. This equipment returns answer-supervision signals on all direct inward dialed (DID) calls forwarded back to the public switched telephone network. Permissible exceptions are: • A call is unanswered. • A busy tone is received. • A reorder tone is received. Avaya attests that this registered equipment is capable of providing users access to interstate providers of operator services through the use of access codes. Modification of this equipment by call aggregators to block access dialing codes is a violation of the Telephone Operator Consumers Act of 1990. Canadian Department of Communications (DOC) Interference Information This Class A digital apparatus complies with Canadian ICES-003. Cet appareil numérique de la classe A est conforme à la norme NMB-003 du Canada. This equipment meets the applicable Industry Canada Terminal Equipment Technical Specifications. This is confirmed by the registration number. The abbreviation, IC, before the registration number signifies that registration was performed based on a Declaration of Conformity indicating that Industry Canada technical specifications were met. It does not imply that Industry Canada approved the equipment. Installation and Repairs Before installing this equipment, users should ensure that it is permissible to be connected to the facilities of the local telecommunications company. The equipment must also be installed using an acceptable method of connection. The customer should be aware that compliance with the above conditions may not prevent degradation of service in some situations. Repairs to certified equipment should be coordinated by a representative designated by the supplier. Any repairs or alterations made by the user to this equipment, or equipment malfunctions, may give the telecommunications company cause to request the user to disconnect the equipment.
Declarations of Conformity United States FCC Part 68 Supplier’s Declaration of Conformity (SDoC) Avaya Inc. in the United States of America hereby certifies that the equipment described in this document and bearing a TIA TSB-168 label identification number complies with the FCC’s Rules and Regulations 47 CFR Part 68, and the Administrative Council on Terminal Attachments (ACTA) adopted technical criteria. Avaya further asserts that Avaya handset-equipped terminal equipment described in this document complies with Paragraph 68.316 of the FCC Rules and Regulations defining Hearing Aid Compatibility and is deemed compatible with hearing aids. Copies of SDoCs signed by the Responsible Party in the U. S. can be obtained by contacting your local sales representative and are available on the following Web site: http://www.avaya.com/support. All Avaya media servers and media gateways are compliant with FCC Part 68, but many have been registered with the FCC before the SDoC process was available. A list of all Avaya registered products may be found at: http://www.part68.org by conducting a search using “Avaya” as manufacturer. European Union Declarations of Conformity
Avaya Inc. declares that the equipment specified in this document bearing the “CE” (Conformité Europeénne) mark conforms to the European Union Radio and Telecommunications Terminal Equipment Directive (1999/5/EC), including the Electromagnetic Compatibility Directive (89/336/EEC) and Low Voltage Directive (73/23/EEC). Copies of these Declarations of Conformity (DoCs) can be obtained by contacting your local sales representative and are available on the following Web site: http://www.avaya.com/support. Japan This is a Class A product based on the standard of the Voluntary Control Council for Interference by Information Technology Equipment (VCCI). If this equipment is used in a domestic environment, radio disturbance may occur, in which case, the user may be required to take corrective actions.
To order copies of this and other documents: Call: Avaya Publications Center Voice 1.800.457.1235 or 1.207.866.6701 FAX 1.800.457.1764 or 1.207.626.7269 Write: Globalware Solutions 200 Ward Hill Avenue Haverhill, MA 01835 USA Attention: Avaya Account Management E-mail:
[email protected] For the most current versions of documentation, go to the Avaya support Web site: http://www.avaya.com/support.
Contents
Preface . . . . . . . . . . . . . . . . . . . . . . . . . . . . . . . . . . . . 11 Intended audience . . . . . . . . . . . . . . . . . . . . . . . . . . . . . . . . . . .
11
Related documents . . . . . . . . . . . . . . . . . . . . . . . . . . . . . . . . . .
11
Conventions . . . . . . . . . . . . . . . . . . . . . . . . . . . . . . . . . . . . . .
12
Contacting Avaya . . . . . . . . . . . . . . . . . . . . . . . . . . . . . . . . . . .
13
Chapter 1: Getting Started . . . . . . . . . . . . . . . . . . . . . . . . .
15
System requirements . . . . . . . . . . . . . . . . . . . . . . . . . . . . . . . . .
16
Pre-installation procedures . . . . . . . . . . . . . . . . . . . . . . . . . . . . . .
17
Installing Bridge Talk . . . . . . . . . . . . . . . . . . . . . . . . . . . . . . . . . Uninstalling Bridge Talk . . . . . . . . . . . . . . . . . . . . . . . . . . . . . .
17 20
Starting Bridge Talk . . . . . . . . . . . . . . . . . . . . . . . . . . . Sign-in privileges . . . . . . . . . . . . . . . . . . . . . . . . . . Establishing an operator audio path . . . . . . . . . . . . . . . . Setting up auxiliary audio paths . . . . . . . . . . . . . . . . . . Establishing multiple Bridge Talk sessions on different bridges
. . . . .
20 22 23 24 26
Exiting from Bridge Talk. . . . . . . . . . . . . . . . . . . . . . . . . . . . . . . .
27
Chapter 2: Understanding the User Interface . . . . . . . . . . . . . . .
29
Overview of the Bridge Talk interface Title bar . . . . . . . . . . . . . . . Menu bar . . . . . . . . . . . . . . Main tool bar . . . . . . . . . . . . Conference Navigator . . . . . . . Pending queue . . . . . . . . . . . Enter queue . . . . . . . . . . . . Conference Room . . . . . . . . . System Message and Chat area . Help Requests queue . . . . . . . Operator status bar . . . . . . . . Keyboard shortcut keys . . . . . .
. . . . . . . . . . . .
. . . . . . . . . . . .
. . . . . . . . . . . .
. . . . .
. . . . .
. . . . .
. . . . .
. . . . .
. . . . .
. . . . . . . . . . . .
. . . . . . . . . . . .
. . . . . . . . . . . .
. . . . . . . . . . . .
. . . . . . . . . . . .
. . . . . . . . . . . .
. . . . . . . . . . . .
. . . . . . . . . . . .
. . . . . . . . . . . .
. . . . . . . . . . . .
. . . . . . . . . . . .
. . . . . . . . . . . .
. . . . . . . . . . . .
. . . . . . . . . . . .
. . . . . . . . . . . .
. . . . . . . . . . . .
. . . . . . . . . . . .
. . . . . . . . . . . .
. . . . . . . . . . . .
. . . . . . . . . . . .
. . . . . . . . . . . .
30 33 33 33 34 34 35 36 37 38 39 40
Modifying Bridge Talk windows . . . . . . . Changing the size of a window or a field. Displaying or hiding fields . . . . . . . . Displaying a field. . . . . . . . . . . . Hiding a field . . . . . . . . . . . . . . Changing the field order. . . . . . . .
. . . . . .
. . . . . .
. . . . . .
. . . . . .
. . . . . .
. . . . . .
. . . . . .
. . . . . .
. . . . . .
. . . . . .
. . . . . .
. . . . . .
. . . . . .
. . . . . .
. . . . . .
. . . . . .
. . . . . .
. . . . . .
. . . . . .
. . . . . .
43 43 44 44 45 45
Issue 1 July 2005
3
Contents
Administrator and maintenance options . . . . . . . . . . . . Starting a system administrator or maintenance session Closing a telnet session . . . . . . . . . . . . . . . . . . . Setting lines per column in All Lines dialog box . . . . . Using the ACS option . . . . . . . . . . . . . . . . . . . . Lock and release of Bridge Talk areas . . . . . . . . . . .
. . . . . .
46 46 47 48 48 49
Chapter 3: Creating a Conference . . . . . . . . . . . . . . . . . . . . .
51
Creating a new conference . . . . . . . . . . . . . . . . . Naming a conference . . . . . . . . . . . . . . . . . . Specifying a conference ID . . . . . . . . . . . . . . . Additional information about conference ID . . . . Setting entry or exit tones and messages . . . . . . . Additional information about entry and exit tones Adding a voice roster . . . . . . . . . . . . . . . . . . Locking a conference . . . . . . . . . . . . . . . . . . Additional information about locking . . . . . . . Securing a conference . . . . . . . . . . . . . . . . . Additional information about security . . . . . . . Setting up a lectured conference . . . . . . . . . . . . Additional information about lecture . . . . . . . . Muting a line . . . . . . . . . . . . . . . . . . . . . . . Additional information on muting a line . . . . . .
Linking conferences . . . . . . . . . . . . . . . . . . . . . Adding a virtual link line . . . . . . . . . . . . . . . . Removing a virtual link line from a conference . . Additional information about virtual link lines. . . Adding a dedicated link line . . . . . . . . . . . . . . Removing a dedicated link line from a conference Using virtual and dedicated link lines in a conference
65 66 68 68 68 68 69
. . . . . . .
. . . . . . .
. . . . . . .
. . . . . . .
. . . . . . .
. . . . . . .
. . . .
. . . . . . .
. . . . . . . . . . . . . . . . . . .
. . . . . . .
. . . . . . . . . . . . . . .
. . . . . .
63 63 65
. . . .
. . . . . . . . . . . . . . .
. . . . . .
Providing music for a conference . . . . . . . . . . . . . . . . . . . . . . . . . . Adding an analog or digital music line . . . . . . . . . . . . . . . . . . . . . . Removing music from a conference . . . . . . . . . . . . . . . . . . . . .
. . . .
. . . . . . . . . . . . . . .
. . . . . .
61 61 62 62
. . . .
. . . . . . . . . . . . . . .
. . . . . .
. . . .
. . . .
. . . . . . . . . . . . . . .
. . . . . .
Using annunciator messages . . . . . . . . . . . . . . . . . . Recording an annunciator message . . . . . . . . . . . . Playing back an annunciator message . . . . . . . . . Additional information about annunciator messages .
. . . .
. . . . . . . . . . . . . . .
. . . . . .
60
. . . .
. . . . . . . . . . . . . . .
. . . . . .
Working with base and current line statuses . . . . . . . . . . . . . . . . . . . .
. . . . . . .
. . . . . . . . . . . . . . .
. . . . . .
52 53 53 54 54 55 55 56 56 56 57 58 58 59 59
. . . . . . .
. . . . . . . . . . . . . . .
. . . . . .
. . . . . . . . . . . . . . .
4 Bridge Talk 4.0 User’s Guide
. . . . . . . . . . . . . . .
. . . . . .
. . . .
. . . . . . .
. . . . . . . . . . . . . . . . . . .
. . . . . . .
. . . . . . .
Contents
Chapter 4: Dialing In. . . . . . . . . . . . . . . . . . . . . . . . . . . . . Overview of dialing in . . . . . . . . . . . . . . . How the system routes DNIS/DDI calls . . . . When to use a filtered Enter queue . . . . . . Creating a Filtered DNIS/DDI Enter queue
. . . .
. . . .
. . . .
. . . .
. . . .
. . . .
. . . .
. . . .
. . . .
. . . .
. . . .
. . . .
. . . .
. . . .
72 72 73 73
Placing incoming lines into a conference . . . . . . . . . Using the Line Detail dialog . . . . . . . . . . . . . . . Keyboard shortcut keys for the Line Detail dialog Using a dial list to supply caller information. . . .
. . . .
. . . .
. . . .
. . . .
. . . .
. . . .
. . . .
. . . .
. . . .
. . . .
. . . .
. . . .
. . . .
75 76 84 86
Chapter 5: Using Dial Lists and Dialing Out . . . . . . . . . . . . . . . .
87
Working with dial lists . . . . . . . Creating a new dial list . . . . Modifying a dial list . . . . . . Changing entries in a dial list .
. . . .
. . . .
. . . .
. . . .
. . . .
. . . .
. . . .
. . . .
. . . .
. . . .
. . . .
71
. . . .
. . . .
. . . .
. . . .
. . . .
. . . .
. . . .
. . . .
. . . .
. . . .
. . . .
. . . .
. . . .
. . . .
. . . .
. . . .
. . . .
. . . .
. . . .
88 89 92 93
Overview of dialing out . . . . . . . . . . . . . . Using FastDial . . . . . . . . . . . . . . . . . Using BlastDial. . . . . . . . . . . . . . . . . Additional information about Blast Dial . Using a DNIS/DDI Blast Dial . . . . . . . . . . Using manual (one-time) dial . . . . . . . . . Additional information about manual dial Adding a delay in a dialing sequence . . . .
. . . . . . . .
. . . . . . . .
. . . . . . . .
. . . . . . . .
. . . . . . . .
. . . . . . . .
. . . . . . . .
. . . . . . . .
. . . . . . . .
. . . . . . . .
. . . . . . . .
. . . . . . . .
. . . . . . . .
. . . . . . . .
. . . . . . . .
. . . . . . . .
. . . . . . . .
. . . . . . . .
94 95 100 105 105 105 107 107
Chapter 6: Recording Conferences . . . . . . . . . . . . . . . . . . . .
109
Overview of recording . . . . . . . . . . . . . . . . . . . . . . . . . . . . . . . . . Types of recordings . . . . . . . . . . . . . . . . . . . . . . . . . . . . . . . . Legal notification regarding conference recordings . . . . . . . . . . . . . .
110 110 111
Creating an analog recording . . . . . . . . . . . . . . . . . . . . . . . . . . . . . Playing back an analog recording . . . . . . . . . . . . . . . . . . . . . . . .
111 112
Creating a digital recording . . . . . . . . . . . . . . . . . . . . . . . . . . . . . . Playing back a digital recording . . . . . . . . . . . . . . . . . . . . . . . . . Deleting a digital conference recording . . . . . . . . . . . . . . . . . . . . .
113 114 114
Issue 1 July 2005
5
Contents
Chapter 7: Conducting Polling and Q&A Sessions . . . . . . . . . . . . Conducting polling sessions . . . . . . . . . . . . . Starting a polling session . . . . . . . . . . . . . Performing operator polling tasks . . . . . . . . Excluding certain lines from the vote count . Providing help to a participant . . . . . . . . Saving or printing the polling results . . . . Allowing a participant to change a vote . . . . . Clearing all votes . . . . . . . . . . . . . . . . . Ending a polling session . . . . . . . . . . . . . Creating a tag digit list . . . . . . . . . . . . . .
115
. . . . . . . . . .
. . . . . . . . . .
. . . . . . . . . .
. . . . . . . . . .
. . . . . . . . . .
. . . . . . . . . .
. . . . . . . . . .
. . . . . . . . . .
. . . . . . . . . .
. . . . . . . . . .
. . . . . . . . . .
. . . . . . . . . .
. . . . . . . . . .
. . . . . . . . . .
. . . . . . . . . .
. . . . . . . . . .
116 117 119 119 120 121 122 122 122 123
Conducting Question and Answer (Q&A) sessions . . Starting a Q&A session . . . . . . . . . . . . . . . Assisting callers during a Q&A session . . . . . . Responding to moderators who request help . Responding to participants who request help . Allowing participants to ask a question . . . .
. . . . . .
. . . . . .
. . . . . .
. . . . . .
. . . . . .
. . . . . .
. . . . . .
. . . . . .
. . . . . .
. . . . . .
. . . . . .
. . . . . .
. . . . . .
. . . . . .
. . . . . .
125 126 129 129 131 132
Chapter 8: Transferring Calls . . . . . . . . . . . . . . . . . . . . . . . .
135
Overview of the transfer process . . . . . . . . . . . . . . . . Transferring a call within your phone system . . . . . . . Additional information on call transfers . . . . . . . . Transferring one or more participants . . . . . . . . . . . Transferring an entire conference to another conference Transferring a dedicated link line. . . . . . . . . . . . . .
. . . . . .
136 136 136 137 138 139
Chapter 9: Assisting an Active Conference . . . . . . . . . . . . . . . .
141
Managing active conferences. . . . . . . . . . . . . . . . . . . . . . . . . . . . . Responding to help requests . . . . . . . . . . . . . . . . . . . . . . . . . . . Additional information on providing help . . . . . . . . . . . . . . . . . . Modifying conference information using Conference Details . . . . . . . . . Modifying participant information . . . . . . . . . . . . . . . . . . . . . . . . Listening to (auditing) a conference . . . . . . . . . . . . . . . . . . . . . . . Speaking to the entire conference . . . . . . . . . . . . . . . . . . . . . . . . Sending messages to other operators using Chat . . . . . . . . . . . . . . . Sending messages to operators or moderators using the Conference Viewer Adding a note to a conference report . . . . . . . . . . . . . . . . . . . . . .
142 142 143 144 145 146 146 147 148 148
About subconferences . . . . . . . . . . . . . . . . . . . . . . . . . . . . . . . . How Bridge Talk tracks subconference activity . . . . . . . . . . . . . . . . . Starting or joining subconferences . . . . . . . . . . . . . . . . . . . . . . .
149 149 150
6 Bridge Talk 4.0 User’s Guide
. . . . . .
. . . . . .
. . . . . .
. . . . . .
. . . . . .
. . . . . .
. . . . . .
. . . . . .
. . . . . .
. . . . . .
Contents
Chapter 10: Using the Listening Commands . . . . . . . . . . . . . . . Overview of listening . . . . . . . . . . . . . . . . . . Additional information on listening commands Listening to specific lines . . . . . . . . . . . . . . Listening to all lines in a conference . . . . . . . . Listening to an auxiliary channel . . . . . . . . . .
. . . . .
154 155 155 157 158
Scanning conferences. . . . . . . . . . . . . . . . . . . . . . . . . . . . . . . . . Scanning multiple conferences . . . . . . . . . . . . . . . . . . . . . . . . . . Specifying a scanning interval . . . . . . . . . . . . . . . . . . . . . . . . . .
159 159 160
Applying gain to a conference . . . . . . . . . . . . . . . . . . . . . . . . . . . . Additional information about gain . . . . . . . . . . . . . . . . . . . . . .
160 160
Faulting a line . . . . . . . . . . . . . . . . . . . . . . . . . . . . . . . . . . . . . Additional information on faulting a line . . . . . . . . . . . . . . . . . . .
161 161
Adding an audio prompt . . . . . . . . . . . . . . . . . . . . . . . . . . . . . . .
162
Chapter 11: Scheduling a Conference . . . . . . . . . . . . . . . . . . .
163
Overview of the Conference Scheduler . . . . . Scheduling an attended conference . . . . . Scheduling an unattended conference . . . . Scheduling an on-demand conference . . . . Scheduling a flex conference . . . . . . . . . About Name Record/Playback . . . . . . . . Defining one-time or on-going conferences . Defining conference features . . . . . . . . .
. . . . . .
. . . . . .
. . . . . .
. . . . . .
. . . . . .
. . . . . .
. . . . . .
. . . . . .
. . . . . . . .
. . . . . .
. . . . . . . .
. . . . . .
. . . . . . . .
. . . . .
. . . . . .
. . . . . . . .
. . . . .
. . . . . .
. . . . . . . .
. . . . .
. . . . . .
. . . . . . . .
. . . . .
199
. . . . . .
. . . . . . . .
. . . . .
Chapter 12: Performing Post-Conference Tasks . . . . . . . . . . . . . . . . . . .
. . . . . . . .
. . . . .
197
. . . . . .
. . . . . . . .
. . . . .
Accessing the Scheduler directly . . . . . . . . . . . . . . . . . . . . . . . . . .
. . . . . .
. . . . . . . .
. . . . .
193 195
. . . . . .
. . . . . . . .
. . . . .
Viewing or modifying scheduled conferences. . . . . . . . . . . . . . . . . . . . Printing scheduled conference information . . . . . . . . . . . . . . . . .
. . . . . .
. . . . . . . .
. . . . .
191 191 192
. . . . . .
. . . . . . . .
. . . . .
Viewing or printing conference information . . . . . . . . . . . . . . . . . . . . . Using the View Schedule option . . . . . . . . . . . . . . . . . . . . . . . . . Using the View Expanded Schedule option . . . . . . . . . . . . . . . . . . .
. . . . . .
. . . . . . . .
. . . . .
164 173 174 175 177 182 183 186
. . . . . .
. . . . . . . .
. . . . .
. . . . . . . .
Overview of post-conference tasks Hanging up lines . . . . . . . . . Hanging up a conference . . . . Clearing conference information Clearing call counts . . . . . Clearing disconnected lines
. . . . . . . .
. . . . .
153
. . . . . .
. . . . . . . .
. . . . . .
. . . . . .
200 200 201 201 201 202
Issue 1 July 2005
7
Contents
Clearing minutes-per-conference statistics . . . . Clearing total time statistics . . . . . . . . . . . . Clearing all features from a conference . . . . . . . . Additional information about clearing all features Deleting expired reservations. . . . . . . . . . . .
. . . . .
. . . . .
. . . . .
. . . . .
. . . . .
. . . . .
. . . . .
. . . . .
. . . . .
. . . . .
. . . . .
. . . . .
. . . . .
202 203 203 203 204
. . . . .
. . . . .
. . . . .
. . . . .
. . . . .
. . . . .
. . . . .
. . . . .
. . . . .
. . . . .
. . . . .
. . . . .
. . . . .
206 206 208 209 209
Chapter 13: Using Automatic Conference Select . . . . . . . . . . . . .
211
Working with status information and reports . . . Types of reports . . . . . . . . . . . . . . . . . Displaying status information . . . . . . . . . Printing or viewing a conference status report Printing past conference reports . . . . . . . .
. . . . .
. . . . .
. . . . .
. . . . .
Setting the system to handle calls automatically . . . . Placing callers automatically in a specified conference Setting lines to not answer incoming calls . . . . . . . Setting the system to not answer incoming calls . . . . Additional information on ACS . . . . . . . . . . . .
. . . . .
212 212 212 213 213
Appendix A: Moderator and Participant Touchtone Commands . . . . .
215
Managing Avaya conferences using touchtone commands . . . . . . . . . . . .
216
Managing flex conferences using touchtone commands. . . . . . . . . . . . . . Modifying flex conference settings . . . . . . . . . . . . . . . . . . . . . . . . Managing conferences using flex touchtone commands . . . . . . . . . . . .
222 222 224
Appendix B: Menu Bar and Main Tool Bar . . . . . . . . . . . . . . . . .
231
Menu bar overview. . . . . Using Menu commands File menu . . . . . . View menu . . . . . Line menu . . . . . Conference menu . FastDial menu . . . Tools menu . . . . . Windows menu. . . Help menu . . . . .
. . . . . . . . . .
. . . . . . . . . .
. . . . . . . . . .
. . . . . . . . . .
. . . . . . . . . .
. . . . . . . . . .
. . . . . . . . . .
. . . . . . . . . .
. . . . . . . . . .
. . . . . . . . . .
. . . . . . . . . .
. . . . . . . . . .
. . . . . . . . . .
. . . . . . . . . .
. . . . . . . . . .
. . . . . . . . . .
. . . . . . . . . .
. . . . . . . . . .
. . . . .
. . . . . . . . . .
. . . . .
. . . . . . . . . .
. . . . .
. . . . . . . . . .
. . . . .
. . . . . . . . . .
. . . . .
. . . . . . . . . .
. . . . .
. . . . . . . . . .
. . . . .
. . . . . . . . . .
. . . . .
. . . . . . . . . .
. . . . .
. . . . . . . . . .
. . . . .
. . . . . . . . . .
232 232 232 233 236 237 238 239 240 240
Main tool bar overview . . . . . . . . . . . . . . . . . . . . . . . . . . . . . . . . Main tool bar shortcut keys . . . . . . . . . . . . . . . . . . . . . . . . . . . . Using the tool bar . . . . . . . . . . . . . . . . . . . . . . . . . . . . . . . . .
241 241 241
8 Bridge Talk 4.0 User’s Guide
. . . . . . . . . .
. . . . .
. . . . . . . . . .
Contents
Appendix C: Predefining Login and Operator Information . . . . . . . .
251
Creating a Bridge Talk shortcut. . . . . . . . . . . . . . . . . . . . . . . . . . . .
252
Predefining login information. . . . . . . . . . . . . . . . . . . . . . . . . . . . . Creating a customized Bridge Talk shortcut. . . . . . . . . . . . . . . . . . . Using a batch script . . . . . . . . . . . . . . . . . . . . . . . . . . . . . . . .
253 253 254
Appendix D: Administrator Tasks . . . . . . . . . . . . . . . . . . . . .
255
Overview of the bridge.properties file . . . . . . . . . . . . . . . . . . . . . . . .
256
About Network Address Translation (NAT) mode . . . . . . . . . . . . . . . . . . Configuring NAT on a workstation . . . . . . . . . . . . . . . . . . . . . .
262 263
Setting up PuTTY SSH. . . . . . . . . . . . . . . . . Generating a SSH1 (RSA) key. . . . . . . . . . . Generating a SSH2 RSA or SSH2 DSA key . . . Procedures for creating an OpenSSH format Converting a SSH2 Public key . . . . . . . . . . Exporting public keys to the bridge using FTP . Launching PuTTY SSH from Bridge Talk . . . .
264 265 267 269 270 270 271
. . . . . . .
. . . . . . .
. . . . . . .
. . . . . . .
. . . . . . .
. . . . . . .
. . . . . . .
. . . . . . .
. . . . . . .
. . . . . . .
. . . . . . .
. . . . . . .
. . . . . . .
. . . . . . .
. . . . . . .
. . . . . . .
Index . . . . . . . . . . . . . . . . . . . . . . . . . . . . . . . . . . . . . 273
Issue 1 July 2005
9
Contents
10 Bridge Talk 4.0 User’s Guide
Preface Use Bridge Talk (formerly known as Workstation) to create, schedule, and manage teleconferences on an conferencing server. In addition, you can assist moderators and participants during Question and Answer (Q&A) and polling sessions. Note: This guide refers to the Workstation software as Bridge Talk.
Note:
Intended audience Use this guide if you want to manage or schedule conferences using Bridge Talk.
Related documents This guide is designed for use with the following: ●
Scheduler User’s Guide
●
Meeting Exchange Administration and Maintenance Guide for the CS700/780 4.0 Conferencing Server
●
Meeting Exchange Administration and Maintenance Guide for the S6200, S6500, and S6800 Media Servers
For information on using Bridge Talk, see the Bridge Talk online help. Tip: Tip:
Use Internet Explorer 6.0 with SP1 or later for optimum Bridge Talk online help performance.
Issue 1 July 2005
11
Preface
Conventions Table 1 describes conventions commonly used in this book. Table 1: Writing conventions
Note:
Convention
Indicates
Choose
A command from the menu bar. For example, choose File > Exit.
Click
An item selection in GUI-based dialogs or Web pages. For example, click OK or Print.
Enter
Text input from a keyboard. For example, enter: pmadm -r -p
Keyname
Keyboard keys, for example Esc or Enter. In certain cases, keynames refer a combination of keys, such as Ctrl+Enter.
ASCII text
Specific Ascii-based keys or key sequences, macros, commands, fields or items, and lines or strings in a file or system display. For example, Open the file in the text editor of your choice and locate the following term: TemplateDir
Bold
GUI-based items, such as menu commands, buttons, box labels, and fields, as well as numbers, letters, symbols on a keyboard or keypad. For example, when you click Configure, the Administration Configuration dialog displays.
Italic
Titles of books and CD-ROMs or verbatim (exactly as shown) text passages. Provides emphasis on terms where needed. For example: ● See the Bridge Talk User’s Guide. ● Verify that the switch is in the off position before removing the high-voltage transformer.
Link
URLs, cross-references and other hypertext fields. For example, see Installing XYZ on page 123.
Note: This guide uses the star-number system for participant and moderator commands. Before proceeding, you should verify the configuration your system uses. For example, your administrator might configure your system so that participants request help by pressing 0 instead of *0. For a list of telephone keypad commands that participants and moderators can use, see Appendix A: Moderator and Participant Touchtone Commands on page 215.
12 Bridge Talk 4.0 User’s Guide
Contacting Avaya
Contacting Avaya For information: Telephone
+1-877-742-8351 +1-877-742-8352
Web site
www.avaya.com
US and Canada Technical Support
+1-800-366-5469 +1-978-552-6300 E-mail:
[email protected] Fax: +1-978-552-6220
International Technical Support
+353-1-207-5667 (CS700/CS780) +353-1-207-5668 (CS700/CS780) +353-1-207-5666 (CS7000) E-mail:
[email protected]
International Meeting Exchange Technical Support
E-mail:
[email protected]
Issue 1 July 2005
13
Preface
14 Bridge Talk 4.0 User’s Guide
Chapter 1: Getting Started This chapter provides the following information on: ●
Sign-in privileges
●
Pre-installation procedures
●
Installing Bridge Talk
●
Starting Bridge Talk
●
Exiting from Bridge Talk
Issue 1 July 2005
15
Getting Started
System requirements Use Bridge Talk with the necessary components outlined in Table 2. Table 2: System requirements Component
Description
PC
The minimum requirements are: ● Pentium 266 MHz ● 128 MB RAM (256 MB RAM recommended) ● 1.2 GB hard drive space ● A CD-ROM drive, keyboard, and mouse ● SVGA monitor For optimum Bridge Talk display, set workstation monitors to at least 800 x 600 resolution.
Operating system
Use one of the following operating systems: ● Windows 98 ● Windows NT 4.0 ● Windows 2000 ● Windows XP For Windows NT, Windows XP, and 2K machines, make sure that you have administrator-level access before installing or uninstalling Bridge Talk.
Note:
Note: Bridge Talk does not run on IBM ThinkPads T20, T21, T22, or T23 that use S3 video chipsets.
Scheduler
Use one of the following scheduling applications: ● Classic Scheduler (SchAPI) ● Advanced Scheduler (1.1 API) ● Client Registration Server (CRS) ● External Passcode Validation (EPV)
Browser
Internet Explorer 6.0 SP1 is recommended for optimum Bridge Talk online help performance.
16 Bridge Talk 4.0 User’s Guide
Pre-installation procedures
Pre-installation procedures Before you install Bridge Talk, use the Add/Remove Programs located in the Control Panel folder to uninstall any previous version of Bridge Talk. In addition, you should manually delete the Bridge Talk icon from your desktop. Tip: Tip:
If you customized your Bridge Talk console, make sure that you copy the existing bridge.properties file to another location before proceeding with the installation. After installation is complete, you can move the bridge.properties file to the new installation directory.
Installing Bridge Talk You can run the Install Anywhere installation from your Bridge Talk media or a network device.
Note:
Note: Avaya requires that you uninstall your previous version of Bridge Talk and copy any additional files created during previous Bridge Talk sessions to the new installation directory. (The uninstall utility only deletes files in the Bridge Talk folder that were originally installed.)
Issue 1 July 2005
17
Getting Started
To install Bridge Talk: 1. Perform one of the following actions: - If you are installing Bridge Talk from a CD-ROM, insert the CD-ROM in the drive of your machine. - If you are installing Bridge Talk from a network device, select the network that contains the distribution software. 2. Double-click on setup.exe. The installation program displays the Installer dialog.
3. Click Next. 4. The installation program prompts you to select the folder location in which to install Bridge Talk.
5. Perform one of the following actions:
18 Bridge Talk 4.0 User’s Guide
Installing Bridge Talk
- To use the location currently displayed, click Next. - To use a different folder from the default or currently displayed location: a. Click Choose. b. Select the folder you want and click Next. c. If you do not want to use the non-default location, click Restore Default Folder and click Next. 6. The Pre-Installation Summary dialog lists the selections for intended installation.
7. Click Install. The installation program displays a progress bar. 8. Click Done to complete the installation.
The installation is complete.
Issue 1 July 2005
19
Getting Started
Uninstalling Bridge Talk Use the Add/Remove Programs located in the Control Panel folder to uninstall Bridge Talk. In addition, you should manually delete the Bridge Talk icon from your desktop. For more detailed information on customizing Bridge Talk using the bridge.properties file, see Appendix D: Administrator Tasks on page 255.
Starting Bridge Talk To launch Bridge Talk, you need to have a user name (sign-in), password, and the name of the conferencing server to which you want to connect. Tip: If you do not know one or more of these items, contact your administrator.
Tip:
Use this procedure to log on: 1. Select one of the methods of starting Bridge Talk as described in Table 3. Table 3: Methods of launching Bridge Talk Use
Navigate to
Start
Programs > Avaya> Bridge Talk from the desktop.
Windows Explorer
The , for example: C:\ Program Files\Avaya\Bridge Talk\setup.exe, and double-click on the Bridge Talk icon.
The Bridge Talk login dialog displays.
2. In the Sign-In field, enter your sign-in name, for example, “andrew.” 3. In the Password field, enter your password. You can enter a password (up to eight alphanumeric characters).
20 Bridge Talk 4.0 User’s Guide
Icon
Starting Bridge Talk
Tip: Do not use underscores (_), hyphens (-), spaces, or other special characters in the sign-in name or password fields.
Tip:
4. In the Bridge field, enter a conferencing server name, such as “sales555.” If the conferencing server is not listed, enter the system name or IP address in the Bridge field. 5. In the Operator field, enter the operator station number that you want or select Next Available if you want the system to assign an operator number to you. Tip: You can type a number over Next Available if you want to enter a particular operator number that is not listed.
Tip:
6. Click OK. If the logon is successful, the Bridge Talk splash screen displays.
If the logon is unsuccessful, Bridge Talk displays an error message. An unsuccessful logon might be due to any of the following reasons: ●
You entered an invalid sign-in or password.
●
You entered an operator number or sign-in that is currently in use.
●
Your network connection was lost and the system is not receiving channel information.
Issue 1 July 2005
21
Getting Started
●
You tried to connect to a bridge that is not compatible with Bridge Talk 4.0.
●
The conferencing server is offline.
For more information on sign-ins, see the next section, Sign-in privileges.
Sign-in privileges Sign-ins determine what system features a particular user can access. Table 4 describes the available sign-ins for the system. Table 4: Sign-in privileges Sign-in
Description of Privileges
Scheduler
You can only create, search, modify, or delete attended, unattended, on-demand, and flex conferences created by this sign-in.
Operator
You can schedule and manage conferences, handle incoming and outgoing calls, monitor audio quality, and print reports.
System administrator
You can configure system software settings, manage files and reports, and configure the system for unattended conferences. In addition, this sign-in can perform operator tasks.
System maintenance
You can configure trunk lines and system hardware, start up and shut down the system. In addition, this sign-in can perform administrator and operator tasks. For detailed information about administrator and maintenance tasks, see the Meeting Exchange Administration and Maintenance Guide for the CS700/780 4.0 Conferencing Server or Meeting Exchange Administration and Maintenance Guide for the S6200, S6500, and S6800 Media Servers.
You can log on automatically to Bridge Talk by predefining your sign-in and operator number information. For more information on presetting your sign-in, see Appendix C: Predefining Login and Operator Information on page 251.
22 Bridge Talk 4.0 User’s Guide
Starting Bridge Talk
Establishing an operator audio path An audio path is a software and hardware connection providing incoming and outgoing audio for operator and participant use. To set up an audio path: 1. From the menu bar, choose Line > Audio Path. 2. Under Line, verify that the default operator option is selected. See Table 5 for additional information. 3. In the Audio Path dialog, enter your telephone number in the Phone field. 4. Click Dial or press Enter. When the system dials the number and establishes the audio path, a Dial Status dialog displays stating that the line was dialed successfully. If the system is configured to dial, your phone will ring.
5. Pick up your telephone receiver and click OK in the Dial Status dialog. 6. Click Close in the Audio Path dialog. The Operator status bar shows that your audio path is placed automatically in Conference Room one (C1). Tip: Tip:
To move your operator audio path from room to room in the Conference Navigator, place your cursor to the left of the conference room that you want to enter and click once. To find out more about the Navigator, see Overview of the Bridge Talk interface on page 30. 7. Press Alt+Spacebar to toggle your operator audio path on or off.
For information on setting up link line, music, or record/playback audio paths, see the next section, Setting up auxiliary audio paths.
Issue 1 July 2005
23
Getting Started
Additional information about operator audio path Here are some important reminders: ●
If the system does not establish an operator audio path successfully, the Link Line, Music, Record/Playback, and operator number fields under Line remain unavailable. If this occurs, click Hang up in the Audio Path dialog and repeat steps 3 to 6 listed in Establishing an operator audio path on page 23 using a valid telephone number.
●
If an operator at another workstation cannot establish an audio path, you can dial an operator channel remotely from your workstation. For example, if you are logged in as o2 and set up an audio path for operator 4, the operator can log in as o4 with an active audio path channel. However, if you select another operator’s line, the Hang up button is made unavailable.
Setting up auxiliary audio paths You must establish a separate audio path for an auxiliary line, such as music or record/ playback, before you can add the line to a conference. Tip: Tip:
Make sure that you have established an operator audio path first.
To set up an auxiliary audio path: 1. From the menu bar, choose Line > Audio Path. 2. Under Line, click a non-operator line option as shown.
24 Bridge Talk 4.0 User’s Guide
Starting Bridge Talk
See Table 5 for information on setting up auxiliary audio path options. Table 5: Audio path options Line option
Description
Operator
To establish an operator audio path by dialing your telephone number. You must have an audio path before you can perform operator tasks.
Link Line
To set up a link line audio path by dialing a telephone number assigned as a link line channel. For more information on using link lines, see Linking conferences on page 65.
Music
To insert a music line into a conference before participants join: 1. Right-click on the conference in the Conference Navigator and choose Details. 2. Select a music source (M1 to M4) and click OK. For more information on adding music, see Providing music for a conference on page 63.
Record/ Playback (Analog)
To add a record/playback line into a conference before participants join: 1. Choose Conference > Record/Playback from the menu bar. 2. In the Record/Playback dialog, select a conference and click Analog. 3. Choose an assigned analog music channel and click OK. Tip: Tip:
You can pause the Record/Playback feature until you are ready to record. For instructions on using Record/Playback, see Chapter 6: Recording Conferences on page 109.
3. Click Dial or press Enter. When the system dials the number and establishes the audio path, a dialog informs you that the line was dialed successfully. 4. Click OK in the Dial Status dialog and click Close in the Audio Path dialog.
Issue 1 July 2005
25
Getting Started
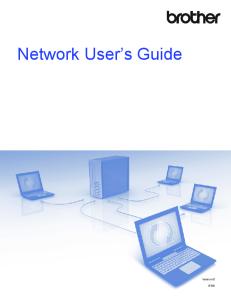
Establishing multiple Bridge Talk sessions on different bridges You can set up several Bridge Talk sessions with a separate audio path on several bridges from a single PC with a multiple-line telephone as shown. Figure 1: Setting up multiple Bridge Talk sessions
1
2
3
Figure notes: 1. Operator console session 1, bridge X, on Extension 1 2. Operator console session 2, bridge Y, on Extension 2 3. Operator console session 3, bridge Z, on Extension 3
Note:
Note: Avaya recommends that you dismantle any voice mail application on the telephone first.
To set up several Bridge Talk sessions using a multiple-line telephone: 1. Launch Bridge Talk (session 1) on bridge X, establish an audio path on the first extension, and place the extension on hold. 2. Launch Bridge Talk (session 2) on bridge Y, establish an audio path on the second extension and place the extension on hold. 3. Continue setting up sessions following steps 1 and 2. For information on command-line variables, see Appendix C: Predefining Login and Operator Information on page 251. Tip: Tip:
Use a different bridge.properties’ file for each Bridge Talk session.
26 Bridge Talk 4.0 User’s Guide
Exiting from Bridge Talk
Exiting from Bridge Talk Select one of the following methods to exit from Bridge Talk: ●
To use another sign-in while Bridge Talk is still running: 1. Choose File > Logout from the menu bar. 2. Click Yes. 3. In the Login dialog, choose one of the following sign-ins.
●
Sign-in
To log on
Operator session
Using a different sign-in (or if another operator wants to log on from your machine).
Administrator or maintenance session
With an administrator or maintenance sign-in to configure or manage the system.
To close Bridge Talk, choose File > Exit from the menu bar. Tip:
Tip:
Remember to hang up your audio path.
Issue 1 July 2005
27
Getting Started
28 Bridge Talk 4.0 User’s Guide
Chapter 2: Understanding the User Interface This chapter covers the following topics: ●
Overview of the Bridge Talk interface
●
Modifying Bridge Talk windows
●
Administrator and maintenance options
Issue 1 July 2005
29
Understanding the User Interface
Overview of the Bridge Talk interface You can create, schedule, and manage attended, unattended, on-demand, and flex conferences using Bridge Talk. There are specific task-based areas in the Bridge Talk interface as shown in Figure 2. Table 6 gives an overview of the main Bridge Talk task areas. Table 6: Bridge Talk task areas Section
Description
Title bar
Displays the system name, operator line number, as well as the date and time. For more information, see Title bar on page 33.
Menu bar
Includes menus for both Bridge Talk-specific and Windows-based commands.
For more instructions on using the menu bar, see Appendix B: Menu Bar and Main Tool Bar on page 231. Main tool bar
Includes commands for entering command-line text. For detailed instructions on each tool bar button or using shortcuts, see Appendix B: Menu Bar and Main Tool Bar on page 231.
Enter queue
Displays lines that are in Enter status. For an overview, see Enter queue on page 35.
Pending queue
Lists all lines that have dialed in and are not in a conference or Enter queue, for example, ODO, Scan, or CLPG. The Pending queue does not include a Get Next button. For details, see Pending queue on page 34.
Conference Navigator
Displays a portion of the conferences currently running on the bridge as well as individual conference attributes or features. See Conference Navigator on page 34.
Conference Room
Shows information about features and attributes for individual conferences; and lists participants, moderators, and their statuses depending on what items you select in the Customize User Interface dialog. See Conference Room on page 36.
System Message and Chat area
Displays operator chat and system alarm messages. See System Message and Chat area on page 37. 1 of 2
30 Bridge Talk 4.0 User’s Guide
Overview of the Bridge Talk interface
Table 6: Bridge Talk task areas (continued) Section
Description
Help Requests queue
Lists participants who are requesting help. For an overview, see Help Requests queue on page 38 or for instructions on using this dialog, see Responding to help requests on page 142.
Operator status bar
Located at bottom of the Bridge Talk interface, the operator status line includes line, operator, and bridge information. For details, see Operator status bar on page 39.
Operator conference
The operator conference area is a behind-the-scenes conference room reserved for operator use only. 2 of 2
Tip: Tip:
Note:
You can rearrange the Bridge Talk console to suit your preferences. For more information on changing the size or content of various windows and dialog boxes, see Modifying Bridge Talk windows on page 43. Note: Certain non-standard cursors, such as an animated cursor, might cause a disruption of the Bridge Talk display.
For a list of shortcut keys for the major Bridge Talk areas, see Keyboard shortcut keys on page 40.
Issue 1 July 2005
31
Understanding the User Interface
Figure 2: Overview of the Bridge Talk interface 1 2
3 4
5
6
7
9 8 10
Figure notes: 1. Title bar 2. Menu bar 3. Main tool bar 4. Enter queue 5. Pending queue 6. Conference Navigator 7. Conference Room 8. System Message and Chat area 9. Help Request queue 10. Operator status bar
32 Bridge Talk 4.0 User’s Guide
Overview of the Bridge Talk interface
Title bar The Bridge Talk title bar includes the system name, operator line number, as well as the date and time on the bridge, as shown.
You can set Bridge Talk to display either a 12-hour or 24-hour time format. Your particular Bridge Talk time format may vary from one bridge to another. However, Bridge Talk converts the time format internally to match that of the bridge, when necessary. For example, you can schedule a conference for 1:30 p.m. (12-hour) on a bridge that is configured for a 24-hour format. Internally, the bridge converts the time to 13:30. To display a different time format for your Bridge Talk session, double-click the Regional Settings icon located in the Control Panel of your machine. Tip: Tip:
To convert to a 24-hour format, select a European country, such as the United Kingdom or France.
Menu bar The menu bar includes pull-down menus for both Bridge Talk-specific and Windows-based commands. For a comprehensive description of each command, see Menu bar overview on page 232.
Main tool bar The main tool bar includes all the commands in the menu bar but uses a command line format for entering commands from a keyboard. For an in-depth description of each button (command), see Main tool bar overview on page 241.
Issue 1 July 2005
33
Understanding the User Interface
Conference Navigator The Navigator displays conferences that are currently running on the bridge. Use the scroll bars to see all of the conferences on the system. Note: After entering a conference name or other data, click outside the field to apply changes.
Note:
By default, Bridge Talk displays the Conference Navigator on the left-hand side of the console. To change the size or the location of the Conference Navigator, see Modifying Bridge Talk windows on page 43.
Pending queue The Pending queue lists all lines that have dialed in and are not in a conference or the Enter queue, for example, ODO, Scan, or CLPG. The Pending queue does not include a Get Next button. To access a line, right-click and select Access (or double-click on the line if this functionality is available on your system). Depending upon the fields selected in the Customize User Interface dialog, the Pending queue may display: ●
Talk: An asterisk (*) in the column means that the caller is talking.
●
Line: The line number.
●
Name: The caller’s name, if available.
●
Progress: The status of the call. For example, “Op7” if the caller is currently speaking with Operator 7, “Ann10” if the caller is currently listening to Annunciator message 10.
●
Company: The caller’s company name, if available.
●
Caller ID: The DNIS telephone number (ANI, CLI).
●
Phone: The caller’s telephone number, if available.
●
PIN: The PIN code that the caller entered, if any.
●
Network. View the caller’s line type, such as Voice over Internet Protocol (VoIP) or PSTN/ ISDN.
●
Current: Line status currently impacted by a feature like Lecture or an action like operator help.
34 Bridge Talk 4.0 User’s Guide
Overview of the Bridge Talk interface
Enter queue The Enter queue displays lines awaiting placement into conferences by operators.
Depending upon the fields selected in the Customize User Interface dialog, the Enter queue may display: ●
Talk: An asterisk (*) in the column means that the caller is talking.
●
Line: The line number.
●
Name: The caller’s name, if available.
●
Progress: The status of the call. For example, “Op7” if the caller is currently speaking with Operator 7, “Ann10” if the caller is currently listening to Annunciator message 10.
●
Company: The caller’s company name, if available.
●
Caller ID: The DNIS telephone number (ANI, CLI).
●
Phone: The caller’s telephone number, if available.
●
Passcode. You can view but not edit the moderator or participant code. The system logs only the last-entered passcode in the Call Detail Record (CDR).
●
PIN: The PIN code that the caller entered, if any.
●
Network. View the caller’s line type, such as Voice over Internet Protocol (VoIP) or PSTN/ ISDN.
●
Current: Line status currently impacted by a feature like Lecture or an action like operator help.
●
Time in Queue: Tracks the hours, minutes, and seconds that a line remains in the Enter queue. If a line is accessed and then returned the queue, the system resets the time to zero. System administrators can update timing using the timeInQueueInterval parameter located in the bridge.properties file.
! Important:
Important: Time in Queue may require frequent line updates from the conferencing server. Therefore, this field could significantly impact Bridge Talk response time if there is a large amount of lines in the Enter Queue. If you want to display Time in Queue, an administrator can increase the timeInQueueInterval value to improve responsiveness.
For details on the properties file, see Overview of the bridge.properties file on page 256.
Issue 1 July 2005
35
Understanding the User Interface
Note: If DNIS filtering is set, the Enter queue includes a Show Filtered/Show All toggle button. If you click Show All, the Enter queue displays all lines in Enter status. If you click Show Filtered, the Enter queue lists only those lines that meet your search criteria.
Note:
For information about handling incoming calls or using the Filtered Enter queue, see Chapter 4: Dialing In on page 71. For an overview of the timed operator assistance feature, see About time-sensitive operator assistance on page 38.
Conference Room A Conference Room window displays information about features and attributes for individual conferences; and lists participants, moderators, and their statuses. Note that columns and ordering depend upon modifications made in the Customize User Interface dialog. 1
2
3
4
5
6
7
8
Figure notes: 1. Conference room number 2. Call flow, such as flex 3. Prompt set for conference-wide annunciator messages 4. Conference name 5. Total number of participants (TP) 6. Music (M1-4), if active 7. Recording channel (Play, Rec, DigRec, or DigPlay) plus , if active 8. Polling or Q&A session, if active
Tip: To open the Conference Room window for any conference, double-click on a line in the Conference Navigator.
Tip:
Note the following: ●
Current displays the line status temporarily impacted by a feature like Music or an action like operator help (if selected as a viewable field).
●
Base displays the line status not influenced by a particular feature or action (if selected as a viewable field).
●
An AUTOVLL (audio) line appears in the conference room of an active global conference.
36 Bridge Talk 4.0 User’s Guide
Overview of the Bridge Talk interface
●
If external recording is enabled on the system, a Conference Record line appears in the conference room when a moderator presses *2 (or uses a Web-based interface) to start an external digital recording.
●
Right-click on a line to view line options, such as Mute and Moderator. If you select both Mute and Moderator, the moderator will be a muted moderator.
●
You can start a Conference Viewer chat session by clicking on CV Chat (if configured on the system). For instructions, see Sending messages to operators or moderators using the Conference Viewer on page 148.
By default, the Hang up button in the conference room window is now unavailable. To make this command available, please contact Avaya Technical Support. Note that there are 999 available conference rooms. Room 1000 is reserved for music on-hold. Tip: Do not interfere with or modify the Conference Record or AutoVLL line.
Tip:
System Message and Chat area System messages and operator chat messages appear at the lower portion of the Conference Navigator area. Meeting Exchange conferencing servers provide for application server and Media Processing Card (MPC) fail over or redundancy. Operators can create several Bridge Talk sessions by connecting to one or more active conferencing servers as well as the standby server, and display both the active and standby sessions on their workstations. In the event of a fail over, a system message appears in the System Message and Chat area of the standby Bridge Talk session. ●
For application server fail overs, Bridge Talk displays the following message: 0 : Standby Server(standby) taking over for aps1 If this message appears, dial in and establish an audio path to the newly active application server. Note that the IP address appears on the Bridge Talk title bar.
●
For MPC fail overs, Bridge Talk displays the following message: Media Server On Key XXX Unregistering Contact Support If this message appears, notify Avaya Technical Support. However, the media server resumes conference recording or playback automatically.
To create several Bridge Talk sessions, see Establishing multiple Bridge Talk sessions on different bridges on page 26. For instructions on using the Chat option, see Sending messages to other operators using Chat on page 147 or Sending messages to operators or moderators using the Conference Viewer on page 148.
Issue 1 July 2005
37
Understanding the User Interface
Help Requests queue The Help Requests queue lists participants who want to ask a question. Participants temporarily enter the Help Requests queue while waiting for operator help but remain in the conference. Note that the lines display in yellow in the Conference Room window.
The Help Requests queue displays: ●
Line/Conf: The line number.
●
Conference Name: The name of the conference.
●
Conferee Name: The name of the conference participant.
●
Time in Queue: The hours, minutes, and seconds that a line remains in the Help Requests queue. If a line is accessed and then returned the queue, the system resets the time to zero. System administrators can update timing using the timeInQueueInterval parameter located in the bridge.properties file. For details on the properties file, see Overview of the bridge.properties file on page 256. Note: The Get Next Help button is available only if one or more callers are in the Help Requests queue. You cannot use the Get Next Help button if you are currently accessing another line or if you have not yet established an audio path.
Note:
For details on handling help requests, see Responding to help requests on page 142.
About time-sensitive operator assistance If the time-sensitive operator assistance feature is enabled on the bridge, the system can respond to help requests at a specified time in the day, week, or weekend. Specifically, the system can: ●
Dial out to an operator.
●
Play a recording if no operator is available.
●
Send the line to the Help Requests or Enter queue when operators are present.
38 Bridge Talk 4.0 User’s Guide
Overview of the Bridge Talk interface
As an example, a system may provide a operator assistance schedule similar to the one described in Table 7. Table 7: Examples of time intervals for operator assistance Time interval
The system
9:00 a.m. to 5:00 p.m.
Places callers into the Help Requests or Enter queue.
5:00 p.m. to 12:00 a.m.
Dials out to an operator assistant, such as 222-555-1234.
2:00 a.m. to 9:00 a.m.
Plays an annunciator message like “Dial 1-800-ASSIST.”
Operator status bar The Operator status bar includes the following information: ●
AVL: Number of lines available, not including disconnects.
●
DC: Number of disconnected lines.
●
ENT: Number of callers in the Enter queue. This field is highlighted with a blue outline when callers are in the queue.
●
DNIS ENT: Number of callers in the DNIS-filtered Enter queue. Note that DNIS ENT only appears if DNIS filtering is set. This field is highlighted with a blue outline when callers are in the queue.
●
FLT: Number of faulted lines, including those that are out of service.
●
HLP: Number of callers in the Help Requests queue.
●
OPR: The conference to which the operator is currently connected.
●
TLK: Talk toggle (On or Off). When this switch is set to On, you can speak to participants. The text changes from black (Off) to pink (On).
●
ACCESSED LINE: The line number you are currently accessing.
When the Bridge Talk console is locked, a “Workstation Locked” message appears on the status bar as shown.
You can place your operator line in a conference by clicking on the conference in the Conference Navigator.
Issue 1 July 2005
39
Understanding the User Interface
Keyboard shortcut keys Bridge Talk includes keyboard shortcuts (hot keys) to initiate certain commands. Table 8 lists the keyboard shortcuts that you can use to turn your voice path on or off or access lines in the Enter or Help Requests queue. Table 9 and Table 10 list the shortcuts for some of the major Bridge Talk task areas. Table 8: Basic shortcut keys Command
Shortcut keys
To
Voice path
Alt
Spacebar
Toggle your operator voice path on/off.
Access
Ctrl
Enter
Specify a line or access the next available line.
Enter
Ctrl
E
Help
Ctrl
H
Access a selected line and display the Line Detail dialog. This is identical to clicking the Enter button from the tool bar. Access the line of a participant requesting help (identical to clicking the help reQuests button from the tool bar).
Table 9 lists the shortcut keys for the menu bar. Table 9: Menu bar shortcut keys Shortcut key
To
Alt
F
Display the File menu.
Alt
V
Show the View menu.
Alt
L
View the Line menu.
Alt
C
Open the Conference menu.
Alt
S
Display the Fast Dial menu.
Alt
T
Show the Tools menu. 1 of 2
40 Bridge Talk 4.0 User’s Guide
Overview of the Bridge Talk interface
Table 9: Menu bar shortcut keys (continued) Shortcut key
To
Alt
W
Open the Windows menu.
Alt
H
Display the Help menu. 2 of 2
Table 10 lists the shortcut keys for the main tool bar. You can use the commands only if the Main status displays green as shown. The Main status displays green when the focus is on the tool bar. If focus is already on the tool bar, just press a capitalized letter (hot key) in the button name. For example, press a to view the Access command line. The Main status displays red when the focus is not on the tool bar. Click on any button to return the focus to the tool bar. Table 10: Main tool bar shortcut keys
Shortcut key
To
A
Open the Access command line
C
Display the Conference command line.
D
Show the Display command line.
E
Access the next line in the Enter queue.
F
Display the Fastdial command line.
Q
Access the next line in the Help Requests queue.
L
Open the Line command line. 1 of 2
Issue 1 July 2005
41
Understanding the User Interface
Table 10: Main tool bar shortcut keys (continued)
Shortcut key
To
M
View the Music command line.
O
Display the Options command line.
P
Show the Purge command line.
S
View the Set command line.
T
Display the Transfer command line.
V
Retrieve the last line.
U
Activate the Update command.
?
Launch the Help.
Esc
Exit out of a command line. 2 of 2
For more information on using the tool bar, see Main tool bar overview on page 241.
42 Bridge Talk 4.0 User’s Guide
Modifying Bridge Talk windows
Modifying Bridge Talk windows You can modify many Bridge Talk visual properties to suit your preferences (unless a system administrator has locked the console). For more information on the locking feature, see Lock and release of Bridge Talk areas on page 49.
Changing the size of a window or a field You can change the size of most Bridge Talk windows or fields using the following standard Windows method: 1. Move the cursor to an edge of the window or the heading of a field that you want to expand or contract. The cursor changes from its default shape to a double-headed arrow. 2. Keep the left mouse button pressed down, and move the cursor to a new position, changing the border of the window. Tip: Tip:
Use this method to change the relative size of the conference information, chat, and alarm portions of the Conference Navigator.
Issue 1 July 2005
43
Understanding the User Interface
Displaying or hiding fields You can customize the Conference Navigator, Enter queue or Pending queue, and Conference Room windows by display or hiding a field, or changing the field order in the Customize User Interface dialog. 1
2
3
4
Figure notes: 1. Navigator 2. Enter Queue 3. Pending Queue 4. Conference Room tab
Displaying a field To display a field: 1. Open (double-click on) a conference room in the Conference Navigator if you want the Conference Room tab to appear in the Customize User Interface dialog. 2. Choose Tools > Customize from the menu bar. 3. Select a tab, such as the Navigator. 4. In Available Properties, select the field that you want to add to the selected window.
Note:
Note: Some fields in the Enter and Pending tabs cannot be deleted (hidden), such as Name and Line. 5. Click Add. Bridge Talk moves the item to Visible Properties, which means that Bridge Talk displays this field in the selected window.
44 Bridge Talk 4.0 User’s Guide
Modifying Bridge Talk windows
Tip: Tip:
You can also move a field from Available Properties to Visible Properties by double-clicking on the field name.
Hiding a field To remove a field: 1. Choose Tools > Customize from the menu bar. 2. Select a tab. 3. In Visible Properties, select the field that you want to remove from the selected window. 4. Click Delete. Bridge Talk moves the item to Available Properties, which means that Bridge Talk does not display this field in the selected window. Tip: Tip:
You can also move a field from Visible Properties to Available Properties by double-clicking on the field name.
Changing the field order To change the current field order: 1. Choose Tools > Customize from the menu bar. 2. Select a tab. Be sure that the fields you want to display are in Visible Properties. If you need to add or remove fields, follow the procedures described in Displaying a field or Hiding a field earlier in this section. 3. Select a field item in Visible Properties. 4. Click one of the following to change the display order for this field: - Up arrow to move the field one place to the left - Down arrow to move the field one place to the right As you click the Up or Down arrow, Bridge Talk shows the current field order.
Issue 1 July 2005
45
Understanding the User Interface
Administrator and maintenance options If you have an administrator- or maintenance-level sign-in, you can configure several advanced Bridge Talk features, as well as modify settings on the connecting bridge. Table 11 describes advanced options that are available to Bridge Talk administrators. Table 11: Administrator-level features Option
Description
Set the number of lines per column in View > All Lines dialog
Select the number of lines per column that you want displayed in the View > All Lines dialog. See Setting lines per column in All Lines dialog box on page 48.
Set Automatic Conference Select (ACS)
Automatically places a caller directly into a specified conference without operator intervention or security codes. See Using the ACS option on page 48.
Lock or release Bridge Talk task areas
Determines the size and location of the Help, Enter, or Pending queues, and the Conference Room window. See Lock and release of Bridge Talk areas on page 49.
View or modify settings on the connecting bridge through Bridge Talk
Access the system administrator software while Bridge Talk is running. See the next section, Starting a system administrator or maintenance session.
Starting a system administrator or maintenance session With an administrator or maintenance sign-in, you can access the system administrator console software remotely through Bridge Talk using a telnet connection. To launch the administrator software from Bridge Talk: 1. Choose File > Session from the menu bar.
2. Select the task you want, Administrator or Maintenance. Bridge Talk temporarily closes during the telnet session.
46 Bridge Talk 4.0 User’s Guide
Administrator and maintenance options
3. Select the type of telnet session you want to start.
If you installed Crosstalk or Hostaccess previously on your workstation, you can select the telnet application that you prefer. The default is puTTY, which provides VT220 emulation over TCP/IP. HyperAccess includes Wyse 60 and dial-up connectivity. Tip: Tip:
If this is the first time that you are launching a telnet session from Bridge Talk, ask your system administrator which application to use. You will see the Console Application dialog only once. After you select a telnet application, Bridge Talk stores your selection in the bridge.properties file for subsequent, automatic access.
Note:
Note: An administrator can install and configure the PuTTY SSH option on both the bridge and Bridge Talk. For information on using PuTTY SSH, see Setting up PuTTY SSH on page 264.
Closing a telnet session To end a telnet session: 1. Use the arrow keys to select Exit in the menu bar (or press e). 2. Press Enter. Tip: Tip:
After you close your telnet session, you might be prompted to close other active sessions. Use caution before closing any current sessions.
The telnet application closes. Bridge Talk restarts automatically.
Issue 1 July 2005
47
Understanding the User Interface
Setting lines per column in All Lines dialog box From the User Interface Options dialog (Figure 3), you can set the number of lines per column that appear in the View > All Lines dialog. For example, if you are using a NA ISDN system, you can select 23 lines per column. Figure 3: Number of line per column setting for View All Lines window
1
2
3
Figure notes: 1. 23 lines for NA ISDN 2. 24 lines for T1 3. 30 lines for E1 (Euro ISDN)
To set the number of lines per column: 1. Choose Tools > Options from the menu bar. 2. From the Number of Lines per Column list, select the number of lines per column that you want displayed in the View > All Lines dialog, and click OK.
Using the ACS option You can use the Automatic Conference Select (ACS) to set certain lines to place callers in a specific conference automatically. To place callers in a specified conference: 1. From the main tool bar, click Set. 2. From the Set submenu tool bar, click Acs. 3. In the prompt area, enter a conference number followed by a space, and a range of lines that you want to place, and press Enter. For more information on ACS, see Chapter 13: Using Automatic Conference Select on page 211.
48 Bridge Talk 4.0 User’s Guide
Administrator and maintenance options
Lock and release of Bridge Talk areas An administrator can set and lock the size and location of key task areas to prevent an operator from customizing the Bridge Talk interface. If an operator tries to move a locked window, the window instantly reverts to its former position. Table 12 describes what happens when your workstation is locked. Table 12: Bridge Talk locked window attributes User Interface Area
Operators
Help, Enter, or Pending queues, Chat, Conference Navigator, and Conference Room windows
Cannot customize, minimize, resize, or close these windows.
Conference Room
Can open only one Conference Room window at a time.
View Menu commands
Cannot access the Enter or Pending queues, Help Requests, main tool bar, and Conference Navigator commands from View Menu.
Window Menu
Cannot access the Windows menu.
Tools Menu commands
Cannot access the Customize commands. Tip: Tip:
The Options command is available only if you have an administratoror maintenance-level sign-in.
To lock Bridge Talk windows: 1. Log in to Bridge Talk with an administrator- or maintenance-level sign-in. 2. Arrange windows to suit your preferences. Tip: Tip:
Be sure to open and position a single conference room window.
Issue 1 July 2005
49
Understanding the User Interface
3. Choose Tools > Options from the menu bar. 4. Select Lock in the User Interface Options dialog and click OK.
The Operator status bar displays a “Workstation Locked” message. If you want to lock multiple Bridge Talk sessions, you can copy the bridge.properties file of the “locked” Bridge Talk to each additional workstation.
Note:
Note: When you select Lock, the other Option Selections’ commands like Multiple Conference Room Windows, become unavailable.
To unlock Bridge Talk windows: 1. Log in to Bridge Talk with an administrator- or maintenance-level sign-in. 2. Choose Tools > Options from the menu bar. 3. Select Unlock in the User Interface Options dialog and click OK. For information on setting the number of lines per column that appear in the View > All Lines dialog, see Setting lines per column in All Lines dialog box on page 48.
50 Bridge Talk 4.0 User’s Guide
Chapter 3: Creating a Conference This chapter provides instructions on the following: ●
Creating a new conference
●
Working with base and current line statuses
●
Using annunciator messages
●
Providing music for a conference
●
Linking conferences
Issue 1 July 2005
51
Creating a Conference
Creating a new conference You can create conferences immediately during a dial-in or dial-out procedure or you can schedule conferences ahead of time. Table 13 describes the various ways of creating conferences. Table 13: Methods of creating conferences Option
Description
FastDial or BlastDial
Choose Select Conference > Next Available. For more information on FastDial or BlastDial, see Chapter 5: Using Dial Lists and Dialing Out on page 87.
Place
Place an incoming caller in a conference room that is not currently in use.
Line Detail dialog
From the Line Detail dialog, click Start Conf and enter the conference passcode in the Start Conference dialog to start a previously scheduled unattended, on-demand, or flex conference immediately.
Conference Scheduler
Schedule an attended, unattended, on-demand, or flex conference. Using the information supplied by the Conference Scheduler, the system automatically creates a conference when a caller is actually placed into the conference. For information about using the Conference Scheduler, see Chapter 11: Scheduling a Conference on page 163.
External Conference Scheduler
Schedule conferences using an external scheduling application, such as External Passcode Validation (EPV).
52 Bridge Talk 4.0 User’s Guide
Creating a new conference
Naming a conference A conference name is an optional label (up to 60 alphanumeric characters) used to identify a conference in the Conference Navigator and in reports, such as a Call Detail Record (CDR). Note that Bridge Talk creates polling results' filenames based on the conference name. Tip: Tip:
To prevent another operator from accidentally overwriting your conference room information, make sure that you name your conference promptly.
To name a conference: 1. In the Conference Navigator, highlight a conference number that is not in use 2. Press Tab to move to the conference name field and enter a name for the conference, for example, “Sales Mtg”.
Tip: Tip:
Click outside the conference name field to view the name you entered. The conference name registers on the system when the first person enters the conference.
Specifying a conference ID A conference ID is an optional conference number (up to 60 alphanumeric characters) used for generating reports. You can determine a conference by its ID number even if several conferences have the same name. The conference ID displays in reports, such as the Call Detail Record (CDR) or Conference Detail Record (CODR) if entered when booking a conference or if your system is configured for Automatic Conference ID.
Note:
Note: Use a conference ID if you want to generate a CODR or conference report. The system does not generate a CODR if the conference ID is left blank.
Issue 1 July 2005
53
Creating a Conference
If your system is not configured to assign IDs automatically, you can set a conference ID by following these steps: 1. From the main tool bar, click Conference. 2. From the Conference submenu tool bar, click ID. 3. In the prompt area, enter a conference number, followed by a space and an ID. 4. Press Enter.
Additional information about conference ID Here are some important reminders: ●
If your system is configured for Automatic Conference ID, the system automatically generates a unique ID for each conference when the first caller is placed in the conference. To determine if your system is configured for Automatic Conference ID, see the system configuration printout or ask your administrator.
●
If you schedule an unattended conference and do not specify a Conference ID number, the system uses the Confirmation number as the Conference ID.
●
You can assign an ID number to associate a conference with a cost center or customer identifier.
●
For information about configuring or printing of CDRs and CODRs, see the Meeting Exchange Administration and Maintenance Guide for the CS700/780 4.0 Conferencing Server or Meeting Exchange Administration and Maintenance Guide for the S6200, S6500, and S6800 Media Servers.
Setting entry or exit tones and messages An entry or exit tone or message is a tone or recorded voice message that participants hear whenever someone enters or leaves a conference. Entry tones and exit tones have different sounds, which let participants distinguish between someone entering or leaving the conference. Voice messages can be used to inform participants that a PIN code is required or a conference is about to end. To set an entry or exit tone for a conference, select Entry Tone or Exit Tone in the Conference Room window as shown.
The Entry or Exit Tone feature toggles on and off.
54 Bridge Talk 4.0 User’s Guide
Creating a new conference
Additional information about entry and exit tones Entry and exit tones can be used singly or combined, for example, you can just use entry tones. Here are some important reminders: ●
Entry tone-specific: - You can use entry tones for the entire duration of a conference or you can remove them at some point after a conference begins. - Moderators might ask you to introduce incoming participants after the entry tone sounds or remove entry tones after the first few minutes of a conference to avoid disruptions.
●
Exit tone-specific: - Check with the moderator before the conference begins to see whether an exit tone is desired. - You can remove exit tones at some point after a conference begins.
Conference-specific entry or exit tones or messages can be set up when scheduling a conference. For information, see Defining conference features on page 186. For information about configuring the system for entry or exit tones and recorded messages, see the Meeting Exchange Administration and Maintenance Guide for the CS700/780 4.0 Conferencing Server or Meeting Exchange Administration and Maintenance Guide for the S6200, S6500, and S6800 Media Servers.
Adding a voice roster If Name Record/Playback is enabled, moderators or participants can initiate a voice roster (roll call) of participants at any time during an unattended conference. If the voice roster request is conference wide, all conference participants can hear the roll call. If the voice roster is individual only, the requesting participant is temporarily removed from the conference to hear the roll call. Tip: Tip:
To hear a current conference voice roster, enter *8 from a telephone keypad.
For more information on the Name Record/Playback feature, see Name Record/ Playback (NRP) and Caller Detail on page 171.
Issue 1 July 2005
55
Creating a Conference
Locking a conference When lock is enabled, the system displays a “Conference is locked.” warning message, preventing operators from accidentally placing participants into the wrong conference. You can click Yes to place the participant in the locked conference or click No to cancel. To lock or unlock a conference, select Lock in the Conference Room window.
Tip: A locked conference appears as a yellow line in the Conference Navigator.
Tip:
Additional information about locking Here are some important reminders: ●
Any operator can gain access to a locked conference. To prevent an operator from accessing a conference, a moderator can secure the conference. For more information, see Additional information about security on page 57.
●
You cannot change the name of a locked conference. However, you can provide a name for a locked conference that does not yet have a name.
●
If you access a line from a locked conference, you can return the line to the conference by clicking Release, which prevents Bridge Talk from displaying the verification prompt.
Securing a conference In a secured conference, a moderator can prevent anyone from listening to or joining the conference. Specifically, operators cannot enter, record, scan, or listen to the conference. During the conference, moderators must press *7 on their telephone keypads to toggle this feature on or off. Moderators hear a tone or voice message to indicate that the conference is secured or unsecured. Tip: Tip:
A secured conference displays as a red line in the Conference Navigator.
56 Bridge Talk 4.0 User’s Guide
Creating a new conference
To enable security for a conference: 1. Designate one or more conference participants as moderators. 2. Select SecAllowed in the conference room window as shown.
The Security feature toggles on and off. 3. Remind the moderator to secure the conference by pressing *7 from the keypad. Note: A moderator can secure a conference if security is enabled and scheduled on the system. When a moderator has turned on security, you cannot disable security for that conference until the moderator turns off security.
Note:
If you need to contact the moderator, click on the conference in the Conference Navigator. If the conference is secured, a “Conference is secured.” dialog displays.
When you click Yes, the system plays a message to the moderator to remove security so that you can join the conference. However, you cannot join a secured conference until a moderator turns off security.
Additional information about security Here are some important reminders: ●
A moderator must turn off security before conducting a Q&A or polling session or asking for operator assistance.
●
If an operator is present in a conference when a moderator turns on security, the operator is moved to the operator conference.
Issue 1 July 2005
57
Creating a Conference
Setting up a lectured conference A lectured conference mutes all lines except moderator lines. Lecture prevents background noise from interfering with the conference and ensures that only the moderator’s voice is heard. To set up a lecture conference, select Lecture in the conference room window as shown.
The Lecture feature toggles lecture on and off.
Additional information about lecture Here are some important reminders: ●
You can apply Lecture before or during a conference.
●
Moderators can apply Lecture by pressing *5 if enabled on the system.
●
Muted participant lines can request operator help in a lectured conference. When you access a line that requests help, you temporarily remove the line from the conference.
●
A muted moderator retains moderator status and can still use moderator-based touchtone commands. Moderators can mute and unmute themselves using the *6 command.
●
Lecturing a conference will not automatically mute moderator lines. However, you can override the *6 command by toggling Moderator Mute on or off. For example, if a lectured conference includes several moderators, you can mute all but one moderator. Tip:
Tip:
Bridge Talk lists muted moderators between moderators and participants if an operator re-sorts a conference room by Base line status.
To determine if lecture or moderator mute options are available on your system, see the system configuration printout or ask your administrator.
58 Bridge Talk 4.0 User’s Guide
Creating a new conference
Muting a line Participants and moderators can mute or unmute their lines during a conference. To mute a line without accessing the line: 1. Right-click on the line in the conference room window. 2. In the Line submenu, click Mute. The Mute option toggles on or off. Note: When operators select or clear Mute, callers cannot alter their mute status using touchtone commands.
Note:
Additional information on muting a line ●
Here are some important reminders:Bridge Talk identifies muted lines in the conference room window.
●
Moderators and participants can mute and unmute their lines using the *6 command. A muted moderator retains moderator status and can still use touchtone commands.
●
Operators can override self-mute/unmute at any time by toggling Mute on or off.
Issue 1 July 2005
59
Creating a Conference
Working with base and current line statuses Base and Current are two line identifiers, which replace the single Status field in the Conference Room, Enter and Pending queues, Line Detail, Q&A, Polling, and View All Lines dialog boxes. These identifiers help you keep track of a line’s basic status as well as temporary status changes triggered by action-based commands like Q&A or lecture. Table 14 provides an overview of the Base and Current statuses. Table 14: Base and current line statuses Status
State
Description
Base
The states are: ● Mute ● Normal ● Moderator ● Muted Moderator
A modifiable line status not influenced by a particular feature or action. Base status options appear on submenu items, for example, when you right-click on a line in the Conference Room window or View All Lines dialog.
Note:
Current
The states are: ● Mute ● Normal ● Moderator ● Muted Moderator ● Polling ● Music
60 Bridge Talk 4.0 User’s Guide
Note: Participants and moderators can mute or unmute their lines during a conference. However, operators can override self-mute/unmute at any time. When operators select or clear Mute, callers cannot alter their mute status using touchtone commands.
A view-only, non-modifiable line status impacted by a feature like Lecture or Music or a temporary action like operator help. When completed, the line reverts to the Base status. If selected as a viewable field, Current status displays in the Conference Room window, Enter or Pending queues, Q&A, and Polling dialog boxes.
Using annunciator messages
Using annunciator messages Annunciator messages are prerecorded system messages played to participants who dial into a system or who answer the phone during a dial out. You can customize these messages to include specific company information or translate the messages into other languages.
Note:
Note: The conferencing servers include several prerecorded annunciator messages. Contact your system administrator before recording over any prerecorded messages.
Recording an annunciator message You can record messages that apply to individual callers or entire conferences. Bridge Talk provides up to 60 seconds for any message. Tip: Tip:
Make sure that you have established your operator audio path before recording messages.
To record an annunciator message: 1. Write down the text of the annunciator message that you want to record prior to recording. 2. Choose Tools > Annunciator from the menu bar. 3. In the Annunciators dialog, scroll up or down and select the number of the annunciator message that you want to record.
4. Click Edit Text.
Issue 1 July 2005
61
Creating a Conference
5. With the same annunciator message selected, enter a summary of the message text. 6. Click Save Text and click Record. 7. In the Record window, speak slowly and clearly into your headpiece. 8. Click Stop to finish the recording. 9. Click Playback to review your recording. The system stores the message in the default /usr2/prompts/Set1/messages file on the bridge. Note that you can only modify the default annunciator prompt set using the Annunciators dialog.
Playing back an annunciator message You can replay an annunciator message that you just recorded to verify that it is correct. To replay an annunciator message: 1. From the main tool bar, click Options. 2. From the Options submenu toolbar, click Annunciator. 3. In the Annunciator Message window, select the message you want to play back. 4. Click Playback. Bridge Talk displays the Playback dialog while the system plays the message into your headphones. If you need to re-record the message, repeat steps 3-9 in Recording an annunciator message on page 61. 5. Click Stop when finished.
Additional information about annunciator messages Here are some important reminders: ●
You can use an annunciator message to inform callers of the currently scheduled, available conferences.
●
You can use an annunciator message to provide instructions to called parties on a BlastDial.
For information about prerecorded annunciator messages, see the Meeting Exchange Administration and Maintenance Guide for the CS700/780 4.0 Conferencing Server or Meeting Exchange Administration and Maintenance Guide for the S6200, S6500, and S6800 Media Servers.
62 Bridge Talk 4.0 User’s Guide
Providing music for a conference
Providing music for a conference When you add a music line to a conference, the system automatically mutes all lines in the conference so that participants can listen to music before the conference begins. There are two types of music channels, digital and analog. Tip: Tip:
Be sure to establish a music audio path first. For instructions, see Setting up auxiliary audio paths on page 24.
Adding an analog or digital music line If there is an external RCA jack installed on your bridge, participants can listen to music piped in from a radio, tape recorder, or CD player. The system plays music from the M1 line in the Enter and Hold Conference queues; however, you can use lines M1-4 to add music to individual conference rooms.
1
2
3
4
Figure notes: 1. M1 - Analog or Digital 2. M2 - Digital 3. M3 - Digital 4. M4 - Digital
Issue 1 July 2005
63
Creating a Conference
To place a music line into a conference: 1. Choose Conference > Details from the menu bar. 2. In the Input dialog, enter a conference number, and click OK. 3. Under Features in the Conference Detail dialog, choose one of the following music options listed in Table 15. Table 15: Music lines Channel
Type
Description
M1
Analog or Digital
Participants hear music selected for the Enter and Hold Conference queues. This channel can be either analog or digital. Tip: Tip:
M2
Digital
M3
Digital
M4
Digital
Do not establish an audio path on the M1 channel. An external music source is always mapped to M1 and cannot be hung up.
Participants hear music selected for conferences.
The music channels (M1-M4) are defined by the system administrator as all digital or a combination (one analog and three digital). Check with your administrator to find out how the bridge is configured. 4. Click OK. Note the following:
Note:
●
For attended conferences, the operator manually turns off the music.
●
For unattended and on-demand conferences, the system automatically turns off the music when the first moderator joins the conference.
●
For flex conferences, the system automatically turns off the music when the leader joins the conference.
Note: When music is playing, the Current status column in the conference room window changes to Music.
64 Bridge Talk 4.0 User’s Guide
Linking conferences
Removing music from a conference To remove music from a conference: 1. From the Conference Navigator, right-click on the conference. 2. Select Details. 3. In the Music Source field, select Off. 4. Click OK.
Linking conferences Link lines are used to join several active conferences running on different conferencing servers (bridges). You can use a link line to dial in to or dial out from a bridge. An operator assigned to a particular bridge adds the link line to the specific conference. Tip: Tip:
Make sure that you establish a link line audio path first. See Setting up auxiliary audio paths on page 24.
Table 16 provides a brief comparison of the two types of link lines. Table 16: Link line types Virtual Link
Dedicated Link
Select this link type if your bridge does not have a dedicated link line or if you want to link two or more conferences.
Select this link type if your bridge is set up with a dedicated link line and you want to link two conferences.
An additional link can be added at either end of the chain. Unlimited number of lines.
Limited number of lines
Uses any participant line temporarily defined as a link line and then released.
Requires a dedicated link line with a telephone number assigned by a service provider.
Requires a revenue line.
Uses a non-revenue line.
Add link using Place command.
Add link using Transfer function.
Remove link with Hang Up function.
Remove link with Remove Link Line function.
Issue 1 July 2005
65
Creating a Conference
For detailed instructions, see: ●
Adding a virtual link line on page 66.
●
Adding a dedicated link line on page 68.
●
Using virtual and dedicated link lines in a conference on page 69. Tip: If a bridge is rebooted or shut down, you must re-establish any link line connections.
Tip:
For more information on configuring link lines, see the Meeting Exchange Administration and Maintenance Guide for the CS700/780 4.0 Conferencing Server or Meeting Exchange Administration and Maintenance Guide for the S6200, S6500, and S6800 Media Servers.
Adding a virtual link line Using Bridge Talk, you can join several active conferences running on different bridges by adding one or more Virtual Link Lines (VLLs). To accomplish this, define an available participant line as a VLL and link the line to another bridge. The system processes a virtual link line much like any participant line; however, you should apply moderator status to the line. Note: Only the number of available participant lines on the bridge limits the amount of virtual lines that you can use.
Note:
Choose one of the following methods to place a VLL into a conference: ●
If you are dialing out a VLL to another bridge: 1. Choose Line > Access from the menu bar and enter a line number (or click OK to access the next available line). 2. In the Line Detail dialog, enter an identifiable line name, such as “Acme Sales.”
66 Bridge Talk 4.0 User’s Guide
Linking conferences
3. Select Moderator and VLL as shown.
4. Enter the phone number of the bridge you want to link to and click Dial. When the other bridge’s operator answers, ask the operator to place the VLL in the appropriate conference. 5. The other bridge’s operator defines the line as a virtual link line with moderator status and places the VLL in the conference. 6. Click Place to place the VLL in the appropriate conference on your bridge. The two conferences on the two systems are now combined into one conference. ●
If you receive a VLL dialed out from another system: 1. Select the VLL from the Enter or Pending queues. 2. Click Enter
on the main tool bar or press Shift+e to access the line.
3. In the Line Detail dialog, name the link line, for example, Link to Bridge B. 4. Select both the VLL and Moderator features. The system assigns the line a VLL status. 5. Under Find Conference, select the conference that you want to link and click Place. The VLL remains linked to the other bridge until it is hung up or disconnected. When disconnected, the line returns to its previous status. To remove a virtual link line, see the next section, Removing a virtual link line from a conference.
Issue 1 July 2005
67
Creating a Conference
Tip: Be sure to assign moderator status to a VLL to prevent Bridge Talk from automatically muting the line during lecture, Q&A, or polling.
Tip:
Removing a virtual link line from a conference To remove a virtual link line: 1. Right-click on the link line in the Conference Room and choose Details. 2. In the Line Details dialog, click Hang Up and then click OK.
Additional information about virtual link lines Here are some important reminders: ●
VLLs appear on Polling and Q&A windows. In polling printouts, a VLL counts as one line in the total participants’ category.
●
A VLL displays as one line in conference reports. For billing purposes, you can set up two conferences on separate systems with identical conference names and IDs.
Adding a dedicated link line You can use a dedicated link line to join two active conferences running on different bridges. To set up a dedicated link line: 1. From the menu bar, choose Line > Audio Path. 2. Select Link Line. 3. Dial out using the assigned telephone number. Once you establish the connection, the link line is available for use.
Removing a dedicated link line from a conference To remove a dedicated link line: 1. From the main tool bar, click Transfer. 2. From the Transfer submenu toolbar, click Link Lines. 3. In the prompt area, type r, followed by a space and the number of the link line that you want to remove from the conference. 4. Press Enter.
68 Bridge Talk 4.0 User’s Guide
Linking conferences
Using virtual and dedicated link lines in a conference You can use a virtual or a dedicated link line or a combination of the two to link several conferences as shown.
Conference Room 12
Conference Room 8
Bridge A
Bridge C
Dedicated link line
Virtual link line
VLL Bridge B
VLL
Conference Room 14
Issue 1 July 2005
69
Creating a Conference
70 Bridge Talk 4.0 User’s Guide
Chapter 4: Dialing In This chapter includes the following topics: ●
Overview of dialing in
●
Placing incoming lines into a conference
Issue 1 July 2005
71
Dialing In
Overview of dialing in When a caller dials into a conferencing server, the bridge plays a prerecorded welcome message based on the DNIS/DDI number. In addition, the system may prompt callers to state their names and company-related information, which the system records and associates with the line. The bridge displays lines that are in transition (ODO, Scan, or CLPG) in the Pending queue, and then transfers them into the Enter queue or conference room. Operators can access a line from the Enter queue, speak to the caller, and place the line into a conference using the Line Detail dialog. For instructions, see Placing incoming lines into a conference on page 75.
Note:
Note: Make sure that the DNIS/DDI digits are valid for the connecting bridge. When the bridge is collecting digits, lines display in SCAN mode in the Pending queue. However, DNIS filtering does not affect the Pending queue.
How the system routes DNIS/DDI calls Depending upon the DNIS/DDI system configuration, a bridge collects digits entered by callers dialing into the bridge, plays conference-specific messages, brands incoming lines with a conference or company name, and places lines directly into the Enter queue (Figure 4). Specifically, the bridge matches the DNIS/DDI digits to a Call Branding table and listed in ascending order by the system administrator. Depending on the number of digits specified from 1 to 16, the bridge performs a Short Collection Search (if activated) from right to left. Figure 4: Dial-in process
2 1
Figure notes: 1. Caller dials in 2. Bridge collects digits 3. Bridge matches digits to Call Branding table
72 Bridge Talk 4.0 User’s Guide
3
5553 5554 5555 5556 5557-Sales Mtg 5558
Overview of dialing in
When to use a filtered Enter queue You can set up a filtered Enter queue for a particular company, group, or conference based on the Dialed Number Identification Service (DNIS) or Direct Dial In (DDI) process. If you set up a filtered DNIS/DDI Enter queue, the bridge displays DNIS/DDI lines in your customized Enter queue and displays a DNIS ENT status with the current line count on the Operator status bar. You can toggle back and forth between the Enter queue and the DNIS Enter queue. The Operator status bar displays both Filtered and All Enter totals. For details, see the next section, Creating a Filtered DNIS/DDI Enter queue. You can create a filtered Enter queue if the connecting bridge supports DNIS/DDI. For example, if you set up a specific Enter queue for Front Runner, Inc., you can greet the participants with, “Welcome to the Front Runner Conference. May I have your name, please?” before placing them into the conference.
Creating a Filtered DNIS/DDI Enter queue To create a filtered DNIS/DDI Enter queue: 1. Choose Tools > Set DNIS filter. 2. In the Set DNIS Filter dialog, select Use DNIS filter as shown.
1
2
3
Figure notes: 1. Set DNIS filter 2. The Min. length of DNIS filter setting 3. Add DNIS box
The Set DNIS Filter dialog displays the Min. Length of DNIS filter number on the connecting bridge, for example, 4 digits.
Issue 1 July 2005
73
Dialing In
Tip: Tip:
If you do not use DNIS filtering, select No DNIS Filter. DNIS filtering may slow down Enter queue processing because the system maintains both lists whether you show or hide the filtered list. 3. Enter search criteria as follows: - The wildcard character (?) is always last in a series. - If the number of DNIS/DDI digits is set to 4, the default (last) entry in the table is ????. The system uses this entry for any line that does not match specified DNIS/DDI numbers. For every wildcard that you enter, the system displays 0 through 9 for that placeholder. For example, if you enter 555?, the system displays, 5551, 5552, and 5553. 4. Click Add to add the DNIS/DDI digits to your DNIS Filtered List. 5. Click OK to create a filtered Enter queue.
Note:
Note: Each Bridge Talk session maintains its own DNIS filtered list. The Enter queue only displays lines that are in Enter status, and includes a Show Filtered/ Show All toggle button. If you click Show All, the Enter queue displays all lines in Enter status. If you click Show Filtered, the Enter queue lists only those lines that meet your DNIS/DDI search criteria.
If a bridge brands incoming lines as DNIS Direct, operators cannot place callers into the DNIS conference until the bridge places the first DNIS caller into the conference room, which officially starts the conference. This feature prevents operators from using DNIS-reserved conference rooms.
Note:
Note: The bridge.properties file stores your DNIS/DDI numbers from session to session. However, if your system administrator turns the short search feature off and changes the number of collected digits on a bridge, you must reconfigure your DNIS Filter List. For example, if the bridge doubles the number of collected digits, then you must update your DNIS digits from 5555 (four) to 03335555 (eight) and restart Bridge Talk.
For details on the bridge.properties file, see Overview of the bridge.properties file on page 256.
74 Bridge Talk 4.0 User’s Guide
Placing incoming lines into a conference
Placing incoming lines into a conference When participants dial in, their lines temporarily appear in the Enter or Pending queue. Depending on how your conferencing server is set up, you may hear an audio prompt (one beep or a continuous beep) alerting you that participants are in the Enter or Pending queue. Before you can access a line, speak to a caller, and place the line into a conference, you must first establish an audio path. If you did not set an audio path, see Establishing an operator audio path on page 23. To place the caller in a conference: 1. Choose one of the following methods of accessing incoming lines listed in Table 17. Table 17: Methods of accessing a line To
Click
Description
Access the next line
The Get Next Enter button in the Enter queue accesses the next line and displays the Line Detail dialog for the line. (Get Next Enter is available only if one or more callers are in the Enter queue.) You cannot use Get Next Enter if you are currently accessing another line or if you have not yet established an audio path.
Specify a line number
The Access button on the main tool bar prompts you to enter a specific line number. Type in the line number and press Enter to display the Line Detail dialog for the line.
Create a filtered Enter queue
The Get Next Filtered Enter button in the Enter queue accesses the next line for a particular company or group based on DNIS/ DDI digits. (Get Next Filtered Enter is available only if one or more callers are in the Enter queue.)
Select a line
Double-click on a line (if enabled on the system)
If activated in the bridge.properties file, double-click on a line in the Enter queue to display the Line Detail dialog for the line.
2. Complete the Line Detail dialog either by filling in the fields in the dialog or by using a dial list (roster) to supply information.
Issue 1 July 2005
75
Dialing In
3. Click Place or Transfer in the Line Detail dialog to place the line into a conference. See the next section, Using the Line Detail dialog. If you use a dial list, you can skip over the following procedure that describes how to enter line detail information. For information about using a dial list, see Using a dial list to supply caller information on page 86.
Using the Line Detail dialog When you access a line using the Line Detail dialog, Bridge Talk displays your operator number in the Progress column of the Enter queue and unmutes the line so that you can speak to the caller. A line modification indicator (green line) appears when an operator:
Note:
●
Accesses a line out of a conference. The line indicator displays in the conference room to show that the operator is viewing or modifying caller information as shown.
●
Clicks Caller Detail while a conference is in progress. The indicator displays in the conference room to show that the operator is viewing or modifying caller information without accessing the line.
●
Clicks Caller Detail during Polling and Q&A sessions. The indicator displays in the Conference Room and Polling or Q&A windows. For more information, see Chapter 7: Conducting Polling and Q&A Sessions on page 115. Note: The modification indicator will not prevent other operators from accessing or modifying the same line. The indicator remains until the last operator closes the Line Detail dialog or when an operator right-clicks on the line and chooses Clear Indicator from the submenu.
You can complete the Line Detail dialog by entering caller information, such as the name, company, and telephone number as shown in Figure 5.
76 Bridge Talk 4.0 User’s Guide
Placing incoming lines into a conference
Figure 5: Line Detail dialog box
1 5
2 3 4
7
6 8
Figure notes: 1. Dial Extension 2. Prompt Set 3. Passcode 4. Start Conference 5. LineAux fields 6. Network type 7. Base line status 8. Current line status
For a list of Line Detail dialog shortcut keys, see Table 20.
Issue 1 July 2005
77
Dialing In
To enter information in the Line Detail dialog: 1. Under Caller Information, press Tab or click the mouse to fill in the optional information listed in Table 18, which is tracked in the Call Detail Record (CDR). Table 18: Caller information in the Line Detail dialog box Information
Description
Name
The first and last names of the caller (up to 20 alphanumeric characters).
Company
The company name of the caller (up to 20 alphanumeric characters).
Phone
The caller’s telephone number (up to 40 alphanumeric characters).
LineAux1
Optional caller information (up to 60 alphanumeric characters), such as the caller’s E-mail address.
LineAux2
Optional caller information (up to 60 alphanumeric characters).
LineAux3
Optional caller information (up to 60 alphanumeric characters).
Caller ID
A telephone number automatically displays if caller ID is available on an incoming line. This information is non-editable.
Conference
The name (up to 60 alphanumeric characters) or number of the conference in which you want to place the caller. 1 of 2
78 Bridge Talk 4.0 User’s Guide
Placing incoming lines into a conference
Table 18: Caller information in the Line Detail dialog box (continued) Information
Description
Prompt Set
The system plays private messages to participants in their own language. Note that Bridge Talk can list up to 20 prompt sets if configured on the system. Some participants may dial a DNIS-based number to preselect a language, which displays in the Prompt Set box. For more information on DNIS, see the Meeting Exchange Administration and Maintenance Guide for the CS700/780 4.0 Conferencing Server or Meeting Exchange Administration and Maintenance Guide for the S6200, S6500, and S6800 Media Servers. The settings are: ● Conference. When you place a line into the conference, the line inherits the language of the conference. ● Prompt Set. When you place a line into the conference, the selected prompt set remains associated with the line. The line does not assume the language of the conference.
! Important:
Important: If you transfer participants to another conference room, all lines with a Conference prompt set inherit the language of the new conference room. However, lines with a preselected prompt set do not inherit the language of the new conference room.
Keep in mind that there may be several different prompt sets for participant lines, which may not match the prompt set selected for the conference. To view or change the prompt set of a conference, see Modifying conference information using Conference Details on page 144. Passcode
The last DTMF passcode that a moderator or participant enters displays in the Line Detail dialog. You can view but not edit this code. The system logs only the last-entered passcode in the CDR.
Note:
Note: This is an optional field that you can select as viewable from the Enter and Pending queues. 2 of 2
2. Click Hide/Find to locate the exact name or number of the conference. The Hide/Find button toggles to show or hide the find function. 3. Under Find Conference, choose one of the following search options to locate the exact name or number of a conference:
Issue 1 July 2005
79
Dialing In
- Search For. Enter a few letters or numbers in any of the following fields. Search For:
Procedure
Conference number Conference name Conference ID
Enter the first few letters or numbers of the conference in any of the appropriate Search For fields.
Confirmation code Moderator code
Note:
Conferee code
Note: The name of the conference is case sensitive.
- Show All Conferences. Browse through a list of all active conferences running on the bridge. 4. Enter a phone number and click Dial to dial the number. If you do not need to dial an extension, go to step 6. 5. To dial an extension for a main number that you are dialing: a. Click Dial Ext. b. In the Dial Extension dialog, enter the digits in the Phone Extension field, and click Dial.
The conferencing server dials the number. The CDR phone field will include the main phone number and the appended extension. c. Click Close. 6. If there is a caller waiting in the Enter queue, you can start a scheduled unattended or on-demand conference immediately by following these steps: a. Click on the Start Conf button.
80 Bridge Talk 4.0 User’s Guide
Placing incoming lines into a conference
b. Enter the alphanumeric Conference Code (moderator or participant passcode) in the Start Conference dialog as shown, and click OK.
Tip: Tip:
If the caller is a moderator, be sure to select moderator status before placing the line into the conference. If the passcode is valid, the bridge finds the corresponding schedule and starts the conference (or if the conference has already started, finds the active conference). Bridge Talk highlights the conference in the Find Conference area and activates the Place/ Transfer button so you can place the line into the conference. 7. Under Base State, select one of the following options described in Table 19.
Table 19: Base states in Line Detail dialog box Base State
Description
Normal
A regular participant.
Mute
A muted participant.
Moderator
A moderator.
Muted Mod
A muted moderator. A muted moderator retains moderator status and can still use moderator-based touchtone commands.
Note:
Note: Moderators can mute and unmute themselves using the *6 command. However, you can override the *6 command by toggling Mute on or off. 1 of 2
Issue 1 July 2005
81
Dialing In
Table 19: Base states in Line Detail dialog box (continued) Base State
Description
Note that the Current State is a read-only field that indicates if the line is: ●
Currently impacted by a feature like lecture or an action like operator help.
●
Not impacted. 2 of 2
8. Under Q&A Priority, select one of the following: Q&A
To
Top
Place participants at the beginning of the queue, in the order in which they pressed 1 or *1. Tip: Tip:
Moderators always precede callers in the queue.
Normal
Place participants after Top priority participants, in the order in which they pressed 1 or *1. (Default)
Excluded
Prevent participants from asking questions during a Q&A session. Excluded participants are not shown in the Q&A queue; however, they can request and receive operator help.
For information about setting caller priority during a Q&A session, see Conducting Question and Answer (Q&A) sessions on page 125. 9. Select one or more of these options: Option
To
VLL
Define this line as a virtual link line. (The default is clear.)
Call Type
Identify what kind of line is in use. Accept the default value unless you want to enter a new call type, such as dial_in or ODO. (The default is dial_out.) 1 of 2
82 Bridge Talk 4.0 User’s Guide
Placing incoming lines into a conference
Option
To
Network (Telephony)
View the caller’s line type, such as Voice over Internet Protocol (VoIP) or PSTN/ISDN. The telephony network type is tracked in CDR and CODR reports.
Release on Close
Release the line back to its previous location automatically when you close the Line Detail dialog.
Note:
Note: Clear Release on Close if you want to continue talking with a participant while opening other Bridge Talk windows. The line remains accessed until you select Line > Release from the menu bar. 2 of 2
10. Click one or more of the following related functions and then click Place. Button
To
Roster
Enter dial-in caller information from a preset dial list that automatically fills in the Line Detail dialog.
Release/ Access
Release an accessed line back to its previous location, such as a conference or help queue. The Release/Access button toggles to release or access the line.
Note:
Note: The Accessed Line field in the Operator status bar indicates what line you are accessing.
Hang Up
Hang up the line.
Fault
Fault the line. For instructions on removing lines, see Faulting a line on page 161.
The system closes the Line Detail dialog and places the caller in the conference.
Issue 1 July 2005
83
Dialing In
Note: If the conference is secured, a Conference is Secured dialog displays when you click Place.
Note:
Click Yes if you want the system to play a message to the moderator to remove security so that the participant can join the conference. A participant cannot join a secured conference until the moderator turns off security.
Keyboard shortcut keys for the Line Detail dialog Table 20 gives an overview of the Line Detail dialog shortcut keys. Table 20: Line Detail dialog shortcut keys Shortcut key
To
Alt
A
Start a conference.
Alt
C
Enter the name or number of the conference.
Alt
D
Dial the entered telephone number.
Alt
E
Release the line.
Alt
F
Alt
G
Hang up the line.
Alt
H
Enter the caller’s telephone number.
Alt
I
Use or hide the Find feature.
Do one of the following: ● Search for a conference (available only if you click the Find button to display the Find Conference feature). ● Fault (available only if Find Conference is hidden).
1 of 2
84 Bridge Talk 4.0 User’s Guide
Placing incoming lines into a conference
Table 20: Line Detail dialog shortcut keys (continued) Shortcut key
To
Alt
L
Choose the Release on Close option.
Alt
N
Enter the caller’s name.
Alt
O
Enter the company name of the caller.
Alt
P
Place the caller into a conference.
Alt
Q
Choose a Q&A priority. (Default is Normal)
Alt
R
Display the Roster List dialog.
Alt
S
Select a Base State line status. (Default is Normal)
Alt
T
Transfer the line to another conference.
Alt
V
Define the line as a virtual link line.
Alt
W
Display a list of all active conferences running on the bridge (available only if you click the Find button to display the Find Conference feature).
Alt
X
Stop Name Record/Playback (NRP) playback.
Alt
Y
Identify what kind of line is in use, for example, dial-in or ODO.
Alt
1
Enter optional caller information in the LineAux1 field.
Alt
2
Enter optional caller information in the LineAux2 field.
Alt
3
Enter optional caller information in the LineAux3 field. 2 of 2
Issue 1 July 2005
85
Dialing In
Using a dial list to supply caller information You can use a dial list (roster) to display caller information in the Line Detail dialog or if you need to dial out to participants on different dial lists. If your company has several frequent callers who attend a variety of conferences, you can create a roster of recurring names. To use the roster function: 1. From the Line Detail dialog, click Roster. Bridge Talk highlights the last dial list used. 2. From the Roster List dialog, select the correct dial list.
3. Under Conferee List, click an entry on the dial list. Bridge Talk highlights that entry. Tip: Tip:
To sort a dial list column in ascending or descending order, click on the header of the column that you want to sort. To display the dial list in the order that you entered the names, select Display As Entered. 4. Click Associate. Bridge Talk automatically fills in the Line Detail dialog with information from the dial list entry. For more information on using Display As Entered, see step 6 in Creating a new dial list on page 89.
86 Bridge Talk 4.0 User’s Guide
Chapter 5: Using Dial Lists and Dialing Out This chapter provides information on: ●
Working with dial lists
●
Overview of dialing out
Issue 1 July 2005
87
Using Dial Lists and Dialing Out
Working with dial lists A dial list is a phone list created by operators for use during BlastDial, FastDial, or Roster tasks. Individual dial list entries include a participant name, phone number, and optional company name. Table 21 provides a summary of dial list options. Table 21: Dial list options To
Procedure
Create a new dial list
Select one of these commands from the menu bar: 1. Choose Fast Dial > New. 2. Choose Fast Dial > Edit. 3. In the Dial List Navigator dialog, select New. For detailed instructions, see Creating a new dial list on page 89.
Edit an existing dial list
Follow these steps: 1. Choose Fast Dial > Edit from the menu bar. 2. In the Dial List Navigator dialog, select the dial list that you want to use. 3. Select Edit to modify or Duplicate to copy an existing list. For more information, see Changing entries in a dial list on page 93.
Duplicate an existing dial list
Use this procedure: 1. Choose Fast Dial > Edit from the menu bar. 2. In the Dial List Navigator dialog, select the dial list and click Duplicate. 3. In the name field, replace the name of the existing dial list with the name of the new dial list that you want to create. 4. Modify the dial list entries that you want to change and click Save.
Delete a dial list
Follow these steps: 1. Choose Fast Dial > Edit from the menu bar. 2. In the Dial List Navigator dialog, select the dial list and click Delete. 3. Click Yes in the confirmation dialog.
Print a dial list
Do the following: 1. Choose Fast Dial > Edit from the menu bar. 2. In the Dial List Navigator dialog, select the dial list and click Print. 3. In the Dial List Reports dialog, click Print.
88 Bridge Talk 4.0 User’s Guide
Working with dial lists
Creating a new dial list To create a new dial list: 1. Choose Fast Dial > New from the menu bar. 2. Enter a dial list name up to eight (alphanumeric or extended ASCII) characters. The dial list name must begin with alpha characters, for example, FrontRun or FrtRun22.
Note:
Note: You should not use certain characters in front of participant names in a dial list since these characters may be used by the system as flags. For example: - Moderator Status. If an “@” sign is placed before a person’s name, the system automatically assigns that line moderator status when it is included in a FastDial or BlastDial. - Q&A Priority. If a “+” sign is placed before the conferee name when creating a dial list, the system places these lines at the beginning of the question queue, directly beneath moderators on the display, regardless of when they enter the queue chronologically. If an “=” sign is placed before the conferee name, the system excludes the conferee from asking questions during Q&A. Bridge Talk masks special characters in the console but includes them in CDRs. 3. Click Add to add an entry to the list. Bridge Talk adds a blank line to the bottom of the list.
1
2
3
Figure notes: 1. Dial list name 2. Directly to Conf 3. Display As Entered
Note:
Note: Once you create a name, you cannot change the position of the name in the dial list.
Issue 1 July 2005
89
Using Dial Lists and Dialing Out
4. Complete the following dial list line information listed in Table 22. Table 22: Dial list - modifying line information Click
To
Name
Enter a caller’s name (up to 20 alphanumeric characters) that you want to include on the list.
Company
Enter the name of the caller’s company (up to 20 alphanumeric characters).
Moderator
Set up the caller as a Moderator; otherwise, leave the Moderator field blank.
Q&A Priority
Select the appropriate priority level from the shortcut menu: ● Top. To give a caller priority over other callers during a Q&A session. ● Excluded. To prevent a caller from asking questions during a Q&A session. ● Normal. (Default) To give a caller that same priority level as other callers.
Telephone
Enter the person’s telephone number in the field.
5. To delete an entry, select the entry and click Remove. 6. To sort entries, choose one of the following sort options under Conferee List: - Click Display As Entered to view the dial list in the order that you entered the names. - Clear Display As Entered to view the list in alphabetical order.
90 Bridge Talk 4.0 User’s Guide
Working with dial lists
7. To use the dial list for a BlastDial, choose one of the following options in the Optional Access Code field listed in Table 23. Table 23: Optional access code options Choose
To
With access codes
Enter a passcode in the field. The called parties are required to enter a passcode (up to 16 alphanumeric characters) before they can join the conference. Tip: For BlastDials, you can use the same passcode for several conferences because the system places the participants directly into the specified conferences.
Tip:
Without access codes
Leave the field blank if you want the called parties to enter the conference without a special passcode. The called parties can enter the conference by pressing 1 (unless the system is set up to place blast-dialed participants directly into a conference as soon as they answer their phones).
Directly to Conf
Place callers directly into the conference without entering any DTMF commands. The system ignores the called party’s voice mail filter. Any device that automatically answers the telephone is placed into the conference, including voice mail, modem, and fax.
Note:
Note: When you select Directly to Conf, the Optional Access Code field is overwritten with 16 zeros and is deactivated, which allows automatic entry. If you deselect Directly to Conf, the Optional Access Code field clears and is re-activated.
8. Click one of the following: - Save to save the dial list. The system saves the dial list using the list name that you specified in step 2. - Print to print out the dial list.
Issue 1 July 2005
91
Using Dial Lists and Dialing Out
Modifying a dial list To modify a dial list: 1. Choose Fast Dial > Edit from the menu bar. 2. In the Dial List Navigator dialog, select one of these options listed in Table 24. Table 24: Modifying list features in a dial list To
Procedure
Edit an existing dial list
Select the dial list and click Edit. See Changing entries in a dial list on page 93.
Duplicate an existing dial list
Use this procedure: 1. Select the dial list and click Duplicate. 2. In the name field, replace the name of the existing dial list with the name of the new dial list that you want to create. 3. Modify the entries within the dial list that you want to change and click Save.
Delete a dial list
Follow these steps: 1. Select the dial list and click Delete. 2. Click Yes in the confirmation dialog.
Create a passcode for a BlastDial
Move the cursor to the optional Access Code field and enter a passcode.
Change an existing passcode
Select the code in the optional Access Code field and enter a new passcode.
Note:
Note: Bridge Talk automatically selects Message 243 as the default Blast Dial message when you enter a code in the Optional Access Code field. See Table 28 for a detailed description of the available default Blast Dial messages. 1 of 2
92 Bridge Talk 4.0 User’s Guide
Working with dial lists
Table 24: Modifying list features in a dial list (continued) To
Procedure
Place callers directly into the conference without prompting them to enter any DTMF commands
Select Directly to Conf to direct the system to ignore the called party’s voice mail filter. Any device that automatically answers the telephone is placed into the conference, including voice mail, modem, and fax.
Display the dial list in as-entered order
Leave the Display As Entered check box selected. (Default) For more information, see step 6 in Creating a new dial list.
Print
Click Print. In the Dial List Reports dialog, click Print again.
Note:
Note: When you select Directly to Conf, the Optional Access Code field is overwritten with 16 zeros and is deactivated, which allows automatic entry. If you deselect Directly to Conf, the Optional Access Code field clears and is re-activated.
2 of 2 3. Click Close or
to exit from the Dial List Navigator dialog.
Changing entries in a dial list To modify a dial list: 1. Choose Fast Dial > Edit from the menu bar. 2. In the Dial List Navigator dialog, select the dial list you want to modify. 3. Click Edit. Bridge Talk displays the selected dial list.
Issue 1 July 2005
93
Using Dial Lists and Dialing Out
4. Choose one of the following options in Table 25. Table 25: Modifying entries in a dial list To
Procedure
Add a new entry
Click Add. Bridge Talk displays a new blank line at the bottom of the list.
Modify an existing entry
Select the entry and then modify the fields that you want to change.
Delete an entry
Select the entry and then click Remove.
5. Click Save.
Overview of dialing out Use dial out when you want to call and place individuals into a conference either before a conference begins or during a conference. In addition, you can restrict dial outs using these features: ●
Restrict Dialout. A bridge can filter all dial outs using a utility customized by the system administrator. For example, the filtering process can block long-distance calls. Administrators can allow or prevent operators from dialing out specified numbers through Bridge Talk. For more information, contact Avaya Technical Support.
●
Moderator Block Dialout. On a per conference basis, schedulers can allow or prevent moderators from using Auto Blast or Moderator Originator Dial Out (ODO). However, this option does not affect operator functions. See table entries, Auto Blast or Block Dialout in Chapter 11: Scheduling a Conference.
94 Bridge Talk 4.0 User’s Guide
Overview of dialing out
Choose one of the dial-out operations described in Table 26. Table 26: Types of dial-out operations Type
Description
FastDial
To dial out to participants using a previously created dial list. When a participant answers the phone, place the person in the appropriate conference.
BlastDial
To dial out to a list of pre-programmed numbers. As each participant answers the telephone, the system automatically plays an annunciator message that provides conference instructions. Tip: Tip:
Manual (one-time dial-out)
Be sure to create and save the dial list before you begin the BlastDial procedure.
To dial phone numbers from the Dial dialog that are not on your list (or if you reached an automated system and must enter additional digits to continue processing the call). For more information on manual dialing, see Using manual (one-time) dial on page 105.
Using FastDial Using FastDial, you can dial out to participants using a previously created dial list. When the participant answers the phone, place the person in the appropriate conference. To dial out to participants using a dial list: 1. Choose Fast Dial > Dial from the menu bar. -OrClick the Fastdial button on the tool bar and click Dial.
Issue 1 July 2005
95
Using Dial Lists and Dialing Out
2. In the Dial dialog, select a dial list from the Select Dial List.
1
2 3
4 5
Figure notes: 1. Select Dial List 2. Select Conference 3. Music 1 (Analog or Digital) Music 2 Digital Music 3 Digital Music 4 Digital 4. Hold Dial List saves position in the dial list if you need to perform another task 5. Manual dial out to a person who is not on the dial list
96 Bridge Talk 4.0 User’s Guide
Overview of dialing out
3. In the Select Conference field, choose one of the following methods to place the participants. Conference Name
Description
New (Default)
To create a new conference: 1. Select in the Select Conference list. 2. Bridge Talk displays the Conference Name dialog and prompts for a name for the conference. 3. Enter the conference name (up to 60 alphanumeric characters) and click OK.
Note:
Existing
Note: The system uses the default prompt set for the bridge.
Choose an existing conference from the Select Conference list. Tip: Tip:
The system uses the prompt set scheduled for the conference.
For example, if you select the SalesQ dial list and you want to place the people you call into the SalesQ conference, the top portion of the Dial window might look like the following:
As an option, you can enter a line number that the system will use as a starting point for the dial out. If you leave this field blank, the system starts at line number 1 (or first available). 4. To add music to the conference: a. Select one of the following music channels: - 1 (Analog or Digital) - 2 (Digital) - 3 (Digital) - 4 (Digital) b. Click Music On. 5. Select a name in the Dial List Contents window and click Dial/Access. If you do not need to dial an extension, go to step 7.
Issue 1 July 2005
97
Using Dial Lists and Dialing Out
Tip: Tip:
Do not create a blank entry (no telephone number) in a dial list. Use Manual Dial to dial any telephone numbers that are not on the dial list. 6. To dial an extension for a main number that you are dialing: a. Click Dial Ext.
b. In the Dial Extension dialog, enter the digits in the Phone Extension field, and click Dial.
The bridge dials the number. (If you do not enter a telephone number, a dialog displays prompting you to enter a number.) The CDR will include both the main phone number and the extension. c. Click Close. 7. Under Dial, choose one or more options described in Table 27. Table 27: FastDial options Click
To
Dial/Access
Dial a line or re-access a line placed on hold.
Place
Place the caller into the conference you selected in step 3. The system places the caller into the conference, displays an asterisk (*) in the Status column of the dial list, and returns you to the Fastdial list. 1 of 2
98 Bridge Talk 4.0 User’s Guide
Overview of dialing out
Table 27: FastDial options (continued) Click
To
Hold Line!
Place the line on hold. When you click Hold Line! in the Dial dialog, you can perform other operations. When you place a line on hold, Bridge Talk displays the exclamation point symbol (!) in the Status column of the Dial list. Tip: Tip:
To re-access the line that you placed on hold, select the line and click Dial/Access.
Hang up
Hang up the line. Use hang up if the called party does not want to be placed in a conference or if no one answers.
Music/Music On
Toggle music on or off: ● Click Music On from the Dial List dialog to add music to a conference in which no music is playing (if available). ● Click Music Off to stop music in a conference in which music is already playing.
Manual
Dial out to a person who is not on the dial list. Do not create a blank entry (no telephone number) in the dial list.
Display As Entered
Display the dial list in as-entered order. (Default) For instructions, see step 6 in Creating a new dial list.
Hold Dial List
Exit out of the FastDial temporarily and save your position in the dial list. To place a dial list on hold: 1. Click Hold Dial List in the Dial dialog. 2. Click Yes. Bridge Talk closes the Dial List window so that you can perform other tasks. To resume the FastDial, click Hold Dial List from the Fastdial submenu tool bar.
Note:
Note: You can hold your position only in one dial list at a time. 2 of 2
8. Repeat steps 5-7 for each name in the dial list.
Note:
Note: If you close the dial list while you are accessing a line, you remain accessed to that line.
Issue 1 July 2005
99
Using Dial Lists and Dialing Out
Using BlastDial During a BlastDial, the system dials out using a dial list of pre-programed telephone numbers. As each participant answers the telephone, the system automatically plays an annunciator message, which provides instructions to the participants being called. You can use more than one dial list for each blast dial to the same conference; however, you must specify the conference number when starting the blast to assure that participants join the same conference. Tip: If you want to add a level of security by requiring the called parties to use a specific passcode to enter the conference, be sure to specify that passcode when creating a new dial list. See Creating a new dial list on page 89.
Tip:
To use BlastDial: 1. Choose Fast Dial > Blast from the menu bar. -OrClick the Fastdial button on the tool bar and click Blast.
100 Bridge Talk 4.0 User’s Guide
Overview of dialing out
2. In the Blast Dial dialog, select a dial list from the Select Dial List field.
1
2 3
5 4
Figure notes: 1. Select Dial List 2. Select Conference 3. Music 1 (Analog or Digital) Music 2 Digital Music 3 Digital Music 4 Digital 4. Blast/reBlast redials participants 5. Display As Entered displays participants in a non-ordered list
Issue 1 July 2005
101
Using Dial Lists and Dialing Out
3. In the Select Conference field, choose one of the following methods to place the participants. Conference Name
Description
New (Default)
To create a new conference: 1. Select in the Select Conference list. 2. Bridge Talk displays the Conference Name dialog and prompts for a name for the conference. 3. Enter the conference name (up to 60 alphanumeric characters) and click OK. Tip: The system uses the default prompt set for the bridge.
Tip:
Existing
Choose an existing conference from the Select Conference list.
Note:
Note: The system uses the prompt set scheduled for the conference.
For example, if you select the SalesQ dial list and you want the called parties to enter the SalesQ conference, the top portion of the Blast Dial dialog might look like the following:
Tip: Tip:
You can enter a line number that the system can use as a starting point for the dial out. If you leave this field blank, the system starts at line number 1. 4. To add music to the conference: a. Select one of the following music channels: - 1 (Analog or Digital) - 2 (Digital) - 3 (Digital) - 4 (Digital) b. Click Music On.
102 Bridge Talk 4.0 User’s Guide
Overview of dialing out
5. To change the default annunciator message: a. Click the Annunciator Message Browse button. b. In the Annunciator Messages dialog, click Use Selected Message. Click
Description
Use Selected Message
To specify an annunciator message, select the message you want and then click Use Selected Message. Tip: Tip:
Use Default Message
Note:
Browse the list to locate and highlight the message you want to use.
See Table 28 for a detailed description of the available default Blast Dial messages.
Note: If you use Directly to Conf to place callers directly into the conference, the system does not play an annunciator message (even if a message was selected previously). Table 28: Default BlastDial messages Bridge
Message
1.3x and 3.0x
Message 8. “Hello. Your conference call is about to begin. To join the conference, please enter 1 on your touchtone keypad. Thank you.”
2.0x, 2.1x, and 3.1x or later
Bridge Talk automatically selects Message 242 if you do not enter a code (or Message 243 if you do enter a code) in the Optional Access Code field. See Create a passcode for a BlastDial on page 92 in Table 24. Message 242. “Hello. Your conference call is about to begin. To join the conference, please enter 1 on your touchtone keypad. Thank you.” -OrMessage 243. “Hello. Your conference call is about to begin. To join the conference, please enter your security code followed by the pound key. Thank you.”
For more information about messages, see Using annunciator messages on page 61. 6. Click Exclude to omit certain telephone numbers from the BlastDial. To re-enable dialing for an excluded entry, clear Exclude for that entry.
Issue 1 July 2005
103
Using Dial Lists and Dialing Out
7. Click Blast/reBlast to begin the Blast Dial. As the called parties answer their telephones and join the conference, the Bridge Talk Status column displays the following:
Note:
*
Called party has been placed in the conference.
CLPG
Call is in progress.
Note: If not enough lines are available for the blast, Bridge Talk displays an error message. 8. Under Blast, choose one or more of the following Blast Dial options: Click
To
Display As Entered
Display the dial list in as-entered order. (Default) For more information, see step 6 in Creating a new dial list.
Blast/reBlast
Redial any participants (except for those you excluded in step 6). Blast and reBlast is a toggle.
Clear CLPG
Clear all lines that the system used for dialing that were not placed in the conference. The Blast Dial dialog remains open as system hangs up all lines in CLPG status.
Next/Place
Access the next line in CLPG state from the Enter queue. After speaking with the caller, place the line into the conference by clicking Place. Next and Place is a toggle.
Music On/Music Off
Play music in the conference. Music On and Music Off is a toggle.
9. To end the blast session, click Close. Bridge Talk prompts for confirmation that you want to close the Blast Dial session. When you click OK, the system hangs up all lines in CLPG state. Tip: Tip:
For information on scheduling a moderator-initiated, unattended Blast Dial, see Auto Blast on page 167 in Table 44.
104 Bridge Talk 4.0 User’s Guide
Overview of dialing out
Additional information about Blast Dial Here are a few important reminders: ●
If you want to create a new dial list for a Blast Dial, be sure to create and save the dial list before you begin the Blast Dial.
●
Participants must press 1 to enter the conference if no passcode is assigned, unless: - The system is set up to place blast-dialed participants directly into a conference as soon as they answer their phones. - Directly to Conf is selected for the dial list.
Using a DNIS/DDI Blast Dial Usually operators launch a Blast Dial. However, you can set up moderator-initiated blast dials for unattended and on-demand conferences (if configured on the connecting bridge). For more information on how to schedule this feature, see Auto Blast in Table 44.
Using manual (one-time) dial In a one-time dial out operation, you dial out to a specific number during a conference. You do not need to use a dial list. To dial out to participants manually: 1. From the Dial dialog, click Manual. 2. In the Conference Name dialog, enter the conference name, and click OK. 3. In the Manual Dial dialog, enter the caller information as shown in Figure 6.
Issue 1 July 2005
105
Using Dial Lists and Dialing Out
Figure 6: Manual Dial dialog
1 2
Figure notes: 1. Up to 20 alphanumeric characters 2. Up to 60 alphanumeric characters
4. Enter a phone number and click Dial to dial the number. If you do not need to dial an extension, go to step 6. Tip: Tip:
You must click Dial first in the Manual Dial dialog to make the Dial Ext button available. 5. To dial an extension for a main number that you are dialing: a. Click Dial Ext. b. In the Dial Extension dialog, enter the digits in the Phone Extension field, and click Dial.
The system dials the number. The CDR will include both the main phone number and the extension. c. Click Close.
106 Bridge Talk 4.0 User’s Guide
Overview of dialing out
6. In the Manual Dial dialog, click: - Place. To place the called party into the conference. - Hangup. To hang up the line without placing the line into a conference if no one answers the phone.
Additional information about manual dial Here are a few important reminders: ●
Phone numbers can contain up to 40 characters that include the digits 0–9 and star (*) or pound sign (#).
●
If you access a disconnected line and click Dial, the system displays a dial prompt with the line name and phone number (if this information was entered previously). Click OK to dial the phone number and re-establish the connection.
Adding a delay in a dialing sequence You can insert a temporary delay when dialing if your bridge is configured to accept commas in the dialing sequence. A phone number can include one or more dial delays (commas). Table 29 describes the delay procedure. Table 29: Inserting a delay in a dialing sequence Insert
Procedure
Delay
Use a comma to insert a delay in the dialing sequence. The system inserts a one-second-dial delay for each comma that you enter. For example, if your telephone system requires you to dial 9 and wait for a dial tone before dialing the number, you can use the dialing sequence 9,5551234. The bridge dials 9, waits one second, and then dials the number 555-1234. Tip: Tip:
To insert a longer delay, enter more than one comma.
Contact your system administrator to find out how your telephone system is configured for dialing.
Issue 1 July 2005
107
Using Dial Lists and Dialing Out
108 Bridge Talk 4.0 User’s Guide
Chapter 6: Recording Conferences This chapter includes instructions on the following: ●
Overview of recording
●
Creating an analog recording
●
Creating a digital recording
Issue 1 July 2005
109
Recording Conferences
Overview of recording Operators can start, stop, and play back conference recordings that they initiate through Bridge Talk, as well as those initiated by moderators who use touchtone commands. In addition, conferences can be scheduled (using the Advanced Scheduler) to enable automatic conference recordings, which start as soon as the first caller dials into the conference. The system announces to the first caller, moderator or participant, that the recording is about to begin. Subsequent callers hear a message stating that conference recording is in progress. Note that conference recording starts when the first moderator joins if music is turned on (or any caller if music is turned off). Note: Moderators can record and play back a conference that they secure. By contrast, operators cannot record a secured conference. If an operator starts recording a conference that switches to secured, the system immediately stops the recording.
Note:
Types of recordings You can record an entire conference or only a segment using the following recording types, if configured on the connecting bridge: ●
Analog. This feature is available only on CS700/CS780 conferencing servers. Operators or moderators can record to an analog device, such as a tape recorder. See the next section, Creating an analog recording on page 111.
●
Digital. Operators or moderators can record digitally to a file on the system. For instructions, see Creating a digital recording on page 113.
●
External Digital Recording. Moderators (leaders) can dial out and record a conference digitally using an external recording device. A Conference Record line appears in the conference room, as shown.
! Important:
Important: Do not tamper with or modify the properties of the Conference Record line. Remember, external recordings are not stored on the bridge so you cannot play back a file through Bridge Talk.
110 Bridge Talk 4.0 User’s Guide
Creating an analog recording
Note: If you record several segments of a conference, the system saves only the name of the last segment.
Note:
You can use up to four record-playback combinations within a single conference: ●
Analog record with digital record
●
Analog playback with digital record
●
Digital playback with analog record
●
Analog, digital, and external record Tip: If desired, you can record a conference twice using the analog or digital functions of Bridge Talk and an external recording device.
Tip:
Legal notification regarding conference recordings In certain locations, including the United States, you are required by law to notify all participants when a conference call will be recorded. To accomplish this, you can: ●
Notify participants individually before placing them into the conference.
●
Notify participants in the annunciator message.
●
Begin the conference by announcing that the conference call will be recorded.
●
When an external recording or Digital Record Playback (DRP) starts, the system plays a message into the conference.
Creating an analog recording Analog recording is the process of recording to an analog device that is connected to a PBX utility. You can insert an Analog recording channel into a conference room before participants call in. Note that Analog channels are available only on CS700/CS780 conferencing servers. Tip: Tip:
Make sure that you establish a record/playback audio path first. If you did not set an audio path, see Setting up auxiliary audio paths on page 24.
To record a conference: 1. Choose Conference > Record/Playback from the menu bar. 2. In the Record/Playback dialog, click Record
in the Analog area.
Issue 1 July 2005
111
Recording Conferences
3. In the Select Channel dialog, select a channel number, and click OK.
Recording begins and the record button switches from gray to red. 4. Press the Record/Play button on your recording device. 5. To stop the recording, click Stop
in the Analog area.
The recording stops and the Record button switches from red to gray. 6. Press Stop on your recording device. For information about playing back the recording, see the next section, Playing back an analog recording. Note: The system assigns the letter A (Analog) plus an automatically selected channel number for the recording, such as A1 or A22. The channel displays in the Record/Playback dialog, Conference Room title bar, and Conference Navigator (if you include Record in the list of visible properties of the Customize User Interface dialog).
Note:
Playing back an analog recording You can play back an entire conference or part of a conference. Here are some important reminders: ●
Do not rewind a tape while the record channel is active. Rewinding may add noise to the conference.
●
You cannot apply gain while playing back an analog tape.
To play back an analog recording: 1. In the Record/Playback dialog, click Play
in the Analog area.
2. In the Select Channel dialog, select a channel number, and click OK. Playback begins and the Play button switches from gray to green. 3. Press the Play button on your recording device. 4. To stop the playback, click Stop
in the Analog area.
The playback stops and the Play button switches from green to gray.
112 Bridge Talk 4.0 User’s Guide
Creating a digital recording
Creating a digital recording Digital recording is the process of recording a conference to a file stored on the bridge. Digital channels are available on systems that have an installed, removable hard drive. The system can store digitally recorded conferences up to 12 hours per conference or up to 293 hours on the system's removable hard drive or a RAID 5 disk drive (depending upon how the system is configured). For example, if you use the removable hard drive to back up your system or save voice rosters, the number of available hours decreases. Tip: Tip:
You can insert a record channel into a conference before participants join the conference. However, digital playback for an attended conference will not begin until a participant enters the conference.
To create a digital recording: 1. Choose Conference > Record/Playback from the menu bar. The system displays the Record/Playback dialog.
2. In the Record/Playback list, select the conference that you want to record. 3. Click Record
in the Digital area.
4. In the Digital Record dialog, enter a filename up to eight characters with no extension. The Digital Record dialog displays the amount of time available for recording. The recording begins and the record button switches from gray to red. 5. To stop the recording, click Stop
in the Digital area.
The recording stops and the Record button switches from red to gray. For information about playing back the recording, see the next section, Playing back a digital recording on page 114 or Deleting a digital conference recording on page 114.
Issue 1 July 2005
113
Recording Conferences
Note:
Note: The system assigns the letter D (Digital) plus an automatically selected channel number for the recording, such as D1 or D22. The channel number displays in the Record/Playback dialog, Conference Room title bar, and Conference Navigator (if you include Record in the list of visible properties of the Customize User Interface dialog).
Playing back a digital recording You can play back an entire conference or part of a conference. To play back a digital recording: 1. In the Record/Playback dialog, click Play
in the Digital area.
2. In the Digital Play field, select the file you want to play.
Note:
Note: If you want the playback to begin at a specific point after the recording began, enter the amount of time that you want to skip (expressed in the number of minutes and seconds). Note that the system increments in 8-second intervals. For example, if you enter 9 seconds, the system skips 8 seconds; if you enter 17 seconds, the system skips 16 seconds. Playback begins and the Play button switches from gray to green. Note that all lines are in listen-only mode. 3. To stop the playback, click Stop
in the Digital box.
The playback stops and the Play button switches from green to gray.
Deleting a digital conference recording You can delete digital recordings that you do not want to save. To delete a digital recording: 1. In the Record/Playback dialog, click Delete
.
The Delete File dialog displays. 2. In the File Name box, select a file and click OK. 3. Click Yes in the Confirmation dialog to delete the file. For more information the record/playback feature, see the Meeting Exchange Administration and Maintenance Guide for the CS700/780 4.0 Conferencing Server or Meeting Exchange Administration and Maintenance Guide for the S6200, S6500, and S6800 Media Servers.
114 Bridge Talk 4.0 User’s Guide
Chapter 7: Conducting Polling and Q&A Sessions This chapter covers the following topics: ●
Conducting polling sessions
●
Conducting Question and Answer (Q&A) sessions
Issue 1 July 2005
115
Conducting Polling and Q&A Sessions
Conducting polling sessions You can conduct a polling session that lets participants cast votes or express opinions based on a predefined tag digit list. Before polling, make sure that you: ●
Select at least one participant to be a moderator to ask questions during the polling session. During a polling session, all lines are muted except for moderator lines. Moderators can mute and unmute themselves using the *6 command. A muted moderator retains moderator status and can still use moderator-based touchtone commands. Note: You can override the *6 command by toggling Moderator Mute on or off. For example, in a lectured conference that includes several moderators, you can mute all but one moderator.
Note:
●
Save time by preparing a unique tag digit list file in advance or you can use an existing tag digit list and temporarily change the information.
●
Prompt participants how to vote on a set of choices using the touchtone keypad on their telephones.
●
Set up and then display voting options in the Polling dialog. For polling instructions, see the next section, Starting a polling session on page 117. Tip:
Tip:
You can save or print the results when each individual poll ends. For details, see Saving or printing the polling results on page 121.
116 Bridge Talk 4.0 User’s Guide
Conducting polling sessions
Starting a polling session Once you have prepared for a polling session, you can begin polling. To start a polling session: 1. From the Conference Room window title bar, click Poll. The Polling dialog displays. 2. Click on a line and click Caller Detail to see and, if enabled, hear caller information without accessing the line.
An abbreviated Line Detail dialog displays.
A line modification indicator (green line) displays in the Polling and Conference Room windows when an operator clicks Caller Detail. The indicator shows that the operator is viewing or modifying caller information.
Note:
Note: The indicator does not prevent other operators from modifying the same line.
Issue 1 July 2005
117
Conducting Polling and Q&A Sessions
3. If NRP (INDVL, CONF, or OPER) is scheduled for the conference and the caller responded to the name prompt, click: - Play to hear what the caller recorded. The system plays caller information only to the operator. The conference does not hear the recording. - StopX to stop the recording. 4. When finished, click OK to close the abbreviated Line Detail dialog. 5. Choose one of the following tag digit options: Option
Procedure
Use an existing tag digit list
In the Tag Files field, select the tag digit list file you want to use. Bridge Talk displays the tag digit list associated with that file. For information about creating tag digit list files, see Creating a tag digit list on page 123.
Create a temporary tag digit list
Click in the Tag field of a digit and enter the label text you want to use for that tag. Repeat this for each digit that you want to use. Tip: Tip:
After entering the text, click outside the text box to apply changes.
6. Click Start Polling to begin polling. The polling session begins and the system mutes all non-moderator lines. Bridge Talk clears all previous votes and totals.
Note:
Note: All lines excluding moderators are muted in a lectured conference. However, you can select a moderator line and click Mute to mute or unmute the line. 7. Ask a polling question and list the possible responses. 8. Prompt participants to press a key on their telephone keypads that corresponds to their selection. As participants vote, the system displays the votes in the Polling dialog. 9. Click Save Results to save or print the polling results.
Note:
Note: Participants can request help from the operator by pressing 0 or *0.
118 Bridge Talk 4.0 User’s Guide
Conducting polling sessions
Performing operator polling tasks You can perform one or more of the following tasks during a polling session: ●
Excluding certain lines from the vote count
●
Providing help to a participant
●
Saving or printing the polling results
Excluding certain lines from the vote count By default, all moderators and participants vote during a poll and the system includes all votes in the tag digit totals. However, you can exclude moderators and specific participants from voting. To exclude moderators or certain participants from having their votes included in the totals: 1. In the Polling dialog, click Start Polling. 2. Select the participants and moderators whose votes should not be tabulated. 3. Click Mute Line. The Current line status for each of these participants changes from Normal to Muted. 4. Clear Include Moderator/Mute Votes as shown. The Moderator/Mute Votes check box toggles on and off.
Issue 1 July 2005
119
Conducting Polling and Q&A Sessions
Providing help to a participant A participant can request help during a polling session by pressing 0 or *0. When this occurs, Bridge Talk displays a check mark in the Help Req check box for that participant and highlights the line in yellow as shown.
To provide help to participants during a polling session: 1. From the Polling dialog, click Help Line. The bridge automatically accesses the line of the first participant who requested help. 2. Click Release Line when you have finished assisting the participant. The system returns the participant to the polling session.
Note:
Note: You can access only those lines requesting help from the polled conference.
120 Bridge Talk 4.0 User’s Guide
Conducting polling sessions
Saving or printing the polling results During a polling session, Bridge Talk displays the tag digit vote total and how each participant voted. Tip: You cannot save the polling results of an unnamed conference to a file.
Tip:
If a participant votes but hangs up before you display or save the results to a file, the vote is not included in the total participants count. However, the tag digit totals and total responses do include the participants’ participation. described in Table 30. Table 30: Saving or printing polling results
Note:
Task
Procedure
Print the vote total that each tag digit received. (Individual participant votes are not included.)
To print the vote total: 1. Click Print Results. 2. In the Print dialog, select Summary. 3. Enter optional descriptive text and click OK.
Print the vote total that each tag digit received and how each individual voted.
To print individual votes and the vote total: 1. Click Print Results. 2. Select Complete in the Print dialog. 3. Enter optional descriptive text and click OK.
Save the vote total that each tag digit received to a file. (Individual participant votes are not included.)
To save the vote total to a file: 1. Click Save Results. 2. Select Summary in the Print dialog. 3. Enter a filename and click OK.
Save the vote total that each tag digit received and how each individual voted to a file.
To save individual votes and the vote total to a file: 1. Click Save Results. 2. Select Complete in the Print dialog. 3. Enter a filename and click OK.
Note: The system automatically generates a polling name based on the conference name and date (up to 60 alphanumeric characters), for example, Front_Runner_Monday_Morning_Meeting.Jan08. The system stores the polling files in the /usr/dcb/dbase/polprnts directory or another location specified in your bridge.properties file. Therefore, do not include a pathname with a slash (/) when you save polling results.
Issue 1 July 2005
121
Conducting Polling and Q&A Sessions
Allowing a participant to change a vote If a participant asks to change a vote (for example, if the participant pressed the wrong digit), you must first clear the participant’s original vote. To allow a participant to change a vote: 1. From the Polling dialog, select the participant who wants to change a vote. 2. Click Clear Vote. Bridge Talk clears the vote so that the participant can make a new selection.
Clearing all votes To clear votes on all conference participate lines: 1. Make sure that you have saved or printed any vote information that you need. 2. Click Clear All Votes.
Ending a polling session When the polling session is complete, do the following: 1. Be sure that you have saved or printed any vote information that you need. 2. For information, see Saving or printing the polling results on page 121. 3. Click Clear All Votes to remove all votes. 4. To edit or remove labels that are not from a saved tag digit file, you can: Click
To
On the tag you want to change.
Remove or retype the label text for a digit or digits.
Clear Tags.
Remove all of the labels.
5. Click Clear Tags and select a different list in the Tag File list to start a new poll. 6. When finished, click Stop Polling. The system unmutes all participant lines (except for any lines that you explicitly muted) and ends the current polling session. Other operators viewing the Polling dialog should note that the Stop Polling button switches back to Start Polling.
122 Bridge Talk 4.0 User’s Guide
Conducting polling sessions
7. Click Close and choose one of the following options to end the polling session: - Yes to stop conference polling after you exit. - No to allow conference polling to resume after you exit. If you are the only active operator in the conference, the polling session ends; however, if there are other operators currently polling the conference, the polling sessions continue. - Cancel to return to the Polling dialog. Tip: If you muted any lines during polling to exclude from voting, remember to unmute them.
Tip:
Creating a tag digit list Here are some important reminders on tag digits: ●
Operators can access all tag digit lists stored on a bridge, regardless of who created them. More than one operator can use the same tag digit list at the same time.
●
If several operators are polling a single conference, make sure that all the operators use the same tag digit list.
To create a tag digit list: 1. Choose Conference > Polling from the menu bar. 2. In the Input dialog, enter the number of your conference, and press Enter. The bridge uses tag digits to match votes to the items participants vote on. A tag digit includes a tag (descriptive text) and a digit from 1 to 9 (maximum is 9). Tip: Tip:
After entering the text, click outside the text box to apply changes. 3. Click on a digit in the Digit field. 4. In the Tag field, select one of these numbering conventions: Description
Example
Use a tag with an underscore (_) or an ellipsis (...) to specify a range.
Option_2 or 1...3
Use a tag with a colon.
Option 2:
Use a tag with single or double digits.
Option 12
Issue 1 July 2005
123
Conducting Polling and Q&A Sessions
Tip: Tip:
Do not use a hyphen, for example, Option-2. You can create a standard tag digit list for the most common responses, such as: Digit
Tag Label
1
Yes
2
No
3
Undecided
If you want to create the tag digits for mixers, the tags might like this example: Digit
Tag
1
Supremo Mixer
2
Mix-o-Matic
3
Mixing Master
During a polling session, participants who want to vote for Supremo Mixer can press 1 on their telephone keypads, those who want to vote for Mix-o-Matic can press 2. As participants vote, Bridge Talk displays the votes in the Polling dialog as shown. 5. Repeat this step for each digit that you want to use. 6. Click Save As. 7. In the Save As dialog, enter a filename for the tag digit list file (up to 8 characters), and click OK. Tip: Tip:
When a conference requires many polls, you can assign the tag digit list files sequential names that correspond to the number of the question. For example, the ACME conference might use tag digit list files named ACME1, ACME2, ACME3, and ACME4. 8. Click Close to exit from the Polling dialog and then confirm that you want to leave polling.
124 Bridge Talk 4.0 User’s Guide
Conducting Question and Answer (Q&A) sessions
Conducting Question and Answer (Q&A) sessions Question and Answer (Q&A) sessions provide an orderly method of letting participants ask questions or make comments during a lecture or large conference. An administrator can configure the bridge to prompt for one or two digits for help (1 or *1) or operator (0 or *0). During a Q&A session, all lines are muted except: ●
A participant asking a question
●
Moderators Moderators can mute and unmute themselves using the *6 command. A muted moderator retains moderator status and can still use moderator-based touchtone commands.
Note:
Note: Set participant priorities before starting a Q&A session and verify that there is at least one moderator line in the conference.
To change the priority of a participant: 1. Click the Q&A Priority field of the participant’s line in the Conference Room window. 2. Select the new priority that you want to assign to the caller, as listed in Table 31. Table 31: Setting caller priorities in Q&A
Note:
Option
To
Top
Place callers at the beginning of the queue, in the order in which they pressed 1 or *1. Moderators are placed at the beginning of the caller queue. For more information on setting priorities, see step 8 in the Using the Line Detail dialog on page 76.
Excluded
Prevent callers from asking questions during a Q&A session and are not shown in the Q&A queue. (However, excluded callers can request and receive operator help.)
Normal
Place the caller after Top priority participants, in the order in which they pressed 1 or *1. (Default)
Note: If moderators use the Conference Viewer application to reorder caller priorities in a conference, do not use Q&A Priority. The system will ignore any resetting of priorities through Bridge Talk.
Issue 1 July 2005
125
Conducting Polling and Q&A Sessions
Starting a Q&A session During a Q&A session, a participant who wants to ask a question presses 1 or *1 on a touchtone telephone. The system then places the participant in the Q&A queue but the line remains muted. When an operator selects a line and clicks Ask?, the operator allows a participant who has a question to speak to the conference.
Note:
Note: Be sure to set caller priorities before starting a Q&A session. For instructions, see Table 31.
To start a Q&A session: 1. From the Conference Room window, click Q&A. The Q&A dialog displays.
Tip: Tip:
When opened, the Q&A dialog remains prominent in Bridge Talk until you click Close; therefore, exit out of Q&A before accessing other dialogues. 2. Select a line and then click Caller Detail to see and, if enabled, hear caller information without accessing the line.
126 Bridge Talk 4.0 User’s Guide
Conducting Question and Answer (Q&A) sessions
Note:
Note: Caller Detail displays only if you schedule an unattended conference with the NRP set to OPER. For more information, see Name Record/ Playback (NRP) and Caller Detail in Table 44. An abbreviated Line Detail dialog displays.
A line modification indicator (green line) displays in the Conference Room and Q&A windows when an operator clicks Caller Detail as shown.
The indicator shows that the operator is viewing or modifying caller information. However, the indicator will not prevent other operators from accessing or modifying the same line. 3. If NRP (OPER) is scheduled for the conference and the caller responded to the name prompt, click: - Click Play to hear what the caller recorded. - The system plays caller information only to the operator. The conference does not hear the recording. - Click StopX to stop the recording. 4. When finished, click OK to close the abbreviated Line Detail dialog.
Issue 1 July 2005
127
Conducting Polling and Q&A Sessions
5. In the Q&A dialog, select any of the following commands from Table 32. Table 32: Q&A dialog command buttons Button
To
Op Help
Select a line and click Op Help to speak privately with participants or moderators who press 0 or *0.
Ask?
Select a line and click Ask? when callers press 1 or *1 to ask a question to the entire conference.
Caller Detail
Select a line and click Caller Detail to hear and update caller information without accessing the line.
Retrieve
Retrieve a line that was released back into a conference. The system places the line at the end of the Q&A queue.
Print
Display, print, or save Q&A questions or comments. To print comments or questions: 1. Click Print. 2. In the Input dialog, enter comments up to 76 characters. (Optional) 3. Click OK. 4. In the Q&A Results dialog, click Print.
Clear
Clear all lines from the Q&A queue (except for moderators and participants requesting help).
CV Chat
Start a Conference Viewer chat session. For instructions on setting up Bridge Talk to use the Conference Viewer Chat, see Sending messages to operators or moderators using the Conference Viewer on page 148.
Close
End the Q&A session for the conference.
6. When finished, click Close. 7. Choose one of the following options to end the Q&A session: - Yes to stop Q&A after you exit. The system unmutes all participant lines (except for any lines that you explicitly muted) and ends the current Q&A session. - No to allow Q&A to resume after you exit. If you are the only active operator in the conference, the Q&A session ends; however, if there are other operators currently answering questions during the conference, the Q&A sessions can continue. - Cancel to return to the Q&A dialog.
128 Bridge Talk 4.0 User’s Guide
Conducting Question and Answer (Q&A) sessions
Assisting callers during a Q&A session You can respond to participants and moderators who ask for help during a Q&A session in three ways: ●
Moderator help. For instructions, see the next section, Responding to moderators who request help.
●
Participant help. See Responding to participants who request help on page 131.
●
Participant questions during conference. See Allowing participants to ask a question on page 132.
Responding to moderators who request help When a moderator requests help during Q&A, the system displays check mark in the “Help Req” column and highlights the line in yellow.
To speak to a moderator privately: 1. In the Q&A dialog, select the line of a moderator. The system activates the Op Help button. 2. Click Op Help.
Issue 1 July 2005
129
Conducting Polling and Q&A Sessions
The Operator Help dialog displays as shown in Figure 7. Figure 7: Operator help dialog box
1
2
Figure notes: 1. Muted Moderator line 2. Moderator line
3. Choose any of the moderator help options listed in Table 33. Table 33: Moderator help request options during Q&A Click
Description
Access/ Release
Choose one of the following: ● Access. To access the line so you can speak privately with the moderator. The system deactivates the Mute button and turns on the operator’s audio path. ● Release. To release the line back into the conference. Tip: You can toggle Mute on or off for the line or toggle your talk path on or off.
Tip:
Mute/Unmute
To mute or unmute a moderator. This button only displays when the line is a moderator.
Op Talk
To speak with a moderator who requests help or toggle your talk path on or off.
Note:
Note: Click Op Talk to ensure that all participants can hear your comments. Check to see if your talk path indicator is on or off in the Operator status bar.
4. Click Close when finished.
130 Bridge Talk 4.0 User’s Guide
Conducting Question and Answer (Q&A) sessions
Responding to participants who request help If a participant requests help, the system displays a check mark in the Help Req column and highlights the line in yellow.
To speak to a participant who requests help: 1. In the Q&A dialog, select the line of a participant who requests help. The system activates the Op Help button. 2. Click Op Help. 3. In the Operator Help dialog, choose any of the help options shown in Table 34. Table 34: Participant help request options during Q&A Click
Description
Access/ Release
Choose one of the following: ● Access. To access the line so you can speak privately with the participant. ● Release. To release the line back into the conference or toggle your talk path on or off. Tip: Tip:
Click Retrieve if the participant wants to ask another question. The system places the line at the end of the Q&A queue. 1 of 2
Issue 1 July 2005
131
Conducting Polling and Q&A Sessions
Table 34: Participant help request options during Q&A (continued) Click
Description
Op Talk
To speak with a participant who requests help or toggle your talk path on or off.
Note:
Note: Click Op Talk to ensure that all participants can hear your comments. Check to see if your talk path indicator is on or off in the Operator status bar. 2 of 2
4. Click Close when finished.
Allowing participants to ask a question To allow participants to pose a question to the conference: 1. In the Q&A dialog, select the line of a participant who wants to ask a question. The system activates the Ask? button. 2. Click Ask?. The Ask? dialog displays and Bridge Talk unmutes the line so the participant can ask a question to the conference. 3. If a participant presses 1/*1 and 0/*0 to ask a question and get help regardless of the order, do the following: a. Select the line. b. Respond to the help request. c. Before releasing the line, remind the participant to press 1/*1 again so the system can place the line back in the Q&A queue.
132 Bridge Talk 4.0 User’s Guide
Conducting Question and Answer (Q&A) sessions
4. In the Ask? dialog, choose any of the following options listed in Table 35. Table 35: Participant Ask? options during Q&A Click
Description
Op Talk
To speak with participant who wants to ask a question, or toggle your talk path on or off.
Note:
Note: Click Op Talk to ensure that all participants can hear your comments. Check to see if your talk path indicator is on or off in the Operator status bar.
Release
To return the participant to the conference and mute the line again.
Resume
To return the participant to the same position in the Q&A queue and mute the line again. Tip: Tip:
Click Resume if the participant wants to ask another question or if you inadvertently selected the wrong line.
Issue 1 July 2005
133
Conducting Polling and Q&A Sessions
134 Bridge Talk 4.0 User’s Guide
Chapter 8: Transferring Calls This chapter provides instructions on: ●
Overview of the transfer process
●
Transferring a call within your phone system
●
Transferring one or more participants
●
Transferring an entire conference to another conference
●
Transferring a dedicated link line
Issue 1 July 2005
135
Transferring Calls
Overview of the transfer process Use the transfer feature when:
Note:
●
Transferring a call within your phone system
●
Transferring one or more participants
●
Transferring an entire conference to another conference Note: You can transfer a link line into conferences to join one or more active conferences running on different bridges. For instructions on transferring link lines, see Transferring a dedicated link line on page 139.
Transferring a call within your phone system You can transfer a call to another number within your own telephone system, if enabled on the bridge. To transfer a call: 1. From the main tool bar, click Access. 2. Enter the line numbers (one at a time) that you want to transfer and press Enter. 3. From the Access submenu toolbar, click Transfer. 4. Enter the telephone number to which you want to transfer the caller and press Enter. The system connects the line and dials the number.
Additional information on call transfers Table 36 lists the available call transfer options. Table 36: Call transfer options Option
Description
Pre-conference instructions
Use this feature to review special conference instructions, such as conference security procedures. If a system administrator wants to speak with a moderator before the conference to review special instructions, you can access a line, dial out to the moderator, and then transfer the call to the administrator’s extension. 1 of 2
136 Bridge Talk 4.0 User’s Guide
Overview of the transfer process
Table 36: Call transfer options (continued) Option
Description
Reservation center
Use this feature to transfer a participant to a reservation center. For example, if a moderator wants to schedule another conference, you can access the line and transfer the moderator to the reservation center to make the proper arrangements. 2 of 2
Transferring one or more participants You can transfer some of the participants in a conference to another conference. For example, participants in a large conference may want to break into small groups or subconferences.
To move all participants from one conference to another: 1. From the menu bar, choose Line > Transfer Line. 2. Under Select Transfer Line(s), select the lines that you want to transfer. 3. Under To Conference Selection, choose the conference destination. 4. Click Transfer. If you select Always Confirm before transferring, Bridge Talk displays an “Are you sure?” message before allowing you to transfer lines using the menu bar or tool bar.
Issue 1 July 2005
137
Transferring Calls
Note:
Note: If you transfer participants to another conference room, all lines with a Conference prompt set inherit the language of the new conference room. Lines with a preselected prompt set do not inherit the language of the new conference room.
Transferring an entire conference to another conference You can transfer an entire conference to another conference room. For example, participants in one conference may want to join another conference.
To move all participants from one conference to another: 1. From the menu bar, choose Conference > Transfer. 2. Under From Conference Selection, select the conference that you want to transfer. 3. Under To Conference Selection, select the number for the targeted conference. 4. Click Transfer. If you select Always Confirm before transferring, Bridge Talk displays an “Are you sure?” message before allowing you to transfer lines using the menu bar or tool bar. Tip: Tip:
If there is only one moderator in a conference and moderator hang up is enabled, transfer the moderator line last (or contact the moderator to disable Moderator Hang up prior to transferring the conference) to prevent the system from disconnecting lines after the moderator is transferred.
138 Bridge Talk 4.0 User’s Guide
Overview of the transfer process
Transferring a dedicated link line Operators working on different bridges can add a dedicated link line to separate conferences to link the two conferences together. Specifically, both operators transfer the same numbered link into the respective conferences as shown.
Conference Room 12
Conference Room 8
Bridge A
Bridge B
Dedicated link line
To transfer a dedicated link line: 1. From the main tool bar, click Transfer. 2. From the Transfer submenu toolbar, click Link Lines. 3. In the prompt area, enter a link line number from 1-48, (for example, 2) and a space. 4. Enter a conference room number and press Enter. As shown in the previous example, the operator on bridge transfers a link line into Conference 12. Operator on bridge transfers the link line into Conference 8 using the same procedure and line number. The two conferences on the two systems are now combined into one conference.
Issue 1 July 2005
139
Transferring Calls
140 Bridge Talk 4.0 User’s Guide
Chapter 9: Assisting an Active Conference This chapter includes the following: ●
Managing active conferences
●
About subconferences
Issue 1 July 2005
141
Assisting an Active Conference
Managing active conferences You can manage a conference that is in progress by responding to help requests, modifying conference or participant information, listening to or speaking to conferences, sending messages to other operators, or adding notes about the conference.
Responding to help requests During a conference, participants can request operator help by pressing 0 or *0 on their telephones. The system places the participant’s line in the Help Requests queue. Tip: Tip:
For information on how participants can request help or enter commands from a telephone keypad, see Appendix A: Moderator and Participant Touchtone Commands on page 215.
To access the line to assist a participant who requests help: 1. Choose one of the following: Click
Location
To access
Help Requests queue
The next participant who requests help.
Note:
Main tool bar
Note: The Get Next Help button is available only if one or more callers are in the Help Requests queue. You cannot use the Get Next Help button if you are currently accessing another line or if you have not yet established an audio path.
A specific participant who requests help. Type in the line number of the participant and press Enter.
Bridge Talk displays the Line Detail dialog for the participant. 2. After speaking with the participant, click Release to return the participant to the conference.
Note:
Note: If a muted moderator or muted participant requests help, Bridge Talk lets you speak privately with the requestor (even if the system is set to conference-wide help).
142 Bridge Talk 4.0 User’s Guide
Managing active conferences
Additional information on providing help Depending on the system configuration, you can use one of the methods of providing help described in Table 37. Table 37: Individual and conference-wide help Type
Description
Individual help
Bridge Talk displays the Line Detail dialog when you access a participant’s line in the Help Requests queue. The system temporarily removes the participant from the conference so that you can speak privately without disrupting the conference. If enabled, entry tones will sound after you release the line back into the conference.
Conference-wide help
Bridge Talk displays the Conference Detail dialog when you access a conference in the Help Requests queue. The system lets you enter the conference and speak to all of the participants.
Note:
Note: The system cannot provide conference-wide help to a secured conference.
Providing conference-wide help in secured flex conferences When a participant requests conference-wide help during a secured flex conference, the system places the line in the Help Requests queue as individual help. When the leader requests conference-wide help, the system plays a “Conference is locked, press 1 to unlock your conference.” message to the leader. The leader has two choices: ● If the leader presses 1, the system unlocks the conference and places the conference in the Help Requests queue. ● If the leader presses star (*), the system cancels conference-wide help and the secured conference continues. When a leader tries to secure a flex conference that is in the Help Requests queue, the system plays a “Your conference is in the help queue, press 1 to lock your conference.” message. The leader has two choices: ● If the leader presses 1, the system removes the conference from the Help Requests queue and locks the conference. ● If the leader presses star (*), the conference remains in the Help Requests queue.
Issue 1 July 2005
143
Assisting an Active Conference
Modifying conference information using Conference Details From the Conference Navigator, you can view or modify conference details by accessing the Conference Details dialog. In addition, you can view but not edit the Global ID, Billing Code, or Cross-reference data displayed at the top of the dialog. To view the Conference Details dialog: 1. In Conference Navigator, click on a conference. 2. Right-click and choose Details. The Conference Details dialog displays as shown in Figure 8. Figure 8: Conference Details dialog
1
2
3
4
Figure notes: 1. 2. 3. 4.
Up to 60 characters for Name, Aux1, Aux2, Aux3, Conf ID, and Note. Conference features Prompt set Music source
3. Under Features, select the options that you want for your conference. For example, select a music channel. 4. From the Prompt Set box, select a language for the conference.
144 Bridge Talk 4.0 User’s Guide
Managing active conferences
Note:
Note: Unless changed, the prompt set is linked to the conference room for the duration of the conference. 5. Click Clear All to clear all conference features. 6. Click OK to save your changes.
Modifying participant information To modify participant information during a conference without accessing the line: 1. From the Conference Room window, select a participant’s line. 2. Right-click and choose Details.
A line modification indicator (green line) displays in the Conference Room window when an operator is viewing or modifying caller information. However, the indicator will not prevent other operators from accessing or modifying the same line. 3. If NRP (OPER) is scheduled for the conference and the caller responded to the name prompt, click: a. Play to hear what the caller recorded. b. StopX to stop the recording.
Issue 1 July 2005
145
Assisting an Active Conference
4. From the Prompt Set box, change the prompt set associated with the line by selecting: - Conference. When you place a line into the conference, the line inherits the language of the conference. - Prompt Set. When you place a line into the conference, the selected language remains associated with the line. The line does not assume the language of the conference. The system plays all private messages to the participant in this language during the conference. Keep in mind that there may be several different prompt sets set for participant lines, which may not match the prompt set selected for the conference. 5. Edit the appropriate fields and click OK.
Listening to (auditing) a conference You can use audit to listen in on a conference or speak to an entire conference. To audit a conference: 1. Choose Conference > Audit from the menu bar. 2. Enter the conference number and click OK. Tip: Tip:
To use the listen and scan features to audit individual lines or entire conferences for audio quality, see Chapter 10: Using the Listening Commands on page 153.
Speaking to the entire conference To speak to all the participants in a conference: 1. Select the conference from the Conference Navigator. 2. Turn on your Operator talk path by choosing one of the following: - From the keyboard, press Alt+Spacebar. - From the menu bar, choose Line > Operator Talk. Tip: Tip:
The Operator status bar displays “TLK - on” when you turn on your talk path. The Operator Talk function toggles on and off.
146 Bridge Talk 4.0 User’s Guide
Managing active conferences
Sending messages to other operators using Chat You can send messages to another operator or to all other operators. The chat messages appear at the lower portion of the Conference Navigator window. Chat text displays in the operator transaction logs. To send a message: 1. From the main tool bar, click Options. 2. From the Options submenu tool bar, click Chat.
3. In the Send to Selection field of the Chat Message dialog, choose one of these options: Option
To send a message to
Operator
A specific operator. Enter the operator number in the Operator Number field.
Global
All operators.
4. Enter the message you want to send in the Message Entry field and click Send. The bridge displays the message in the Chat window. For information on system messages, see System Message and Chat area on page 37.
Issue 1 July 2005
147
Assisting an Active Conference
Sending messages to operators or moderators using the Conference Viewer Use the Conference Viewer, a Web-based application, to send chat messages to operators or moderators from the Conference Room or Q&A window.
Note:
Note: Make sure that you are not running any pop-up blocking application.
To launch the Conference Viewer: 1. After you install Bridge Talk, open and immediately close Bridge Talk to populate the bridge.properties file. 2. Locate and open the bridge.properties file in the . 3. In the CVServerPath field, enter the IP address of the Conference Viewer server. Tip: Tip:
See your system administrator if you do not know the IP address. 4. Save and close the bridge.properties file and relaunch Bridge Talk. 5. In the Conference Room or Q&A window, click CV Chat. 6. In the CV Chat dialog, enter your message and click Send. The CV Chat dialog displays your message in black text.
Adding a note to a conference report If you want to make notes during a conference, you can enter a text message (up to 60 characters). This note displays in the Conference Detail dialog and displays in conference reports. To add a note during the conference: 1. From the Conference Navigator, select a conference. 2. Click the right mouse button and select Details. 3. In the Conference Details dialog, enter the text, and click OK.
148 Bridge Talk 4.0 User’s Guide
About subconferences
About subconferences Subconferences are small, private conferences that take place during an unattended, main conference for default or flex call flows. Please note the following: ●
Only moderators can secure unattended subconferences.
●
Moderators can move from one secured subconference to another.
●
A conference can have up to nine subconferences; however, callers in one subconference cannot start a new subconference.
●
Callers can move among subconferences by pressing *93 (or 93 for flex call flow) followed by a number from 1 to 9.
●
Callers can return to the main conference by pressing *93 (or 93) followed by 0.
●
Moderators can return all participants in all subconferences to the main conference by pressing *93 (or 93) followed by #.
●
The subconference ends when the last moderator or participant presses *93 (or 93), plus a number that is not the current subconference number.
●
Bridge Talk carries over a line status from the main conference to a subconference. For example, if the operator mutes a line entering a subconference, the line remains muted. However, if a participant mutes his/her own line before entering a subconference; the participant can unmute the line manually.
●
Subconferences can inherit many of the main conference features, as listed in Table 38.
How Bridge Talk tracks subconference activity The system identifies a subconference by a cross-reference number, which is similar to the main conference number. Bridge Talk displays the subconference cross-reference number in the Conference Navigator and Conference Detail dialogs. Bridge Talk tracks lines that join subconferences or rejoin main conferences as transferred lines.
Note:
Note: The system displays subconference data in conference reports, such as Conference Activity, Conference Status, CDRs, and CODRs.
Issue 1 July 2005
149
Assisting an Active Conference
Starting or joining subconferences If configured on the system, a participant or moderator can start or join up to nine unattended subconferences at any time by entering *93 (or 93 for flex call flow) followed by a number from 1 to 9. Note: Administrators can enable or disable subconferencing as a bridge-wide setting. In addition, only moderators (or moderators and participants) can start a subconference. Check with the system administrator to find out how this feature is configured on your system.
Note:
For more information, see: ●
Table 38 to view subconference touchtone commands.
●
Table 39 to browse inherited subconference features.
●
Table 40 to view optional subconference features.
Callers can use touchtone commands to start or join subconferences as described in Table 38. Table 38: Subconference touchtone commands Press
*
9
3
To
Description
Start or join a subconference
After pressing *93 (or 93) from a telephone keypad, callers can: ● Press a subconference number from 1 to 9, for example, *93, 7.
Note: If the caller presses the current subconference number, the system ignores the command.
0 Note:
* #
● ● ●
Press 0 to return to the main conference. Press * to escape. Moderators can press # to move all participants in all subconferences back to the main conference (after the system plays a warning message).
For a detailed list of keypad commands for different call flows, see Appendix A: Moderator and Participant Touchtone Commands on page 215.
150 Bridge Talk 4.0 User’s Guide
About subconferences
Subconferences may include preset main conference features listed in Table 39. Table 39: Inherited subconference features Main conference feature
Effect on subconference
Moderator Hang Up
If Moderator Hang Up is turned on from the bridge, the last moderator can end a subconference by pressing *93, 0 (or 93, 0) to return to the main conference. However, a main conference and its subconferences can share moderators so that the main conference does not end.
Billing Code prompt
If Billing Code is turned on from the bridge, a moderator in a subconference can view the current billing code of the main conference.
Entry Tones/Exit Tones
If Entry Tones/Exit Tones are turned on from the bridge, the system only plays an entry tone when a participant re-enters the main conference but not when a participant leaves the main conference to enter a subconference.
Auto Extend Duration
If Auto Extend Duration is turned on from the bridge, Bridge Talk extends the main conference and extends the subconference also.
Auto Extend Ports
If Auto Extend Ports is turned on from the bridge, Bridge Talk does not extend additional ports to the subconference. New participants must join the main conference first, then they can press *93 or 93 (followed by a subconference number from 1 to 9) to join a subconference.
Subconferences may also include optional conference features described in Table 40. Table 40: Optional subconference features Feature
Effect in main conference
Effect in subconference
Roll call
If Name Record/Playback (NRP) is selected, the system plays a roll call and participant count in the main conference only. If NRP is not chosen, the system plays a participant count in the main conference only.
If NRP is selected, the system plays a roll call and participant count in the subconference only. If NRP is not chosen, the system plays a participant count in the subconference only.
Note:
Note: Roll calls in main conferences do not affect subconferences.
Note:
Note: Roll calls in subconferences do not affect the main conference. 1 of 2
Issue 1 July 2005
151
Assisting an Active Conference
Table 40: Optional subconference features (continued) Feature
Effect in main conference
Effect in subconference
Q&A
To create a Q&A session. Bridge Talk amends the Q&A queue when a line returns to the main conference.
If a participant in a subconference presses *1 and then *93 or 93 (followed by a subconference number from 1 to 9), the system returns the line to the main conference and adds the line to the Q&A queue.
Security
To rejoin a secured main conference: If a participant tries to rejoin the main conference, the system plays a “The main conference is secured.” message. The system then finds the first moderator in the main conference (or any of the subconferences) and plays a “The main conference is secured, a participant is trying to enter. Press 1 to unlock your conference.” message. ● If the moderator presses 1, the system unlocks the main conference. The participant hears a “Return to main conference is now allowed.” message. ● If the moderator presses star (*), the system plays a “Conference cannot be unlocked.” message to the participant trying to enter the conference.
To join a different subconference: Participants. The system plays a “Subconference is secured, moderator has been notified.” message. The system then finds the first moderator in the main conference (or any of the subconferences) and plays a “Subconference is secured, a participant of another conference is trying to enter this subconference.” message. ● If the moderator presses 1, the system unlocks subconference . The participant hears a, “Entry to subconference is now allowed.” message. ● If the moderator presses star (*), the system plays a “Sorry, subconference cannot be unlocked.” message to the participant. Moderators. Moderators can move from one secured conference to another. If the last (or only) moderator leaves a secured subconference, participants can continue the secured discussion until the last participant hangs up or returns to the main conference. 2 of 2
152 Bridge Talk 4.0 User’s Guide
Chapter 10: Using the Listening Commands This chapter describes the following: ●
Overview of listening
●
Scanning conferences
●
Applying gain to a conference
●
Faulting a line
●
Adding an audio prompt
Issue 1 July 2005
153
Using the Listening Commands
Overview of listening The listening commands let you assess the audio quality of participant lines in a conference without disturbing the conference. In addition, you can locate noise to mute or fault the disruptive lines. However, you cannot listen to lines in a secured conference. If you specify a range of lines in secured conferences, the system plays music for these lines. Unlike the Access Line command, participants are unaware that you are listening on the lines. Tip: Tip:
It is good practice to listen to lines in the Hold conference before you place them in active conferences to ensure that only quality audio lines are used.
To listen to one or more lines in a conference: 1. From the main tool bar, click Options. 2. From the Options submenu toolbar, click Listen. 3. Choose one of the following options: Option
Description
Conference
To listen sequentially to each line in a conference.
Line
To listen to a specific line or range of lines.
Aux
To listen to an auxiliary channel, such as a music channel or link line.
In addition, you can optimize audio quality using any of these tool bar options: Option
Description
Scan
Choose Conference > Scan from the menu bar to determine the sound quality in each individual conference.
Gain
Right-click on the conference in the Conference Navigator and select Gain in the Conference Details dialog to equalize the voice levels.
Fault
Right-click on the line and select Fault in the Line Details dialog to take noisy or non-functioning lines temporarily out of service (off hook) to prevent other participants from calling in on those lines.
Audio prompt
Choose Tools > Continuous Beep from the menu bar to add a continuous audio prompt, if enabled.
154 Bridge Talk 4.0 User’s Guide
Overview of listening
Additional information on listening commands Here are some important reminders: ●
You cannot hang up or mute auxiliary or operator lines. If an operator line is noisy, immediately send an explanatory message to that operator.
●
When listening to a line, you may faintly hear parts of the conference. This is a limitation of the standard 2-wire telephone that most people use and is not an indication of noise.
●
You can listen to a line that is muted. (If you attempt to mute a line that is already muted, you will actually unmute the line.)
●
If you do mute a noisy listen line, you should follow up by accessing the line and informing the participant. If the problem is the line itself, you can ask the participant to call in on another line. You should also fault the suspect line to prevent other participants from calling in on that line. For information about faulting a line, see Faulting a line on page 161.
●
If the participant on the line you are currently listening to leaves the conference; you continue hearing that line, with no display update, until you select Next Line or Previous Line.
Listening to specific lines The listen option lets you listen to a specific line or a range of lines. To listen to a specific line or a range of lines: 1. Choose Line > Listen > Listen Line from the menu bar. 2. Under Line Selection List in the Line Listen dialog, choose one of these options: - Select a single line that you want to listen in on. - Enter a range of sequential line numbers, for example, 3-12.
Issue 1 July 2005
155
Using the Listening Commands
- Enter non-sequential line numbers separated by a single space, such as, 6 8 1 5.
3. Click Apply. 4. Under Listen Line Selection/Actions, choose one of the following options: Option
Description
Next Line
Lets you listen to the next line.
Previous Line
Lets you listen to the previous line.
Hang Up Line
Use the hang up command only when absolutely necessary. You cannot warn a participant that you are about to hang up the line when you are in listening mode.
Mute Line
Mutes the line. Tip: Tip:
5. Click Close when finished.
156 Bridge Talk 4.0 User’s Guide
If you know a moderator's line number, you can toggle Moderator Mute on or off.
Overview of listening
Listening to all lines in a conference Using Conference Listen, you can listen sequentially to each line (including muted) in an active conference so that you can detect any noisy or defective lines. This way you can alert an operator or participant who may be unaware of the audio problem. To listen sequentially to each line in the conference: 1. Choose Conference > Listen Line from the menu bar. 2. Under Conference Selection List in the Conference Listen dialog, select a conference as shown.
3. Under Line Listen List, select a line in the conference. 4. Under Listen Line Selection/Actions, choose one of the following options listed in Table 41. Table 41: Listen Line options Option
Description
Next Line
Lets you listen to the next line.
Previous Line
Lets you listen to the previous line.
Hang Up Line
Use the hang up command only when absolutely necessary. You cannot warn a participant that you are about to hang up the line when you are in listening mode. 1 of 2
Issue 1 July 2005
157
Using the Listening Commands
Table 41: Listen Line options (continued) Option
Description
Mute Line
Mutes the line. Tip: Tip:
If you know a moderator's line number, you can toggle Moderator Mute on or off. 2 of 2
5. Click Close when finished.
Listening to an auxiliary channel Listen to an auxiliary channel to debug and troubleshoot a music channel or a link line. To listen to an auxiliary channel: 1. Choose Line > Listen > Listen Aux from the menu bar. 2. Under Channel type in the Listen Auxiliary Channels dialog, select one of these options: Option
To listen to
OPERATOR
Operator channels
MUSIC
Music channels
LINKCHAN
Link channels
RPCHAN
Record/Playback channels
3. Click Next Line or Previous Line to navigate up or down in the Channel Selection box. 4. Click Close when finished. If you detect noise on an auxiliary (Aux) line, you should remove the line from the conference. To remove a link line, see Removing a dedicated link line from a conference on page 68.
158 Bridge Talk 4.0 User’s Guide
Scanning conferences
Scanning conferences Using scanning, you can access all conferences (except secured) on the entire bridge for a specified time interval (1-59 seconds). Bridge Talk displays a message that you are in scan mode and the Conference Scan dialog displays the conference room number to which you are listening. Tip: Use scan to determine the sound quality in each individual conference quickly.
Tip:
Choose one of the following methods to scan conferences: ●
From the menu bar: 1. Choose Conference > Scan. 2. In the Conference Scan dialog, select the conferences that you want to scan. 3. Click Apply. 4. The selected conferences are listed under Conference Listen List. 5. Select the number of seconds that you want to scan and click Set. 6. Click OK in the Scan Time dialog. 7. Click Start Scan. -Or-
●
From the main tool bar: 1. Click Options. 2. From the Options submenu tool bar, click Scan. 3. Follow steps 2 -7 in the menu bar procedure.
To stop the scan operation, press any key.
Scanning multiple conferences Follow this Windows-based procedure to listen to multiple conferences: 1. Press Ctrl or Shift on your keyboard. 2. Click on several conferences in the Conference Selection list of the Scan dialog and click Apply.
Issue 1 July 2005
159
Using the Listening Commands
Specifying a scanning interval The scan interval is the length of time that you listen to each conference before moving to the next conference. To set or modify the scan time interval: 1. From the main tool bar, click Set. 2. From the Set submenu toolbar, click Scan. 3. In the prompt area, enter the scan interval, and press Enter. Tip: Tip:
You can enter any scan interval value from 1 to 59 seconds.
Applying gain to a conference You can apply gain to a conference to equalize the voice levels in a conference. To apply gain to a conference: 1. From the main tool bar, click Conference. 2. Click Gain from the Conference submenu tool bar. 3. Enter the number for one or more conferences in the prompt area and press Enter. The Gain option toggles on and off.
Additional information about gain Here is an important reminder: Your system might let moderators apply gain by pressing *4 on their telephones. To determine if this is available on your system, see the system configuration printout or ask your administrator.
160 Bridge Talk 4.0 User’s Guide
Faulting a line
Faulting a line Fault a line when you want to take a line out of service (off hook). For example, you can fault a noisy line to prevent other participants from using that line. A faulted line is not the same as an “out of service” line, which is absolutely unusable and cannot be made available by the operator. Choose one of the following methods to fault or unfault lines: ●
To fault a single line: 1. From the Conference Room window, right-click on the line, and select Details. 2. In the Line Details dialog, click Fault, and click OK.
●
To restore a single line: 1. Choose Line > Details from the menu bar. 2. In the Line Detail dialog, enter the line number and click OK. 3. At the prompt, click OK. 4. In the Line Detail dialog, click Fault. The system restores the line.
●
To fault a range of lines: 1. From the main tool bar, choose Line. 2. Select Fault and choose one of these options: - Enter a range of sequential line numbers, for example, 3-12. - Enter non-sequential line numbers separated by a single space, such as, 6 8 1 5. 3. Press Enter.
●
To restore a range of lines, repeat steps 1-3 in the previous procedure. Note: The Fault option toggles on or off.
Note:
Additional information on faulting a line Here are some important reminders: ●
You cannot access or hang up a faulted line. To perform any function on a line that has been faulted, first unfault the line.
●
Calls coming in on faulted lines receive a busy signal or a ring-no-answer (RNA) depending on your system’s configuration.
Issue 1 July 2005
161
Using the Listening Commands
Adding an audio prompt The Continuous Beep (audio) prompt warns you that: ●
Participants are in the Enter or Pending queues (not only on arrival)
●
Participants are in the Help Requests queue
●
Lines are in Disconnect Mode (DC)
When enabled on the bridge, you can select Continuous Beep from the Tools item on the menu bar. If this feature is unavailable, contact your system administrator. For more information on the continuous beep option, see the Meeting Exchange Administration and Maintenance Guide for the CS700/780 4.0 Conferencing Server or Meeting Exchange Administration and Maintenance Guide for the S6200, S6500, and S6800 Media Servers.
162 Bridge Talk 4.0 User’s Guide
Chapter 11: Scheduling a Conference This chapter provides detailed instructions on: ●
Overview of the Conference Scheduler
●
Viewing or printing conference information
●
Viewing or modifying scheduled conferences
●
Accessing the Scheduler directly
Issue 1 July 2005
163
Scheduling a Conference
Overview of the Conference Scheduler You can book conferences, modify scheduled settings, display and print scheduled conference reports, and purge expired conference records using a conference scheduler. There are two conference scheduler options available: the Classic scheduler, which is a Bridge Talk component and the Advanced scheduler, which is a stand-alone (self-contained) application. For a brief overview of both schedulers, see Table 42. To book a conference: 1. From the menu bar, choose View > Conference Scheduler. Depending on how Bridge Talk is configured, a Scheduler Selection dialog may appear as shown.
If this selection dialog does not appear, Bridge Talk launches the default scheduler automatically.
Note:
Note: Administrators can configure scheduler options from the bridge.properties file. To set the default scheduler, see table entry schedulerApp on page 259. To display or hide the Scheduler Selection dialog, see table entry schedulerNoPrompt on page 259. Tip:
Tip:
There are several conference recording options that are available only with the Advanced Scheduler. Therefore, Avaya recommends that you select one scheduler over another rather than swapping back and forth.
164 Bridge Talk 4.0 User’s Guide
Overview of the Conference Scheduler
2. In the Scheduler Selection dialog, choose one of the following scheduling applications listed in Table 42. If there is no selection dialog, go to step 4. Table 42: Selecting a conference scheduler Application
Description
Classic
A legacy application that launches primarily through Bridge Talk using predefined sign-ins stored on the bridge. Currently, the Classic scheduler supports up to 75,000 conference records. sign-in only opens the Scheduler (not Bridge Talk).
Note:
Advanced
Note: The Classic scheduler does not support the conference recording options available in version 3.4x or later. Specifically, you cannot enable/ disable conference recordings or schedule on-board, off-board, or automatic conference recordings.
An optional, stand-alone application that launches independently or through Bridge Talk using predefined sign-ins stored on the bridge. The Advanced scheduler is compatible with 3.4x and 4.0 features and supports up to 500,000 conference records (depending on disk size and conference mode). Tip: Tip:
Install this application on your PC prior to use.
3. Select the option if you want to launch the selected scheduler subsequently without further prompting.
Issue 1 July 2005
165
Scheduling a Conference
Table 43 describes the Conference Scheduler tool bar buttons. Table 43: Conference Scheduler tool bar buttons
Button
Description
Button
Description
Schedule a conference.
View schedule.
Exit from the Conference Scheduler.
View expanded schedule.
Modify a scheduled conference.
Print options.
Modify a conference in progress.
To hide the Conference Scheduler tool bar temporarily. To display the tool bar again, choose View > tool bar.
Purge expired conferences.
View online help.
4. Define the conference mode. For more information, see: - Scheduling an attended conference in the next section. - Scheduling an unattended conference on page 174. - Scheduling an on-demand conference on page 175. - Scheduling a flex conference on page 177. When your conference is scheduled, Bridge Talk displays a confirmation number.
Note:
Note: If you select attended, unattended, or on-demand mode, moderators and participants can use the default keypad commands. For more information, see Managing Avaya conferences using touchtone commands on page 216. Tip:
Tip:
Do not close (exit from) the main Bridge Talk console because the Conference Scheduler will close also.
166 Bridge Talk 4.0 User’s Guide
Overview of the Conference Scheduler
Table 44 lists the following conference fields that can be scheduled. Table 44: Scheduler fields Option
Description
Accounting Code
Similar to a Billing Code, leaders can enter accounting codes using DTMF commands or a Web-based interface. This field appears in the leaders’s CDR. The settings are: ● ON. The system prompts leaders to enter a code upon entering the conference. ● OFF. (Default) Leaders do not enter a code. Tip: Leaders can enter up to 40 characters from a Web-based interface.
Tip:
Auto Blast
When moderator dials a phone number, the system automatically dials the list without additional commands. Select one of the following unattended Auto Blast settings: ● OFF. (Default) Disables the automatic BlastDial feature. The system disables the Dial List and Browse buttons. ●
Manual. Initiates an unattended Auto Blast when a moderator presses *92.
Once the blast operation is in progress, a moderator can press *92 again to initiate a reblast, which hangs up the lines in CLPG mode, and reblasts only the lines that are not yet in the conference. ●
Automatic. Triggers an unattended Auto Blast when the first moderator enters the conference. The system activates the Dial List and Blast Annunciator Browse buttons if you select Manual or Automatic.
For information on selecting a specific blast annunciator message, see the Dial List table entry. 1 of 6
Issue 1 July 2005
167
Scheduling a Conference
Table 44: Scheduler fields (continued) Option
Description
Billing Code Prompt
Select one of the following settings: ● ENABLED. To track billing codes for unattended and on-demand conferences. The system prompts the moderator to enter a billing code upon entering the conference. Moderators can press *91 to modify codes at any time during the conference, however, only the last code entered appears in various system reports. ●
Blast Annunciator
DISABLED. (Default) The system does not prompt a moderator to enter a billing code; however, moderators can press *91 to modify codes at any time during the conference.
To select an annunciator message for an automatic, unattended BlastDial: 1. Click Browse. 2. In the Annunciator Messages dialog, you can select one of the following options: - A message from the list and click Use Selected Message. - Use Default Message. To select a specific annunciator message with the BlastDial, use the default annunciator message (242 or 243) or use a customized annunciator message recorded for each conference. Tip: Tip:
You cannot change the default Blast Annunciator when using a Scheduler-only login.
Block Dialout
You can block or permit moderator ODO on a per conference basis. If Block Dialout is selected, the bridge does not initiate dialing when the moderator tries to dial out during the conference. The settings are: ● ON. A moderator cannot dial out during the conference using either DTMF commands or Auto Blast. ● OFF. (Default) A moderator can dial out during the conference.
Change Conf Opt
You can block or allow changes to flex conference options on a per conference basis. The settings are: ● ON. (Default) A leader can press 1 to start the conference or 2 to modify conference options before the conference starts. ● OFF. The system does not prompt the leader to press 1 to start the conference after the leader enters the Leader PIN. The system automatically proceeds to the next step. 2 of 6
168 Bridge Talk 4.0 User’s Guide
Overview of the Conference Scheduler
Table 44: Scheduler fields (continued) Option
Description
Conferee code
Add a code (up to 16 alphanumeric characters) that a caller must input to join the conference as a regular participant. If the bridge is set for Automatic Security Codes, this field is filled in automatically; however, you can change the code.
Conference ID
Add an optional conference number (up to 12 digits or extended ASCII characters). The conference ID appears in the Conference Detail Report that the system generates at the end of the conference.
Note:
Conference Name
Note: Using the Classic scheduler, you cannot enter IDs with more than 12 numbers. If conferences are scheduled with long IDs using the Advanced scheduler but viewed through the Classic scheduler, the IDs truncate to 12.
Enter a name for the conference up to 12 (alphanumeric or extended ASCII) characters.
Note:
Note: Using the Classic scheduler, you cannot enter IDs with more than 12 characters. If conferences are scheduled with long names using the Advanced scheduler but viewed through the Classic scheduler, the name truncates to 12. Tip:
Tip:
When scheduling attended conferences, avoid using the same name for conferences that may run concurrently. If several are identically named, Bridge Talk displays only one conference in the Conference > Startup List on the menu bar.
Conference Type
Select a one-time or series conference. For more information, see Defining one-time or on-going conferences on page 183.
Confirmation No.
Enter an optional confirmation number (up to 12 digits) to identify the conference. The confirmation number appears in various displays and system reports, including Conference Detail Records (CODRs). The confirmation number you specify must be unique. If you specify a confirmation number that another conference uses, Bridge Talk displays a warning message and requires you to change the number.
Note:
Note: If you do not specify a confirmation number, the system automatically assigns one for you. 3 of 6
Issue 1 July 2005
169
Scheduling a Conference
Table 44: Scheduler fields (continued) Option
Description
Dial List
Associate a dial list that you can use to dial out during the conference. If you do not want to use a dial list, leave this field blank. Note that the system allows entry of dial list names up to eight (alphanumeric or extended ASCII) characters. To assign a dial list to the conference: 1. Click on the Dial List button to view the dial lists stored on the system. 2. Select a dial list in the Dial List Navigator dialog. 3. Click Edit to modify the dial list or designate moderators for the conference. 4. Click Save. 5. To cancel or close the Dial List Navigator dialog, click Close or . Tip: Make sure to enter enough lines in the Maximum Lines field to cover the dial list.
Tip:
For more information about dial lists, see Chapter 5: Using Dial Lists and Dialing Out on page 87. Mode
Moderator code
Choose one of the following scheduling modes: ●
ATTENDED. An operator places callers into the conference and remains available to participants and moderators for the duration of the conference.
●
UNATTENDED. Callers dial into the bridge and enter a passcode to join the conference that is managed by a moderator.
●
ON DEMAND. Callers dial into the bridge and enter a passcode to join the conference on a first-come, first-served basis.
●
FLEX. Callers dial into the bridge and enter a passcode to join the reservationless conference, which is managed by a leader.
Add a code (up to 16 alphanumeric characters) that a caller can input to join the conference as a moderator. Tip: Tip:
The moderator code must be different from the conferee code.
If the system is set for Automatic Security Codes, this field is filled in automatically; however, you can change the code. 4 of 6
170 Bridge Talk 4.0 User’s Guide
Overview of the Conference Scheduler
Table 44: Scheduler fields (continued) Option
Description
Name and Telephone (Optional)
Enter contact information or other pertinent information for the conference, for example: ● Contact Name up to 40 (alphanumeric or extended ASCII) characters ● Telephone number up to 40 (numeric or extended ASCII) digits The system does not process the name and telephone entries. However, this information does appear in the Contact Name and Contact Telephone number fields in conference reports generated by a system administrator.
Name Record/ Playback (NRP) and Caller Detail
Use the NRP feature to schedule annunciator messages that prompt callers to record their names and other relevant information when dialing into an unattended or on-demand conference. Caller Detail. Schedule NRP for a conference to allow an operator to listen to a participant’s recorded information without accessing the line. To schedule a message: 1. Select one of the following NRP settings: - INDVL. The system plays a recording only to the individual. - CONF. The system plays a recording to the conference if initiated by the moderator or leader. - OPER. The system plays a recording to the operator. You can see and hear caller information without accessing the line during the conference. Bridge Talk activates a Caller Detail button, which displays in the Polling or Q&A dialog boxes. The Line Detail dialog displays Play and StopX buttons if the line is not accessed. - OFF. (Default) The system does not play any NRP recording. 2. Select OPER to activate the NRP Annunciator Browse button and click Browse to select a specific annunciator message for the scheduled conference. Otherwise, the system plays the default annunciator (Message 179). To view how the NRP options interact with other feature settings, see Table 47. Here are some important reminders: ● Operators can add caller information without accessing the line by right-clicking on the line and selecting Details. ● Bridge Talk supports non-English languages for participant count and annunciator messages. For more information, see the Meeting Exchange Administration and Maintenance Guide for the CS700/780 4.0 Conferencing Server or Meeting Exchange Administration and Maintenance Guide for the S6200, S6500, and S6800 Media Servers. 5 of 6
Issue 1 July 2005
171
Scheduling a Conference
Table 44: Scheduler fields (continued) Option
Description
Op Help Available
The system allows or blocks help requests on a per conference basis. The settings are: ● ON. (Default) When moderators or participants press *0 or 0, their lines appear in the Help Requests window. ● OFF. When moderators or participants press *0 or 0, the system plays a user-defined annunciator message, such as “Operator Assistance is not available.”
PIN List
If you select Conf PIN, enter a PIN list name that is stored on the bridge. Note that the system allows PIN list names up to 30 (alphanumeric or extended ASCII) characters.
PIN Mode
If selected, participants must enter a PIN as well as a passcode before joining the conference. Choose one of the following PIN list settings on systems that have the PIN code option installed: ● Sys PIN. To allow all PIN codes in the system-wide PIN code database. ● Conf PIN. To allow only the PIN codes in a specified PIN list. ● OFF. (Default) To omit a PIN code.
Note:
Note: Message 247 and 247a are the default PIN code messages for 3.1x or later systems.
PIN code information is included in various system reports. For more information, see Working with status information and reports on page 206. Security Passcode
Participants can be required to enter a security passcode before they can enter a conference. The leader adds the second passcode using DTMF commands prior to conference start. The settings are: ● ON. A leader can add a second security code. ● OFF. (Default) A leader cannot add a second security code.
Sign-In Name
The system displays the sign-in that you used. You cannot modify this field.
Status
The settings are: ● ENABLED. To schedule a conference. ● DISABLED. (Default) To retain the scheduling information without actually scheduling the conference. 6 of 6
172 Bridge Talk 4.0 User’s Guide
Overview of the Conference Scheduler
Scheduling an attended conference Attended is a type of conference in which an operator places callers into a conference and remains available to them for the duration of the conference.
To define settings for an attended conference: 1. Under Conference Information, select ATTENDED mode. 2. Specify the conference as a one-time or on-going (repeat) conference. For more information, see Defining one-time or on-going conferences on page 183. 3. Select the appropriate conference settings. For more information on conference options, see Table 44. 4. Skip over the unattended conference settings, such as Conferee Code, Moderator Code, Name Record/Playback, PIN Mode, and PIN list. 5. To select conference features, such as conference start and end times, see Defining conference features on page 186. 6. Click OK to save the reservation. If the Scheduler finds no errors, the reservation is booked and the Scheduler displays a confirmation number. If the Scheduler finds any errors, it displays an error message explaining the problem. You can then correct the problem and repeat this step.
Issue 1 July 2005
173
Scheduling a Conference
Scheduling an unattended conference Unattended is a type of conference that does not require an operator. Callers must enter a passcode before they can join the conference, which is chaired by a moderator.
To define settings for an unattended conference: 1. Under Conference Information, select UNATTENDED mode. 2. Specify the conference as a one-time or on-going (repeat) conference. For more information, see Defining one-time or on-going conferences on page 183. 3. Select the desired conference settings. For more information on conference options, see Table 44. 4. Enter unattended conference settings, such as Conferee Code, Moderator Code, Name Record/Playback, PIN Mode, and PIN list. 5. To select conference features, such as conference start and end times, Defining conference features on page 186. 6. Click OK to save the reservation. If the Scheduler finds no errors, the reservation is booked and the Scheduler displays a confirmation number. If the Scheduler finds any errors, it displays an error message explaining the problem. You can then correct the problem and repeat this step.
174 Bridge Talk 4.0 User’s Guide
Overview of the Conference Scheduler
Scheduling an on-demand conference On-demand is a type of unattended conference that can start and end at any time and uses a profile to keep track of all the selected conference features, such as Hang up or Name Record/ Playback. A profile is a non-reserved conference that is always available, on a first-come, first-served basis. Callers must enter a passcode before they can join the conference, which is chaired by a moderator.
Note:
Note: Your system administrator must set up the necessary port allocation to support on-demand conferences for your system.
To schedule an on-demand conference: 1. Under Conference Information, select ON DEMAND mode. Tip: Tip:
Set up a separate conference for each desired scheduling profile. 2. For Conference Type, specify a DAILY conference, which includes the Weekend option. For more information, see Defining one-time or on-going conferences on page 183.
Issue 1 July 2005
175
Scheduling a Conference
3. Select the appropriate conference settings listed in Table 45. Table 45: On-demand conference settings Option
Description
Billing Code Prompt
Select one of the following settings: ● ENABLED. To track billing codes for unattended and on-demand conferences. The system prompts the moderator to enter a billing code upon entering the conference. Moderators can press *91 to modify codes at any time during the conference, however, only the last code entered appears in various system reports. ●
Conferee Code and Moderator Code
DISABLED (Default). The system does not prompt a moderator to enter a billing code; however, moderators can press *91 to modify codes at any time during the conference.
Assign a participant code and a moderator code. Tip: Tip:
Give this information to the customer or end-user.
Conference Type
Select DAILY, which includes the Weekend option.
Confirmation No.
Enter an optional confirmation number (up to 12 digits) to identify the conference. The confirmation number appears in various displays and system reports, including Conference Detail Records (CODRs). The confirmation number you specify must be unique. If you specify a confirmation number that another conference uses, Bridge Talk displays a warning message and requires you to change the number. If you do not specify a number, the system automatically assigns one for you.
End Date
Leave blank.
End Time
Select 12:00 AM. Use this end time to activate the schedule from midnight to midnight.
Hang up
Select ON. The system will end the meeting when the last moderator hangs up.
Maximum Lines
Define the number of lines required, for example, 12.
Start Date
Enter 1 of 2
176 Bridge Talk 4.0 User’s Guide
Overview of the Conference Scheduler
Table 45: On-demand conference settings (continued) Option
Description
Start Time
Select 12:00 AM. Note that AM starts immediately after Midnight.
Note:
Weekend
Note: A 24/7 conference starts at 12:00 a.m. If you schedule a code duration for 60 minutes, participants can only enter the conference from 12:00 a.m. to 1:00 a.m. Therefore, set the Code Duration to either 0 (duration = off) or 1440 (1440 = 24 hours).
Select YES. 2 of 2
For more information, see: - Table 44, which lists conference settings like accounting codes and moderator or conferee codes. - Table 49, which describes conference features, such as start and end times and prompt sets. 4. Click OK to save the profile. Tip: Tip:
To enable customized greetings based on the number dialed for the conference; use dedicated telephone numbers and the Dialed Number Identification Service (DNIS).
Scheduling a flex conference Flex (flex flow) is a type of unattended, on-demand conference in which callers can join directly based on a predefined DNIS or DDI number. This reservationless conference uses a profile to keep track of all the selected conference features, such as Hang up or Name Record/ Playback. Note that Q&A and Polling are not supported in flex conferences. Once the system administrator has defined the settings in a profile, participants can join flex conferences on a first-come, first-served basis. However, there can be only one moderator (leader).
Issue 1 July 2005
177
Scheduling a Conference
The system automatically prompts callers dialing into the conference to press star (*) if they are a leader, and, if so, to enter a Leader PIN code. When the first caller enters a valid Leader PIN, the system defines the caller as a moderator or leader of the conference. After the leader joins the conference, the system only prompts for participant passcodes and registers all subsequent callers as participants. Leaders can change profile settings before a conference begins, and create, control, and end a conference call using DTMF telephone commands. For example, leaders can: ●
Specify a conference password. If scheduled previously, leaders can add another layer of security by specifying a optional passcode that participants must enter before they can join the conference. This password is valid only for the duration of the conference and is not stored on the system. Note: If music is turned on for the conference, participants who arrive early wait on standby. If the moderator specifies a passcode upon arrival, the waiting participants must enter the passcode before they are allowed into the conference. However, if music is turned off, participants who arrive before the moderator can enter the conference without the passcode.
Note:
●
Change conference options. When a participant enters a leader PIN code and assumes moderator status, the system immediately prompts the leader to press 1 to start the conference. However, the leader can press 2 to change several conference options before the conference starts. After changing options, the leader can press 1 to start the conference.
●
Use special star commands. Flex conferences require that leaders and participants use touchtone commands during the conference. A leader can create, control, and end a conference call using these star commands. Tip:
Tip:
If you select flex mode, moderators and participants can use star commands. For details, see Managing flex conferences using touchtone commands on page 222.
178 Bridge Talk 4.0 User’s Guide
Overview of the Conference Scheduler
Note:
Note: An administrator must first set up flex conference profiles with reserved lines on each bridge that you plan to use. For more information on configuring flex profiles on your system, see the Meeting Exchange Administration and Maintenance Guide for the CS700/780 4.0 Conferencing Server or Meeting Exchange Administration and Maintenance Guide for the S6200, S6500, and S6800 Media Servers.
To schedule a flex conference: 1. Under Conference Information, select FLEX mode. 2. For Conference Type, specify a DAILY conference, which includes the Weekend option. For more information, see Defining one-time or on-going conferences on page 183.
Issue 1 July 2005
179
Scheduling a Conference
3. Select the desired flex settings described in Table 46. Table 46: Flex conference settings Option
Description
Accounting Code
Similar to a Billing Code, leaders can enter accounting codes using DTMF commands or a Web-based interface. This field appears in the leaders’s CDR. The settings are: ● ON. The system prompts leaders to enter a code upon entering the conference. ● OFF. (Default) Leaders do not enter a code. Tip: Tip:
Leaders can enter up to 40 characters from a Web-based interface.
Block Dialout
You can block or allow moderator ODO on a per conference basis. If Block Dialout is selected, the bridge does not initiate dialing when the moderator tries to dial out during the conference. The settings are: ● ON. A moderator cannot dial out during the conference using either DTMF commands or Auto Blast. ● OFF (Default). A moderator can dial out during the conference.
Change Conf Opt
You can block or allow modification of flex conference options on a per conference basis. The settings are: ● ON. (Default) A leader can press 1 to start the conference or 2 to modify conference options before the conference starts. ● OFF. The system does not prompt the leader to press 1 to start the conference after the leader enters the Leader PIN. The system automatically proceeds to the next step.
Conference Type
Select DAILY, which includes the Weekend option.
End Date
Leave blank.
End Time
Select 12:00 AM. Use this end time to activate the schedule from midnight to midnight.
Hang up
Select ON. The system will end the meeting when the last moderator hangs up. 1 of 2
180 Bridge Talk 4.0 User’s Guide
Overview of the Conference Scheduler
Table 46: Flex conference settings (continued) Option
Description
Name Record/ Play (NRP)
Select INDVL.
Note:
Note: Do not select CONF or OPER as these settings do not apply.
PIN Mode
Select OFF.
Security
Select ON.
Note:
Note: A leader can record a secured conference digitally by pressing *2 to dial out to an external recording device, if enabled on the system.
Start Date
Leave blank.
Start Time
Select 12:00 AM. Note that AM starts immediately after Midnight.
Note:
Weekend
Note: A 24/7 conference starts at 12:00 a.m. If you schedule a code duration for 60 minutes, participants can only enter the conference from 12:00 a.m. to 1:00 a.m. Therefore, set the Code Duration to either 0 (duration = off) or 1440 (1440 = 24 hours).
Select YES. 2 of 2
For more information, see: - Table 44, which lists conference settings like accounting codes and moderator or conferee codes. - Table 49, which describes conference features, such as start and end times and prompt sets. 4. Click OK to save the profile. Tip: Tip:
Set up a separate conference for each desired scheduling profile.
Issue 1 July 2005
181
Scheduling a Conference
Note:
Note: To enable customized greetings based on the number dialed for the conference, use dedicated telephone numbers and the Dialed Number Identification Service (DNIS).
About Name Record/Playback Participants or moderators can press *8, for example, on their phones to hear a roster that includes the recorded names of all participants, at any time during the conference.
Note:
Note: Participants can stop the roll call at any time by pressing any key.
Table 47 describes how Name Record/Playback (NRP) options interact with other conference feature settings. Table 47: Name Record/Playback - option interaction Option
Entry/Exit Tones Off
Entry/Exit Tones On
Entry/Exit Messages On
Annunciator message
Press *8
INDVL
Silence
Plays tone
Plays “Someone has entered/left the conference.”
Plays default message
Plays roll call
CONF
Silence
Plays tone
Plays “Someone has entered/left the conference.”
Plays default message
Plays roll call to conference (if moderator)
OPER
Silence
Plays tone to operator
Plays “Someone has entered/left the conference.” to operator.
Plays default message or allows browse
Plays current participant count
OFF
Silence
Plays tone
Plays “Someone has entered/left the conference.”
None
Plays current participant count
The sections that follow describe the how to set up on-going conferences.
182 Bridge Talk 4.0 User’s Guide
Overview of the Conference Scheduler
Defining one-time or on-going conferences Use recurring options for scheduling conferences that occur once or as daily, weekly, or monthly conferences. Table 48 describes the procedures for scheduling one-time or on-going conferences. Table 48: Conference Scheduler date and time options Option
Description
DAILY (includes Weekend option)
Schedule a conference that occurs at the same time each day over a specified or indefinite time period. The system books a conference for the same time for each day in the date range that you specify. To schedule a daily conference: 1. Select DAILY for Conference Type. 2. Choose a Weekend option: - NO to schedule the conference only Monday through Friday (Default) - YES to schedule a conference seven days each week. 3. In the Start Date field, enter the date to schedule the first conference. 4. In the End Date field, enter the date to schedule the last conference. 5. Select the conference mode, for example, ATTENDED or UNATTENDED. For example, if you schedule a conference that occurs each day from October 3, 2003 until October 3, 2005 but not including weekends, the start date would look like this:
Tip: Tip:
ONE-TIME
For on-demand and flex conferences, select Weekend and then YES.
Schedule a conference that occurs only once. Enter the date in the Date field. (Default) 1 of 3
Issue 1 July 2005
183
Scheduling a Conference
Table 48: Conference Scheduler date and time options (continued) Option
Description
WEEKLY (includes Day of Week option)
Schedule a conference that occurs on the same day and time each week over a specified or indefinite time period in mm/dd/yy format. To set up a weekly conference: 1. Select WEEKLY for Conference Type. 2. Select the day of the week that you want to schedule a conference. 3. In the Start Date field, enter the date to schedule the first conference. 4. In the End Date field, enter the date to schedule the last conference. 5. Select the conference mode, for example, ATTENDED or UNATTENDED. For example, if you schedule a conference that occurs each Monday from October 3, 2003 until October 3, 2005, the conference type and date would look like this:
MONTHLY (includes Day of Week and Week of Month options)
Schedule a conference that occurs on the same week, day, and time each month over a specified or indefinite time period in mm/dd/yy format. To schedule a monthly conference: 1. Select MONTHLY for Conference Type. 2. Select the day of the week that you want. 3. Select the week that you want. 4. In the Start Date field, enter the date to schedule the first conference. 5. In the End Date field, enter the date to schedule the last conference. For example, if you schedule a conference that occurs on the first Friday of every month from October 3, 2003 until October 3, 2005, the start date would look like this:
2 of 3
184 Bridge Talk 4.0 User’s Guide
Overview of the Conference Scheduler
Table 48: Conference Scheduler date and time options (continued) Option
Description
Start Date
Enter the date that you want to start the conference in mm/dd/yy format. For example, if you schedule a conference that occurs each day from October 3, 2003 until October 3, 2005, the start date would look like this:
Tip: Tip:
End Date
If you leave the Start Date field blank, the system schedules the conference for the first day and time that meets your other scheduling criteria.
Enter the date that you want to end the conference in mm/dd/yy format. For example, if you schedule a conference that occurs each day from October 3, 2003 until October 3, 2005, the conference end date would look like this:
Tip: Tip:
If you want to schedule the conference for an indefinite period, leave the End Date field blank. The conference automatically schedules the conference to occur daily, weekly, or monthly for the next 12 months. 3 of 3
Issue 1 July 2005
185
Scheduling a Conference
Defining conference features Under Conference Features, choose from the conference settings listed in Table 49. Table 49: Conference features
Option
Procedure
Auto Extend Duration
Choose one of these options: ● Select ON to extend the conference beyond the end time if scheduled ports and security codes are available in the next 25 minutes and this feature is configured on the connecting bridge. (Default) Just before the conference is scheduled to end, the system plays a “Your conference will be extended 25 minutes.” message. ●
Select OFF to end the conference at the scheduled time.
Auto Extend Ports
Choose one of these options: ● Select ON to allow additional participants to enter a conference if ports are available for the duration of the conference and this feature is configured on the connecting bridge. (Default) ● Select OFF to prevent new participants from entering the conference.
Code Duration
After the conference starts, the number of minutes that the conferee and moderator codes remain valid. If set to 0, the PINs are always valid. (Default is 0.) You can set code duration to any value between 0 (duration = off) and 1440 (1440 = 24 hours) but less than the length of the conference.
Note:
Conference Viewer
Note: A 24/7 conference starts at 12:00 a.m. If you schedule a code duration for 60 minutes, participants can only enter the conference from 12:00 a.m. to 1:00 a.m. Therefore, set the Code Duration to either 0 (duration = off) or 1440 (1440 = 24 hours).
Adds a Conference Viewer flag, which appears in the CODR. 1 of 5
186 Bridge Talk 4.0 User’s Guide
Overview of the Conference Scheduler
Table 49: Conference features (continued)
Option
Procedure
End Time
Set the time that the conference ends. The settings are: ● AM. ● PM.
Note:
Note: If the end time is earlier than the start time, the system assumes the conference ends on the day after the conference begins.
Entry Tone/ Exit Tone
For Entry/Exit Tones, choose one of the following options for participants entering or exiting the conference: ● OFF. (Default) Omit tones or voice messages. ● System. Use the pre-configured default setting. ● Tone. Sound a tone. ● Message. Play a voice message. ● Tone & Message. Sound a tone and play a voice message.
Hang up (Moderator)
Select one of these options to end the conference: ● Choose ON to end the conference as soon as the moderator hangs up. ● Choose OFF to extend the conference after the moderator hangs up. (Default) If the conference has more than one moderator, this option disconnects all lines when the last moderator hangs up. However, moderators can press *98 to toggle the Hang up option on or off. For example, if a conference is scheduled with Hang up activated, a moderator can press *98, leave the conference, and the conference will continue. Tip: Tip:
Use Moderator hang up to ensure that all lines become immediately available for subsequent conferences and to avoid excessive charges to a moderator. 2 of 5
Issue 1 July 2005
187
Scheduling a Conference
Table 49: Conference features (continued)
Option
Procedure
Maximum Lines
Enter the number of lines that you want to reserve for the conference. The system does not let you schedule more lines than are available, unless overbooking is allowed on your system. (Default is 2 lines.) Tip: Tip:
Reserve a few extra lines for your conference to accommodate any dial-out or external conference recording operations. To check the number of reserved lines for any time period on any day, see Viewing or printing conference information on page 191. 3 of 5
188 Bridge Talk 4.0 User’s Guide
Overview of the Conference Scheduler
Table 49: Conference features (continued)
Option
Procedure
Music
Add music to a conference, which mutes all lines. Select one of these options: ● OFF. (Default) The system does not play music before the conference starts. For flex conferences, the system places participants into the conference without the leader present. ● Choose the following music channels, if configured on the system: - M1 (Analog or Digital) - M2 (Digital) - M3 (Digital) - M4 (Digital) Note the following: ● For attended conferences, the operator manually turns off the music. ● For unattended and on-demand conferences, the system automatically turns off the music when the first moderator joins the conference. ● For flex conferences, the system automatically turns off the music when the leader joins the conference. Tip: Tip:
If Automatic Security Code Generation is turned off on the bridge, be sure to add a moderator code, which signals the bridge to stop playing music once the first moderator enters an unattended conference.
For more information on selecting a music channel, see Providing music for a conference on page 63. Start Time
Set the time that the conference begins. The settings are: ● AM. ● PM. The time you specify is the local time of the bridge. Remember to adjust the time accordingly if you are calling from a different time zone. 4 of 5
Issue 1 July 2005
189
Scheduling a Conference
Table 49: Conference features (continued)
Option
Procedure
Prompt Set
Specifies a prompt set for all conference-wide annunciator messages. The system plays all public conference messages in this language. (Default is English) Bridge Talk can list up to 20 prompt sets if configured on the system. The system uses the default language for non-scheduled (ad hoc) conferences.
Note:
Note: A Bridge Talk administrator can set up the prompt set selection list from the bridge.properties file. For more information, see Overview of the bridge.properties file on page 256.
You can view the selected prompt set for the conference from the Conference Details dialog. Security
In a secured conference a moderator can prevent outsiders from listening to or joining the conference. Specifically, operators cannot enter, record, scan, or listen to the conference. The moderator hears a tone or voice message to indicate that the conference is secured or unsecured. Choose one of these options: ● Select ON to let the moderator secure the conference. ● Select OFF to make security unavailable for the conference. (Default) For more information, see Securing a conference on page 56. 5 of 5
190 Bridge Talk 4.0 User’s Guide
Viewing or printing conference information
Viewing or printing conference information Use the Conference Scheduler to view or print conference schedules and lines that are available for use. You can use the Conference Scheduler to determine the number of lines that have been reserved as well as lines that are available for use for any specified date within the next year. To view or print conference schedules: 1. In the Conference Scheduler, choose one of the following: 2. In the Date dialog, enter the date for which you want to check available lines. Option
Click
Procedure
View schedule
Display the total number of reserved, available, and on-demand lines for a specific date. See the next section, Using the View Schedule option.
View expanded schedule
Display the total number of reserved, available, and on-demand lines including the percentage of line use for a specific date. For more information, see Using the View Expanded Schedule option on page 192.
For example, enter 6/30 for June 30, 2005 as shown.
Using the View Schedule option The View Schedule option displays the total line and on-demand line availability including the number of time intervals and reserved lines for 24 hours of a specified date. The number and length of the intervals depend on the conferences that have been scheduled for that date.
Note:
Note: The system subtracts Flexible Digital Auxiliary Port Interface (FDAPI) lines from the total number of available lines. For example, if there are 13 FDAPI ports, which cannot be scheduled, the total number of available lines is 1139 on an 1152-port bridge (1152 - 13 = 1139).
Issue 1 July 2005
191
Scheduling a Conference
In this example, the View Schedule window displays a total of 376 available lines, of which 75 on-demand lines are available.
Using the View Expanded Schedule option The View Expanded Schedule option displays the total line availability including on-demand lines. You can view the time intervals and reserved lines for 24 hours of a specified date including the number of available lines for each interval as shown.
192 Bridge Talk 4.0 User’s Guide
Viewing or modifying scheduled conferences
Viewing or modifying scheduled conferences You can use the Conference Scheduler to view or modify conference reservations. You can click Next or Prev to loop around from the first found record to the last record and back to the first again. You can change the settings for a conference reservation that you scheduled (or a conference that someone else scheduled). However, you may need to modify conference information while the conference currently taking place or in progress. To modify a conference reservation: 1. In the Conference Scheduler, choose one of the following options. Option
Click
Procedure
Modify conference
Modify a prescheduled conference reservation.
Modify-in-progress
Change the settings for any scheduled conference that is currently running. While an unattended conference is in progress, you can change only the End Time, Code Duration, and Maximum Lines.
2. In the Modify Type dialog (for prescheduled conferences only), select Change Conference and click OK as shown.
Issue 1 July 2005
193
Scheduling a Conference
3. In the Conference Search dialog, search for an existing conference using one of the following options. Search Criteria
Enter
Conferee/ Moderator code
A passcode. For example, if you want to search for a conference that has a conferee code of 1357, enter that code in the Conferee/Moderator Code box and click OK.
Note:
Note: When searching for flex conferences, use the conferee code rather than the leader PIN.
Conference Name
The conference name.
Conference Type
ALL, DAILY, ONE-TIME, WEEKLY, or MONTHLY.
Confirmation No.
The confirmation number.
Conference ID
The conference ID.
Date (mm/dd)
The date.
Mode
ALL, UNATTENDED, ON DEMAND, ATTENDED, or FLEX.
Sign-in Name
The sign-in name.
Tip: Tip:
Make sure to narrow your conference search by including several criteria such as Conference Name and Date. 4. Click OK. The Conference Scheduler displays a conference that meets the search criteria you entered. If more than one conference meets your search criteria, the Conference Scheduler indicates the number of matches in the top line. 5. Choose one of the options listed in Table 50. Table 50: Search results options Option
Procedure
Save
Saves your changes to the current conference record. The Scheduler displays a confirmation number.
Previous
Displays the previous conference. 1 of 2
194 Bridge Talk 4.0 User’s Guide
Viewing or modifying scheduled conferences
Table 50: Search results options (continued) Option
Procedure
Next
Displays the next conference that meets your search criteria if the displayed conference is not the one you want to modify.
Cancel
Starts a new search. 2 of 2
Printing scheduled conference information The Conference Scheduler lets you print information about scheduled conferences on the default print device for your workstation. To print the complete conference reservation for a specific conference: 1. From the Conference Scheduler menu bar, choose View > Print Options. The Conference Scheduler displays the Print Options dialog.
2. Choose one of the following options described in Table 51. Table 51: Printing scheduled conferences Click
Procedure
Print Schedule
To print the total number of lines that have been reserved for a specific date or a range of dates: 1. Click Print Schedule and click OK. 2. In the Date Range dialog, enter date criteria. 3. Click Print to print the report. 4. In the Print dialog, click OK. 1 of 2
Issue 1 July 2005
195
Scheduling a Conference
Table 51: Printing scheduled conferences (continued) Click
Procedure
Print Expanded Schedule
To print both the total number of lines that have been reserved and the number of available lines for a specific date or a range of dates: 1. Select Print Expanded Schedule and click OK. 2. In the Date Range dialog, enter date criteria. 3. Click Print to print the report. 4. In the Print dialog, click OK.
Print Conference
To print the complete conference reservation for a specific conference to the default print device for your workstation: 1. Choose Print Conference and click OK. 2. In the Conference Search dialog, enter search criteria to find the conference. If the Conference Scheduler finds one or more conferences that meet your criteria, the Scheduler displays a confirmation dialog. 3. In the confirmation dialog, click one of the following: - Yes to view each matching conference in sequential order before printing. The Scheduler displays each conference that matches your criteria. - No to print all matching conferences automatically. - Cancel to view (but not print) any conferences. Tip: Tip:
Print Daily Conferences
Click Next to go to the next matching conference without printing the currently displayed conference.
To print a list of conferences scheduled for a specific date or a range of dates to the default print device for your workstation: 1. Select Print Daily Conferences and click OK. 2. In the Date Range dialog, enter date criteria, and click OK. 3. In the Print Daily Conferences dialog, click Yes if you want to sort the conferences by start time. 4. Click Print to print the report. 5. In the Print dialog, click OK. 2 of 2
196 Bridge Talk 4.0 User’s Guide
Accessing the Scheduler directly
Accessing the Scheduler directly If scheduling is a primary activity for some users, Bridge Talk administrators can set up sign-ins that launch only the scheduler and prevent access to other Bridge Talk functions. With Scheduler sign-ins, users can create, modify, and delete attended, unattended, on-demand, and flex reservations created by their sign-ins. By contrast, the Advanced scheduler can launch independently with any sign-in. See your system administrator about setting up a scheduler sign-in. After you log in, the default scheduler displays. Depending on how Bridge Talk is configured, a Scheduler Selection dialog may appear as shown.
Note:
Note: Administrators can configure scheduler options from the bridge.properties file. To set the default scheduler, see table entry schedulerApp on page 259. To display or hide the Scheduler Selection dialog, see table entry schedulerNoPrompt on page 259. Tip:
Tip:
There are several conference recording options that are available only with the Advanced Scheduler. Therefore, Avaya recommends that you select one scheduler over another rather than swapping back and forth.
For information on choosing a scheduler, see Overview of the Conference Scheduler on page 164.
Issue 1 July 2005
197
Scheduling a Conference
198 Bridge Talk 4.0 User’s Guide
Chapter 12: Performing Post-Conference Tasks This chapter discusses the following topics: ●
Overview of post-conference tasks
●
Working with status information and reports
Issue 1 July 2005
199
Performing Post-Conference Tasks
Overview of post-conference tasks Clearing all system information and conference features prevents over billing and makes cleared lines available. After a conference ends, you can free up system resources by: ●
Hanging up lines
●
Hanging up a conference
●
Clearing conference information
●
Deleting expired reservations
Hanging up lines You can hang up one or more specified lines. To hang up one or more lines: 1. Click Line on the main tool bar. 2. In the Line submenu tool bar, click Hangup. 3. Enter the line number in the text box and press Enter. To hang up sequential lines: 1. Click Line on the main tool bar. 2. In the Line submenu tool bar, click Hangup. 3. Enter a range of line numbers, for example, 3-12 in the text box. 4. Press Enter. To hang up non-sequential lines: 1. Click Line on the main tool bar. 2. In the Line submenu tool bar, click Hangup. 3. Enter line numbers separated by a single space, such as, 6 8 1 5. 4. Press Enter.
200 Bridge Talk 4.0 User’s Guide
Overview of post-conference tasks
Hanging up a conference Use Hang up when you want to simultaneously disconnect all lines that are connected to a conference. Choose one of the following methods to hang up a conference: ●
From the menu bar, choose Conference > Hang up. -Or-
●
From the main tool bar: a. Click Conference. b. From the Conference submenu tool bar, click Hang up. c. In the prompt area, enter the number of the conference that you want to hang up. d. Click Yes in the Confirmation dialog to hang up the conference.
Clearing conference information You can prepare a conference room for the next conference by: ●
Clearing call counts
●
Clearing disconnected lines
●
Clearing minutes-per-conference statistics
●
Clearing total time statistics
Clearing call counts To clear the call counts to reset the accumulated calls for each line to zero: 1. Click Purge from the main toolbar. 2. From the Purge submenu tool bar, click Call Counts.
Issue 1 July 2005
201
Performing Post-Conference Tasks
Clearing disconnected lines Disconnect mode is essential for freeing up disconnecting lines immediately for new calls. This mode is primarily used for attended conferencing where operators continually monitor bridge activity. By contrast, disconnect is rarely used for unattended conferencing, where there are no operators to purge the disconnects. To clear disconnected lines: 1. Click Purge from the main toolbar. 2. From the Purge submenu tool bar, click Disconnect. 3. In the Purge Disconnects prompt area, enter a conference number (or type a to purge all disconnected lines in all conferences). 4. Press Enter. Tip: Tip:
Use this procedure only on systems with Disconnect enabled.
Clearing minutes-per-conference statistics Clearing the minutes-per-conference statistics resets the total minutes for a conference to zero. Since the system starts tracking conference minutes as soon as the first person joins the conference, the tracked minutes may not match the actual conference minutes and may lead to overbilling. Tip: Tip:
To prevent overbilling, run Purge Mins/conf when the moderator officially begins the conference. The system resets the conference minutes to zero, and the Conference Report and CDRs reflect the actual conference minutes.
To reset the total minutes for a conference to zero: 1. Click Purge from the main toolbar. 2. From the Purge submenu tool bar, click Minutes per Conference. 3. In the prompt area, enter the number of one or more conferences. 4. Press Enter.
Note:
Note: You do not need to run this procedure for completed conferences if your system uses Automatic Conference Clear or if you run Conference Clear_all for completed conferences.
202 Bridge Talk 4.0 User’s Guide
Overview of post-conference tasks
Clearing total time statistics You can clear the total time statistics to reset all line times on the system to zero. To reset the total time statistics for a conference to zero: 1. Click Purge from the main tool bar. 2. From the Purge submenu tool bar, click Total times.
Clearing all features from a conference You can clear all of the following features from a conference that has ended using the Clear All command: Global ID Cross Reference Billing Code Accounting Code Name
Aux 1 Aux 2 Conf ID Note Entry/Exit tone
Gain Lecture Lock Security Music
Record/Playback Prompt Set (resets to system default) Time information Links
Choose one of the following methods to clear all features from a conference: ●
From the Conference Room window, click the Clear All button. -Or-
●
From the Conference Navigator, select a conference. Right-click and choose Details from the submenu. Tip: To clear the features from more than one conference, enter the conference numbers in the prompt area.
Tip:
Additional information about clearing all features Here are some important reminders: ●
If your system uses Automatic Conference Clear, you do not need to clear the features manually. The bridge automatically clears the conference room when all participants disconnect. Check with your system administrator to determine if your system uses Automatic Conference Clear.
●
If you attempt to use Clear All for a conference that has not ended (that is, a conference in which one or more of the participants are still connected), Bridge Talk displays an error message.
Issue 1 July 2005
203
Performing Post-Conference Tasks
Deleting expired reservations Periodically, you may want to delete past conference records but preserve recently expired conference scheduling records that fall within a specified time interval. To delete expired conferences from the database: 1. From the Conference Scheduler, click Purge
.
2. In the Purge Expired Conferences dialog, enter a number (in weeks).
For example: - To delete scheduling records covering the past three months and retain only the previous two weeks, enter 2. - To delete the scheduling records of all conferences previous to the time period you specified in step 2, select Purge All and click OK. The bridge deletes all of the records and returns you to the Conference Scheduler. - To delete the scheduling records individually that are previous to the time period you specified in step 2, select Purge with Verify and click OK. - To purge all reservations that have expired as of midnight of the previous day, enter zero (0). Tip: Tip:
For optimal performance, run purge at small, frequent intervals on a dedicated PC when the bridge is not active. 3. Click OK.
Note:
Note: A Bridge Talk or system administrator can increase the default schapi_timer_C value in the bridge.properties file to prevent Bridge Talk from timing out when searching (or purging) a large number of schedule records. Note that this setting is for use with the on board Scheduler only. For instructions on modifying this parameter, see the schapi_timer_C table entry in Table 69. The system prompts you to purge the conferences with or without verification.
204 Bridge Talk 4.0 User’s Guide
Overview of post-conference tasks
4. Choose a purge option as described in the following table. Click
Option
Description
Purge All
Without verification
To delete all conference scheduling records previous to the time period you specified: 1. Select Purge All. 2. Click OK. The system deletes all of the records and returns you to the Conference Scheduler.
Purge with Verify
With verification
To delete conference scheduling records previous to the time period you specified individually: 1. Select Purge with Verify. 2. Click OK. 3. Bridge Talk displays the first scheduling record. 4. Choose one of the following: - Click Delete to delete the scheduling record. The system deletes the record, and Bridge Talk displays the next record. - Click Next to display the next record. - Click Cancel to return to the Conference Scheduler.
If you selected Purge with Verify, Bridge Talk displays the first scheduling record of a conference previous to the time period you specified as shown.
Issue 1 July 2005
205
Performing Post-Conference Tasks
5. Choose one of the following: - To delete the scheduling record, click Delete. The bridge deletes the record, and Bridge Talk displays the next record that meets your criteria. - To display (not delete) the next record that meets your criteria, click Next. - To return to the Conference Scheduler, click Cancel.
Working with status information and reports This section includes instructions on: ●
Types of reports
●
Displaying status information
●
Printing or viewing a conference status report
Types of reports Bridge Talk generates the following reports listed in Table 52. Table 52: Report types Report
Description
ACS
Shows what lines are set as Automatic Conference Select (ACS).
Answer
Displays the lines that are set to Answer or No Answer.
Call Counts
Shows the number of calls dialed on each line.
Note:
Line Connect Times
Note: The bridge records the total number of calls per line. The number is reset when you purge call counts (or when an administrator reboots or restarts bridge).
Displays the number of minutes each line was active.
Note:
Note: Each time a new caller uses a line, the bridge resets the line connect time to zero (0), and restarts the count. 1 of 2
206 Bridge Talk 4.0 User’s Guide
Working with status information and reports
Table 52: Report types (continued) Report
Description
Conference Minutes
Lists the total number of minutes for an active conference.
Operator Status
Displays information on operators; specifically which operators are logged in, what conferences they are in, and whether their talk path is on or off.
Total Line Times
Shows the accumulated minutes total for each line as well as the system time total.
Note:
Note: The bridge increments this value for every minute that a line is in use. The number is reset when you purge total line times (or when an administrator reboots or restarts bridge).
Conference Status
Lists the participant lines as well as enabled and disabled features selected for the conference. In addition, this report includes Global Conference IDs, Billing codes, Auxiliary fields, and Cross-reference IDs.
Conference Activity
Displays enabled and disabled features selected for the conference. In addition, this report lists Global Conference IDs, Billing codes, Auxiliary fields, Cross-reference IDs, and all participants who were in the conference including their start and end times.
Past Conference
Includes Conference Detail Record (CODR) information for non-current conferences. See Printing past conference reports on page 209. 2 of 2
Note: Bridge Talk records the time that you print the report on your PC (not the time that the conference takes place on a remote bridge).
Note:
System administrators can provide the following reports directly from the bridge: ●
Call Detail Record (CDR). Contains information about a particular phone line, which is generated and stored on the bridge after a line disconnects.
●
Conference Detail Record (CODR). Provides conference statistics that are generated and stored on the bridge when a conference ends.
For more information on CDRs or CODRs, see the Meeting Exchange Administration and Maintenance Guide for the CS700/780 4.0 Conferencing Server or Meeting Exchange Administration and Maintenance Guide for the S6200, S6500, and S6800 Media Servers. For directions on viewing or printing Bridge Talk reports, see the Reports table entry in Table 60.
Issue 1 July 2005
207
Performing Post-Conference Tasks
Displaying status information Click Display from the main tool bar and then choose one of the options described in Table 53. Table 53: Display submenu tool bar Option
Click
Description
ACS
Lists lines that are set as Automatic Conference Select (ACS), which automatically places a caller directly into a conference without operator intervention or security codes.
ansWer
Sets individual lines to Answer or No Answer. (When No Answer is enabled, the system ignores incoming calls.)
Call counts
Shows the number of calls dialed on each line.
Line connect times
Records the number of minutes each line was active.
Mins/conf
Tabulates the number of minutes for every person in an active conference. For example, if a conference includes ten participants for 20 minutes each, the Minutes per Conference total is 10 x 20 or 200.
Op stat
Displays information on operators, specifically which operators are logged in, what conferences they are in, and whether their talk path is on or off.
Total line times
Shows the accumulated minutes for each line as well as the system time total.
208 Bridge Talk 4.0 User’s Guide
Working with status information and reports
Printing or viewing a conference status report To print or view a conference status report: 1. Choose View > Reports from the menu bar. 2. Select Conference Status. Bridge Talk opens the Conference Status Report dialog. 3. Enter the conference number for which you want to print a report and click View. 4. Click Print to print the report.
Printing past conference reports Similar in content to Conference Activity reports, Past Conference Reports display data for non-current conferences. You can search for past conferences by entering the date. Note that Bridge Talk truncates the Conference Name and Conference ID to 12 characters for conferences booked with the Classic scheduler. To search for past conferences: 1. Choose View > Reports from the menu bar. 2. Select Past Conferences. 3. In the Past Conference Reports dialog, select a conference date, and click OK.
Issue 1 July 2005
209
Performing Post-Conference Tasks
4. Browse the list of conferences scheduled on the selected date.
The system lists conferences chronologically by disconnect time. 5. Select one date at a time from the list and click View.
Note:
Note: This process make take several minutes. 6. Click Print to print the report. 7. Click OK in the Print dialog. 8. Click Close and Cancel to close the Past Conferences Reports dialog.
210 Bridge Talk 4.0 User’s Guide
Chapter 13: Using Automatic Conference Select This chapter discusses the following topics: ●
Setting the system to handle calls automatically
●
Placing callers automatically in a specified conference
●
Setting lines to not answer incoming calls
●
Setting the system to not answer incoming calls
Issue 1 July 2005
211
Using Automatic Conference Select
Setting the system to handle calls automatically You can set the system to do any of the following options automatically: ●
Placing callers automatically in a specified conference
●
Setting lines to not answer incoming calls
●
Setting the system to not answer incoming calls
Placing callers automatically in a specified conference You can use the Automatic Conference Select (ACS) to set certain lines to place callers in a specific conference automatically. To place callers in a specified conference: 1. From the main toolbar, click Set. 2. From the Set submenu toolbar, click Acs. 3. In the prompt area, enter a conference number followed by a space, and a range of lines that you want to place. 4. Press Enter.
Setting lines to not answer incoming calls By default the system answers all incoming calls. However, you can change specific lines to No Answer if you want to reserve certain lines for dialing out. All incoming calls on these lines receive a “ring-no-answer”. To specify that specific lines ignore incoming calls: 1. From the main toolbar, click Set. 2. From the Set submenu toolbar, click Answer. Tip: Tip:
If you do not know the answer status of a line, use Display Answer before running Set Answer. 3. To change the answer state of one or more lines, enter a line number or a range of line numbers, and press Enter.
212 Bridge Talk 4.0 User’s Guide
Setting the system to not answer incoming calls Use the Set Nighttime command to prevent the system from answering any calls. This command places all channels in No Answer mode and prevents access to operator menus and commands. Using this command does not affect active conferences, but does prevent operators from viewing and assisting participants in those conferences. When the system is in no-answer mode, incoming callers receive the ring-no-answer (RNA) signal. Choose one of the following methods to set a system to Nighttime mode: ●
Set the system to no-answer mode by choosing File > Night Time from the menu bar. -Or-
●
From the main toolbar: a. Click Set. b. From the Set submenu toolbar, click Nighttime.
Additional information on ACS The ACS status remains in effect until one of the following occurs: ●
You or another operator changes the ACS status.
●
The system administrator changes any setting for any channel and saves the changes.
●
The system administrator reinitializes or shuts down the conferencing server or resets the power on the conferencing server. Tip:
Tip:
Use No Answer carefully because callers receive a ring-no-answer on telephone systems lacking a hunt group setup, which uses the next available line. Check with your system administrator to determine whether your telephone system hunts beyond a ring-no-answer (RNA) signal.
Issue 1 July 2005
213
Using Automatic Conference Select
214 Bridge Talk 4.0 User’s Guide
Appendix A: Moderator and Participant Touchtone Commands This appendix lists Dual Tone Multifrequency Dialing (DTMF) commands that moderators and participants can press on a telephone keypad to manage a conference. Participants can use a subset of these commands. This appendix includes instructions on: ●
Managing Avaya conferences using touchtone commands
●
Managing flex conferences using touchtone commands
! Important:
Important: Some conferencing servers may be set up to ignore touchtone star (*) commands. Check with your system administrator to see if your particular system supports star commands. Some system administrators, with root access to conferencing servers, can modify the default touchtone command settings. If your system administrator does not have root access, contact Avaya Customer Support personnel for assistance.
If no operators are available during unattended conferences, a system administrator can set up a help line that callers can dial out to for assistance. An assistant will be on call to answer questions during the conference. However, the system administrator must pre-configure the unattended help line prior to use. For more information, see the Meeting Exchange Administration and Maintenance Guide for the CS700/780 4.0 Conferencing Server or Meeting Exchange Administration and Maintenance Guide for the S6200, S6500, and S6800 Media Servers.
Issue 1 July 2005
215
Moderator and Participant Touchtone Commands
Managing Avaya conferences using touchtone commands Moderators and participants can enter touchtone star commands from a telephone keypad (Figure 9) during a conference, for example, to request help from an operator or hear a roll call. You can toggle these commands on and off. Figure 9: Types of keypads
1
ABC 2
DEF 3
GHI 4
JKL 5
MNO 6
PQR S
TUV 8
XYZ 9
*
0
#
1
2
Figure notes: 1. Hard telephone keypad (Available for use with all bridge versions) 2. Soft telephone keypad (online IP only)
Table 54 lists the following default in-conference keypad commands for moderators. To browse a list of touchtone commands for participants, see Table 55. Table 54: Default Avaya touchtone commands for moderators Press
*
0
To
Feature
Description
Request Help
Help
Places the moderator in the Help Requests queue.
or 0 1 of 5
216 Bridge Talk 4.0 User’s Guide
Managing Avaya conferences using touchtone commands
Table 54: Default Avaya touchtone commands for moderators (continued) Press
*
To
Feature
Description
1
Dial out by accessing an open line
Moderator Dial Out
*
2
Return both moderator and caller to the conference
While dialing out, the system temporarily removes the moderator from the conference. Available only after the moderator presses *1 to access a line and dial out. Your administrator must configure dialout commands for your system.
*
3
Return moderator to the conference and hang up the called party
Note:
Note: Moderators can dial out from a secured conference if enabled on the system. 2 of 5
Issue 1 July 2005
217
Moderator and Participant Touchtone Commands
Table 54: Default Avaya touchtone commands for moderators (continued) Press
*
2
To
Feature
Description
Start or stop an unattended conference recording
Unattended Digital Record/ Playback
The moderator can record an unattended conference digitally by pressing *2 (or from a Web-based application). If the system is configured to create filenames automatically, the system generates an 8-digit conference recording filename. When the moderator presses *94, the system replays the filename number and, subsequently, lists the number in the CODR.
External Digital Record/ Playback
Note:
Note: If a moderator records several segments of a conference, the system only saves the last named segment. Tip:
Tip:
The moderator can record the conference digitally by pressing *2 to dial out to an external recording device, if enabled on the system. However, the files are not stored on the system so the moderator cannot access or playback these recordings from Bridge Talk.
*
3
*
4
Start or stop a playback of an unattended conference
Unattended Digital Record/ Playback
Any moderator can start or stop the unattended playback.
Equalize voice levels on all conference lines
Gain
Increases the volume on the lines.
3 of 5
218 Bridge Talk 4.0 User’s Guide
Managing Avaya conferences using touchtone commands
Table 54: Default Avaya touchtone commands for moderators (continued) Press
To
Feature
Description
*
5
Toggle lecture on or off
Lecture
The system plays a tone and then places all participant lines (except moderators) in listen-only mode.
*
Toggle self mute on or off
Mute
6
Mutes or unmutes the line (if moderator self-mute is configured on the bridge).
*
7
Toggle conference security on or off
Secure
A moderator can prevent anyone from listening to or joining the conference; however, the moderator can record a secured conference. Moderators hear a tone or voice message indicating that the conference is secured or unsecured. You can activate security only if this feature is enabled and scheduled on the system. Operators cannot enter, record, scan, or listen to a secured conference.
*
8
Play a roster of participant names during a conference
Roster
The system temporarily removes the requester from the conference and plays the names of the participants.
Any single key
#
#
*
9
1
*
9
2
Stop playing the roster
Ends the roster playback.
End the conference
Conference hang up
A moderator can press ## to end the conference immediately.
Track billing codes for unattended or on-demand conferences
Billing code prompt
Prompts moderators to enter a billing code. Moderators can modify codes during the conference but only the last code entered appears in the Billing Code field of the Conference Detail Record (CODR). See the Billing Code Prompt table entry in Table 44.
Trigger an unattended, automatic BlastDial or reblast (if configured on the connecting bridge)
BlastDial
See the Auto Blast table entry in Table 44.
4 of 5
Issue 1 July 2005
219
Moderator and Participant Touchtone Commands
Table 54: Default Avaya touchtone commands for moderators (continued) Press
*
9
3
To
Feature
Description
Start or join a subconference
Unattended Subconference
After pressing *93 from a telephone keypad, a moderator can: ● Press a subconference number from 1 to 9, for example, *93, 7.
0
Note: If the moderator presses the current subconference number, the system ignores the command.
Note:
* #
*
9
4
*
9
8
Press 0 to return to the main conference. ● Press * to escape. ● Press # to play a warning message into all subconferences that participants will be rejoining the main conference shortly. After a few moments, the system transfers all lines back to the main conference. For more information, see About subconferences on page 149. ●
Replay a conference recording file number
Unattended Digital Record/ Playback
When a moderator presses *94, the system replays the 8-digit file number of the conference recording.
Extend or end the conference
Moderator hang up
The moderator can end the conference is one of two ways: ● Choose ON to extend the conference after the moderator hangs up. ● Choose OFF to end the conference when the moderator hangs up. 5 of 5
220 Bridge Talk 4.0 User’s Guide
Managing Avaya conferences using touchtone commands
Table 55 lists the following default in-conference participant keypad commands. Table 55: Default Avaya touchtone commands for participants Press
*
0
To
Feature
Description
Request Help
Help
Places the participant in the Help Requests queue.
Start or stop a playback of an unattended conference
Unattended Digital Record/ Playback
Any participant can start or stop the unattended playback.
Equalize voice levels on all conference lines
Gain
Increases the volume on the line.
Toggle self mute on or off
Mute
Mutes or unmutes the line.
or 0
*
3
*
4
*
6
Note: Participants cannot unmute their own lines if muted by an operator or by lecture mode.
Note:
*
Play a roster of participant names during a conference
8
Any single key
*
9
3 0
Roster
Stop playing the roster Start or join a subconference
The system temporarily removes the requester from the conference and plays the names of the participants. Ends the roster playback.
Unattended Subconference
After pressing *93 from a telephone keypad, a participant can: ● Press a subconference number from 1 to 9, for example, *93, 7. Note: If the caller presses the current subconference number, the system ignores the command.
Note:
*
Press 0 to return to the main conference. ● Press * to escape. For more information, see About subconferences on page 149. ●
Issue 1 July 2005
221
Moderator and Participant Touchtone Commands
Managing flex conferences using touchtone commands Flex (flex flow) is a reservation-less conference that uses a profile, instead of a scheduled reservation, to keep track of all selected conference features like roll call or Moderator Hang up.
Modifying flex conference settings After a participant enters a leader PIN code and assumes leader (moderator) status, one of the following scenarios occurs: ●
If Change Conf Opt is scheduled for a conference, the system immediately prompts the leader to press 1 to start the conference. However, the leader can press 2 to change several conference options before the conference starts. After changing options, the leader can press 1 to start the conference.
●
If Change Conf Opt is not scheduled for a conference, the system places the leader directly into the conference after playing a “Your conference call will now begin.” message.
Table 56 describes the default touchtone commands used to modify conference settings. Table 56: Default flex touchtone commands to modify conference settings Press 1
Feature
Description
Conference Start
Start the conference. After pressing 1, the leader can select from the following options: ● Press star (*) to omit an additional conference passcode requirement.
*
If the leader presses *, the system places the leader into the conference and plays an “A conference passcode will not be required for this conference.” message. ●
A leader who does not press star (*) can enter an optional participant passcode (from 4 to 9 digits) followed by the pound sign (#). The system plays the following messages: “Please enter the conference passcode followed by the pound sign.” message to participants dialing in.
(Continued) 1 of 2
222 Bridge Talk 4.0 User’s Guide
Managing flex conferences using touchtone commands
Table 56: Default flex touchtone commands to modify conference settings (continued) Press
Feature
Description
Conference Start
If participants enter the wrong code, the system plays an “I'm sorry, the entry is invalid. Please re-enter your passcode followed by the pound sign.” message. “Your conference passcode is . To change this entry, press star now.” message. This message confirms your passcode. If no keys are pressed, the system places the leader into the conference. Adding a conference passcode affects only the current conference but does carry over to future conferences.
(Continued)
Edit options
Change conference options.
1
Change Leader PIN
Allow the moderator to change one Leader PIN for the conference. This passcode is stored in the conference record.
2
Entry/Exit announcements
Prompt participants to state their names upon entering the conference. ● Choose 1 to allow participants to hear a roll call. ● Choose 2 to disable the roll call feature.
Music
Toggle music on or off. The conference can start in one of two ways: ● Turn music off to allow the conference to begin when the first caller enters the conference. ● Turn music on to play music into the conference until the leader arrives.
Auto Continuation (Moderator Hang up)
Toggle auto continuation on or off. The conference can end in one of two ways: ● Turn ON to extend the conference after the leader hangs up. ● Turn OFF to end the conference when the leader hangs up.
Options menu
Play a list of the available default modify conference commands.
Return to previous menu
Cancel current menu option.
2
3
4
9
*
2 of 2
Note:
Note: Changing the default conference options affect both current and future conferences scheduled for the profile (except for music, which only affects future conferences).
Issue 1 July 2005
223
Moderator and Participant Touchtone Commands
Managing conferences using flex touchtone commands Flex conferences require that moderators and participants use non-default keypad commands during the conference. You can toggle these commands on and off. Table 57 lists the default flex touchtone commands for leaders. Tip: To browse a list of flex touchtone commands for participants, see Table 58.
Tip:
Table 57: Default flex touchtone commands for leaders Press
*
0
0
0
*
1
To
Feature
Description
Request conference-wide operator help
Help
An operator can speak to all participants at the same time. This command toggles on and off. The line name does not display in the Help queue window; however, the line number and conference name do appear.
Request an operator to speak with you privately Dial out by accessing an open line (ODO)
An operator speaks to the leader only. This command toggles on and off. The line color changes to yellow in the Help queue indicating individual help. Moderator Dial Out
While dialing out, the system temporarily removes the leader from the conference.
Note:
*
1
Place the participant into the conference
Options 1-4 are available only after the leader has used *1 to access a line for dial out.
Note:
*
2
Note: An administrator must configure dialout commands for your system.
Note: Leaders can dial out from a secured conference, if enabled on the system.
Join the participant and continue dialing 1 of 5
224 Bridge Talk 4.0 User’s Guide
Managing flex conferences using touchtone commands
Table 57: Default flex touchtone commands for leaders (continued) Press
*
To
Feature
Description
*
Disconnect the line and return to conference
Moderator Dial Out
(Continued)
3
*
4
Disconnect the line continue dialing out
*
Cancel request and return to conference Unattended Digital Record/ Playback
The leader can record an unattended conference digitally by pressing *2 (or from a Web-based application). If the system is configured to create filenames automatically, the system generates an 8-digit conference recording filename. When the leader presses 94, the system replays the filename number and, subsequently, lists the number in the CODR.
2
Record the conference
External Digital Record/ Playback
Note:
Note: If a leader records several segments of a conference, the system only saves the last named segment. Tip:
Tip:
The leader can record the conference digitally by pressing *2 to dial out to an external recording device, if enabled on the system. However, the files are not stored on the system so the leader cannot access or play back these recordings from Bridge Talk. 2 of 5
Issue 1 July 2005
225
Moderator and Participant Touchtone Commands
Table 57: Default flex touchtone commands for leaders (continued) Press
*
*
3
4
To
Feature
Description
Change Conference Entry Tone & Exit announcement options
Entry Tones/ Exit Tones
The leader can change both tones to one setting, such as Tones (or Message).
Secure the conference
Security
Note:
To remove security:
*
5
Note: Do not select Tone & Message; this feature does not apply.
A leader can prevent anyone from listening to or joining the conference; however, the leader can record a secured conference. Leaders hear a tone or voice message indicating that the conference is secured or unsecured. You can activate security only if this feature is enabled and scheduled on the system. Operators cannot enter, record, scan, or listen to a secured conference.
Note:
Note: A leader can record a secured conference digitally by pressing *2 to dial out to an external recording device, if enabled on the system.
However, the files are not stored on the system so you cannot access or play back these recordings from Bridge Talk.
*
6
To unmute:
*
7
*
8
Mute your individual line (Self mute)
Mute
Mutes or unmutes the line.
Extend or end the conference
Auto Continuation (Leader Hang Up)
The leader can end the conference is one of two ways: ● Choose ON to extend the conference after the leader hangs up. ● Choose OFF to end the conference when the leader hangs up. 3 of 5
226 Bridge Talk 4.0 User’s Guide
Managing flex conferences using touchtone commands
Table 57: Default flex touchtone commands for leaders (continued) Press
*
9
Any single key #
#
To
Feature
Description
Hear a private roll call during a conference
Roster
The system temporarily removes the requester from the conference and plays the names of the participants.
Stop playing the roster
Ends the roster playback.
Mute the conference
Mute All
The system plays a tone and then places all participant lines (except moderators) in listen-only mode.
Hear a private participant count
Participant Count
The system temporarily removes the requester from the conference and plays the total number of current participants.
Hear a list of available touchtone commands
DTMF Help
Leaders hear touchtone commands that are available to both leaders and participants. Press any key to cancel.
End the conference
Conference hang up
The leader can press 77 to end the conference immediately.
To unmute the conference: 9
9
*
#
*
*
7
7
4 of 5
Issue 1 July 2005
227
Moderator and Participant Touchtone Commands
Table 57: Default flex touchtone commands for leaders (continued) Press 9
3
To
Feature
Description
Start or join a subconference
Unattended Subconference
After pressing 93 from a telephone keypad, a leader can: ● Press a subconference number from 1 to 9, for example, 93, 7.
Note: If the leader presses the current subconference number, the system ignores the command.
Note:
0
*
Press 0 to return to the main conference. ● Press * to escape. ● Press # to play a warning message into all subconferences that participants will be rejoining the main conference shortly. After a few moments, the system transfers all lines back to the main conference. For more information, see About subconferences on page 149. ●
#
9
4
Replay a conference recording file number
Unattended Digital Record/ Playback
When a leader presses 94, the system replays the 8-digit file number of the conference recording. 5 of 5
Note:
Note: The Billing Code touchtone command is not available for flex conferences.
228 Bridge Talk 4.0 User’s Guide
Managing flex conferences using touchtone commands
Table 58 lists the default flex touchtone commands for participants. Table 58: Default flex touchtone commands for participants Press
*
0
0
0
*
6
To unmute:
*
7
*
9
Any single key
*
#
To
Feature
Description
Request conference-wide operator help
Help
An operator can speak to all participants at the same time. This command toggles on and off. The line name does not display in the Help queue window; however, the line number and conference name do appear.
Request an operator to speak with you privately
An operator speaks to one participant at a time. This command toggles on and off. The line color changes to yellow in the Help queue indicating individual help.
Mute your individual line (Self mute)
Mute
Mutes or unmutes the line. Participants can unmute their own lines by pressing *7, if enabled on the bridge.
Hear a private roll call of participants
Roster
The system temporarily removes the requester from the conference and plays the names of the participants.
Stop playing the roster Hear a private participant count
Ends the roster playback. Roster
Available to both the leader and participants. 1 of 2
Issue 1 July 2005
229
Moderator and Participant Touchtone Commands
Table 58: Default flex touchtone commands for participants (continued) Press
*
*
9
3
To
Feature
Description
Hear a list of available touchtone commands
DTMF Help
Participants hear touchtone commands that are available to participants only. Press any key to cancel.
Start or join a subconference
Unattended Subconference
After pressing 93 from a telephone keypad, a participant can: ● Press a subconference number from 1 to 9, for example, 93, 7.
0
Note: If the caller presses the current subconference number, the system ignores the command.
Note:
*
Press 0 to return to the main conference. ● Press * to escape. For more information, see About subconferences on page 149. ●
2 of 2
230 Bridge Talk 4.0 User’s Guide
Appendix B: Menu Bar and Main Tool Bar This appendix provides detailed descriptions of the following: ●
Menu bar overview
●
Main tool bar overview
Issue 1 July 2005
231
Menu Bar and Main Tool Bar
Menu bar overview The menu bar includes pull-down menus for both Bridge Talk-specific and Windows-based commands.
Tip: Some commands may become unavailable if an administrator locks the size and location of the windows.
Tip:
Using Menu commands Choose a command by clicking on the name or pressing Alt + underlined letter.
File menu The File menu lists system administrator or maintenance sessions, nighttime mode, log off, and exit commands as shown in Table 59. Table 59: File Menu Menu
Command
Description
Session
To start an administrator or maintenance session if you have administrative- or maintenance-based privileges associated with your sign-in. For more information on what system features you can access, see Sign-in privileges on page 22.
Nighttime
To make the system unavailable to any new callers but does not disturb conferences that are already active.
Open
To open a new session.
Print Setup
To set up print options.
Logout
To log off as one user and log on again using a different sign-in.
Exit
To end the Bridge Talk session.
232 Bridge Talk 4.0 User’s Guide
Menu bar overview
View menu The View menu displays or hides the Enter or Pending queues, Help Requests queue, and the tool bar. You can view all lines on the system, generate reports, and launch the Conference Scheduler. In addition, there are docking options for the Conference Navigator. Table 60 lists the available commands. Table 60: View menu Menu
Command
Description
Display/Hide Enter Queue
To display lines that are in Enter status and includes a Show Filtered/Show All toggle button. If you click Show All, the Enter queue displays all lines in Enter status. If you click Show Filtered, the Enter queue lists only those lines that meet your search criteria.
Display/Hide Pending Queue
To list all callers who have dialed in and have not been placed in a conference, for example, ODO, Scan, and CLPG. The Pending queue does not include a Get Next Enter button.
Display/Hide Help Requests
To list caller lines requesting help.
Display/Hide tool bar
To display the tool bar. The tool bar comprises all the commands in the menu bar but uses a command line format for entering keyboard commands.
Conference Navigator
To dock the Conference Navigator on the top, bottom, left, or right.
Update
To refresh all Bridge Talk status information. Bridge Talk displays a progress bar while an update is in progress.
(Continued)
1 of 3
Issue 1 July 2005
233
Menu Bar and Main Tool Bar
Table 60: View menu (continued) Menu
Command
Description
All Lines
To show the status of all lines on the conferencing server: 1. Choose View > All Lines from the menu bar and select the line. 2. Right-click and choose one of the following commands from the shortcut menu: Access, Fault, Hang up, Mute, or Line Detail. Line status key: DC FL MS OS MO MU MM PO VL
= disconnected line = faulted = music = out of service = moderator = muted (Current line status) = muted moderator = polling = virtual link line
To view commands for a group of lines: 1. Choose View > All Lines from the menu bar. 2. Using standard Windows command keys, press SHIFT to select the first and last line in a sequential range (or press Ctrl to select non-sequential lines). 3. Right-click and choose one of the following commands from the shortcut menu: Fault, Hang up, or Mute. To select the number of lines per column that you want displayed in the All Lines dialog, see the Options table entry in Table 64. 2 of 3
234 Bridge Talk 4.0 User’s Guide
Menu bar overview
Table 60: View menu (continued) Menu
Command
Description
Reports
To generate several different report types, including: ● ACS. To show what lines are set as Automatic Conference Select (ACS). ● Answer. To display the lines that are set to Answer or No Answer. ● Call Counts. To show the number of calls dialed on each line. ● Line Connect Times. To display the number of minutes each line was active. ● Minute per Conference. To list the total number of minutes for an active conference. ● Operator Status. To display information on operators; specifically which operators are logged in, what conferences they are in, and whether their talk path is on or off. ● Total Line Times. To show the accumulated minutes total for each line as well as the system time total. ● Conference Status. To list the participant lines as well as enabled and disabled features selected for the conference. In addition, this report includes Global Conference IDs, Billing codes, Auxiliary fields, and Cross-reference IDs. ● Conference Activity. To display enabled and disabled features selected for the conference. In addition, this report lists Global Conference IDs, Billing codes, Auxiliary fields, Cross-reference IDs, and all participants who were in the conference including their start and end times. ● Past Conference. To provide conference reports (CODR and CDRs) for non-current conferences. See Printing past conference reports on page 209.
Conference Scheduler
To display the Conference Scheduler. 3 of 3
Issue 1 July 2005
235
Menu Bar and Main Tool Bar
Line menu The Line menu lists line-related commands as shown in Table 61. Tip: You can establish your audio path from this menu.
Tip:
Table 61: Line menu Menu
Command
Description
Access
To display the Line Detail dialog for a specified line.
Enter
To access the next available line in the Enter queue.
Help
To access a line in the Help Requests queue.
Retrieve
To retrieve a line that was released back into a conference or re-access a line placed in the wrong conference.
Details
To display the Line Detail dialog for a specified line.
Release
To release an accessed line back into the originating conference.
Transfer
To transfer a caller or link line into a conference.
Listen
To listen in on a caller line or an auxiliary line (music channel) to determine audio quality.
Operator Talk
To toggle operator talk path on or off.
Audio Path
To establish an operator audio path.
236 Bridge Talk 4.0 User’s Guide
Menu bar overview
Conference menu The Conference menu lists conference-related commands. Table 62 lists the commands. Table 62: Conference menu Menu
Command
Description
Audit
To audit (listen) to a specific conference to determine audio quality.
New
To create a new conference.
Help
To access all lines in a conference that request help (pre-configured system option).
Details
To view or modify information for a specific conference, such as Name, ID, Lecture, Lock, Note, or Prompt Set.
Polling
To start a polling session.
Q&A
To start a Q&A session.
Listen
To listen to individual lines within a conference to determine audio quality. This option is very useful for troubleshooting noisy lines.
Scan
To listen to each active conference on the system for a specified time period. This option is useful for determining the system-wide sound quality.
Record/ Playback
To start a recording or a playback into a conference. Analog channels are available on all systems. Digital channels are available on systems that have Record/ Playback hard drives.
Transfer
To transfer entire conferences from one conference room to another.
Startup List
To display a list of attended conferences reserved through the Conference Scheduler that are set up shortly before scheduled startup time.
Hang up
To disconnect all lines in a specified conference simultaneously when the conference ends.
Issue 1 July 2005
237
Menu Bar and Main Tool Bar
FastDial menu The FastDial menu provides commands for creating new dial lists, editing dial lists, and dialing out options as shown in Table 63. Table 63: FastDial menu Menu
Command
Description
New
To create a new dial list for FastDial or BlastDial operations.
Edit
To modify an existing dial list.
Dial
To dial out using a FastDial list.
Blast
To dial out a pre-programmed list of telephone numbers simultaneously.
Hold Dial
To hold your position in a dial list when you must interrupt the dial-out process temporarily.
238 Bridge Talk 4.0 User’s Guide
Menu bar overview
Tools menu The Tools menu contains commands for recording greetings, sending chat messages to other operators, purging system settings, customizing your Bridge Talk software, and adding audio prompts. Table 64 describes the available commands. Table 64: Tools menu Menu
Command
Description
Annunciator
To record and play back greetings and audio prompts.
Chat
To send messages to other operators on the system.
Set ACS
To send lines into a predetermined conference room without operator intervention or security codes.
Set Answer
To set individual lines to Answer or No Answer. When the No Answer option is enabled, the system ignores incoming calls.
Set DNIS Filter
To filter the Enter queue with specific DNIS digits. If you set the DNIS filter, the system maintains both lists whether you show or hide the filtered list, which may slow down Enter queue processing.
Purge
To reset Call Count, Disconnects, Minutes per Conference, and Total Line Time settings to zero (0) on the system.
Customize
To change the visual properties of the Conference Navigator, Enter or Pending queues, Help Requests queue, or Conference Room windows.
Options
To set user interface options for Bridge Talk. Select: ● 23 lines for NA ISDN ● 24 lines for T1 ● 30 for E1 (Euro ISDN) From a drop-down list, you can select the number of lines per column that you want displayed in the View > All Lines dialog. This option must be set by a system administrator.
Continuous Beep
To add an audio prompt warning you that a participant is in the Enter, Help Requests, or Pending queues, or if a line is in disconnect mode (DC). This option must be enabled on your conferencing server by an administrator.
Options
Issue 1 July 2005
239
Menu Bar and Main Tool Bar
Windows menu The Windows menu lists commands for arranging multiple Bridge Talk windows described in Table 65. Table 65: Windows menu Menu
Command
Description
Cascade
To overlap all running windows in Bridge Talk.
Tile Horizontal
To arrange all running windows side by side.
Tile Vertical
To arrange all running windows vertically.
Docked
To place all running windows in the same position in Bridge Talk after reboot.
Help menu The Help menu provides Bridge Talk Help access as well as release and copyright information listed in Table 66. Table 66: Help menu Menu
Command
Description
Topics
To launch the Help.
About
To display Bridge Talk version, release, and copyright information.
240 Bridge Talk 4.0 User’s Guide
Main tool bar overview
Main tool bar overview The main tool bar includes all the commands in the menu bar but uses a command line format for entering commands from a keyboard. You can activate tool bar commands by clicking on a command button or using shortcut keys.
Main tool bar shortcut keys Use shortcut keys to enter tool bar commands from the keyboard. Bridge Talk displays a capitalized letter (hot key) in the button name. You can activate the commands only if the Main status displays green. The Main status displays green when the focus is on the tool bar. If focus is already on the tool bar, press a hot key. For example, press a to view the Access command line. The Main status displays red when the focus is not on the tool bar. Click on any button to return the focus to the tool bar.
Using the tool bar To use the tool bar: 1. Click on a command button. One of the following options displays: - Command line text box for entering keyboard commands. -Or- Submenu tool bar, which is a set of subcommands specific to the chosen command. If you click a button that has a set of subcommands, Bridge Talk switches to the subcommand and displays submenu commands. For more detailed descriptions, see Table 67. Tip: Tip:
Note that the status level text changes to Main plus the selected submenu.
Issue 1 July 2005
241
Menu Bar and Main Tool Bar
2. Enter information in the command line text box (or click on a submenu button). To cancel, press Esc (or click Back
on a submenu tool bar).
Table 67 describes the command line commands and how to use them. Table 67: Main tool bar Menu
Command
Description
Access
To dial out, change the status of a line, or speak to a caller: 1. Click Access (or press a if status line is green). 2. Enter the line number and press Enter.
Access
The Access submenu displays.
3. Click on one of the following Access submenu commands: - Dial. Displays the conference name and dials the telephone number of the accessed line. - Call type. Shows whether the call is a dial-in or dial-out. - cO name. Records the caller’s company name. - Fault. Makes the line unavailable to participants if a problem is detected. - Hangup. Hangs up the accessed line. - Moderator. Switches the moderator toggle on or off. - mUte. Switches the participant’s audio toggle on or off. - Name. Identifies the person who is on the accessed line. - Place. Places callers into conferences. - Release. Returns an accessed line back into the conference room. - roSter. Lets you enter line information for dial-in callers from a preset dial list. - Transfer. Transfers a line to another extension within your company's phone system. - Virtual link. Uses a participant line to link two systems. - Back. Returns you to the tool bar. - Help. Launches Bridge Talk Help. 1 of 8
242 Bridge Talk 4.0 User’s Guide
Main tool bar overview
Table 67: Main tool bar (continued) Menu
Conference
Command
Description
Conference
To add or change conference features: 1. Click Conference (or press c if status line is green). The Conference submenu displays.
2. Click on one of the following Conference submenu commands: - Clear all. Clears features from a conference, such as lecture, entry/exit tones, or music. - Entry tone. Sets entry tones for a conference. - Exit tone. Sets exit tones for a conference. - Gain. Equalizes the audio (volume) of all lines in a conference. - Hangup. Disconnects an entire conference. - Id. Lets you create a unique identification number (up to 60 numeric characters) for the conference. - Lecture. Mutes all participants except moderators (listen-only mode). - locK. Warns you about placing a participant in a locked conference. - Name. Lets you add a conference name (up to 60 alphanumeric characters). - noTe. Associates a text message with the conference. - Play. Starts a playback into a conference. - pOll. Initiates a polling session. - Q&a. Starts a Q&A session. - Record. Places a record channel into a conference so that the operator can record the conference. - Security. Prevent all operators from listening to a conference or new participants from entering a conference. 2 of 8
Issue 1 July 2005
243
Menu Bar and Main Tool Bar
Table 67: Main tool bar (continued) Menu
Command
Description
Display
To display conference or system statistics: 1. Click Display (or press d if status line is green). The Display submenu displays.
Display
2. Click on one of the Display submenu commands. - Acs. Lists lines that are set as Automatic Conference Select (ACS), which automatically places a caller directly into a conference without operator intervention or security codes. - ansWer. Sets individual lines to Answer or No Answer. (When No Answer is enabled, the system ignores incoming calls.) - Call counts. Shows the number of calls dialed on each line. - Line connect times. Records the number of minutes each line was active. - Mins/conf. Tabulates the number of minutes for every person in an active conference. For example, if a conference includes ten participants for 20 minutes each, the Minutes per Conference total is 10 x 20 or 200. - Op stat. Displays information on operators, specifically which operators are logged in, what conferences they are in, and whether their talk path is on or off. - Total line times. Shows the accumulated minutes for each line as well as the system time total. 3. In the Report Line Information dialog, make your selection, and click View Report. 4. Click Print to view or print the report. Enter Enter
To access a line in the Enter queue that has dialed in but not yet placed into a conference: 1. Click Enter (or press e if status line is green). 2. Speak with the caller and enter the appropriate information in the Line Detail dialog. 3. Click Place. 3 of 8
244 Bridge Talk 4.0 User’s Guide
Main tool bar overview
Table 67: Main tool bar (continued) Menu
Command
Description
Fastdial
To dial out to participants using a previously created dial list: 1. Click Fastdial (or press f if status line is green).
FastDial
The Fastdial submenu displays.
2. Click on one of the Fastdial submenu commands: - Edit. Displays available dial lists. - Dial. Shows dial list information. - Blast. Displays BlastDial list information. - hoLd dial. Toggles between pause or resume on a FastDial.
Help Requests
Help Requests
To provide help to a participant: 1. Click help reQuests (or press q if status line is green). 2. Click on a line in the Help Requests queue. 3. Press Enter to access the line and speak with the caller. The Access submenu displays. For more information, see the Access entry in Table 67. 4 of 8
Issue 1 July 2005
245
Menu Bar and Main Tool Bar
Table 67: Main tool bar (continued) Menu
Command
Description
Line
To change line information without actually accessing a line: 1. Click Line (or press l if status line is green).
Line
The Line submenu displays.
2. Click on one of the following Line submenu commands: - Call type. To indicate that the call is a dial-in or dial-out. - cO name. To identify the caller's company name. - Fault. To make the line unavailable to callers if a problem is detected. For more information, see Faulting a line on page 161. - Hangup. To hang up specified lines. See Hanging up lines on page 200. - Moderator. To designate a line as moderator. - mUte. To toggle the listen mode on or off. - Name. To populate the name field. - Reconnect. To flag a line as “reconnected” when reconnected by the operator. - Virtual link. To dial a participant line to link two systems. Music Music
To add music to a conference: 1. Click Music (or press m if status line is green). 2. Enter a music channel that has been set up for your system (M1-M4), a space, and the conference room number. 3. Press Enter. To remove music from a conference: 1. Click Music (or press m if status line is green). 2. Type r, a space, and the conference room number. 3. Press Enter. 5 of 8
246 Bridge Talk 4.0 User’s Guide
Main tool bar overview
Table 67: Main tool bar (continued) Menu
Command
Description
Options
To record greetings, listen to audio quality, or exit from Bridge Talk: 1. Click Options (or press o if status line is green).
Options
The Options submenu displays.
2. Click on one of the following Options submenu commands: - Annunciator. To record and play back greetings that participants hear when they call into the system. - Chat. To send messages to other operators on the system. - cOnf activity. To display the Conference Activity window. - Exit. To end the Bridge Talk session. - Listen. To listen to individual lines or conferences to assess audio quality. - Print. To print the current status for a specific conference. - Scan. To listen to the audio quality of conferences system-wide. - scHeduler. To open the Conference Scheduler so you can schedule or modify conferences. Purge Purge
To purge (reset) submenu values to zero: 1. Click Purge (or press p if status line is green). The Purge submenu displays.
2. Click on one of the following Purge submenu commands: - Call counts. Shows the number of calls dialed on each line. - Disconnects. Removes disconnected lines from a single conference or from the entire system. - Mins/conf. Resets the total minutes for a particular conference back to zero. - Total line times. Resets all the line times on the entire system back to zero. 6 of 8
Issue 1 July 2005
247
Menu Bar and Main Tool Bar
Table 67: Main tool bar (continued) Menu
Command
Description
Set
To set conference scan times or switch the system to nighttime mode: 1. Click Set (or press s if status line is green).
Set
The Set submenu displays.
2. In the Set submenu, click on one of the following submenu commands: - Acs. Configures selected lines to enter a conference automatically upon dialing in. (This option displays only with an administrator or maintenance sign-in.) - ansWer. Sets specific lines to ignore incoming calls. - Nighttime. Places the system in a “no answer” mode and prevents access to operator-based commands. - Scan time. Specifies the interval (in seconds) between conference switches during a scan. Transfer Transfer
To transfer participants from one conference to another conference or establish link lines: 1. Click Transfer (or press t if status line is green). The Transfer submenu displays.
2. In the Transfer submenu, click on one of the following submenu commands: - Conferees. Moves one or more participants from one conference to another. - Link lines. Creates a physical connection between two conferences on two or more systems. - coNference. Moves all participants from one conference to another. 7 of 8
248 Bridge Talk 4.0 User’s Guide
Main tool bar overview
Table 67: Main tool bar (continued) Menu
Command
Description
Retrieve
To retrieve a line that was released back into a conference or re-access a line placed in the wrong conference: 1. Click Retrieve (or press v if status line is green).
Retrieve
The Access submenu displays. For more information, see the Access table entry in Table 67. 2. Click Place, enter the correct conference name, and press Enter. Update Update
To refresh all Bridge Talk status information.
Note:
Note: Bridge Talk displays a progress bar while an update is in progress. Bridge Talk may take several minutes to refresh depending on bridge activity. Once underway, you cannot cancel the update process.
To update, click Update (or press u if status line is green). Help
To launch Bridge Talk help, click Help (or press ? if status line is green).
8 of 8
Issue 1 July 2005
249
Menu Bar and Main Tool Bar
250 Bridge Talk 4.0 User’s Guide
Appendix C: Predefining Login and Operator Information This appendix provides instructions on: ●
Creating a Bridge Talk shortcut
●
Predefining login information
Issue 1 July 2005
251
Predefining Login and Operator Information
Creating a Bridge Talk shortcut You can create your own customized Bridge Talk shortcut for your desktop. Tip: Tip:
Before adding a new shortcut, you should delete any previous Bridge Talk shortcuts from your desktop.
To add a Bridge Talk shortcut on the desktop: 1. In My Computer or in the right pane of Windows Explorer and navigate to the Bridge Talk installation path. 2. Select the Bridge Talk.exe 3. On the File menu, click Create Shortcut. 4. Drag the Bridge Talk shortcut icon onto the desktop. If the Bridge Talk icon does not display: 1. Right-click on the generic shortcut icon and select Properties. 2. Click Change Icon and click Browse. 3. Navigate to the Bridge Talk installation directory and select the Bridge Talk.exe. 4. Click Finish. The Bridge Talk icon displays on your desktop. To change any settings for the Bridge Talk shortcut: 1. On the desktop, right-click the Bridge Talk icon, and click Properties. 2. Enter the new installation path in the Target field of the Shortcut window. 3. Click OK. To delete, drag the shortcut to the Recycle Bin. The Bridge Talk program still exists on the disk.
252 Bridge Talk 4.0 User’s Guide
Predefining login information
Predefining login information If you want to use the same sign-in information each time you start Bridge Talk, you can create a shortcut or batch script using one or more of the predefined command-line variables described in Table 68. To locate the properties file, right-click on the Bridge Talk icon located on the desktop. Table 68: Command line login variables Value
Description
-login
Use the following comma-delimited format: -login name, password, bridge For example, enter: -login m7,xyzzy,bridge34 where: Login is a sign-in based on a predefined set of user privileges, for example, maintenance, administrator, or operator. Password is the password for that user name. Bridge is the name of the bridge that you want to use. Operator-number is a number between 1 and the number of operators that your bridge can accommodate.
-operator
Enter an operator number or zero (0) for next available: -operator n For example, enter: -operator 12
-noscheduler
To disable the Bridge Talk Scheduler, enter: -noscheduler
-properties
Use this option if you want to use an alternate bridge.properties file. Specify a full path to the bridge.properties file using a valid filename and extension: -properties For example, enter: “C:\Program Files\Avaya\Bridge Talk\” -properties bridge.properties2
Creating a customized Bridge Talk shortcut To create a customized Bridge Talk shortcut for your desktop: 1. From your desktop, right-click and select New > Shortcut. 2. Click Browse and navigate to the Bridge Talk installation directory. 3. The default Bridge Talk installation path is C:\Program Files\Avaya\Bridge Talk. 4. Locate and select Bridge Talk.exe. 5. Click OK and Next.
Issue 1 July 2005
253
Predefining Login and Operator Information
6. Enter a shortcut name and click Finish to add the Bridge Talk shortcut to the desktop. 7. Right-click on the Bridge Talk shortcut and select Properties. 8. In the Shortcut dialog, select the Shortcut tab.
9. In the Target field, add a space, and then add the following to the end of the line: -login name password, bridge For example enter: “C:\Program Files\Avaya\Bridge Talk.exe” -login m7,xyzzy,bridge34 Tip: Tip:
To login to a specified bridge using the next available operator, enter “C:\ Program Files\3_4Avaya\Bridge Talk\Bridge Talk.exe” -login ,, -operator 0 If you want to disable the Scheduler, add a space, then add the following to the end of the line: -noscheduler For example enter: “c:\Program Files\Avaya\Bridge Talk.exe” -noscheduler 10. Click Apply and OK to save the changes.
Using a batch script Use a batch script similar to the following: “c:\Program Files\Avaya\Bridge Talk.exe” -operator 0 -login m7,xyz,bridge34
254 Bridge Talk 4.0 User’s Guide
Appendix D: Administrator Tasks This appendix includes the following: ●
Overview of the bridge.properties file
●
About Network Address Translation (NAT) mode
●
Setting up PuTTY SSH
Issue 1 July 2005
255
Administrator Tasks
Overview of the bridge.properties file Similar to an INI file, administrators can configure key Bridge Talk options on each workstation from the bridge.properties file. The bridge.properties file is located in the Bridge Talk installation path. Table 69 lists many of the bridge.properties parameters that can be customized.
! Important:
Important: Administrators should exercise caution when resetting certain parameter values in the bridge.properties file as this may directly impact Bridge Talk performance or connectivity to the bridge. Tip:
Tip:
After installing Bridge Talk, launch and then immediately close Bridge Talk to populate this file. Modify and save the file before reopening Bridge Talk.
Table 69: Bridge.properties file parameters Parameter
Description
Default Value
allowConftoolbarFocus
Enables focus on the Conference Room tool bar. The settings are: ● True. The spacebar can toggle the tool bar options on and off. ● False. The spacebar cannot toggle the tool bar options on and off.
False
commandPort
Enables Bridge Talk to receive TCP status messages from the bridge.
20002
! CAUTION: CAUTION:
CVBrowser
Modifying this value may affect Bridge Talk connectivity to the bridge.
Defines the browser for launching the Conference Viewer application.
Note:
explorer.exe
Note: If you are using Windows NT systems, change explorer.exe to iexplore.exe. 1 of 6
256 Bridge Talk 4.0 User’s Guide
Overview of the bridge.properties file
Table 69: Bridge.properties file parameters (continued) Parameter
Description
Default Value
CVServerPath
The Conference Viewer server.
enableHangupButton
Enables the Hang up button in the Conference Room window. The settings are: ● True. Operators can use the Hang up button to hang up the conference. ● False. Operators cannot use the Hang up button to hang up the conference. The button is made unavailable.
False
LineDetailDialog ShowFindButton
Enables the Find Conference function in the Line Detail dialog. The settings are: ● True. Operators can use the Hide/ Find function to search for conferences. The Hide/Find button is visible. ● False. Operators cannot use the Hide/Find button to search for conferences. The Hide/Find button is hidden.
True
maxNumOpers
Sets the maximum number of operators allowed.
12
NatConnection
Enables multiple workstations running Bridge Talk to share a single IP address or several IP addresses. The settings are: ● True. Uses NAT mode if supported by the connecting bridge. ● False. Does not use NAT mode.
False
! CAUTION: CAUTION:
Modifying this value may affect Bridge Talk connectivity to the bridge.
For more information on NAT mode, see About Network Address Translation (NAT) mode on page 262. 2 of 6
Issue 1 July 2005
257
Administrator Tasks
Table 69: Bridge.properties file parameters (continued) Parameter
Description
Default Value
NatTcpBridgePort
The NAT TCP status port used by the bridge.
20008
! CAUTION: CAUTION:
NatTcpKeepAliveMSec
Modifying this value may affect Bridge Talk performance or connectivity to the bridge.
The TCP session keep-alive interval in milliseconds.
60000
! CAUTION: CAUTION:
NatUdpBridgePort
Modifying this value may affect Bridge Talk connectivity to the bridge.
The NAT UDP status port used by the bridge.
20008
! CAUTION: CAUTION:
NatUdpKeepAliveMSec
Modifying this value may affect Bridge Talk connectivity to the bridge.
The keep-alive interval in milliseconds for the UDP session.
30000 (milliseconds)
! CAUTION: CAUTION:
Modifying this value may affect Bridge Talk connectivity to the bridge.
numPromptSetLangs
The number of languages used for Prompt Set.
4
promptSetLang1
The language identified by the number 1 used in Prompt Set.
English
Note:
Note: Verify that each prompt set language you define is consistent across multiple bridges. 3 of 6
258 Bridge Talk 4.0 User’s Guide
Overview of the bridge.properties file
Table 69: Bridge.properties file parameters (continued) Parameter
Description
Default Value
promptSetLang2
The language identified by the number 2 used in Prompt Set. For example, enter German.
2
promptSetLang3
The language identified by the number 3 used in Prompt Set, such as Portuguese.
3
promptSetLang4
The language identified by the number 4 used in Prompt Set, such as French.
4
Note:
schapi_timer_C
Note: The maximum is 20 languages.
Sets the maximum number of seconds allowed for any action, such as search or purge, before the bridge drops the connection to the Scheduler.
Note:
600 (seconds)
Note: The schapi_timer_C parameter only appears after you open and close the Scheduler, and then exit Bridge Talk.
! CAUTION: CAUTION:
Modifying this value may affect Bridge Talk performance or connectivity to the bridge.
schedulerApp
Sets the type of scheduler used. The options are: ● Classic=BTSched ● Advanced=SSched
Depends on selection
schedulerNoPrompt
Displays or hides the Scheduler Selection dialog. ● False=Hides the dialog. Bridge Talk launches the scheduler defined in the schedulrApp parameter. ● True=Displays the dialog from which users can select either the Classic or Advanced scheduler.
False
4 of 6
Issue 1 July 2005
259
Administrator Tasks
Table 69: Bridge.properties file parameters (continued) Parameter
Description
Default Value
showLineModifyIndicator
Sets the Line Modification Indicator on or off.
True
showTimeInHelpQueue
Displays the hours, minutes, and seconds since the line entered the queue.
True
SSchedPath
Sets the path for the Advanced scheduler.
Depends on selection
Note:
statusTCPKeepAliveMsgWait
Note: If you install the Advanced scheduler in a non-default location and plan to book conferences through Bridge Talkusing this scheduler, change the path to match the non-default location.
The interval in seconds that Bridge Talk waits to receive a TCP status message after the statusTCPLastMsgInterval timer expires.
10 (seconds)
! CAUTION: CAUTION:
statusTCPLastMsgInterval
Modifying this value may affect Bridge Talk performance or connectivity to the bridge.
The maximum interval in seconds to wait for a TCP status message. After the interval ends, Bridge Talk sends a keep alive status message. At this point, the statusTCPKeepAliveMsgWait timer begins.
60 (seconds)
! CAUTION: CAUTION:
Modifying this value may affect Bridge Talk performance or connectivity to the bridge. 5 of 6
260 Bridge Talk 4.0 User’s Guide
Overview of the bridge.properties file
Table 69: Bridge.properties file parameters (continued) Parameter
Description
Default Value
TalkMSecInterval
The interval in milliseconds that talk bits are sent from the bridge.
500 (half-second)
! CAUTION: CAUTION:
TcpStatusPort
Modifying this value may affect Bridge Talk performance.
Set this parameter to a non-zero value to receive TCP status messages from the bridge.
Note:
5021
Note: Bridge Talk does not use this port in NAT mode.
! CAUTION: CAUTION:
Modifying this value may affect Bridge Talk performance or connectivity to the bridge.
timeInQueueInterval
The interval in seconds that the elapsed time is updated.
10 (seconds)
UdpStatusPort
Enables Bridge Talk to receive UDP status messages from the bridge.
5020
! CAUTION: CAUTION:
Modifying this value may affect Bridge Talk performance or connectivity to the bridge. 6 of 6
Issue 1 July 2005
261
Administrator Tasks
About Network Address Translation (NAT) mode Using the Network Address Translation (NAT) mode, multiple workstations running Bridge Talk can share a single IP address or several IP addresses. Specifically, NAT maps an internal IP address and a TCP (or UDP) port to a different external IP address and port. In NAT mode, Bridge Talk initiates all sessions (Modapi, TCP events, and UDP status events) from the client side and keeps the connections active by sending keep-alive messages. In turn, the bridge sends event and status messages on the reverse path over all types of NAT routers as shown in Figure 10. Figure 10: Bridge Talk with NAT mode enabled Network NAT router Bridge
Modapi TCP UDP Status messages Event messages
Workstation
NAT-enabled and standard Bridge Talk sessions can run concurrently on the same bridge.
Note:
Note: If Bridge Talk does not detect NAT mode on a connecting bridge, the session reverts to the standard (Non-NAT) mode.
The basic steps are: 1. Bridge Talk initiates the main command and reply TCP session. 2. Bridge Talk starts another TCP session to a designated port (20008/tcp) on the bridge. Tip: Tip:
Port 20008 can be changed to another port by the system administrator. The first session command over this channel indicates to the bridge that it is a TCP-status session associated with a specific command/reply. Bridge Talk reissues this keep-alive command every 60 seconds (default). 3. Bridge Talk initiates a UDP session to a designated port (20008/udp) on the bridge. Although UDP does not have a session concept as such, the first session command over this channel informs the bridge that it is a UDP-status session associated with a specific command/reply. Bridge Talk reissues this keep-alive command every 30 seconds (default) to maintain the NAT channel mappings.
262 Bridge Talk 4.0 User’s Guide
About Network Address Translation (NAT) mode
Configuring NAT on a workstation To set up NAT on a workstation: 1. Install Bridge Talk 4.0x or later. 2. Launch and immediately close Bridge Talk to populate the bridge.properties file with the default values. 3. Open the bridge.properties file and change the NatConnection parameter to true. For descriptions and default values, see Table 70. 4. Save and close the bridge.properties file. 5. Restart Bridge Talk and connect to a bridge that is NAT enabled. Bridge 3.3x installation or upgrade procedures provide NAT capability by including the following lines in the /etc/services file: modapi-nattcp
20008/tcp
This port must match the NatTcpBridgePort in the bridge.properties file.
modapi-natudp
20008/udp
This port must match the NatUdpBridgePort in the bridge.properties file.
Tip: Tip:
The system administrator should verify that the NAT lines are included in the /etc/ services file on each bridge designated as NAT enabled.
Table 70 describes the NAT-specific parameters contained in the bridge.properties file. Table 70: NAT parameters in the bridge.properties file Parameter
Description
Default Value
NatConnection
The settings are: ● False. (Default) Does not use NAT mode. ● True. Uses NAT mode if supported by the connecting bridge.
False
NatTcpBridgePort
The NAT TCP status port used by the bridge. If you change this port, be sure that the system administrator changes the modapi-nattcp port on the bridge.
20008
NatTcpKeepAliveMSec
The TCP session keep-alive interval in milliseconds.
60000 1 of 2
Issue 1 July 2005
263
Administrator Tasks
Table 70: NAT parameters in the bridge.properties file (continued) Parameter
Description
Default Value
NatUdpBridgePort
The NAT UDP status port used by the bridge. If you change this port, be sure that the system administrator changes the modapi-natudp port on the bridge.
20008
NatUdpKeepAliveMSec
The keep-alive interval (in milliseconds) for the UDP session.
30000
PingMSecInterval
The keep-alive interval (in milliseconds) for the main session. This is a Bridge Talk parameter used with NAT mode.
60000
TcpStatusPort
Although Bridge Talk does not use this port in NAT mode, set this parameter to a non-zero value to receive TCP status messages from the bridge.
5021
UdpStatusPort
Although Bridge Talk does not use this port in NAT mode, set this value to a non-zero number to receive UDP status messages from the bridge.
5020
2 of 2 For information on NAT-related error messages, see the Meeting Exchange Administration and Maintenance Guide for the CS700/780 4.0 Conferencing Server or Meeting Exchange Administration and Maintenance Guide for the S6200, S6500, and S6800 Media Servers.
Setting up PuTTY SSH PuTTY SSH provides a secure, remote connection to the system administrator software when accessed through Bridge Talk by using encryption, secure tunneling capabilities, and authentication methods.
Note:
Note: The system supports OpenSSL version 9.6.
264 Bridge Talk 4.0 User’s Guide
Setting up PuTTY SSH
Generating a SSH1 (RSA) key To create public and private keys for SSH1 (RSA): 1. From the Bridge Talk installation directory, double-click on puttygen.exe. 2. In the PuTTY Key Generator dialog, select the SSH1 RSA option under Parameters as shown.
Note:
Note: Verify that the SshProt value is set to dword:00000001 in the puttyS700.reg file located in the Avaya Bridge Talk installation directory. 3. Click the Generate button in the Actions panel. 4. Hover your mouse over the empty area of the new dialog while the random key is generating. 5. Enter and confirm passphrase (password). Passphrases are optional. Tip:
Tip:
Jot down the passphrase to use as a SSH login to the bridge. If you forget the password, you will have to generate new keys. However, be aware of security issues when writing down passwords. 6. Click on the Save public key button in the Actions panel to save the public key. 7. Name the file, putty_pub_key, and save the key in the Avaya Bridge Talk installation directory.
Issue 1 July 2005
265
Administrator Tasks
Note:
Note: Contact your system administrator to install the putty_pub_key file in the PuTTY SSH accounts folder. There may be some minor format modifications required before installing the file. 8. Click on the Save private key button in the Actions panel to save the private key. 9. Name the file, putty_priv_key, and save the key in the Avaya Bridge Talk installation directory. After the system administrator creates an authorized_keys file on the bridge, you can export the public keys to the bridge into the authorized_keys file using FTP. Table 71 displays the basic PuTTY format. Note that you have to edit the PuTTY format to create the OpenSSH format, which removes line breaks and specified key information, as detailed in the following instructions. Table 71: Basic PuTTY format Type
Format
PuTTY
1024 37 (existing line break) 1200219282166154179068441455452413787685841979 0133142585390545318320336813150430357872048196 0562221091195590834930352938799995451059272960 5474260709654385900646800402916446795342842904 1264291622262882325716872972102707491455360422 4164579912058940562433342240027535537647098502 776593936643051323127940594863639 ssh1-rsa-key-20030923
OpenSSH
1024371200219282166154179068441455452413787685 8419790133142585390545318320336813150430357872 0481960562221091195590834930352938799995451059 2729605474260709654385900646800402916446795342 8429041264291622262882325716872972102707491455 3604224164579912058940562433342240027535537647 098502776593936643051323127940594863639
To create an OpenSSH format for SSH1 (RSA): 1. Remove the specified key information, for example, ssh1-rsa-key-20030923. 2. Remove line breaks to create a single, continuous line. 3. Save and close the authorized_keys file.
266 Bridge Talk 4.0 User’s Guide
Setting up PuTTY SSH
Generating a SSH2 RSA or SSH2 DSA key To create public and private keys for SSH2 RSA or SSH2 DSA: 1. From the Bridge Talk installation directory, double-click on puttygen.exe. 2. In the PuTTY Key Generator dialog, select the SSH2 RSA or SSH2 DSA option under Parameters as shown.
Note:
Note: Verify that the SshProt value is set to dword:0000000 in the puttyS700.reg file located in the Avaya Bridge Talk installation directory. For example, change the value to 00000002 if you select the SSH2_RSA protocol. Change the value to 00000003 if you select the SSH2_DSA protocol. Distribute the modified puttyS700.reg file to all workstations. 3. Click the Generate button in the Actions panel. 4. Hover your mouse over the empty area of the new dialog while the random key is generating. 5. Enter and confirm passphrase (password). Passphrases are optional. Jot down the passphrase to use as a SSH login to the bridge. If you forget the password, you will have to generate new keys. However, be aware of security issues when writing down passwords. 6. Click on the Save public key button in the Actions panel to save the public key.
Issue 1 July 2005
267
Administrator Tasks
7. Name the file, putty_pub_key, and save the key in the Avaya Bridge Talk installation directory.
Note:
Note: Contact your system administrator to install the putty_pub_key file in the PuTTY SSH accounts folder. There may be some minor format modifications required before installing the file. 8. Click on the Save private key button in the Actions panel to save the private key. 9. Name the file, putty_priv_key, and save the key in the Avaya Bridge Talk installation directory. After the system administrator creates an authorized_keys file on the bridge, you can export the public keys to the bridge into the authorized_keys file using FTP. Table 72 provides a format example for the SSH2_RSA protocol. Table 72: SSH2 RSA_protocol Type
Format
PuTTY
Comment: "ssh2-rsa-key-20030923" AAAAB3NzaC1yc2EAAAABJQAAAIEAhkpcm14P+J7hC/4/ 5T0Ez4wmWXlfN0s/ SC0d8jtgIRbsXnruPEm+KmKcj9YJN8JFFJj8Fva4f2uVaz pjIEbD7EM9ZfWkRrPbXv5brRoOfLXj4HXQ0x4B4j8GELUe uLlvt0QI+i/ zZAbAua3SdmpymCJwA5OHDFbmC+u13wdA1i8=
OpenSSH
ssh-rsa AAAAB3NzaC1yc2EAAAABJQAAAIEAhkpcm14P+J7hC/4/ 5T0Ez4wmWXlfN0s/ SC0d8jtgIRbsXnruPEm+KmKcj9YJN8JFFJj8Fva4f2uVaz pjIEbD7EM9ZfWkRrPbXv5brRoOfLXj4HXQ0x4B4j8GELUe uLlvt0QI+i/ zZAbAua3SdmpymCJwA5OHDFbmC+u13wdA1i8=
268 Bridge Talk 4.0 User’s Guide
Setting up PuTTY SSH
Table 73 provides a format example for the SSH2_DSA protocol. Table 73: SSH2_DSA protocol Type
Format
PuTTY
Comment: "dsa-key-20030923" AAAAB3NzaC1kc3MAAACAY9A4Gcb/ brCOxL2hmSfC6lb9lX3dk0s1qiCPh7kuAvCZvmvp9eNa7y gZ8Ld36xeSN5XzkLKS23d7BWsrkoNXmemRBUKPzwMh8w66 GDprTM5YUmyWnmGSUVtUOcxOy9KJatu8mmT5uHg9Ey8Yn6 Uq8KesFJy6OfL6LJ77wPWkVu0AAAAVAIlSDJusRS4t/ 0yZ3uFd2yw3FWGtAAAAgAFk/J+J/ KVH5uFAhV9RH8ZfCoQlPdDrv4icSxTTuRCRCtDOurtwQ/ VDuRSasJAn3NnxIghRl8qzIpQjjGkHJVJVTUfIoi2s97oy fDZExMqq2Jiran0SH+HVSZx1LhlfFmg7rONBEdwNKoTB9e bmuGb3nSnM7nNpBDtdUAigNu6EAAAAgCvB930HigyXxrXY qXc9Q2EFCEYPUS3AZSU0sOoHc2n9Xo1ANt/ MsNCTfmDT5YPoqle8sB2BIQeLU1CayuWtM3WMAGaFYKzFe 69tnho7Y6UlWdJcYm05UJ17eck7oyDfsw8DLHDclHhLNNd r38wc2l3GjWVaAitvbb1CoNM37P53
OpenSSH
ssh-dss AAAAB3NzaC1kc3MAAACAY9A4Gcb/ brCOxL2hmSfC6lb9lX3dk0s1qiCPh7kuAvCZvmvp9eNa7y gZ8Ld36xeSN5XzkLKS23d7BWsrkoNXmemRBUKPzwMh8w66 GDprTM5YUmyWnmGSUVtUOcxOy9KJatu8mmT5uHg9Ey8Yn6 Uq8KesFJy6OfL6LJ77wPWkVu0AAAAVAIlSDJusRS4t/ 0yZ3uFd2yw3FWGtAAAAgAFk/J+J/ KVH5uFAhV9RH8ZfCoQlPdDrv4icSxTTuRCRCtDOurtwQ/ VDuRSasJAn3NnxIghRl8qzIpQjjGkHJVJVTUfIoi2s97oy fDZExMqq2Jiran0SH+HVSZx1LhlfFmg7rONBEdwNKoTB9e bmuGb3nSnM7nNpBDtdUAigNu6EAAAAgCvB930HigyXxrXY qXc9Q2EFCEYPUS3AZSU0sOoHc2n9Xo1ANt/ MsNCTfmDT5YPoqle8sB2BIQeLU1CayuWtM3WMAGaFYKzFe 69tnho7Y6UlWdJcYm05UJ17eck7oyDfsw8DLHDclHhLNNd r38wc2l3GjWVaAitvbb1CoNM37P53
Procedures for creating an OpenSSH format Use one of the following methods to create an OpenSSH format: ●
Use the ssh-keygen tool located on the bridge, which generates keys and configures OpenSSH formats automatically.
●
To configure an OpenSSH format manually: a. Remove the specified key information, for example, ssh2-rsa-key-20030923. b. Remove line breaks to create a single, continuous line. c. Save and close the authorized_keys file.
Issue 1 July 2005
269
Administrator Tasks
Converting a SSH2 Public key Use the ssh-keygen tool located on the bridge to convert a public key to a format that works with OpenSSH by entering the following command: ssh-keygen -i -f putty_public_key >> ~/.ssh/authorized_keys
Exporting public keys to the bridge using FTP To export the public keys to the bridge: 1. Connect to the bridge using FTP. 2. Locate the home directory of the account you want to access, dcbadmin or dcbmaint. 3. Verify that the authorized_keys file exists using: ./ssh/authorized_keys If the file does not exist, see the Meeting Exchange Administration and Maintenance Guide for the CS700/780 4.0 Conferencing Server or Meeting Exchange Administration and Maintenance Guide for the S6200, S6500, and S6800 Media Servers for instructions on setting up an authorized_keys file. 4. Modify the public key if you want PuTTY to work with OpenSSH depending on the protocol selected, for example, SSH1 RSA, SSH2 RSA, or SSH2 DSA.
270 Bridge Talk 4.0 User’s Guide
Setting up PuTTY SSH
Launching PuTTY SSH from Bridge Talk To launch the administrator software using the PuTTY SSH option: 1. Launch Bridge Talk and choose File > Session from the menu bar. 2. Select the task you want, Administrator or Maintenance. 3. Choose PuTTY SSH from the Console dialog and click OK as shown.
You will see the Console Application dialog only once. After you select a telnet application, Bridge Talk stores your selection in the bridge.properties file for subsequent, automatic access. Tip: Tip:
Note:
In the bridge.properties file, set LastPuttyProtocol=ssh to use SSH. Note: OpenSSH is a third party product not licensed by, or distributed through, Avaya. License for this product is available with the software. For instructions on installing OpenSSH, see the Meeting Exchange Administration and Maintenance Guide for the CS700/780 4.0 Conferencing Server or Meeting Exchange Administration and Maintenance Guide for the S6200, S6500, and S6800 Media Servers.
Issue 1 July 2005
271
Administrator Tasks
272 Bridge Talk 4.0 User’s Guide
Index
Index
A Access description of . . . . . . . . . . . line hang up . . . . . . . . . . . Access a line by entering a line number . . . . . from a locked conference . . . . . in operator status line . . . . . . . in progress column, Pending . . . indicator . . . . . . . . . . . . . operator status . . . . . . . . . . to mute a noisy line . . . . . . . . using line access shortcut . . . . . when line is disconnected . . . . . Access code Directly to Conf option . . . . . . in dial list . . . . . . . . . . . . . option in BlastDial . . . . . . . . Accounting code description, scheduling field . . . . ACS (Automatic Conference Select) command for, in Display submenu . hunt group, problems with . . . . . lines . . . . . . . . . . . . . . . report . . . . . . . . . . . . . . report, menu bar . . . . . . . . . Additional information on annunciator messages . . . . . . applying gain . . . . . . . . . . . audio path . . . . . . . . . . . . BlastDial . . . . . . . . . . . . . clearing all features . . . . . . . . conference IDs . . . . . . . . . . entry tones . . . . . . . . . . . . exit tones . . . . . . . . . . . . faulting a line . . . . . . . . . . . Get Next Enter . . . . . . . . . . lecture . . . . . . . . . . . . . . listening commands . . . . . . . . locking . . . . . . . . . . . . . . manual dial . . . . . . . . . . . . muting a line . . . . . . . . . . . Name Record/Playback . . . . . . providing help . . . . . . . . . . Q&A . . . . . . . . . . . . . . . security . . . . . . . . . . . . .
. . . . . . . 242 . . . . . . . 242 . . . . . . . . .
. . . . . . . . .
. . . . . . . . .
. . . . . . . . .
. . . . . . . . .
. . . . . . . . .
. 75 . 56 . 39 . 76 . 76 . 39 . 155 . 40 . 107
. . . . . . . 91 . . . . . . . 91 . . . . . . . 92 . . . . . . . 167 . . . . .
. . . . .
. . . . .
. . . . .
. . . . .
. . . . .
. 244 . 213 . 212 . 235 . 235
. . . . . . . . . . . . . . . . . . .
. . . . . . . . . . . . . . . . . . .
. . . . . . . . . . . . . . . . . . .
. . . . . . . . . . . . . . . . . . .
. . . . . . . . . . . . . . . . . . .
. . . . . . . . . . . . . . . . . . .
. 62 . 160 . 24 . 105 . 203 . 54 . 55 . 55 . 161 . 75 . 58 . 155 . 56 . 107 . 59 . 171 . 143 . 130 . 57
Administrator opening a telnet session . . . . . . . . . . . . 232 privileges for . . . . . . . . . . . . . . . . . . 22 Advanced scheduler, definition . . . . . . . . . . . . . . 165 Alarm messages, displayed . . . . . . . . . . . . . . 37 Alarm messages . . . . . . . . . . . . . . . . . . 30 allowConfToolBarFocus parameter in bridge.properties . . . . . . . . . 256 AM scheduling start or end times, Flex . . . . . . . 180 scheduling start, end times, on-demand . . . . . 176 Analog moderator keypad commands . . . . . . . 218, 221 music channel, adding to conference . . . . . . . 63 Animated cursor, problems with . . . . . . . . . . . . . . 31 Annunciator command, in Options submenu. . . . . . . . . 247 Annunciator messages additional information . . . . . . . . . . . . . . 62 non-English, support for . . . . . . . . . . . . 190 playing back . . . . . . . . . . . . . . . . . . 62 Answer command for, in Display submenu . . . . . . . 244 reports, menu bar . . . . . . . . . . . . . . . 235 Application copying bridge.properties file to workstations . . . 50 fail over message . . . . . . . . . . . . . . . . 37 keyboard shortcut keys . . . . . . . . . . . . . 40 locking down windows . . . . . . . . . . . . . . 49 modifying windows . . . . . . . . . . . . . . . 43 operator conference, description of . . . . . . . . 31 server fail over message . . . . . . . . . . . . . 37 setting up several sessions, on different bridges . . 26 table describing sections of . . . . . . . . . . . 30 table listing Conference commands . . . . . . . 237 table listing FastDial commands . . . . . . . . 238 table listing Line commands . . . . . . . . . . 236 table listing Menu bar options . . . . . . . . . 232 table listing Tools commands . . . . . . . . . . 239 table listing View commands . . . . . . . . . . 233 table of sign-in privileges . . . . . . . . . . . . . 22 using the main tool bar. . . . . . . . . . . . . 241 Ask? button, in Q&A . . . . . . . . . . . . . . . . 132 Assistance responding to help requests, description . . . . . 38
Issue 1 July 2005
273
Index
Assistant for help, unattended conferences . . . . . . . . 215 Associate in Roster List dialog . . . . . . . . . . . . . . . 86 Attended conference startup list option . . . . . . . . . . . . . . . . 237 Audio assessing quality . . . . . . . . . . . . . . . . 154 link line, establishing . . . . . . . . . . . . . . 25 music, establishing path for . . . . . . . . . . . 25 operator, establishing path for . . . . . . . . . . 25 prompt in Enter or Pending . . . . . . . . . . . 75 record/playback, establishing path for . . . . . . 25 setting paths, multiple sessions . . . . . . . . . 26 Audio conferencing system name in title bar . . . . . . . . . . . . . . . . . . 21, 30 Audit a conference . . . . . . . . . . . . . . . . . . 146 Auto blast, description, scheduling field . . . . . . . . 167 recording, of conference . . . . . . . . . . . . 110 Auto Extend Duration conference duration, when scheduling . . . . . . 186 in subconferences . . . . . . . . . . . . . . . 151 scheduling for . . . . . . . . . . . . . . . . . 186 Auto Extend Ports in subconferences . . . . . . . . . . . . . . . 151 scheduling for . . . . . . . . . . . . . . . . . 186 Automatic Conference Clear, additional information on . . . . . . . . . 203 ID . . . . . . . . . . . . . . . . . . . . . . . 54 recording, overview . . . . . . . . . . . . . . . 110 AUTOVLL VLL (audio) line, in global conferences, description 36 Available lines See also AVL AVL number of available lines, on operator status bar . 39
B Back command, on Access submenu . . . . Base line status, description of . . . . . . . Beep audio prompt, in Enter, Pending queues continuous . . . . . . . . . . . . . . Billing Code display, in Conference Details dialog . . for VoIP . . . . . . . . . . . . . . . in subconferences . . . . . . . . . . Prompt, scheduling field . . . . . . . .
274 Bridge Talk 4.0 User’s Guide
. . . . . 242 . . . . . 60 . . . . . 75 . . . . . 162 . . . .
. . . . 144 . 34, 35, 83 . . . . 151 . . . . 168
Blast Annunciator, scheduling field . . . . . . . . . command, FastDial submenu . . . . . . . . BlastDial accessing lines . . . . . . . . . . . . . . . additional information . . . . . . . . . . . . automatic, triggered by moderator . . . . . . Blast Annunciator, description, scheduling field clearing all lines . . . . . . . . . . . . . . . placing callers . . . . . . . . . . . . . . . . starting line number . . . . . . . . . . . . . using reBlast . . . . . . . . . . . . . . . . Block Dialout description, scheduling field . . . . . . . . . Bridge setting up several sessions . . . . . . . . . Bridge.properties file copying to workstations . . . . . . . . . . . definition of . . . . . . . . . . . . . . . . . DNIS/DDI filter option . . . . . . . . . . . . NatConnection parameter . . . . . . . . . . Browser system requirements . . . . . . . . . . . .
. 168 . 245 . . . . . . . .
104 105 105 168 104 104 102 104
. 168 . . 26 . . . .
. 50 256
. 73 263
. . 16
C Call counts command for, in Display submenu . . . . . . . 244 command, in Purge submenu . . . . . . . . . 247 report, Menu bar . . . . . . . . . . . . . . . 235 Call transfers . . . . . . . . . . . . . . . . . . . 136 Call type command, from Access submenu . . . . . . . 242 command, Line submenu . . . . . . . . . . . 246 in Line Detail dialog . . . . . . . . . . . . . . . 82 Callers adding details, during Polling . . . . . . . . . . . 117 handling dial ins from . . . . . . . . . . . . . . 71 ID, displayed in Line Detail dialog . . . . . . . . 78 listening to recorded audio . . . . . . . . . . . . 80 placing into conferences . . . . . . . . . . . 75, 212 See also Conferees or Participants Calls answering. . . . . . . . . . . . . . . . . . . . 75 automatically answering . . . . . . . . . . . . 212 blast dialing all conferees . . . . . . . . . . . 100 clearing counts . . . . . . . . . . . . . . . . 201 FastDial (dialing one at a time) . . . . . . . . . 105 ignoring . . . . . . . . . . . . . . . . . . . . 212 placing . . . . . . . . . . . . . . . . . . . . . 87 setting no answer mode . . . . . . . . . . . . 213 transferring . . . . . . . . . . . . . . . . . . 136 CDR accounting code, description, scheduling field . . 167 caller information . . . . . . . . . . . . . . . . 78
Index definition of . . . . . . . . . . . . . . passcode, last entered . . . . . . . . phone number, extension . . . . . . . VoIP call data . . . . . . . . . . . . Change Conf Opt description, scheduling field . . . . . . Channel placing, to record a conference . . . . setting up recording audio path . . . . Chat area location on UI . . . . . . . . . . command, in Options submenu . . . . messages, displayed . . . . . . . . . messages, how to send . . . . . . . . messages, using Conference Viewer . . Classic scheduler, definition. . . . . . . . . . Clear Indicator in Line submenu . . . . . . . . . . . Clearing all features, command button . . . . . all features, from Conference Room . . CLPG, definition of . . . . . . . . . . features, additional information . . . . line modification indicator . . . . . . . Clock setting 12-hour or 24-hour . . . . . . . Code conferee, description, scheduling field . moderator, description, scheduling field optional passcode . . . . . . . . . . Code Duration scheduling for . . . . . . . . . . . . CODR conference ID . . . . . . . . . . . . conference minutes . . . . . . . . . . conference name . . . . . . . . . . . confirmation number . . . . . . . . . definition of . . . . . . . . . . . . . . VoIP call data . . . . . . . . . . . . Columns changing in UI windows . . . . . . . . Command line mode, using the main tool bar . . . . . commandPort parameter in bridge.properties . . . . . Commands Access, on main tool bar . . . . . . . Clear CLPG . . . . . . . . . . . . . Conference - Audit . . . . . . . . . . Conference - Details . . . . . . . . . Conference - Hang up . . . . . . . . Conference - Help . . . . . . . . . . Conference - Listen . . . . . . . . . . Conference - New . . . . . . . . . .
. . . .
. . . . 207 . . . . 35 . . . . 80 . 34, 35, 83
. . . . . 168 . . . . . 243 . . . . . 25 . . . . .
. . . . .
. . . . .
. . . . .
. 37 . 247 . 30 . 147 . 148
. . . . . 165 . . . . . 76 . . . . .
. . . . .
. . . . .
. . . . .
. 243 . 203 . 104 . 203 . 76
. . . . . 30 . . . . . 169 . . . . . 170 . . . . . 91 . . . . . 186 . . . . . .
. . . . 53 . . . . 202 . . . . 53 . . . . 169 . . . . 207 . 34, 35, 83
. . . . . 43 . . . . . 241 . . . . . 256 . . . . . . . .
. . . . . . . .
. . . . . . . .
. . . . . . . .
. 242 . 104 . 237 . 237 . 237 . 237 . 237 . 237
Conference - Polling . . . . . . . . . . . Conference - Q&A . . . . . . . . . . . . Conference - Record/Playback . . . . . . Conference - Scan . . . . . . . . . . . Conference - Startup List . . . . . . . . Conference - Transfer . . . . . . . . . . Conference, on main tool bar . . . . . . . Details, modifying participant information . Display, description of tool bar commands DTMF, for default conferences . . . . . . DTMF, for Flex conferences . . . . . . . Enter, on main tool bar. . . . . . . . . . FastDial - Blast . . . . . . . . . . . . . FastDial - Dial . . . . . . . . . . . . . . FastDial - Edit . . . . . . . . . . . . . . FastDial - Hold Dial . . . . . . . . . . . FastDial - New . . . . . . . . . . . . . Fastdial, on Main tool bar . . . . . . . . Fastdial, on main tool bar . . . . . . . . File - Exit . . . . . . . . . . . . . . . . File - Logout . . . . . . . . . . . . . . File - Nighttime . . . . . . . . . . . . . File - Open . . . . . . . . . . . . . . . File - Print Setup . . . . . . . . . . . . File - Session . . . . . . . . . . . . . . Help - About . . . . . . . . . . . . . . Help - Topics . . . . . . . . . . . . . . Hold Dial List . . . . . . . . . . . . . . Hold Line! . . . . . . . . . . . . . . . . Line - Access . . . . . . . . . . . . . . Line - Audio Path . . . . . . . . . . . . Line - Details . . . . . . . . . . . . . . Line - Enter . . . . . . . . . . . . . . . Line - Help . . . . . . . . . . . . . . . Line - Listen . . . . . . . . . . . . . . . Line - Operator Talk . . . . . . . . . . . Line - Release . . . . . . . . . . . . . Line - Retrieve . . . . . . . . . . . . . Line - Transfer . . . . . . . . . . . . . Line, on main tool bar . . . . . . . . . . Moderator. . . . . . . . . . . . . . . . Moderator toggle . . . . . . . . . . . . Music, on main tool bar . . . . . . . . . Mute . . . . . . . . . . . . . . . . . . Options, on main tool bar . . . . . . . . Participant . . . . . . . . . . . . . . . Retrieve, on main tool bar . . . . . . . . set nighttime . . . . . . . . . . . . . . Set, on main tool bar . . . . . . . . . . star (*), commands, description of . . . . Tools - Annunciator . . . . . . . . . . . Tools - Chat . . . . . . . . . . . . . . . Tools - Continuous Beep . . . . . . . . . Tools - Customize . . . . . . . . . . . . Tools - Options . . . . . . . . . . . . .
. . . . . . . . . . . . . . . . . . . . . . . . . . . . . . . . . . . . . . . . . . . . . . . . . . . . . . .
. . 237 . . 237 . . 237 . . 237 . . 237 . . 237 . . 243 . . 145 . . 208 . . 216 . . 222 . . 244 . . 238 . . 238 . . 238 . . 238 . . 238 . . . 95 . 95, 245 . . 232 . . 232 . . 232 . . 232 . . 232 . . 232 . . 240 . . 240 . . . 99 . . . 99 . . 236 . . 236 . . 236 . . 236 . . 236 . . 236 . . 236 . . 236 . . 236 . . 236 . . 246 . . 215 . . 242 . . 246 . . 242 . . 247 . . 215 . . 249 . . 213 . . 248 . . 216 . . 239 . . 239 . . 239 . . 239 . . 239
Issue 1 July 2005
275
Index Tools - Purge . . . . . . . . . . . . Tools - Set ACS . . . . . . . . . . Tools - Set Answer . . . . . . . . . using hot keys . . . . . . . . . . . View - All Lines . . . . . . . . . . . View - Conference Navigator . . . . View - Conference Scheduler . . . . View - Enter queue . . . . . . . . . View - Help Requests . . . . . . . . View - Pending queue . . . . . . . . View - Reports . . . . . . . . . . . View - Tool bar . . . . . . . . . . . Windows - Cascade. . . . . . . . . Windows - Docked . . . . . . . . . Windows - Tile Horizontal . . . . . . Windows - Tile Vertical . . . . . . . Company name, command in Access submenu name, in submenu command . . . . Conf PIN conference PIN list, definition of . . . Conferees assisting . . . . . . . . . . . . . . blast dialing all simultaneously . . . . changing votes of . . . . . . . . . . code, description, scheduling field . . FastDial (dialing one at a time) . . . helping . . . . . . . . . . . . . . . modifying caller information . . . . . questions from . . . . . . . . . . . questions from during Q&A . . . . . voting in conferences . . . . . . . . See also Callers or Participants Conference Activity display command, Options submenu . report, Menu bar . . . . . . . . . . Conference Detail dialog accessing, modifying . . . . . . . . adding music . . . . . . . . . . . . billing code display . . . . . . . . . cross reference display . . . . . . . global ID display . . . . . . . . . . menu item . . . . . . . . . . . . . viewing selected language . . . . . Conference features Auto Extend Duration field . . . . . . Auto Extend Ports setting . . . . . . Code Duration field . . . . . . . . . Conference Viewer setting . . . . . End Time field . . . . . . . . . . . Entry and Exit tones . . . . . . . . Hang up (moderator) field . . . . . . Maximum Lines setting . . . . . . . Music field . . . . . . . . . . . . . Prompt Set setting . . . . . . . . .
276 Bridge Talk 4.0 User’s Guide
. . . . . . . . . . . . . . . .
. . . . . . . . . . . . . . . .
. . . . . . . . . . . . . . . .
. . . . . . . . . . . . . . . .
. . . . . . . . . . . . . . . .
. 239 . 239 . 239 . 41 . 234 . 233 . 235 . 233 . 233 . 233 . 235 . 233 . 240 . 240 . 240 . 240
. . . . . . 242 . . . . . . 246 . . . . . . 172 . . . . . . . . . .
. . . . . . . . . .
. . . . . . . . . .
120, 142 . . 100 . . 119 . . 169 . . 105 120, 142 . . . 145 125, 126 . . . 129 . . . 116
. . . .
. . . . . . 247 . . . . . . 235 . . . . . . .
. . . . . . .
. . . . . . .
. . . . . . .
. . . . . . .
. 144 . 63 . 144 . 144 . 144 . 237 . 146
. . . . . . . . . .
. . . . . . . . . .
. . . . . . . . . .
. . . . . . . . . .
. . . . . . . . . .
. 186 . 186 . 186 . 186 . 187 . 187 . 187 . 188 . 189 . 190
Security field . . . . . . . . . . . . . . Start Time field . . . . . . . . . . . . . Conference IDs additional information . . . . . . . . . . description, scheduling field . . . . . . . setting . . . . . . . . . . . . . . . . . Conference Name description, scheduling field . . . . . . . Conference Navigator window . . . . . . . . changing location of . . . . . . . . . . . modifying conference information . . . . . viewing subconferences . . . . . . . . . Conference Note . . . . . . . . . . . . . . Conference Recording line, in Conference Room, description of . Conference Type description, scheduling field . . . . . . . Conference Viewer description, scheduling field . . . . . . . scheduling for . . . . . . . . . . . . . . using . . . . . . . . . . . . . . . . . . Conferences adding callers . . . . . . . . . . . . . . adding gain to voice levels . . . . . . . . adding operator channel . . . . . . . . . auditing . . . . . . . . . . . . . . . . . automatically placing callers in . . . . . . checking line audio quality . . . . . . . . creating new, EPV . . . . . . . . . . . . deleting records . . . . . . . . . . . . . description of . . . . . . . . . . . . . . dial lists . . . . . . . . . . . . . . . . . dialing a single number during . . . . . . for operators only . . . . . . . . . . . . hang up lines in . . . . . . . . . . . . . hanging up all lines . . . . . . . . . . . IDs . . . . . . . . . . . . . . . . . . . including a note . . . . . . . . . . . . . locking . . . . . . . . . . . . . . . . . managing . . . . . . . . . . . . . . . . menu, description of . . . . . . . . . . . modifying lines for . . . . . . . . . . . . modifying schedules of . . . . . . . . . music, during FastDial . . . . . . . . . . naming . . . . . . . . . . . . . . . . . placing callers in . . . . . . . . . . . . preventing entry (locking) . . . . . . . . printing schedule information . . . . . . . providing music, before conference starts . recording . . . . . . . . . . . . . . . . report, Menu bar . . . . . . . . . . . . reports . . . . . . . . . . . . . . . . . retrieving lines from . . . . . . . . . . . scanning . . . . . . . . . . . . . . . . scheduling attended . . . . . . . . . . .
. . . 190 . . . 189 . . . . 54 . . . 169 . . . . 53 . . . . . .
. . . . . .
. . . . . .
169
. 30 . 34 144 149 148
. . . . 37 . . . 169 . . . 186 . . . 186 . . . 148 . . . . . . . . . . . . . . . . . . . . . . . . . . . . . . . . .
. 75, 212 . . 160 . . . 39 . . 146 . . 212 . . 154 . . . 52 . . 204 . . 243 . . 100 105, 107 . . . 31 . . 243 . . 237 . . . 53 . . 148 . . . 56 199, 211 . . 237 . . 193 . . 193 . . . 99 . . . 53 . . . 75 . . . 56 . . 195 . . . 63 . . . 110 . . 235 . . 206 . . 249 . . 158 . . 173
Index scheduling on-demand . . . . . . . . . . . . . 175 scheduling, a Flex conference . . . . . . . . . . 177 scheduling, a Flex conference call . . . . . . . . 177 securing from outside listeners . . . . . . . . 56, 57 setting up music audio path . . . . . . . . . . . 25 that operator is connected to . . . . . . . . . . 39 tones for . . . . . . . . . . . . . . . . . . . . 54 transferring link lines to . . . . . . . . . . . . . 139 transferring, using tool bar . . . . . . . . . . . . 248 using Conference Scheduler. . . . . . . . 163, 166 viewing information about . . . . . . . . . . . . 30 voting during . . . . . . . . . . . . . . . . . . 116 Conference-wide help, description of . . . . . . . . . . . . . . . 143 Confirmation number additional information on . . . . . . . . . . . . 54 description, scheduling field . . . . . . . . . . . 169 Continuous beep description of . . . . . . . . . . . . . . . . . . 162 Converting public keys to OpenSSH format . . . . . . . . . 270 Cost center associating with conference . . . . . . . . . . . 54 Counts changing vote . . . . . . . . . . . . . . . . . 119 clearing call . . . . . . . . . . . . . . . . . . 201 non-English language support for . . . . . . . . 190 participants, Name Record/Playback . . . . . . . 190 Cross-reference display in Conference Detail . . . . . . . . . . . 144 number, for subconferences . . . . . . . . . . . 149 Crosstalk telnet session, opening . . . . . . . . . . . . . 47 Current line status, description of . . . . . . . . . . . . 60 Cursor animated, problems with . . . . . . . . . . . . 31 Customer identifier associating with conference . . . . . . . . . . . 54 CV Chat starting Conference Viewer session, from Q&A . . 128 CVBrowser parameter in bridge.properties . . . . . . . . . . 256 CVServerPath parameter in bridge.properties . . . . . . . . . . 257
D DC disconnected line status . . . . . . . . . . . . . 39 See also Disconnect DDI filtered Enter queue . . . . . . . . . . . . . . . 73 Dedicated link line, defining . . . . . . . . . . . . . . . . 68
Default Conference Options Flex, modifying using DTMF commands . . . . 222 Delay adding to dialing sequence . . . . . . . . . . . 107 Details conference, accessing or modifying . . . . . . . 144 modifying caller information . . . . . . . . . . 145 Dial command, FastDial submenu . . . . . . . . . 245 command, from Access submenu . . . . . . . 242 Dial in placing callers into conferences . . . . . . . . . 72 Dial lists creating . . . . . . . . . . . . . . . . . . . . . 89 deleting . . . . . . . . . . . . . . . . . . . . . 88 duplicating . . . . . . . . . . . . . . . . . 88, 92 modifying . . . . . . . . . . . . . . . . . . 88, 92 naming, character limitation on . . . . . . . . . . 88 printing . . . . . . . . . . . . . . . . . . . . . 88 using multiple . . . . . . . . . . . . . . . . . 100 Dial out adding 9 to a phone number . . . . . . . . 106, 107 blast . . . . . . . . . . . . . . . . . . . . . 100 FastDial (dialing one at a time) . . . . . . . . . 105 overview . . . . . . . . . . . . . . . . . . . . 94 table that lists types of . . . . . . . . . . . . . . 95 to operator assistant, unattended conferences . 215 using keypad, moderator . . . . . . . . . . . . 217 Digital external recording, leader commands . . . . . . 225 music channel, adding to conference . . . . . . . 63 recording, default moderator commands, . . . . 218 recording, external, moderator commands . . . 218 recording, external, overview . . . . . . . . . . . 110 recording, external, reserving lines . . . . . . . 188 recording, moderator commands, Flex . . . . . 225 Directly to Conf optional access code . . . . . . . . . . . . . . 91 Disconnect a VL line . . . . . . . . . . . . . . . . . . . . 68 all lines, from Menu bar . . . . . . . . . . . . 237 an entire conference . . . . . . . . . . . . . . 243 audio prompt, on Menu bar . . . . . . . . . . 239 hangup, all lines in a conference . . . . . . . . 201 hangup, one or more lines . . . . . . . . . . . 200 mode, audio prompt for . . . . . . . . . . . . 162 number of lines, on status bar . . . . . . . . . . 39 purge lines, from Menu bar . . . . . . . . . . . 239 re-establishing, disconnected line . . . . . . . 107 removing disconnect mode . . . . . . . . . . . 247 when moderator hangs up . . . . . . . . . . . 187 Display As Entered, check box . . . . . . . . . . . . . . 99 description of tool bar commands . . . . . . . . 208
Issue 1 July 2005
277
Index
DNIS Direct mode, in Pending queue, definition . . . . 73 ENT, caller status . . . . . . . . . . . . . . . . 39 filtered Enter queue . . . . . . . . . . . . . . . 73 using with on-demand conferences . . . . 177, 182 DTMF creating subconferences, caller commands . . . . 221 creating subconferences, Flex call commands . . 230 creating subconferences, Flex leader commands . 228 creating subconferences, moderator commands . 220 definition of . . . . . . . . . . . . . . . . . . . 215 Mute All, Flex call flow . . . . . . . . . . . . . 229 overview of, in subconferences . . . . . . . . . 149 passcode, last-entered, Line Detail. . . . . . . . 79 subconferences, overview of . . . . . . . . . . 150 See also Touchtone Duplicate a dial list . . . . . . . . . . . . . . . . . . .88, 92 Duration Auto Extend, scheduling for . . . . . . . . . . . 186
E Edit command, FastDial submenu . . . . . . . enableHangupButton parameter in bridge.properties . . . . . . . End Time scheduling for . . . . . . . . . . . . . . ENT caller status . . . . . . . . . . . . . . . Enter command, description of . . . . . . . . . using keyboard shortcut . . . . . . . . . . Enter queue audio prompt heard in . . . . . . . . . . . continuous beep . . . . . . . . . . . . . DNIS/DDI filtered . . . . . . . . . . . . . DNIS/DDI, number of callers. . . . . . . . DNIS/DDI, using Show All toggle . . . . . DNIS/DDI, using Show Filtered toggle . . . number of callers . . . . . . . . . . . . . Show All toggle, description of, Enter queue Show Filtered button, description of . . . . Time in Queue . . . . . . . . . . . . . . Entry Tone/Exit Tone scheduling for . . . . . . . . . . . . . . Entry tones . . . . . . . . . . . . . . . . . additional information . . . . . . . . . . . command for, Conference submenu . . . . in subconferences . . . . . . . . . . . . scheduling for . . . . . . . . . . . . . . EPV overview, creating new conferences . . . .
278 Bridge Talk 4.0 User’s Guide
. . . 245 . . . 257 . . . 187 . . . 39 . . . 244 . . . 40 . . . . . . . . . .
. . . . . . . . . .
. 75 . 162 . 73 . 39 . 74 . 74 . 39 . 30 . 30 . 35
. . . . . .
. . . . . .
. 187 . 54 . 55 . 243 . 151 . 187
. . . 52
Excluding in Dial list, Q&A priority . . . . . . . . in Line Detail, Q&A priority . . . . . . . votes during poll . . . . . . . . . . . . Exit application from Options submenu . . . Exit tones additional information . . . . . . . . . command, in Conference submenu . . . in subconferences . . . . . . . . . . . scheduling for . . . . . . . . . . . . . Exporting public keys . . . . . . . . . . . . . . Extension dialing, during Fast Dial . . . . . . . . dialing, during Manual Dial . . . . . . . dialing, from Line Detail . . . . . . . . External digital recording, leader commands . . . digital recording, moderator commands . digital recording, overview . . . . . . . digital recording, reserving lines for . . .
. . . . . 90 . . . . . 82 . . . . . 119 . . . . 247 . . . .
. . . .
. . . .
. . . .
. 55 243 151 187
. . . . 270 . . . . . 98 . . . . 106 . . . . . 80 . . . .
. . . .
. . . .
. . . .
225 218 . 110 188
F Fail over messages, displayed . . . . . . FastDial Blast command . . . . . . . . . calls . . . . . . . . . . . . . . description of . . . . . . . . . . description of menu items . . . . Dial command . . . . . . . . . . Edit command . . . . . . . . . . Hold dial command . . . . . . . Starting line number . . . . . . . Fault command, from Access submenu command, Line menu . . . . . . Faulted line, in Line Detail . . . . . . . . lines, additional information . . . number of lines displayed . . . . Features clearing from conference . . . . . File menu description of . . . . . . . . . . Filtered DNIS/DDI Enter queue. . . . . . Find Conference function, in Line Detail . . . . . . Flex conference, how to schedule . . . DTMF commands, for Flex . . . . scheduling options. . . . . . . .
. . . . . . . . 37 . . . . . . . .
. . . . . . . .
. . . . . . . .
. . . . . . . .
. . . . . . . .
. . 245 . . 105 . 95, 245 . . 238 . . 245 . . 245 . . 245 . . . 97
. . . . . . . 242 . . . . . . . 246 . . . . . . . . 83 . . . . . . . 161 . . . . . . . . 39 . . . . . . . 203 . . . . . . . 232 . . . . . . . . 73 . . . . . . . . 79 . . . . . . . 177 . . . . . . . 222 . . . . . . . 177
Index scheduling, security passcode . touchtone commands . . . . . FLT faulted line status . . . . . . . FTP exporting public keys . . . . .
. . . . . . . . . 172 . . . . . . . . . 230 . . . . . . . . . 39 . . . . . . . . . 270
G Gain adding to conference voice levels . . . . . additional information . . . . . . . . . . . command, in Conference submenu . . . . Generate command, report types . . . . . . . . . . Get Next Enter additional information on . . . . . . . . . description of . . . . . . . . . . . . . . . Get Next Help description of . . . . . . . . . . . . . . . Global conferences, AUTOVLL line, description of . Global ID display in Conference Detail dialog. . . . . Groups transferring participants into subconferences
. . . 160 . . . 160 . . . 243 . . . 235 . . . 75 . . . 75
. . . . . . . . . . . .
. . . . . . . . . . . .
. . . 36
. . . . . . .
. . . . . . . . . . 39 . . . . . . . . . . 99 . . . . . . . . . 245 . . . . . . . . . . 99 . . . . . . . . . . 47 . . . .
. . . .
. . . .
. . . .
. . . .
. . . .
. . . .
. . . .
. . . .
. 84 . 41 . 40 241
. . . . . . . . . 213 . . . . . . . . . . 63
I ID
. . . 144 . . . 137
237, 243 . . . 187 . . . 83 . . . 161 . . . 99 . . . 151 . . . 242 . . . 246 . . . 200 . . . 187 . . . 24 . . . 68
. . . . . 40 . . . . . 143 . . . . . 143 . . . . . . .
. . . . . . . . . . 79
. . . 142
H Hang up conference lines . . . . . . . . . . . conference, when moderator leaves . . during a dial in . . . . . . . . . . . . faulted line, removing . . . . . . . . . in Dial List dialog box . . . . . . . . . in subconferences . . . . . . . . . . line using Access button . . . . . . . line, using Line button . . . . . . . . . line, using Line submenu tool bar . . . moderator, scheduling for . . . . . . . operator line . . . . . . . . . . . . . virtual link line . . . . . . . . . . . . Help accessing line, using keyboard shortcut conference-wide, description of . . . . individual, description of . . . . . . . . Help Requests queue additional information . . . . . . . . . conference-wide help, description . . . description . . . . . . . . . . . . . . number of callers . . . . . . . . . . . providing assistance . . . . . . . . . Time in Queue . . . . . . . . . . . . when to use . . . . . . . . . . . . .
Hide/Find function, in Line Detail dialog . HLP caller status in Help . . . . . Hold Dial List command . . . . . . . . . . command, FastDial submenu Hold Line! command . . . . . . . . . . Hostaccess telnet session, opening . . . Hot keys for Line Detail dialog . . . . . for main tool bar . . . . . . . for Menu bar . . . . . . . . using . . . . . . . . . . . . Hunt group ACS, potential problems with . workaround, for link lines. . .
. . . . . . .
. . . . . . .
. 143 . 143 . 31 . 39 . 142 . 38 . 142
command, in Conference submenu . . . IDs setting conference . . . . . . . . . . . Indicator clearing . . . . . . . . . . . . . . . . of accessed line . . . . . . . . . . . . of changes to caller details during polling of changes to caller details during Q&A . Individual help, description of . . . . . . . . . .
. . . . 243 . . . . . 53 . . . .
. . . .
. . . .
. . . .
. 76 . 76 . 117 127
. . . . 143
K Keyboard shortcut keys . . . . . . . . . Keypad commands . . . . . . . . . . Keys converting, to OpenSSH format exporting to bridge. . . . . . .
. . . . . . . . . 40 . . . . . . . . 215 . . . . . . . . 270 . . . . . . . . 270
L Language viewing prompt set from Conference Details. viewing prompt set from Line Details dialog . Leader modifying conference options . . . . . . . scheduling a conference . . . . . . . . . .
. . 146 . . . 79 . . 222 . . 177
Issue 1 July 2005
279
Index
Lecture additional information . . . . . . . . command, in Conference submenu . muted lines, during polling . . . . . . Line accessed line status . . . . . . . . audio quality . . . . . . . . . . . . Base status, description . . . . . . . blast dialing . . . . . . . . . . . . call type, in Line submenu . . . . . . clearing disconnected . . . . . . . . command, flags lines as reconnected command, for virtual link line . . . . command, naming a line . . . . . . company name, Line submenu . . . Current status, description. . . . . . description of . . . . . . . . . . . . dialing out . . . . . . . . . . . . . excluding from vote counts . . . . . faulting . . . . . . . . . . . . . . . Hangup submenu command . . . . . hangup, using Line button . . . . . . hangup, using Line submenu tool bar ignoring calls . . . . . . . . . . . . indicator of accessed line . . . . . . indicator, in Polling . . . . . . . . . indicator, in Q&A . . . . . . . . . . linking, using tool bar for . . . . . . listening to . . . . . . . . . . . . . moderator command, Line submenu . mute toggle command . . . . . . . number of available . . . . . . . . . number of disconnected . . . . . . . number of faulted . . . . . . . . . . reserved within a 24-hour period . . . resetting times to zero . . . . . . . retrieving . . . . . . . . . . . . . . starting point during BlastDial . . . . starting point during FastDial . . . . status, key to . . . . . . . . . . . . transferring link lines . . . . . . . . virtual, linking to other systems . . . Line Connect Times command, on Display submenu . . . report, Menu bar . . . . . . . . . . Line Detail dialog Caller ID . . . . . . . . . . . . . . choosing call type . . . . . . . . . . defining a virtual link line . . . . . . dialing an extension . . . . . . . . . DTMF passcode, description of . . . faulting a line in . . . . . . . . . . . filling in fields using Associate button . Find Conference function . . . . . . Hide/Find function . . . . . . . . .
280 Bridge Talk 4.0 User’s Guide
. . . . . . 58 . . . . . . 243 . . . . . . 118 . . . . . . . . . . . . . . . . . . . . . . . . . . . . . . . . . . . . .
. . . . . . . . . . . . . . . . . . . . . . . . . . . . . . . . . . . . .
. . . . . . . . . . . . . . . . . . . . . . . . . . . . . . . . . . . . .
. . . . . . . . . . . . . . . . . . . . . . . . . . . . . . . . . . . . .
. . . . . . . . . . . . . . . . . . . . . . . . . . . . . . . . . . . . .
. 39 . 154 . 60 . 100 . 246 . 202 . 246 . 246 . 246 . 246 . 60 . 246 . 105 . 119 . 161 . 246 . 246 . 200 . 212 . 76 . 117 . 127 . 248 . 158 . 246 . 246 . 192 . 39 . 39 . 191 . 203 . 249 . 102 . 97 . 234 . 139 . 68
. . . . . . 244 . . . . . . 235 . . . . . . . . .
. . . . . . . . .
. . . . . . . . .
. . . . . . . . .
. . . . . . . . .
. . . . . . . . .
78 82 82 80 79 83 86 79 79
placing a caller . . . . . . . . . . . . . . placing participants in secured conference . Release button . . . . . . . . . . . . . . Release on Close option . . . . . . . . . . Release on Close, definition of . . . . . . . shortcut keys . . . . . . . . . . . . . . . viewing selected language, based on DNIS . Line menu description of . . . . . . . . . . . . . . . LineDetailDialogShowFindButton parameter in bridge.properties . . . . . . . Lines dialing out . . . . . . . . . . . . . . . . . Link lines defining a dedicated . . . . . . . . . . . . hunt group, workaround for . . . . . . . . setting up audio path for . . . . . . . . . . using tool bar . . . . . . . . . . . . . . . Listen command, in Options submenu. . . . . . . Listening commands, additional information . . . . . overview of commands . . . . . . . . . . to music in a conference . . . . . . . . . . to recorded audio . . . . . . . . . . . . . to specific lines . . . . . . . . . . . . . . Lists See also Dial lists Lock conference, additional information . . . . . conference, command, Conference submenu of application windows . . . . . . . . . . . Logins . . . . . . . . . . . . . . . . . . . . Look up scheduled conferences . . . . . . . . . .
. . . . . . .
. . . . . . .
. . . . . . .
83 84 83 83 83 84 79
. . 236 . . 257 . . 107 . . . .
. . . .
. 68 . 63 . 25 248
. . 247 . . . . .
. . . . .
155 154 . 63 . 80 155
. . . .
. . . .
. 56 243
. 49 . 20
. . 193
M Main tool bar description of . . . . . . . . shortcut keys . . . . . . . . using buttons . . . . . . . . Maintenance opening a telnet session . . . privileges . . . . . . . . . . Manual dial additional information . . . . in Fastdial dialog box . . . . Maximum Lines scheduling for . . . . . . . . maxNumOpers parameter in bridge.properties Menu bar shortcut keys . . . . . . . . using Menu bar options . . .
. . . . . . . . . . 30 . . . . . . . . . . 41 . . . . . . . . . 241 . . . . . . . . . 232 . . . . . . . . . . 22 . . . . . . . . . 107 . . . . . . . . . . 99 . . . . . . . . . 188 . . . . . . . . . 257 . . . . . . . . . . 40 . . . . . . . . 30, 232
Index
Messages alarm . . . . . . . . . . . . . . . . . . . . . 30 annunciator . . . . . . . . . . . . . . . . . . 62 chat . . . . . . . . . . . . . . . . . . . . . . 30 displayed by system . . . . . . . . . . . . . . 30 fail over, displayed . . . . . . . . . . . . . . . 37 sending to operators . . . . . . . . . . . . . . 147 sending, using Conference Viewer . . . . . . . . 148 using default . . . . . . . . . . . . . . . . . . 103 using selected . . . . . . . . . . . . . . . . . 103 Midnight scheduling conferences spanning 24 hours . . . . 176 scheduling Flex conferences, spanning 24 hours . 180 Minutes-per-conference clearing statistics . . . . . . . . . . . . . . . . 202 command, in Purge submenu . . . . . . . . . . 247 command, on Display submenu . . . . . . . . . 244 report, Menu bar . . . . . . . . . . . . . . . . 235 Mode commands, entering from keyboard . . . . . . . 241 description, scheduling field . . . . . . . . . . . 170 no-answer . . . . . . . . . . . . . . . . . . . 213 Scan, in Pending queue . . . . . . . . . . . . . 73 Moderator code, description, scheduling field . . . . . . . . 170 command, from Access submenu . . . . . . . . 242 command, Line submenu . . . . . . . . . . . . 246 dial out . . . . . . . . . . . . . . . . . . . . . 217 DTMF, for Flex conferences . . . . . . . . . . . 222 hang up, of conference . . . . . . . . . . . . . 187 line, when muted . . . . . . . . . . . . . . . . 59 muting, by operator . . . . . . . . . . . . . . . 81 operator request, unlock secured conference . . 57, 84 setting up automatic BlastDial for . . . . . . . . 105 table listing commands . . . . . . . . . . . . . 215 Modifying a dial list . . . . . . . . . . . . . . . . . . . . 92 Base line status . . . . . . . . . . . . . . . . 60 conference in progress . . . . . . . . . . . . . 193 conference information . . . . . . . . . . . . . 144 dial list entries . . . . . . . . . . . . . . . . . 93 participant information without accessing the line . 145 MPC fail over messages . . . . . . . . . . . . . . . 37 Multiple Conference Window enabling multiple open windows . . . . . . . . . 49 in Tools - Options . . . . . . . . . . . . . . . . 239 Music adding music, during FastDial . . . . . . . . . . 99 adding to conference . . . . . . . . . . . . . . 63 description of, main tool bar . . . . . . . . . . . 246 in BlastDial . . . . . . . . . . . . . . . . . . . 104 scheduling for . . . . . . . . . . . . . . . . . 189 setting up audio path for . . . . . . . . . . . . . 25 turning on or off manually . . . . . . . . . . . . 246
Mute lines, additional information . . . . . . . . moderator, by operator . . . . . . . . . . participant, command from Access submenu toggle command, Line submenu . . . . . . Mute All description of, Flex call flow . . . . . . . .
. . . .
. . . .
. 59 . 81 242 246
. . 229
N Name command, Conference submenu . . command, from Access submenu . command, Line submenu . . . . . description, scheduling field . . . . Name Record/Playback additional information . . . . . . . participant count. . . . . . . . . . Naming a conference . . . . . . . . . . . NAT configuring workstations . . . . . . NatConnection parameter in bridge.properties . . . parameter, in bridge.properties file . NatTcpBridgePort parameter in bridge.properties . . . NatTcpKeepAliveMSec parameter in bridge.properties . . . NatUdpBridgePort parameter in bridge.properties . . . NatUdpKeepAliveMSec parameter in bridge.properties . . . Network Address Translation (NAT) configuring workstations . . . . . . Next accessing lines during BlastDial . . Nighttime command . . . . . . . . . No answer reports . . . . . . . . . . . . . . setting . . . . . . . . . . . . . . setting individual lines . . . . . . . Normal priority, in dial list . . . . . . . . . priority, in Q&A . . . . . . . . . . Note command, in Conference submenu . Notes adding, during a conference . . . . numPromptSetLangs parameter in bridge.properties . . .
. . . .
. . . .
. . . .
. . . .
. . . .
. . . .
243 242 246 171
. . . . . . 171 . . . . . . 190 . . . . . . . 53 . . . . . . 263 . . . . . . 257 . . . . . . 263 . . . . . . 258 . . . . . . 258 . . . . . . 258 . . . . . . 258 . . . . . . 262 . . . . . . 104 . . . . . . 213 . . . . . . 235 . . . . . . 213 . . . . . . 244 . . . . . . . 90 . . . . . . . 82 . . . . . . 243 . . . . . . 148 . . . . . . 258
Issue 1 July 2005
281
Index Listen command, in submenu . . . . moderator lines displayed first . . . . modifying, predefined Flex conference number of lines per column . . . . . opening multiple conference rooms . . opening Scheduler from the tool bar . printing conference status, submenu . Scan command, in submenu . . . . .
O ODO (Originator Dial Out) moderator keypad commands . . . . . . . . On-demand creating scheduling profiles . . . . . . . . . scheduling a conference call. . . . . . . . . Op Help Available scheduling option . . . . . . . . . . . . . . Op Talk use of, during Q&A . . . . . . . . . . . . . OpenSSH format, converting keys . . . . . . . . . . . format, methods of creating . . . . . . . . . SSH1_RSA protocol . . . . . . . . . . . . SSH2_DSA protocol . . . . . . . . . . . . SSH2_RSA protocol . . . . . . . . . . . . Operators adding channel to conference . . . . . . . . auditing a conference . . . . . . . . . . . . checking line audio quality. . . . . . . . . . components of UI window for . . . . . . . . conference area . . . . . . . . . . . . . . conference connection to . . . . . . . . . . conference room, description of . . . . . . . deleting scheduling records . . . . . . . . . hanging up a line . . . . . . . . . . . . . . linking virtual lines . . . . . . . . . . . . . modifying caller information . . . . . . . . . muting moderator, Line Detail . . . . . . . . naming conferences . . . . . . . . . . . . printing schedule information . . . . . . . . privileges . . . . . . . . . . . . . . . . . . report, Menu bar . . . . . . . . . . . . . . requesting moderator to unlock conference . . scanning conferences . . . . . . . . . . . . sending messages to . . . . . . . . . . . . sending messages, Conference Viewer . . . statistics for, command, on Display submenu . status bar . . . . . . . . . . . . . . . . . talk path . . . . . . . . . . . . . . . . . . time-sensitive assistance . . . . . . . . . . transferring callers . . . . . . . . . . . . . turning talk function on/off . . . . . . . . . . voice path (toggle on/off) . . . . . . . . . . OPR operator connection status . . . . . . . . . Options annunciator submenu command . . . . . . . Chat command in submenu . . . . . . . . . description of, on tool bar . . . . . . . . . . displaying Conference Activity . . . . . . . . exiting application from Options submenu . .
282 Bridge Talk 4.0 User’s Guide
. . 217 . . 175 . . 175 . . 172 . . 130 . . . . .
. 270 . 269 . 266 . 269 . 268
. . 39 . . 146 . . 154 . . 30 . . 57 . . 39 . . 31 . . 204 . . 24 . . 68 . . 145 . . 81 . . 53 . . 195 . . 22 . . 235 . 57, 84 . . 158 . . 147 . . 148 . . 244 . . 31 . . 236 . . 38 . . 136 . . 146 . . 40 . . 39 . . . . .
. 247 . 247 . 247 . 247 . 247
. . . . . . . .
. . . . . . . .
. . . . . . . .
. . . . . . . .
. . . . . . . .
247 239 222 239 239 247 247 247
OS system requirements . . . Out of service lines, handling . Overbilling preventing, using purge . . Overbooking in unattended conferences .
. . . . . . . . . . . 16 . . . . . . . . . . 161 . . . . . . . . . . 202 . . . . . . . . . . 188
P Parameters allowConfToolBarFocus . . . . . commandPort . . . . . . . . . . CVBrowser . . . . . . . . . . . CVServerPath . . . . . . . . . . enableHangupButton . . . . . . LineDetailDialogShowFindButton . maxNumOpers . . . . . . . . . NatConnection . . . . . . . . . NatTcpBridgePort . . . . . . . . NatTcpKeepAliveMSec . . . . . NatUdpBridgePort . . . . . . . . NatUdpKeepAliveMSec . . . . . numPromptSetLangs . . . . . . promptSetLang1 . . . . . . . . promptSetLang2 . . . . . . . . promptSetLang3 . . . . . . . . promptSetLang4 . . . . . . . . schapi_timer_C . . . . . . . . . schedulerApp . . . . . . . . . . schedulerNoPrompt . . . . . . . setting system . . . . . . . . . . showLineModifyIndicator . . . . . showTimeInHelpQueue . . . . . SSchedPath . . . . . . . . . . statusTCPKeepAliveMsgWait . . statusTCPLastMsgInterval . . . . TalkMSecInterval . . . . . . . . TcpStatusPort . . . . . . . . . . timeInQueueInterval . . . . . . . UdpStatusPort . . . . . . . . . Participants assisting . . . . . . . . . . . . table listing commands . . . . . talking to . . . . . . . . . . . .
. . . . . . . . . . . . . . . . . . . . . . . . . . . . . .
. . . . . . . . . . . . . . . . . . . . . . . . . . . . . .
. . . . . . . . . . . . . . . . . . . . . . . . . . . . . .
. . . . . . . . . . . . . . . . . . . . . . . . . . . . . .
. . . . . . . . . . . . . . . . . . . . . . . . . . . . . .
. . . . . . . . . . . . . . . . . . . . . . . . . . . . . .
. . . . . . . . . . . . . . . . . . . . . . . . . . . . . .
256 256 256 257 257 257 257 257 258 258 258 258 258 258 259 259 259 259 259 259 212 260 260 260 260 260 261 261 261 261
. . . . . . . 141 . . . . . . . 215 . . . . . . . . 39
Index
transferring into smaller groups, subconferences transferring one or more . . . . . . . . . . . . virtual link, two conferences . . . . . . . . . . See also Callers or Conferees Passcode last-entered, description of . . . . . . . . . . second level, scheduling for . . . . . . . . . . Past Conference reports, from Menu bar . . . . . . . . . . . . reports, viewing and printing . . . . . . . . . . Paths of default installation . . . . . . . . . . . . . PC system requirements . . . . . . . . . . . . . Pending queue audio prompt heard in . . . . . . . . . . . . . continuous beep . . . . . . . . . . . . . . . line indicator, description . . . . . . . . . . . number of callers . . . . . . . . . . . . . . . Phone extension, dialing during Fast Dial . . . . . . . extension, dialing during Manual Dial . . . . . extension, dialing from Line Detail . . . . . . . numbers, characters used in. . . . . . . . . . PIN codes and lists, definition of . . . . . . . . . . PIN List description, scheduling field . . . . . . . . . . PIN Mode description, scheduling field . . . . . . . . . . Place command, from Access submenu . . . . . . . Placing callers during Blast . . . . . . . . . . . . . . callers using Get Next Enter . . . . . . . . . . callers without an access code . . . . . . . . participants, unlocking a secured conference . . Play playback command, analog . . . . . . . . . . playback command, Conference submenu . . . playback, annunciator messages . . . . . . . Poll command, in Conference submenu . . . . . . Polling adding caller details from audio . . . . . . . . line indicator, description . . . . . . . . . . . muted lines, in lectured conference . . . . . . Polling sessions conducting . . . . . . . . . . . . . . . . . . ending . . . . . . . . . . . . . . . . . . . . results . . . . . . . . . . . . . . . . . . . . starting . . . . . . . . . . . . . . . . . . . . Population of Line Detail dialog box from roster . . . . . .
. 137 . 248 . 68 . 79 . 172 . 235 . 209 . 253 . 16 . 75 . 162 . 76 . 39 . 98 . 106 . 80 . 107 . 172 . 172 . 172 . 242 . 104 . 75 . 91 . 84 . 112 . 243 . 62 . 243 . 117 . 117 . 118 . 116 . 122 . 121 . 117
Ports Auto Extend, scheduling for . . . . . . . . . . 186 Predefined application executable . . . . . . . . . . . . . 253 Print command, in Options submenu. . . . . . . . . 247 Printing CDRs, CODRs . . . . . . . . . . . . . . . . . 54 Conference Activity report . . . . . . . . . . . 235 Conference Status report . . . . . . . . . . . 235 past conference reports . . . . . . . . . . . . 209 scheduled conferences information . . . . . . . 195 Privileges for administrator-related tasks . . . . . . . . . . 22 for operator-related tasks . . . . . . . . . . . . 22 for scheduler-related tasks . . . . . . . . . . . . 22 Profiles setting up, for Flex . . . . . . . . . . . . . . . 177 setting up, for On-demand or Flex . . . . . . . 175 Prompt Set description, scheduling field . . . . . . . . . . 190 scheduling for . . . . . . . . . . . . . . . . . 190 viewing selected conference language . . . . . 146 viewing selected language from Line Details dialog 79 viewing selected language of the participant. . . . 79 viewing selected language, Conference Details . 146 promptSetLang1 parameter in bridge.properties . . . . . . . . . 258 promptSetLang2 parameter in bridge.properties . . . . . . . . . 259 promptSetLang3 parameter in bridge.properties . . . . . . . . . 259 promptSetLang4 parameter in bridge.properties . . . . . . . . . 259 Protocols SSH1_RSA . . . . . . . . . . . . . . . . . . 266 SSH2_DSA . . . . . . . . . . . . . . . . . . 269 SSH2_RSA . . . . . . . . . . . . . . . . . . 268 Public keys, exporting to bridge . . . . . . . . . . . . 270 Purge Call counts, submenu command . . . . . . . . 247 description of . . . . . . . . . . . . . . . . . 239 disconnect lines, submenu command . . . . . . 247 Minutes-per-conference, submenu command . . 247 Total Line Times command . . . . . . . . . . 247 puTTY SSH, setting up a secured channel . . . . . . . 264 telnet application, using . . . . . . . . . . . . . 47
. 83
Issue 1 July 2005
283
Index
Q Q&A (Question-and-Answer) . . . . . additional information . . . . . . . Ask? button . . . . . . . . . . . command, in Conference submenu in Dial list . . . . . . . . . . . . line indicator, description . . . . . Op Talk, button, use of . . . . . . pressing *1 during subconferences. Release button, use of . . . . . . Resume button, use of . . . . . . sessions . . . . . . . . . . . . . setting caller priority. . . . . . . . starting Conference Viewer . . . .
. . . . . . . . . . . . .
. . . . . . . . . . . . .
. . . . . . . . . . . . .
. . . . . . . . . . . . .
. . . . . . . . . . . . .
. . . . . . . . . . . . .
. 125 . 130 . 132 . 243 . 90 . 127 . 130 . 152 . 133 . 133 . 126 . 82 . 128
R Reconnect command, Line submenu . . . . . . Record/Playback additional information . . . . . . . . setting up recording audio path . . . Recording analog . . . . . . . . . . . . . . . automatic start, overview of . . . . . conferences . . . . . . . . . . . . conferences chapter . . . . . . . . moderator keypad commands . . . . moderator touchtone commands . . . placing a record channel . . . . . . setting up audio path for . . . . . . . Regional setting time display . . . . . . . . . Release button, operator help option . . . . . button, questions during Q&A, . . . . button, use of in Line Detail dialog . . command, from Access submenu . . on Close, option, in Line Detail dialog Release on Close using Line Detail dialog with . . . . . Reports ACS . . . . . . . . . . . . . . . . adding a conference note to . . . . . Conference Activity . . . . . . . . . Conference Status . . . . . . . . . how values increment . . . . . . . . line connect times . . . . . . . . . minutes per conference . . . . . . . operator status . . . . . . . . . . . printing and viewing status . . . . . total line times . . . . . . . . . . .
284 Bridge Talk 4.0 User’s Guide
Results conference name requirement . . . polling . . . . . . . . . . . . . . Resume button, in Q&A . . . . . . . . . . Retrieve description of . . . . . . . . . . . line from wrong conference . . . . scheduled conferences . . . . . . Roll call in subconferences . . . . . . . . . using voice roster . . . . . . . . . Roster command, from Access submenu . for voice roll call . . . . . . . . . . populating in Line Detail dialog box . using to supply information to dial list
. . . . . . . 53 . . . . . . 121 . . . . . . 133 . . . . . . 249 . . . . . . 249 . . . . . . 193 . . . . . . 151 . . . . . . . 55 . . . .
. . . .
. . . .
. . . .
. . . .
. . . .
242
. 55 . 83 . 86
S . . . . . . 246 . . . . . . 171 . . . . . . 25 . . . . . . . .
. . . . . . . .
. . . . . . . .
. . . . . . . .
. . . . . . . .
. 111 . 110 . 110 . 109 . 218 . 225 . 243 . 25
. . . . . . 30 . . . . .
. . . . .
. . . . .
130, 131 . . . 133 . . . 83 . . . 242 . . . 83
. . . . . . 83 . . . . . . . . . .
. . . . . . . . . .
. . . . . . . . . .
. . . . . . . . . .
. . . . . . . . . .
. 235 . 148 . 235 . 235 . 206 . 235 . 235 . 235 . 206 . 235
Scan command, in Options submenu. . . . . . . mode, in Pending queue, definition . . . . . Scanning conferences . . . . . . . . . . . . . . . . schapi_timer_C parameter in bridge.properties . . . . . . . Scheduler accessing reservations, during emergencies Advanced, definition . . . . . . . . . . . . Classic, definition . . . . . . . . . . . . . command, in Options submenu. . . . . . . privileges . . . . . . . . . . . . . . . . . system requirements . . . . . . . . . . . schedulerApp parameter in bridge.properties . . . . . . . schedulerNoPrompt parameter in bridge.properties . . . . . . . Scheduling a daily conference . . . . . . . . . . . . . a Flex conference call . . . . . . . . . . . a monthly conference . . . . . . . . . . . a one-time conference . . . . . . . . . . . a weekly conference . . . . . . . . . . . . an on-demand conference . . . . . . . . . an on-going conference . . . . . . . . . . description, conference ID field . . . . . . . Flex conferences . . . . . . . . . . . . . for Auto Extend Duration . . . . . . . . . . for Auto Extend of ports . . . . . . . . . . setting up profiles, for Flex . . . . . . . . . setting up profiles, for On-demand or Flex . . Search For field in Line Detail . . . . . . . . . . . . . . .
. . 247 . . . 73 . . 158 . . 259 . . . . . .
. . . . . .
197 165 165 247 . 22 . 16
. . 259 . . 259 . . . . . . . . . . . . .
. . . . . . . . . . . . .
183 177 184 183 184 175 183 169 177 186 186 177 175
. . . 80
Index
Security additional information . . . . . . . . . . . . . . 57 command, in Conference submenu . . . . . . . 243 in subconferences . . . . . . . . . . . . . . . 152 operator conference . . . . . . . . . . . . . . 57 passcode, description, scheduling field . . . . . . 172 requesting moderator to unlock conference . . . 57, 84 scheduling for . . . . . . . . . . . . . . . . . 190 setting up secured connections, admin software . 264 Server fail over message . . . . . . . . . . . . . . . . 37 Sessions polling . . . . . . . . . . . . . . . . . . .116, 117 polling, ending . . . . . . . . . . . . . . . . . 122 polling, starting . . . . . . . . . . . . . . . . . 116 Q&A, description of . . . . . . . . . . . . . . . 126 Q&A, starting . . . . . . . . . . . . . . . . . . 125 questions during Q&A . . . . . . . . . . . . . . 129 Set 12-hour or 24-hour format . . . . . . . . . . . . 30 button, on main tool bar . . . . . . . . . . . . . 248 Nighttime command. . . . . . . . . . . . . . . 213 Shortcut keys, for Line Detail dialog . . . . . . . . . . . 84 keys, for main tool bar . . . . . . . . . . . . . 41 keys, for Menu bar . . . . . . . . . . . . . . . 40 Show All toggle, description of, Enter queue . . . . . . . . 30 toggle, in DNIS/DDI Enter queue . . . . . . . . . 74 Show All Conferences in Line Detail . . . . . . . . . . . . . . . . . . 80 Show Filtered description of, Enter queue . . . . . . . . . . . 30 toggle, in DNIS/DDI Enter queue . . . . . . . . . 74 showLineModifyIndicator parameter in bridge.properties . . . . . . . . . . 260 showTimeInHelpQueue parameter in bridge.properties . . . . . . . . . . 260 Sign-in as administrator or maintenance . . . . . . . . . 27 exiting from current login . . . . . . . . . . . . 27 invalid sign-in or password . . . . . . . . . . . 21 login procedure . . . . . . . . . . . . . . . . . 20 name, description, scheduling field . . . . . . . . 172 operator session . . . . . . . . . . . . . . . . 27 table of privileges . . . . . . . . . . . . . . . . 22 Sort dial list entries, alphabetically or as entered . . . 86 Speed dialing table that lists types of . . . . . . . . . . . . . 95 SSchedPath parameter in bridge.properties . . . . . . . . . . 260 SSH exporting public keys . . . . . . . . . . . . . . 270 SSH1_RSA protocol . . . . . . . . . . . . . . 266
SSH2_DSA protocol . . . . . . . . . . . . . . SSH2_RSA protocol . . . . . . . . . . . . . . Star commands, description of, default . . . . . . . commands, description of, Flex. . . . . . . . . Start Time scheduling for . . . . . . . . . . . . . . . . . Starting line during BlastDial . . . . . . . . . . . . . . . . during FastDial . . . . . . . . . . . . . . . . Startup list, on Conference Menu . . . . . . . . . . . Statistics . . . . . . . . . . . . . . . . . . . . . clearing, preventing overbilling . . . . . . . . . Status bar, operator . . . . . . . . . . . . . . . . . description, scheduling field . . . . . . . . . . line, description of Base . . . . . . . . . . . . line, description of Current . . . . . . . . . . . of line when viewing, letters . . . . . . . . . . reports, printing and viewing . . . . . . . . . . statusTCPKeepAliveMsgWait parameter in bridge.properties . . . . . . . . . statusTCPLastMsgInterval parameter in bridge.properties . . . . . . . . . Subconferences affecting Q&A in main conference . . . . . . . applying moderator hang up . . . . . . . . . . applying security . . . . . . . . . . . . . . . Auto Extend Duration, non -supported feature . . Auto Extend Ports, non -supported feature . . . cross reference number . . . . . . . . . . . . overview . . . . . . . . . . . . . . . . . . . roll call . . . . . . . . . . . . . . . . . . . . starting, using caller DTMF commands . . . . . starting, using Flex leader DTMF commands . . starting, using Flex participant DTMF commands starting, using moderator commands . . . . . . transferring participants into . . . . . . . . . . using entry tones in . . . . . . . . . . . . . . using exit tones in . . . . . . . . . . . . . . . viewing a billing code . . . . . . . . . . . . . viewing from Conference Navigator . . . . . . . Sys PIN system-wide PIN codes, definition . . . . . . . System browser requirements . . . . . . . . . . . . . clearing features . . . . . . . . . . . . . . . clearing information . . . . . . . . . . . . . . displayed messages . . . . . . . . . . . . . . message area, location on UI . . . . . . . . . OS requirements . . . . . . . . . . . . . . . PC requirements . . . . . . . . . . . . . . . Scheduler requirements . . . . . . . . . . . . setting parameters. . . . . . . . . . . . . . .
Issue 1 July 2005
269 268 216 224 189 102
. 97 237 202 202
. 31 172
. 60 . 60 234 206 260 260 152 151 152 151 151 149 150 151 221 228 230 220 137 151 151 151 149 172
. 16 201 202 . 30 . 37 . 16 . 16 . 16 212
285
Index
T Talk (to participants) . . . . . . . . . . . . . TalkMSecInterval parameter in bridge.properties . . . . . . . TcpStatusPort parameter in bridge.properties . . . . . . . Technical support contact information . . . . . . . . . . . . Telephone description, scheduling field . . . . . . . . extension, dialing during Fast Dial . . . . . extension, dialing during Manual Dial . . . extension, dialing from Line Detail . . . . . keypad commands . . . . . . . . . . . . keypad commands, DTMF . . . . . . . . using multiple-line, setting up audio paths . Telnet accessing bridge console, as administrator . Time in Queue Enter. . . . . . . . . . . . . . . . . . . Help Requests . . . . . . . . . . . . . . Time intervals displayed within a 24-hour period . . . . . in Expanded Schedule . . . . . . . . . . setting 12-hour, 24-hour format . . . . . . Time sensitive operator assistance . . . . . . . . . . . . timeInQueueInterval parameter in bridge.properties . . . . . . . Title bar description of . . . . . . . . . . . . . . . TLK operator talk toggle . . . . . . . . . . . . Tones entry . . . . . . . . . . . . . . . . . . . Tool bar . . . . . . . . . . . . . . . . . . . using hot keys . . . . . . . . . . . . . . Tools menu description of . . . . . . . . . . . . . . . Top priority in dial list . . . . . . . . . . . . . . . . . in Q&A . . . . . . . . . . . . . . . . . . Total Line Times report, Menu bar . . . . . . . . Line Times, command, in Display submenu Line Times, resetting to zero. . . . . . . . time statistics, clearing . . . . . . . . . . Touchtone Flex change conference commands . . . . Flex telephone commands, for leaders . . . Flex telephone commands, for participants .
286 Bridge Talk 4.0 User’s Guide
. . . 39 . . . 261 . . . 261 . . . 13 . . . . . . .
. . . . . . .
. 171 . 98 . 106 . 80 . 215 . 215 . 26
. . . 47 . . . 35 . . . 38 . . . 191 . . . 192 . . . 30 . . . 38
standard telephone commands, for moderators standard telephone commands, for participants Transfer command, from Access submenu . . . . . . Transferring calls . . . . . . . . . . . . . . . . . . . . conference, using tool bar . . . . . . . . . . definition of . . . . . . . . . . . . . . . . . link lines, using tool bar . . . . . . . . . . . one or more participants . . . . . . . . . . . participants, into smaller groups . . . . . . .
. 216 . 221 . 242 . . . . . .
136 248 237 248 248 137
. . . . . . . . . .
. . . . . . . . .
U UdpStatusPort parameter in bridge.properties . UI (User Interface) . . . . . . . . application, sections of. . . . . changing window or column size components of . . . . . . . . locking application windows . . logging in . . . . . . . . . . . Main tool bar, description of . . modifying windows . . . . . . starting . . . . . . . . . . . . Unattended conferences dial out to operator assistant . . table listing conference features
. . . . . . . . . .
. . . . . . . . . .
. . . . . . . . . .
. . . . . . . . . .
. . . . . . . . . .
. . . . . . . . . .
. . . . . . . . . .
261 30 30 43 30 49 20 30 43 20
. . . . . . . . 215 . . . . . . . . 186
. . . 261
V
. . . 30
View expanded schedule . . . . . . . . . . . . . . 192 line status, key to . . . . . . . . . . . . . . . 234 menu, description of . . . . . . . . . . . . . . 233 Past Conference reports . . . . . . . . . . . . 209 scheduled conferences . . . . . . . . . . . . 193 time intervals and reserved lines . . . . . . . . 191 Virtual link lines. . . . . . . . . . . . . . . . . . . 68 command, from Access submenu . . . . . . . 242 command, from Line submenu . . . . . . . . . 246 selecting in Line Detail . . . . . . . . . . . . . . 82 VLL See also virtual link lines Voice mail, setting up multiple sessions, impact on . . . 26 path, toggling (on/off) . . . . . . . . . . . . . . 40 roster, using during conferences . . . . . . . . . 55 VoIP description of, billing . . . . . . . . . . . 34, 35, 83
. . . 39 . . . 54 . . . 30 . . . 241 . . . 239 . . . 90 . . . 82 . . . .
. . . .
. 235 . 244 . 247 . 203
. . . 222 . . . 224 . . . 229
Index
W Windows changing UI columns . Conference Navigator . locking UI . . . . . . modifying display . . . polling . . . . . . . . resizing . . . . . . . sizing . . . . . . . .
. . . . . . .
. . . . . . .
. . . . . . .
. . . . . . .
. . . . . . .
. . . . . . .
. . . . . . .
. . . . . . .
. . . . . . .
. . . . . . .
. . . . . . .
. . . . . . .
. . . . . . .
43 30 49 43 116 43 43
Issue 1 July 2005
287
Index
288 Bridge Talk 4.0 User’s Guide