Using FreeCAD Mark J. Norton Sept. 30, 2011 FreeCAD is a 3D graphics application design to support computer aided design(CAD). It allows parametric object creation and easy shaping of parts. However, the online document is lacking - to say the least. This document is intended to capture useful tips, basic processes, etc.
Views Most work in FreeCAD is done from one of six views, though an axometic view is also supported. Views can be selected from view icons at the top of the application.
Getting a feel for these views will help when you start building models. Each of these views can be accessed from the numerical keypad when the app is in view mode, selected by the tab at the bottom of the Property pane:
The icons are as follows: View
Icon
Keypad
Axometic
0
Front
1
Right
2
Top
3
Back
4
Left
5
Bottom
6
The manifier icon, , will center the current document and scale it so that it all fits in the view pane. This is very useful when adding new primitive parts as they are often much larger than the current part you are working on.
Workshops Different modeling techniques are called “workshops” in FreeCAD. Workshops can be thought of as collected sets of operations represented by icons that appear at the top of the application window. Of particular importance to OSE is the Parts Workshop that allow complex shapes to built up out of primitives (cube, cylinder, sphere, cone, and torus). These are selectable from a set of icons at the top of the application:
Clicking on one of these icons will cause that primitive part to be added to your document. It has a default name like “box001”, which can easily be renamed by right clicking on the item in the Labels & Attributes pane and selecting “Rename”. It can also be changed by left clicking on the item, and editing the Label property in the Properties pane.
Sizing a Primitive Part Create a new document and add a box by clicking on the cube icon. It shows as a light green square:
Click on the data tab. In the Properties pane, the Height, Length, and Width properties can be modified by selecting the value and modifying it with the keypad. Units default to millimeters (mm). How is the default units for a document specified?
Change the values to: Height = 8.0 Length=6.0 Width=4.0 Height is the Z axis, Length is the X axis, and Width is the Y axis. Click on the view tab and experiment with different views. In axomatic view, the sized cube looks like this:
Postitioning a Part Part primitives can be moved around in several ways. Precise positioning is done in the Properties pane. Click on the “+” sign next to “Placement”, then click on the plus
sign next to “Position”. The properties for the box will look like this (by default):
The placement of the box is at position [0.00, 0.00, 0.00], which is the origin of the placement coordinates system. On useful trick is to create a sphere and give it a small radius (say 0.2). By default, it should appear at the origin. If not, set the postition to [0.00, 0.00, 0.00]. This gives you a visual representation of where the origin is, which can help when positioning other parts.
Parts can be rotated in the coordinate space as well. Click on the plus sign next to “Axis”. You should see:
The axis properties define an “axis” that you can rotate the select part around. In the above illustration, the angle of rotation will be about the z-axis. To make this a more interesting example, set x to 1.00 and then set Angle to 45 degrees. This will cause the box to be rotated about a line extending from 0,0,0 to 1,0,1. The front view now looks like this:
Making Cuts Cutting away material is an essential way to form more complex parts. Supposed we wanted to drill a hole through our box. Click on the cylinder icon to add a cylinder primitive to the document. Select it. In the data tab, change the radius to 1.00. Set the position to [3.00, 2.00, -1.00]. Change the view to top to see the postioned cylinder.12 To make the hole, click on “Box” in the Labels & Attributes pane, and then control click on “Cylinder”. The order is important because we are going to subtract the second from the first. Now click on the Cut icon at the top of the application window: If you shift to axomatic view, you should see this:
FreeCAD creates a new name for the combined object, “Cut” in this case. If you click on the plus sign next to this part in the Labels & Attributes pane, you’ll see the two primitives that went into making this new part. Besides drilling holes, the cut operation can be used to make angle, bevels, countersunk holes, etc.
Combining Parts Primitive parts can be combined to form more complex parts using the Union operation. To see how this works, create a new document and add two spheres to it. Click on the second sphere (usually called “Sphere001”) and change it’s position to [7.00, 0.00, 0.00]. Your view should looke like this:
As in the cut operation, click on one part, then control-click on a second. The order doesn’t matter in this case, however. Then click on the union icon in the workbench tool bar,
.
This creates a new part called “Fusion” which is the union of the two selected parts. Unions are useful because subsequent operations are done on them as a joined
whole. Thus, I can make a cut through both of them (using a box) to create this:
So, when cutting multiple holes through a part using cylinders, it’s sometimes usefult to place all the cutting cylinders in the document, then create a union of all of them before making the cut. This is especially useful if the same set of holes will appear on another part, since the cylinder union can be selected and copied from one document to another. One note on undo. Occasionally, you’ll make a mistake - perhaps getting the cut order wrong, for example. Select “Undo” from the edit menu or press Control-Z. The last operation will be undone. However, the two parts in that operation will be flagged as non-visible. This can changed in the View property tab of the Properties pane.
Rotating a Part Suppose we have a plate that we want to cut a hole in. Create a box and shape it to the plate dimensions. It might look like this for a half inch thick, five by five plate:
So we add a cylinder to be the cutter:
This won’t do it since we what to use the cylinder to drill through the plate. To do this, rotate the cylinder to the orientation you need. In this picture, the cylinder needs to be rotated around the Y-axis. This takes a bit of visualization, but some experimentation and practice will help.
To rotate, select the Data tab of the Properties pane. Click on the plus-sign in front of Placement, and again on the plus-sign in front of Axis. You should see something like this:
We want to rotate around the Y-axis, so first set the value of the Z-axis to 0.00. This is best done with the little up/down control that appears when you click on the value. Next, set the Y-axis property to 1.00, again with the increment controls. Finally, edit the angle property to 90.00 degrees. You should seen this:
Change the postion of the cylinder and use the Cut icon to cut out the hole:
Strange things happen if you set more than one axis to a value other than zero. Sometimes this is useful since it rotates around more than one axis. Sometimes it just messes things up.
Extrusion Extrusion is a technique for creating a 3D shape from a 2D one (this is a simple explanation, it's actually more powerful than that). Closed 2D shapes will become solids. Open shapes or shapes constructed of more than one drawing element will be hollow when extruded. Closed Shape Extrusion Example Open a new FreeCAD document. Select the poly-line drawing tool from the command bar.
Draw a set of points:
Close the shape by making the final click on your original point:
The shape will be called "wire" in the Tree View. With the "wire" shape selected, click on the Extrude button on the command bar. A Combo View box will appear:
In the "Shape" box, select "Wire". Extrusion is done along a direction established by the Direction parameters in the Combo Box. In this example, we'll do a simple extrusion along the Z-axis. Click the "OK" button in the Combo Box.
The main view will now look like a solid shape:
If you click on the 3D view button, you'll see this:
You can play around with the extrusion even after it's been done. Select the Data tab on the "Property View" and drop down the Dir property. Increase the value of Y by one
(Dir = [0.00, 1.00, 1.00]. The 3D view now looks like this:
By changing the Y value, we've changed the extrusion to happen in two directions at once: Y and Z. This is more obvious if you look at a before and after side view:
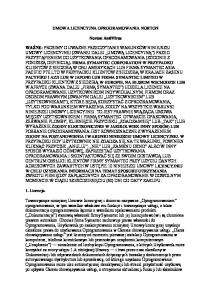
Open Shape Extrusion To illustrate that some shapes will result in open solids once extruded, the following drawing consists of an arc and two lines, merged as a single union:
If we extrude this along the z-axis, we get:
Note that the top and bottom are open. The individual shapes that make up the union are extruded, which means that the result is open at the top and bottom. Here is a fully open shape extruded: