The Black Skimmer Sea Kayak Designed by Duane Strosaker
Model Name
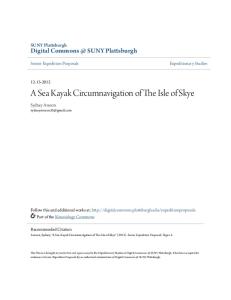
The Black Skimmer is named after the seabird that gracefully flies low over the water at night, skimming its lower beak along the surface to catch fish.
The Black Skimmer sea kayak.
Design
The Black Skimmer is a low volume sea kayak designed to paddle fast and roll easy. The narrow, flared, and V hull, with moderately raked stems, glides efficiently through the water. With moderate rocker, more fore and less aft, the design behaves well and is a pleasure to paddle in calm and rough conditions. The unique "humpdeck" allows the feet to be vertical and together against a bulkhead footrest for better forward stroke posture, technique, and power. The low back deck makes rolling easy.
The "humpdeck" with room for the feet to be vertical and together for a better forward stroke.
Dimensions
Length: 18 feet, 6 inches (with the tips untrimmed) Width: 19 inches Cockpit depth: 8 3/4 inches in front and 6 inches in back (add 1 inch for coaming height) Foot area depth: 10 inches Recommended paddler size: up to 6 feet tall and 175 pounds. 165 pounds is ideal. If you can't fit into 32 inch wide pants, forget about it.
The hull with the bow in the foreground.
Building the Black Skimmer
The instructions for building the Black Skimmer are online at the link below. You may use the instructions to build your own kayak for non-commercial purposes.
Building the Black Skimmer by Duane Strosaker Special Note These building instructions are intended for people who: 1. Read and studied The New Kayak Shop by Chris Kulczycki and The Strip-Built Sea Kayak by Nick Schade. 2. Read and studied the user manual for the brand of epoxy being used. 3. Agree to build and paddle the Black Skimmer at their own risk. You may use these instructions to build your own kayak for non-commercial purposes. Rough Cutting the Panels Cut from 4 sheets of 8 foot by 4 foot marine grade 4 mm Okoume plywood: 1. 10 pieces that are 9 inches wide and 8 feet (sheet length) long. Cut 2 of these pieces into 4 pieces 3 feet long. These pieces are for the bottom and side panels that form the hull. 2. 2 pieces that are 20 inches wide and 8 feet (sheet length) long. These pieces are the stern and center sections of the deck. 3. 1 piece that is 12 inches wide and 4 feet long. This piece is the bow section of deck. 4. 2 pieces that are 8 inches wide and 6 feet long. These pieces are the side sections of the deck. Joining the Rough Panels Use scarf joints to join the rough hull panels and butt joints to join the rough deck panels. Scarf joints in the hull panels allow them to be stacked with the insides of the pairs facing each other during cutting and planing, resulting in more uniform and fair lines during stitching. The more easily made butt joints are fine for joining the rough deck panels. 1. For each of the 4 hull panels (2 bottom and 2 side), join 2 of the 9 inch by 8 foot pieces and one of the 9 inch by 3 foot pieces end to end. Arrange the pieces anyway you like. 2. For the deck join the 2 pieces that are 20 inches wide by 8 feet long for the stern and center sections of the deck and the 12 inch wide by 4 foot long piece for the bow. The 2 deck side panels that are 8 inches wide and 6 feet long will be attached later. Lofting the panels The lofting numbers for the panels are easy to understand. From a starting point on a panel, the numbers tell you how far to go to the right along a straight line, and then from there, how far to go up or down for each point. For example, one of the lines for lofting the bottom hull panels
reads, “At 5 feet to the right the keel is up 1/16 inches and the chine is up 5 27/32 inches.” Only loft on one of each of the bottom and side panels, because they will be stacked with the other bottom and side panels during cutting and planing to reduce the work by half. Important! The hull panels are measured bow to stern, but the deck is measured stern to bow. Be sure to check the direction being measured, and mark the bow and stern on the panels to prevent installing them backwards. Make sure the lines are fair, meaning the curves are smooth and without bulges or hallows. Being off by as little as 1/32 of an inch can cause a noticeably unfair line. Try your best to keep the keel line in the bottom hull panels as accurate and fair as possible. Because the bottom panels meet at a shallow angle, any unfairness is compounded here, resulting in bulges or hollows along the keel line. It is difficult to get the keel line of the bottom hull panels perfectly fair, but don’t worry, because I will tell you how to compensate for minor unfairness later. Bottom Panels
Measure bow to stern with the keel on the bottom and the chine on top.
At 0 feet to the right there is no keel yet and the chine starts (bow) up 2 29/32 inches. Be sure to mark this end as the bow. At 5 13/16 inches to the right the keel starts (bow) up 7/32 inches. At 1 foot to the right the keel is up 3/16 inches and the chine is up 3 3/32 inches. At 2 feet to the right the keel is up 5/32 inches and the chine is up 3 17/32 inches. At 3 feet to the right the keel is up 1/8 inches and the chine is up 4 7/32 inches. At 4 feet to the right the keel is up 3/32 inches and the chine is up 5 1/16 inches. At 5 feet to the right the keel is up 1/16 inches and the chine is up 5 27/32 inches. At 6 feet to the right the keel is up 1/32 inches and the chine is up 6 19/32 inches. At 7 feet to the right the keel is up 0 inches and the chine is up 7 5/32 inches. At 8 feet to the right the keel is up 0 inches and the chine is up 7 1/2 inches. At 9 feet to the right the keel is up 1/32 inches and the chine is up 7 21/32 inches. At 10 feet to the right the keel is up 1/16 inches and the chine is up 7 19/32 inches. At 11 feet to the right the keel is up 3/32 inches and the chine is up 7 7/32 inches. At 12 feet to the right the keel is up 5/32 inches and the chine is up 6 5/8 inches. At 13 feet to the right the keel is up 7/32 inches and the chine is up 5 25/32 inches. At 14 feet to the right the keel is up 9/32 inches and the chine is up 4 7/8 inches. At 15 feet to the right the keel is up 5/16 inches and the chine is up 3 29/32 inches. At 16 feet to the right the keel is up 7/32 inches and the chine is up 3 1/16 inches At 16 feet and 7 1/8 inches to the right the keel ends (stern) up 5/32 inches. At 16 feet and 11 1/2 inches to the right the sheer ends (stern) up 2 11/16 inches. Be sure to mark this end as the stern.
Side Panels
Measure bow to stern with the chine on the bottom and the sheer on top.
At 0 feet to the right there is no chine yet and the sheer starts (bow) up 6 7/8 inches. Be sure to mark this end as the bow. At 1 foot and 5/16 inches to the right the chine starts (bow) up 11/16 inches and the sheer starts up 6 11/32 inches. At 2 feet to the right the chine is up 9/32 inches and the sheer is up 5 29/32inches. At 3 feet to the right the chine is up 3/32 inches and the sheer is up 5 9/16 inches. At 4 feet to the right the chine is up 0 inches and the sheer is up 5 9/32 inches. At 5 feet to the right the chine is up 0 inches and the sheer is up 5 7/32 inches. At 6 feet to the right the chine is up 1/16 inches and the sheer is up 5 7/32 inches. At 7 feet to the right the chine is up 3/16 inches and the sheer is up 5 1/4 inches. At 8 feet to the right the chine is up 9/32 inches and the sheer is up 5 1/4 inches. At 9 feet to the right the chine is up 11/32 inches and the sheer is up 5 1/4 inches. At 10 feet to the right the chine is up 3/8 inches and the sheer is up 5 1/4 inches. At 11 feet to the right the chine is up 5/16 inches and the sheer is up 5 7/32 inches. At 12 feet to the right the chine is up 9/32 inches and the sheer is up 5 5/32 inches. At 13 feet to the right the chine is up 7/32 inches and the sheer is up 5 1/16 inches. At 14 feet to the right the chine is up 1/8 inches and the sheer is up 4 31/32 inches. At 15 feet to the right the chine is up 3/32 inches and the sheer is up 4 15/16 inches. At 16 feet to the right the chine is up 0 inches and the sheer is up 4 29/32 inches. At 17 feet to the right the chine is up 0 inches and the sheer is up 4 15/16 inches. At 17 feet and 11 3/8 inches to the right the chine ends (stern) up 3/16 inches and sheer is up 5 3/16 inches. At 18 feet and 7 5/16 inches to the right the sheer ends (stern) up 5 13/32 inches. Be sure to mark this end as the stern.
Deck Panel
Measure stern to bow, beginning centered exactly 7 feet and 2 inches behind where the center panel meets the stern panel.
At 0 feet to the right (stern) go up and down 0 inches. Be sure to mark this end as the stern. At 1 foot to the right go up and down 1 3/4 inches. At 2 feet to the right go up and down 3 13/32 inches. At 3 feet to the right go up and down 4 15/16 inches. At 4 feet to the right go up and down 6 5/16 inches. At 5 feet to the right go up and down 7 1/2 inches. At 6 feet to the right go up and down 8 7/16 inches. At 7 feet to the right go up and down 9 1/16 inches. At 7 feet and 7 1/4 inches go up and down 9 5/16 inches. This location forms a slight corner where the deck side panels will be attached later. At 8 feet to the right go up and down 9 1/4 inches. At 8 feet and 6 inches to the right go up and down 8 29/32 inches.
At 9 feet to the right go up and down 8 3/16 inches. At 9 feet and 6 inches to the right go up and down 7 5/32 inches. At 10 feet to the right go up and down 5 31/32 inches. At 10 feet and 6 inches to the right go up and down 4 7/8 inches At 11 feet to the right go up and down 4 5/32 inches. At 11 feet and 3 inches to right go up and down 4 inches. At 13 feet and 6 inches to the right go up and down 4 inches, forming a straight line from the lofting point at 11 feet and 3 inches. Also, there is a second lofting point at 13 feet and 6 inches that is up and down 6 9/32 inches. This lofting point is where the deck side panels will be attached later. At 14 feet and 3/8 inches to the right go up and down 5 23/32 inches. At 15 feet and 3/8 inches to the right go up and down 4 9/16 inches. At 16 feet and 3/8 inches to the right go up and down 3 5/16 inches. At 17 feet and 3/8 inches to the right go up and down 2 inches. At 18 feet and 6 3/8 inches to the right go up and down 0 inches. Be sure to mark this end as the bow.
Deck Side Panels
Measure fore to aft with the shear on the bottom and the deck chine on top.
At 0 inches to the right there is no sheer yet and the deck chine starts up 3 inches. At 1/8 inches to the right the sheer starts up 3/4 inches and skip the deck chine. At 6 inches to the right the sheer is up 5/8 inches and the deck chine is up 3 17/32 inches. At 1 foot to the the right the sheer is up 1/2 inches and the deck chine is up 4 3/16 inches. At 1 foot and 6 inches to the right the sheer is up 11/32 inches and the deck chine is up 4 31/32 inches. At 2 feet to the right the sheer is up 1/4 inches and the deck chine is up 5 3/4 inches. At 2 feet and 6 inches to the right the sheer is up 3/16 inches and the deck chine is up 6 1/8 inches. At 3 feet to the right the sheer is up 3/16 inches and the deck chine is up 5 13/16 inches. At 3 feet and 6 inches to the right the sheer is up 1/4 inches and the deck chine is up 5 5/32 inches. At 4 feet to the right the sheer is up 11/32 inches and the deck chine is up 4 13/32 inches. At 4 feet and 6 inches to the right the sheer is up 7/16 inches and the deck chine is up 3 13/32 inches. At 5 feet to the right the sheer is up 9/16 inches and the deck chine is up 2 3/16 inches. At 5 feet and 6 inches to the right the sheer is up 11/16 inches and the sheer is up 1 5/32 inches. At 5 feet and 9 1/4 inches to the right the sheer and deck chine come to a point up 13/16 inches.
Paddler/Cockpit Location
In the proper paddling position (sitting straight up or slightly forward), the paddler’s lower back must be exactly 7 feet and 6 inches forward of the stern tip (before trimming). Any variation in the location of the paddler will alter the intended performance of the kayak. Generally, it is best
to have 4 inches between the paddler's lower back and the back of the cockpit. As a result, the back of my cockpit is 7 feet and 2 inches forward of the stern, which is also where the center deck and rear deck panels meet. Stations
Stations are absolutely necessary to help shape the hull. Using the lofting numbers, draw and cut out the stations from 1/2 inch hardwood plywood. Lofting the stations is similar to the panels, but with the stations the measuring begins at the keel, and then you are told how far to go up and to each side for the chine and sheer. When drawing the stations, be sure to number them and include a vertical center line to help with checking the alignment of the hull.
Station #1: From the keel, the chine is up 2 9/16 inches and left and right 1 3/4 inches, and the sheer is up 7 7/8 inches and left and right 3 5/16 inches. Station #2: From the keel, the chine is up 2 1/8 inches and left and right 4 inches, and the sheer is up 7 inches and left and right 5 23/32 inches. Station #3: From the keel, the chine is up 1 11/16 inches and left and right 6 5/8 inches, and the sheer is up 6 1/4 inches and left and right 8 9/16 inches. Station #4: From the keel, the chine is up 1 1/2 inches and left and right 7 7/16 inches, and the sheer is up 5 15/16 inches and left and right 9 3/8 inches. Station #5: From the keel, the chine is up 1 5/8 inches and left and right 5 3/4 inches, and the sheer is up 6 1/8 inches and left and right 7 1/2 inches. Station #6: From the keel, the chine is up 2 inches and left and right 3 7/16 inches, and the sheer is up 6 5/8 inches and left and right 4 15/16 inches.
Cutting and planing the panels Before cutting and planing the 2 side and 2 bottom hull panels, attach the pairs to each other with the insides facing each other for more uniform and fair lines during stitching. The panels can be attached with staples. Use a jigsaw to cut just outside the lines, and then use a plane to go down to the line. Along the last 12 inches at the bow and stern tips of the deck, leave about 1/8 of an inch of extra wood around the lofted lines so that fine trimming can be done later to better match the deck to the hull.
The bottom and side panels, stacked with the insides facing each other. The bow ends are in the foreground.
Check the lines on panels for fairness. If they are not fair, don’t be afraid to use the plane a little to make them fair.
Again, try your best to keep the keel line in the bottom hull panels as accurate and fair as possible. Because the bottom panels meet at a shallow angle, any unfairness is compounded here, resulting in bulges or hollows along the keel line. It is difficult to get the keel line of the bottom hull panels perfectly fair, but don’t worry, because I will tell you how to compensate for any unfairness later. Before detaching the pairs of bottom and side panels, drill some of the holes for the wires. Drilling the holes through the pairs will allow the holes to match evenly on each side of the stems and along the keel. Also, it is easier to drill the chine holes on the bottom panels now rather than when the hull is assembled. However, some of the drilling will have to wait until the hull is assembled. Drill the holes around the entire perimeter of the bottom panels and only along the stems of the side panels. Detach the pairs of bottom and side panels.
The deck panel with the two deck side panels ready for attaching later.
Be careful moving the deck panel after cutting and planing, because the narrow center deck section could break from the weight of the wider and long bow and stern sections. Always lift or move the deck panel with support in the center and towards the ends.
4 inch strip of plywood epoxied to the bottom of the deck at the 13 feet and 6 inches mark to help with attaching the deck side panels later.
After cutting and planing the deck, on the bottom of it at the 13 feet and 6 inches mark, epoxy on a 4 inch wide strip of 4mm plywood to help with attaching the deck side panels later. 2 of those 4 inches should be in front of the mark and 2 inches behind. Clean up the upward facing surface of the strip after the epoxy has cured. Assembling the Hull With the inside of the bottom panels facing each other and flat, use 18 gauge wire to first snugly attach the bow and stern stems. Loosely wire the keel so that there enough slack to pull the chines apart. Pull the chines of the bottom panels apart to get the approximate shape of the finished hull. Use scraps of wood to evenly support the bottom panels as necessary.
The bottom panels wired together.
With the inside of the side panels facing each other and flat, snugly wire the bow and stern stems. Place the side panels on top of the bottom panels. Line up the bow edge of the side panels with the bow edge of the bottom panels. It is easy to mix up the bow and stern ends of the bottom panels, so check where you marked the bow and stern to make sure the bottom panels are not installed backwards. From the bow, drill holes along the chine of the side panels near the bow to match the holes already drilled along the chine of the bottom panels. As you drill a hole, wire it, alternating the sides of the hull to keep the wiring even as you go along.
The side panels wired to the bottom panels at the bow.
Each station is installed after the chines are wired about one foot past the station location. Install the stations in their numerical order, meaning station #1 first and #6 last. From the bow of the hull, station #1 is 2 feet and 6 inches back,, station #2 is 4 feet and 6 inches back, station #3 is 7 feet and 6 inches back, station #4 is 10 feet and 6 inches back, station #5 is 13 feet and 6 inches back, and station #6 is 15 feet and 6 inches back.
Stations helping to shape the hull.
The stations should fit pretty good, but if necessary, trim the sides of the stations so that they fit inside the side panels of the hull. It is better to trim more than is necessary than not enough, because not enough trimming will cause a bulge and gap at the chines. Don’t make any changes to the angle of the bottom V on the stations, because the bottom panels must be pushed to match them and give the hull its intended shape. Secure the stations in place by stapling them with a staple gun through the side panels. Make sure that the bottom panels are snug against the stations to insure that the hull will be in the proper shape. Also make sure that the center line drawn on the stations is lined up with the keel line. At the stem of the stern, the bottom panels extend about 1/2 inch beyond the side panels. In other words, when the bottom and side panels match perfectly at the bow, the bottom panels will stick out about 1/2 inch past the side panels at the stern. The reason for the extra 1/2 each is to allow for trimming to precisely match the bottom and side panel stems at the stern. Now is the time to trim this extra 1/2 inch off the stern end of the bottom panels. To avoid over cutting, it is better to not quite cut enough off and then file it down the rest of the way. Remove wires as necessary as you cut, and where the wires have been removed, use spring clamps to hold
the bottom panel stems together. Once the trimming is complete, drill new holes and re-wire the the panels at the stem.
Now comes the most critical part of plywood kayak construction. It is extremely important to sight down the chines, and especially the keel, to make sure that the lines are fair or straight. These lines can be checked most accurately with the hull upside down. Look for hollows, bulges and hooks, especially in the keel. Now is the best time for any adjustments to correct the lines. If the lines are not fair or straight, first check to see that the panel edges are even against each other. If necessary, loosen some wires, push and pull the panels until the edges are even, and then retighten the wires. Along the keel you may need to tighten the stitches in the area of bulges and loosen the stitches in the area of hallows. Small wedges of wood in the seam help to remove larger hollows. It is OK to have small gaps between the panels to avoid hollows. Any gaps can be well reinforced later with fiberglass. Also, make sure that the kayak is not twisted. With the hull right side up, sight along the vertical lines on the stations and the bow and stern stems to make sure they line up. If necessary, twist the hull to get them straight.
When the hulled is wired together is the best time to make sure the lines are straight and fair.
With the hull upside down, use a syringe to apply a small amount unthickened epoxy to the seams. This step is not for filleting. Instead, it is for bonding the hull panels together so that the wires can be pulled out. After the epoxy in the seams has hardened, carefully pull out the wires, which are not necessary now that the seams are epoxied. With the wires removed, it is easier to sight along the seams to check again that the lines are fair or straight. If a line is bothering you, use a razor knife to cut through the epoxy in the seam and rework it. This is your last chance to make any changes. Once you are satisfied with the lines, fill the outside seams with thickened epoxy, and after it has hardened, sand the outsides seams smooth. With the hull right side up, use a bead of wood glue to secure the edges of the stations to the panels, so that the staples can be removed. Don’t use a lot of glue on the stations, because they will have to be removed later. Reinforce the outside of the hull with fiberglass as desired. Then remove the stations, fillet the inside seams, and reinforce the inside of the hull with fiberglass as desired.
Assembling the Deck Again, be careful moving the deck panel after cutting and planing, because the narrow center deck section could break from the weight of the wider and long bow and stern sections. Always lift or move the deck panel with support in the center and towards the ends.
Cockpit template.
From scrap plywood, make a template for an ocean cockpit that is 15 inches wide and 22 inches long on the inside. The template is used for the marking the inside line of the cockpit on the deck, and later the cockpit spacer and lip. You may want to make the cockpit longer or shorter, depending on your height or other needs. I'm 5 feet and 10 inches tall, and with 4 inches between the back of the cockpit and my lower back, a 22 inch long cockpit allows me to get my knees under the front of the cockpit and use a foam masik as a knee brace. Because of the narrow width of the kayak, having the cockpit wider than 15 inches could cause the cockpit lip to extend over the side of the deck. Use the cockpit template to draw the inside line for the cockpit on the deck. When positioning the cockpit on the deck, it is important to keep in mind that in the proper paddling position (sitting straight up or slightly forward), the paddler’s lower back must be exactly 7 feet and 6 inches forward of the stern tip on the deck. Any variation in the location of the paddler will change the intended performance of the kayak. Generally, it is best to have 4 inches between the paddler's lower back and the back of the cockpit. As a result, the back of my cockpit is 7 feet and 2 inches forward of the stern tip, which is also where the center deck and rear deck panels meet.
6 inch hole cut in the cockpit and hatch hole cut in front the 13 feet and 6 inches mark, so a hand can reach inside the kayak while assembling the deck.
Don't cut the cockpit out yet. Because this area is going to be bent during the assembly of the deck, having the cockpit cut out now could cause some problems. Instead, only cut out a 6 inch diameter hole in the center of the cockpit for your hand to reach through during assembly. A front hatch hole is also necessary for the hand to reach inside he kayak to assemble the deck. It will have to be cut somewhere in front of the 13 feet and 6 inches mark. Center the deck on the hull. Wrap duct tape around the stern to hold the deck on straight to the hull. At the 7 foot and 7 1/4 inches mark on the deck, where there is a slight corner, drill and wire the deck to the hull on each side. Twist the wire tight, because the deck will be bent upward forward of this location. Add another wire on each side 1/2 inch back from this location and then two more on each side over several inches behind it.
Two spacers, one 8 3/4 inches long and another 10 inches long, to hold the deck up.
From scrap wood make two spacers, one 8 3/4 inches long and another 10 inches long, to hold the deck up. Center the shorter one under the 9 foot mark on the deck and the longer one under the 11 foot mark. A small screw through the deck holds them in place.
Spacers holding the deck up.
Now you can wire the deck to the hull on both sides at the 13 foot and 6 inch mark and several inches forward. Wrap duct tape around the bow to hold the deck straight on the hull. Place the deck side panels with the flat forward section against the 13 foot and 6 inch mark and the pointed rear section at the cockpit. Use masking tape to hold them roughly in place while wiring.
Masking tape holding the deck side panels in place while wiring.
Wire the deck side panels to the deck and hull starting at the cockpit end and moving forward. This wiring is tedious and takes several hours, because it is hard to see and reach the holes. A flashlight inside the kayak helps. Alternate sides as you work forward. In the mid and forward sections, leave a couple of the wires loose as you move forward to give your hand room to fit and work between the panels. Then go back and tighten the wires as space allows. At the forward section, reaching through the front hatch hole makes the wiring easier.
Leaving a couple wires loose as you work forward to have room for your hand to fit and work between the panels.
At the front section, don't bend the panels down and tighten the wires yet. Sand the surfaces where the deck side panels will meet the 4 inch strip of plywood attached under the 13 foot and 6 inch mark to prepare them for bonding with epoxy. Apply some unthickened epoxy to these surfaces to saturate them and then plenty of thickened epoxy to fill any potential gaps. Now begin bending the panels down and tightening the wires.
The front section of the side panels left open before applying epoxy for bonding.
A small screw at the front inside corner of the deck side panels will help hold them down after the epoxy has been applied for bonding. A strap with small blocks of scrap wood also helps hold the seams even while thickened epoxy is applied to the seams between the deck side panels and the deck center panel. After the epoxy has cured, the screws, strap, and wires can be removed. Do not apply any epoxy to the seam between the deck and hull yet.
Screws and strap with blocks help hold everything in place while the epoxy cures.
Close-up view of screw and strap with block helping hold everything in place while the epoxy cures.
Sand the deck seams smooth and reinforce them with a bias cut strip of fiberglass. Allow the epoxy to cure for several days so there will be no movement when the deck is removed from the hull and the bottom of the deck is covered with fiberglass. The front section of the deck side panels are under a lot of tension, so when fiberglassing the bottom of the deck, reinforce the forward first foot of the deck seams with an extra bias cut strip of fiberglass.
Bias cut strips of fiberglass covering the deck seams to prevent movement when the deck is removed from the hull and the bottom of the deck is covered with fiberglass.
Attaching the Deck to the Hull Center the deck on the hull. Raise the deck about an inch to make threading the wires in the deck side panel section easier. Then lower and center the deck on the hull, and begin wiring the deck to the hull at the stern and move forward, alternating sides as you go.
The wires are easier to thread in the center section with the deck raised.
Using thickened epoxy, fill the outside of the sheer seams to glue the deck to the hull. Pull out the wires after the epoxy has hardened but is not fully cured. Use more thickened epoxy to fill the voids where the wires where removed. Then sand the sheer smooth. The cockpit is now ready to be cut. Cut just inside the cockpit line on the deck to allow for trimming down to the cockpit coaming when it is attached later. With the cockpit cut, access to the inside on the kayak will now be easier. Sand and fillet the inside sheer seams and reinforce them with 2 inch fiberglass tape. To make applying the tape easier, cut the hatch holes so you can reach through them. The tape doesn't need to be applied all the way to the ends. As far as you can reach is far enough. Roll up the length of tape you need, and soak it is a plastic cup of epoxy to wet it out. Remove the excess epoxy by drawing the tape between two fingers. Roll up the tape again and then unroll along the inside seam. Cover the outside sheer with fiberglass tape or the fiberglass cloth used to reinforce the deck. The Cockpit Use your cockpit template to draw the inside lines for the cockpit spacers and lip on 4mm plywood. The spacers should be about 3/4 inches wide and stack about 5/8 to 3/4 inches high, and the lip should be about 1 1/2 inches wide. With the bend in the deck in the cockpit area, laminate the layers of the 4mm plywood for the spacers in place. Then laminate the lip on top.
Cockpit spacers laminated in place.
Reinforce the cockpit coaming with fiberglass as desired. © Copyright 2011-2012, Duane Strosaker. All rights reserved.