PROFESSIONAL WINDOWS 7 DEVELOPMENT GUIDE INTRODUCTION . . . . . . . . . . . . . . . . . . . . . . . . . . . . . . . . . . . . . . . . . . . . . . . . . . . . . . . . . . . . xxv
� PART I
INTRODUCING WINDOWS 7
CHAPTER 1
Windows 7 Improvements . . . . . . . . . . . . . . . . . . . . . . . . . . . . . . . . . . . . . . . 3
CHAPTER 2
Developing a Windows 7 Strategy . . . . . . . . . . . . . . . . . . . . . . . . . . . . . . . .13
CHAPTER 3
Understanding .NET 4.0 . . . . . . . . . . . . . . . . . . . . . . . . . . . . . . . . . . . . . . . . .21
� PART II
WORKING WITH THE WINDOWS 7 USER INTERFACE
CHAPTER 4
Interacting with the Taskbar. . . . . . . . . . . . . . . . . . . . . . . . . . . . . . . . . . . . . 37
CHAPTER 5
Advanced Taskbar Techniques . . . . . . . . . . . . . . . . . . . . . . . . . . . . . . . . . . 57
CHAPTER 6
Working with the Ribbon Interface . . . . . . . . . . . . . . . . . . . . . . . . . . . . . . . 85
CHAPTER 7
Creating Custom Ribbon Interface Applications . . . . . . . . . . . . . . . . . . 105
CHAPTER 8
Programming for Aero Glass Functionality . . . . . . . . . . . . . . . . . . . . . . . 139
CHAPTER 9
Working with the Multi-Touch User Interface . . . . . . . . . . . . . . . . . . . . . 159
� PART III
DEVELOPING SECURE APPLICATIONS
CHAPTER 10
Using Standard NT Security Features in Windows 7 . . . . . . . . . . . . . . . . 171
CHAPTER 11
Understanding the User Account Control . . . . . . . . . . . . . . . . . . . . . . . . 201
CHAPTER 12
Developing Applications with Enhanced Security . . . . . . . . . . . . . . . . . 217
CHAPTER 13
Interacting with the Built-In Security Features . . . . . . . . . . . . . . . . . . . . 247
� PART IV ADVANCED WINDOWS 7 PROGRAMMING
ffirs.indd i
CHAPTER 14
Working in the Background . . . . . . . . . . . . . . . . . . . . . . . . . . . . . . . . . . . . 293
CHAPTER 15
Using the Windows 7 Libraries . . . . . . . . . . . . . . . . . . . . . . . . . . . . . . . . . 329
CHAPTER 16
Writing 64-Bit Applications for Windows 7 . . . . . . . . . . . . . . . . . . . . . . . 347
CHAPTER 17
Using Parallel Programming in Windows 7 . . . . . . . . . . . . . . . . . . . . . . . 361
CHAPTER 18
Using the Sensor and Location Platform . . . . . . . . . . . . . . . . . . . . . . . . . 373
CHAPTER 19
Using Windows XP Mode Effectively . . . . . . . . . . . . . . . . . . . . . . . . . . . . 397
12/23/10 4:29:51 PM
PROFESSIONAL
Windows 7 Development Guide John Paul Mueller
ffirs.indd v
12/23/10 4:29:52 PM
Professional Windows 7 Development Guide® Published by Wiley Publishing, Inc. 10475 Crosspoint Boulevard Indianapolis, IN 46256 www.wiley.com Copyright ©2011 by Wiley Publishing, Inc., Indianapolis, Indiana Published simultaneously in Canada ISBN: 978-0-470-88570-3 ISBN: 978-1-118-05795-7 (ebk) ISBN: 978-1-118-05794-0 (ebk) ISBN: 978-1-118-05793-3 (ebk) Manufactured in the United States of America 10 9 8 7 6 5 4 3 2 1 No part of this publication may be reproduced, stored in a retrieval system or transmitted in any form or by any means, electronic, mechanical, photocopying, recording, scanning or otherwise, except as permitted under Sections 107 or 108 of the 1976 United States Copyright Act, without either the prior written permission of the Publisher, or authorization through payment of the appropriate per-copy fee to the Copyright Clearance Center, 222 Rosewood Drive, Danvers, MA 01923, (978) 750-8400, fax (978) 646-8600. Requests to the Publisher for permission should be addressed to the Permissions Department, John Wiley & Sons, Inc., 111 River Street, Hoboken, NJ 07030, (201) 748-6011, fax (201) 748-6008, or online at http://www.wiley.com/go/permissions. Limit of Liability/Disclaimer of Warranty: The publisher and the author make no representations or warranties with respect to the accuracy or completeness of the contents of this work and specifically disclaim all warranties, including without limitation warranties of fitness for a particular purpose. No warranty may be created or extended by sales or promotional materials. The advice and strategies contained herein may not be suitable for every situation. This work is sold with the understanding that the publisher is not engaged in rendering legal, accounting, or other professional services. If professional assistance is required, the services of a competent professional person should be sought. Neither the publisher nor the author shall be liable for damages arising herefrom. The fact that an organization or Web site is referred to in this work as a citation and/or a potential source of further information does not mean that the author or the publisher endorses the information the organization or website may provide or recommendations it may make. Further, readers should be aware that Internet websites listed in this work may have changed or disappeared between when this work was written and when it is read. For general information on our other products and services please contact our Customer Care Department within the United States at (877) 762-2974, outside the United States at (317) 572-3993 or fax (317) 572-4002. Wiley also publishes its books in a variety of electronic formats. Some content that appears in print may not be available in electronic books. Library of Congress Control Number: 2010942183 Trademarks: Wiley and the Wiley logo are trademarks or registered trademarks of John Wiley & Sons, Inc. and/or its affi liates, in the United States and other countries, and may not be used without written permission. Windows is a registered trademark of Microsoft Corporation in the United States and/or other countries. All other trademarks are the property of their respective owners. Wiley Publishing, Inc. is not associated with any product or vendor mentioned in this book.
ffirs.indd vi
12/23/10 4:29:53 PM
18
Using the Sensor and Location Platform WHAT’ S IN THIS CHAPTER? ➤
Understanding the sensor types and location devices
➤
Getting a list of installed sensors
➤
Getting specific sensor information
➤
Working with other sensor and location devices
For many years now, specialty hardware designers have created special drivers and other software to make their hardware accessible from Windows. It’s possible to obtain special scientific sensors for Windows that rely on the RS422 and other standard interfaces. These sensors help scientists of all sorts to gather information and analyze it. Sensors also play a role in industrial automation. However, the fact that sensors are now in many homes is probably what prompted Microsoft to begin adding sensor support to Windows 7. Homes now have Windows-based security systems. You can obtain products to monitor the weather outside your home or to check on your children as they play. At some point, you’ll probably be able to turn on your stove and tell it to cook dinner before your arrival home. The refrigerator will eventually tell you that you’re out of milk. All these applications rely on sensors of various sorts, and they all require specialized device drivers and software.
CH018.indd 373
12/23/10 4:07:28 PM
374
❘
CHAPTER 18 USING THE SENSOR AND LOCATION PLATFORM
This chapter assumes that you’ve installed the Windows API Code Pack. You can fi nd the instructions for installing the Code Pack in the “Obtaining the Windows API Code Pack for Microsoft .NET Framework” section of Chapter 4. The Code Pack contains everything you need to work various types of sensors (as described in the “An Overview of the Sensor Categories” section of this chapter). This chapter relies on a Windows Forms application approach because many developers will be performing updates, rather than creating entirely new applications with the Windows Presentation Foundation (WPF).
It would be quite easy to write an entire book about the sensors that you can use with Windows and still not cover them all. In fact, it would be possible to write a rather larger book just about the various sorts of industrial sensors. Home security would require an entirely separate book because the number and variety of sensors have increased so greatly. For example, many people don’t realize it, but there’s a special sort of sensor that can detect the sound of breaking glass and report it to you. If someone threw a rock through your window, you’d know about it long before you arrived home. Consequently, this chapter gives you just a taste of the sorts of things you can do in Windows 7 with various kinds of sensors. Although theoretically there’s no limit to the number of device types that Windows 7 can support, you can currently place the devices in three major groups: environmental, position, and light. The following sections provide an overview of these three major areas and demonstrate how you’d write code to work with external sensors. (If you have a specially equipped PC, you might fi nd that some of these sensors are installed internally — the physical location doesn’t matter for the purpose of writing the code.) Of course, you must have the device in order to test the code.
In order to code for a specific device, you actually need to have the device attached to your system or network. Because devices differ in their interfaces, functionality, user interface, and other specifi cs, code written for one device won’t necessarily work for any other device. For example, writing code for one scanner won’t necessarily help you create code for a different scanner. The non - standard features of devices have been the bane of developers since someone decided to attach a printer to a computer. Manufacturers sell products based on differences, and consumers purchase products because they deem a particular set of features important. As a consequence, developers generally need to test code with each supported device to ensure it actually works. Because of these differences, the code in this chapter will likely require tuning to work with the specific device attached to your system — don’t assume any of the code will work without modification.
CH018.indd 374
12/23/10 4:07:31 PM
Defining the Sensor and Location Devices
❘ 375
DEFINING THE SENSOR AND LOCATION DEVICES Sensors and location devices are two separate kinds of input for a computer system. Sensors provide environmental information of some sort, while location devices tell you where you are. Combining these two elements is often the stuff of robotics, but this chapter won’t even broach that topic. The following sections describe the kinds of devices that Windows 7 can interact with and tell you a bit about them.
An Overview of the Sensor Categories Sensors provide special functionality to computer systems. The term specifically applies to a device that mimics our own senses in some way. For example, sensors can detect light or sound. A special sensor may provide some type of tactile feedback. Of course, sensors can go well beyond human senses. A light detector can see into the infrared or ultraviolet ranges, neither of which is detectable by human eyes. So sensors can also augment human senses to let us detect things that are normally undetectable. No matter what the sensor does, however, it must convert what it detects into an electrical signal that the computer can interpret. The software you create assigns value to the electrical impulses and presents the resulting information in a form that the human viewer can understand. Location devices are completely different from sensors. The vast majority of location devices today work on the Global Positioning System (GPS), which is an array of satellites that provides positional information in the form of radio waves. In sum, the location device is a special sort of radio receiver in most cases. When working with a GPS device, Windows receives actual satellite data, not electrical impulses. Your software accepts this data and formats it in a way that the human viewer can understand. Another category of location device performs some sort of measurement and presents that measurement in the form of data or electrical impulses, depending on the characteristics of the device. For example, a location device could use a laser to measure the distance from the device to a wall. The output could be in the form of data (so many feet) or electrical impulse (a voltage level that falls within a minimum to a maximum value). The difference between the two categories of location devices is absolute versus relative position. A GPS device provides an absolute position, while the second location device category provides relative position. The SensorCategories class provides a listing of sensor categories you can interact with. Table 18 -1 provides a listing of these categories and describes them. The examples in this chapter will use a number of the categories.
CH018.indd 375
12/23/10 4:07:47 PM
376
❘
CHAPTER 18 USING THE SENSOR AND LOCATION PLATFORM
TABLE 18-1: Categories of Sensors Supported by Windows 7
CH018.indd 376
CATEGORY
GROUP
DESCRIPTION
All
N/A
Accesses all the sensors, no matter what category each sensor is in. This is the category you use to perform tasks such as obtaining an inventory of the system.
BioMetric
Environmental
All biometric devices, such as fingerprint or retina readers. The biometric device need not be security- related. For example, biometric devices can interpret a person’s condition and locate potential health issues.
Electrical
Environmental
Any electrical device that doesn’t fit in some other category. This category would include devices actually used to measure electricity.
Environmental
Environmental
Any device used to measure environmental conditions, such as temperature and humidity. Some unusual devices might fit into this category, such as a device used to measure static electricity based on environmental conditions.
Light
Light
Any device used to measure light. The device could simply measure the amount of light, but there could also be devices used for detecting certain kinds of light.
Location
Position
Any GPS device used to measure an absolute position based on satellite information. Theoretically, this category could also include input from LOng RAnge Navigation (LORAN) devices (see http://www.navcen .uscg.gov/?pageName=loranMain), but such devices are outdated and GPS is probably the only input device you’ll see in use.
Mechanical
Environmental
Either an output or an input device used to measure something mechanically. For example, a device of this type could measure how far a door is opened or the amount of force applied to a test frame.
Motion
Position
Any device used to measure direction and velocity. These devices normally employ accelerometers, but could also rely on other means of detecting motion. See http://www.dimensionengineering.com/ accelerometers.htm for a description of how accelerometers work.
12/23/10 4:07:47 PM
Defining the Sensor and Location Devices
❘ 377
CATEGORY
GROUP
DESCRIPTION
Orientation
Position
Any device used to measure angular rotation about a center of mass. The measurements are normally made in terms of roll, pitch, and yaw. Even though these terms are normally applied to ships and airplanes, they can apply to anything. See http://en.wikipedia.org/wiki/Flight_ dynamics for a description of roll, pitch, and yaw.
Scanner
Light
Any device that captures an image of some type. These devices naturally include scanners, but cameras could also appear in this category, as could telescopes configured to connect to a computer. Generally, this category includes any device that contains a Charge - Coupled Device (CCD) or its equivalent.
The sensors are also categorized by how they’re accessed. The SensorConnectionType enumeration tells you how the sensor is connected to the system. You’ll see one of the following options: ➤
Invalid: Essentially, the system doesn’t know how the device is connected. There might be something wrong with the device configuration. More likely, the device has been turned off so the system can’t see how it’s connected.
➤
Integrated: The device is built into the computer. Normally, this means that the device is part of the motherboard or is a peripheral directly attached to the motherboard.
➤
Attached: The device is attached to the computer indirectly. In most cases, the device attaches through a peripheral device or through an external port. The device may be connected through the USB port.
➤
External: The device uses an external connection. In many cases, this means that the device is attached through a network connection. The device may be on an external system and shared. The device could also be network- capable and have its own network connection.
It ’s one thing to understand the mechanics of sensors, but quite another to see them in action. One of the more interesting uses of sensors in Windows 7 is adjusting monitors to match ambient light conditions. This feature is especially useful for laptops and other mobile devices. The article at http://www .windows7news.com/2008/10/29/windows-7-sensors-explained/ shows the effect of using ambient light sensors to adjust the monitor output.
CH018.indd 377
12/23/10 4:07:48 PM
378
❘
CHAPTER 18 USING THE SENSOR AND LOCATION PLATFORM
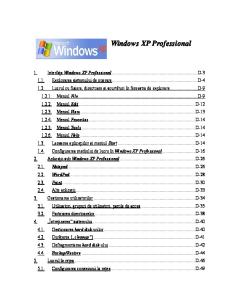
Software Devices You might not think that software can provide sensor capabilities, but it can. Windows 7 can work with software that performs analysis and creates sensor-like output. For example, you need not rely on a physical GPS to determine your position. It’s possible to obtain a reasonably precise location using Wireless Fidelity (WiFi) connections (IEEE 802.11b wireless networking). For that matter, if you’re willing to entertain a little less precision, you can use your IP connection as a means of determining location. The example in the “Obtaining a List of Sensors” section of this chapter checks your system for any sort of sensor that Windows 7 detects. You might think that your system contains a wealth of sensors, but Windows 7 has shown itself extremely picky about what it considers a sensor. Only device drivers written as sensors actually appear as sensors when you check them. Consequently, your system fi lled with sensors might actually report that it has no sensors at all, as shown in Figure 18 -1, when you run the example application.
FIGURE 18-1: Many people are surprised
to find that their system doesn’t have any detectable sensors.
Fortunately, you can add a usable sensor for experimentation and testing purposes that works just fi ne even on a desktop system. The Geosense for Windows driver is a free download from http://www.geosenseforwindows.com/. Download either the 32-bit or 64 -bit driver as required for your machine. Follow these steps to install the software sensor on your system:
1.
Double- click the Geosense_1.2_x86.MSI or Geosense_1.2_x64.MSI fi le. You’ll see a rather humorous licensing agreement and its equally silly condition.
2.
Check I Authorize You to Slap Me if I Violate the Terms Above and click Install. After a few seconds, you’ll see the usual UAC warning.
3. 4.
Click Yes. The installation will proceed, and you’ll eventually see a success message.
5.
CH018.indd 378
Click Finish. At this point, you can run the example in the “Obtaining a List of Sensors” section of this chapter and see the sensor, but the sensor won’t do anything because it isn’t enabled. If your only goal is to determine how Windows installs sensors, you can stop now. However, if you want to see how sensors work, you’ll need to proceed to Step 5. Open the Location and Other Sensors applet in the Control Panel. You’ll see a list of sensors installed on your system, as shown in Figure 18 -2 (the Geosense for Windows sensor might be the only entry on the list).
12/23/10 4:07:54 PM
Obtaining a List of Sensors
❘ 379
FIGURE 18-2: The Geosense for Windows sensor is disabled by default.
6.
Check Enabled and click Apply. The Geosense for Windows sensor is now enabled.
OBTAINING A LIST OF SENSORS Before you can do anything with the sensors on a system, you need to know which sensors are installed. Fortunately, the SensorManager class makes getting the list relatively easy. The Get Sensors example described in the following sections shows how to use this class to query the sensors on a system.
The physical presence of a sensor on your system doesn’t mean that Windows will recognize it. As with any piece of hardware, your sensor must come with an accompanying driver. Unfortunately, many vendors haven’t released a version of their driver that works with the Windows 7 sensor functionality. For example, the Dell D series Latitude comes with a light sensor, but there isn’t a Windows 7 driver for it, and therefore Windows 7 doesn’t recognize the light sensor.
Configuring the Get Sensors Example This example begins with a Windows Forms application. You’ll need to add a List button (btnList) to obtain a list of the sensors, and a list box (lstOutput) to output the results of the query. In addition, you’ll need to add references to Microsoft.WindowsAPICodePack.DLL, Microsoft.WindowsAPICodePack.Shell.DLL, and Microsoft.WindowsAPICodePack.Sensors.DLL. You must also provide the following using statements: using Microsoft.WindowsAPICodePack.Sensors; using Microsoft.WindowsAPICodePack.Shell.PropertySystem;
CH018.indd 379
12/23/10 4:07:54 PM
380
❘
CHAPTER 18 USING THE SENSOR AND LOCATION PLATFORM
Writing the Get Sensors Code You can obtain a considerable amount of information about the sensors on your system. However, because the sensors vary quite a bit, writing generic code can be difficult. There are a number of hurdles to overcome, and sometimes you need to use generic types, such as Object, that don’t provide the best information while writing the code. Of course, there are times when you’ll need to take the generic approach because you need to inventory the devices that a system can access. Listing 18-1 shows one approach to handling this situation.
LISTING 18-1: Displaying a list of installed sensors
private void btnList_Click(object sender, EventArgs e) { // Define a variable to hold the sensor list. SensorList AllSensors; // The system will raise an error if there aren’t // any sensors to query. try { // Obtain a list of all the sensors. AllSensors = SensorManager.GetAllSensors(); } catch (SensorPlatformException SensorErr) { MessageBox.Show(SensorErr.Message, “Error Obtaining Sensors”, MessageBoxButtons.OK, MessageBoxIcon.Error); return; } // Clear the previous entries. lstOutput.Items.Clear(); // Display the total number of sensors. lstOutput.Items.Add(“Number of Sensors: “ + AllSensors.Count); // Display the sensor information. foreach (Sensor ThisSensor in AllSensors) { // Output common elements. lstOutput.Items.Add(“Name: “ + ThisSensor.FriendlyName); lstOutput.Items.Add(“Category ID: “ + ThisSensor.CategoryId); lstOutput.Items.Add(“Type ID: “ + ThisSensor.TypeId); lstOutput.Items.Add(“Description: “ + ThisSensor.Description); lstOutput.Items.Add(“Device Path: “ + ThisSensor.DevicePath); lstOutput.Items.Add(“Manufacturer: “ + ThisSensor.Manufacturer); lstOutput.Items.Add(“Model: “ + ThisSensor.Model);
CH018.indd 380
12/23/10 4:08:00 PM
Obtaining a List of Sensors
❘ 381
lstOutput.Items.Add(“Serial Number: “ + ThisSensor.SerialNumber); lstOutput.Items.Add(“Sensor State: “ + ThisSensor.State); // Check the connection type. try { // The device may not have a physical connection, so // you must place this code in a try block. lstOutput.Items.Add(“Connection Type: “ + ThisSensor.ConnectionType); } catch { // The most common device lacking a connection is a software // device driver. lstOutput.Items.Add(“Connection Type: Software Device”); } // Determine whether the sensor provides a data report. if (ThisSensor.AutoUpdateDataReport) { // Output the common data. lstOutput.Items.Add(“Automatic Data Update”); lstOutput.Items.Add(“\tMinimum Report Interval: “ + ThisSensor.MinimumReportInterval); lstOutput.Items.Add(“\tCurrent Report Interval: “ + ThisSensor.ReportInterval); // Try updating the data. ThisSensor.TryUpdateData(); // Process the data report if there is data available. try { lstOutput.Items.Add(“\tData Report Source: “ + ThisSensor.DataReport.Source); lstOutput.Items.Add(“\tData Report Timestamp: “ + ThisSensor.DataReport.TimeStamp); lstOutput.Items.Add(“\tNumber of Report Values: “ + ThisSensor.DataReport.Values.Count); // Enumerate the values. foreach (Guid Key in ThisSensor.DataReport.Values.Keys) { // Display the key. lstOutput.Items.Add(“\t\t” + Key); // Obtain the values for the key. IList ValueEntries; if (ThisSensor.DataReport.Values.TryGetValue( Key, out ValueEntries))
continues
CH018.indd 381
12/23/10 4:08:01 PM
382
❘
CHAPTER 18 USING THE SENSOR AND LOCATION PLATFORM
LISTING 18-1 (continued)
// Display the values associated with the key. foreach (Object ValueEntry in ValueEntries) lstOutput.Items.Add(“\t\t\t” + ValueEntry); } } catch { lstOutput.Items.Add(“\tNo Data Available”); } } else lstOutput.Items.Add(“No Automatic Data Update”); // Get the sensor properties. IList SuppList = ThisSensor.GetSupportedProperties(); // Display the sensor properties. lstOutput.Items.Add(“Properties:”); foreach (PropertyKey PropKey in SuppList) { try { // This call will error out on software devices in // most cases. object Property = ThisSensor.GetProperty(PropKey); // The actual output property type depends on the device. // You’ll need to add special handling for each device type // you expect to see. lstOutput.Items.Add(“\tKnown Property: “ + “Property ID: “ + PropKey.PropertyId + “ Format ID: “ + PropKey.FormatId); } catch { // Display the unknown property type information. lstOutput.Items.Add(“\tUnknown Property: “ + “Property ID: “ + PropKey.PropertyId + “ Format ID: “ + PropKey.FormatId); } } // Add a space between items. lstOutput.Items.Add(“”); } }
The application begins by retrieving a list of sensors on the system. You have to place the check within a try...catch block because the code will create a SensorPlatformException exception if there aren’t any sensors installed on the system. The SensorManager.GetAllSensors() method retrieves generic information about all the sensors on the system. If you want more specific information, you’ll
CH018.indd 382
12/23/10 4:08:02 PM
Obtaining a List of Sensors
❘ 383
need to obtain a list of particular sensors as described in the “Obtaining Specific Sensor Information” section of this chapter. On successful return from the GetAllSensors() method call, AllSensors will contain a list of sensors installed on the system. There are a number of failure modes that will return an error message similar to the one shown in Figure 18-1 at this point. The code begins displaying information by telling you how many sensors the system found using AllSensors.Count. This value will always be greater than 0 when the GetAllSensors() method call succeeds. The number of sensors found on your system depends in part on the number of Windows 7 device drivers you’ve installed that provide sensor information. The AllSensors .Count value is unlikely to reflect the actual number of sensors installed on your system, since many hardware vendors haven’t updated their drivers to provide this information. At this point, the code uses a foreach loop to begin processing each generic Sensor object in AllSensors. Even though this is a generic object, you can still obtain considerable information from it. The code begins by listing a number of elements common to all sensors, such as the sensor name, description, manufacturer, model, serial number, and so on. The State property tells you the status of the sensor. When a sensor is disabled, as shown in Figure 18 -3, you’re limited as to how much information the system will actually provide. In this case, the sensor simply outputs AccessDenied as its status to show that it has been disabled.
FIGURE 18-3: The example displays a list of sensors installed on the system.
It’s also possible to detect the connection type. This is one of the fi rst tricky pieces of data you can obtain, because a sensor may not have a connection. The most common reason for a lack of a connection is that the sensor is software-based like the Geosense for Windows sensor. Trying to access the ConnectionType property for a sensor that doesn’t have a connection will raise an exception that you must catch. In this case, the code doesn’t perform a lot of analysis; it simply assumes that the sensor is software-based. The AutoUpdateDataReport property tells you whether the sensor will automatically update its data for you. When working with a generic sensor, you don’t have many options for interacting with the sensor. If the AutoUpdateDataReport is false, the best you can do is say that there isn’t any data to process. When the AutoUpdateDataReport property is true, you can obtain some general information about how the sensor collects data, such as the minimum allowable report interval and the current report interval. Some sensors have to have a minimum report interval to avoid data overruns, which result in lost data.
CH018.indd 383
12/23/10 4:08:02 PM
384
❘
CHAPTER 18 USING THE SENSOR AND LOCATION PLATFORM
Because this is a generic query of the sensor and not a specific interaction with it, you’ll probably want to see sample data, but you won’t need specific data for processing. The code calls ThisSensor.TryUpdateData() to attempt to get a data update from the sensor. This call automatically overwrites any existing data that the sensor might possess, so you want to use this call carefully when you’re actually processing data. If the sensor has data to process, the code can retrieve the data source, the time that the data was collected, and the number of values that the sensor can provide. A call to any of these properties when there’s no data present will cause an exception that you must catch. In this case, the exception simply indicates that there’s no data to process. The DataReport property includes three sub-properties of interest. The Source property contains the source of the report information. The TimeStamp property tells you when the data was collected. The Values property is actually a collection of key/value pairs. The Key member is a Guid object that uniquely identifies a particular set of values. The Values member is an IList collection of values associated with the Key. For example, the Geospace for Windows sensor has a Key of {055c74d8-ca6f-47d6-95c61ed3637a0ff4} that represents the location information as shown in Figure 18 - 4. The associated Values member contains a list of entries that defi ne the location, including longitude, latitude, city, state, and even ZIP code. However, you can’t access the Values member directly — doing so raises an exception. Instead, the code uses the TryGetValue() method with the Key as the fi rst argument and a buffer, ValueEntries, as the second argument. Notice that you must use the out keyword. The return from TryGetValue() is a Boolean that indicates success or failure. After the code obtains the values, it uses a foreach loop to FIGURE 18-4: Enabling the Geosense for Windows display them. sensor returns good results even for an IP address. In addition to the other information you can obtain about sensors, each sensor has a list of properties that it supports. The properties you obtain depend on the sensor, and with a software sensor the properties are going to be an unknown type for the most part unless you can get a matching list of Globally Unique IDentifiers (GUIDs) from the vendor. The example shows how to obtain a list of properties using the GetSupportedProperties() method. The output of this method is an IList object, SuppList. The code relies on a foreach loop to process SuppList. Each entry is a PropertyKey object, PropKey. The code next tries to determine the kind of property by calling GetProperty() with PropKey as the argument.
CH018.indd 384
12/23/10 4:08:03 PM
Obtaining Specific Sensor Information
❘ 385
If there’s a method to turn the PropKey into a property value, the call succeeds. Otherwise, the code throws an exception, and you must process it as an unknown property, as shown in the example. Theoretically, even if the system can’t fi nd the PropKey, you should be able to provide custom processing of the property information using the vendor’s documentation.
Each kind of sensor has different property identifiers. You can see the list of these sensors at http://msdn.microsoft.com/library/dd318969.aspx . For example, when working with the Geosense for Windows sensor, you use the property identifiers found at http://msdn.microsoft.com/library/dd318981.aspx to discover the meaning of each property. Many of the GUIDs you see in the listings and output in this chapter appear in the Sensors.H fi le provided with the Windows 7 SDK in the \Program Files\Microsoft SDKs\Windows\v7.1\Include folder. Reviewing this header file can solve a number of the problems you’ll encounter trying to decipher some types of sensor data.
OBTAINING SPECIFIC SENSOR INFORMATION An application may begin by performing an inventory of a system looking for particular sensors. However, in order to perform useful work, the application will eventually need to look for a specific sensor. For example, if you want to obtain location information, you’ll need to locate a Location sensor. The following sections move on to the next step by using the Geosense for Windows sensor, working directly with the sensor to obtain location information.
Understanding the Geosense for Windows Data If you’re going to work with a specific sensor, it’s a good idea to know what type of information you’ll receive. This means knowing the values that you’ll obtain from the DataReport.Values property. The Geosense for Windows sensor outputs two keys. The fi rst contains a timestamp, as shown in Figure 18- 4. The second contains a list of 10 values, as shown in Table 18 -2.
TABLE 18-2: Geosense for Windows Sensor Data ELEMENT
DATA TYPE
DESCRIPTION
0
Double
Latitude
1
Double
Longitude
2
Double
Altitude
3
Double
Accuracy (a value of 0 means that the accuracy level is unknown)
4
String
Street Number continues
CH018.indd 385
12/23/10 4:08:04 PM
386
❘
CHAPTER 18 USING THE SENSOR AND LOCATION PLATFORM
TABLE 18-2 (continued) ELEMENT
DATA TYPE
DESCRIPTION
5
String
Street
6
String
City
7
String
Region
8
String
State
9
String
Postal Code
Configuring the Get Location Example This example begins with a Windows Forms application. You’ll need to add a series of textboxes to hold the data results, as shown in Figure 18-5, and a Get button (btnGet) to output the results of the query. Name the textboxes: txtLatitude, txtLongitude, txtAltitude, txtAccuracy, txtStreetNumber, txtStreet, txtCity, txtRegion, txtState, and txtZIP.
FIGURE 18 - 5: Provide some text-
boxes to hold the output data, as shown here.
In addition, you’ll need to add references to Microsoft.WindowsAPICodePack.DLL, Microsoft.WindowsAPICodePack.Shell.DLL, and Microsoft.WindowsAPICodePack.Sensors.DLL. You must also provide the following using statements:
CH018.indd 386
12/23/10 4:08:09 PM
Obtaining Specific Sensor Information
❘ 387
using Microsoft.WindowsAPICodePack.Sensors; using Microsoft.WindowsAPICodePack.Shell.PropertySystem;
Initializing the Sensor Before you can use the sensor, you need to create an object to access it. The code in Listing 18-2 creates a global object used to access the Geosense for Windows sensor. It also performs some initialization tasks for working with the sensor.
LISTING 18-2: Configure the sensor for use
// Storage for the location sensors. SensorList LocationSensors; // Storage for the Geosense for Windows sensor. Sensor Geosense; public frmMain() { // Perform the standard initialization. InitializeComponent(); // Obtain a list of location sensors. LocationSensors = SensorManager.GetSensorsByCategoryId(SensorCategories.Location); // Access the Geosense sensor. if (LocationSensors.Count == 1 && LocationSensors[0].FriendlyName == “Geosense Sensor”) Geosense = LocationSensors[0]; else foreach (Sensor ThisSensor in LocationSensors) if (ThisSensor.FriendlyName == “Geosense Sensor”) Geosense = ThisSensor; // Verify that we found the sensor. if (Geosense == null) { MessageBox.Show(“Geosense for Windows sensor not installed!” + “\nClosing Application”); Environment.Exit(1); } // Set an event handler for state changes. Geosense.StateChanged += new StateChangedEventHandler(Geosense_StateChanged); // Set an event handler for data updates. Geosense.DataReportChanged += new DataReportChangedEventHandler(Geosense_DataReportChanged); }
CH018.indd 387
12/23/10 4:08:10 PM
388
❘
CHAPTER 18 USING THE SENSOR AND LOCATION PLATFORM
The SensorList object, LocationSensors, contains a list of specific sensors. In this case, it contains those sensors used to obtain location data. The Sensor object, Geosense, contains the reference to the Geosense for Windows sensor. The form’s constructor begins with the usual call to InitializeComponent(). It then obtains a collection of location sensors by calling SensorManager.GetSensorsByCategoryId() with an argument of SensorCategories.Location. Notice how this call differs from the SensorManager .GetAllSensors() method call shown in Listing 8 -1. The output is specific, and only the location sensors will appear in the output collection, LocationSensors. The presence of a location sensor doesn’t mean that you’ve found the Geosense for Windows sensor. The code performs two different checks for the sensor using an if...else structure. In the first case, there’s only one sensor available, so the code checks its FriendlyName property value, which must be “Geosense Sensor“. In the second case, the code uses a foreach statement to check all the sensors returned for a sensor that has a FriendlyName property value of “Geosense Sensor“. In both cases, the result is to set Geosense to a reference of the sensor. The code verifies that the Geosense for Windows sensor is present by checking Geosense for a null value. If the value is null, the code outputs an error message and exits using the Environment .Exit() method. This approach allows the example to return an error code of 1 in this case. When the sensor does exist, the code creates event handlers for the two events that the sensor supports: StateChanged and DataReportChanged. Remember that you can use the IDE to help you create the event handlers. Press Tab after typing += to create the remainder of the event handler statement. Press Tab a second time to create the event handler methods. This process is quick and easy.
Creating and Handling Sensor Events After you create a reference to the Geosense for Windows sensor, you can begin interacting with it. The fi rst step is to check the sensor and then initiate a request, as shown in Listing 18-3.
LISTING 18-3: Perform sensor updates as needed to check the position
private void btnGet_Click(object sender, EventArgs e) { // Verify that the Geosense sensor is on. if (Geosense.State != SensorState.Ready) { MessageBox.Show(“Please enable the Geosense sensor.”); return; } // Perform an update. Geosense.UpdateData(); }
CH018.indd 388
12/23/10 4:08:11 PM
Obtaining Specific Sensor Information
❘ 389
The code begins by checking the Geosense.State property. If this property doesn’t have a value of SensorState.Ready, the code displays an error message and exits without initiating a request. Otherwise, it initiates a request by calling Geosense.UpdateData(). As previously mentioned, the Geosense for Windows sensor supports two events. Listing 18- 4 shows the handlers for these events.
LISTING 18-4: Use events to respond to sensor changes
void Geosense_DataReportChanged(Sensor sender, EventArgs e) { // Create a location Guid. Guid Location = new Guid(“{055c74d8-ca6f-47d6-95c6-1ed3637a0ff4}”); try { // Update the timestamp. txtTime.Text = Geosense.DataReport.TimeStamp.ToString(); // Update the location. txtLatitude.Text = Geosense.DataReport.Values[Location][0].ToString(); txtLongitude.Text = Geosense.DataReport.Values[Location][1].ToString(); txtAltitude.Text = Geosense.DataReport.Values[Location][2].ToString(); txtAccuracy.Text = Geosense.DataReport.Values[Location][3].ToString(); txtStreetNumber.Text = Geosense.DataReport.Values[Location][4].ToString(); txtStreet.Text = Geosense.DataReport.Values[Location][5].ToString(); txtCity.Text = Geosense.DataReport.Values[Location][6].ToString(); txtRegion.Text = Geosense.DataReport.Values[Location][7].ToString(); txtState.Text = Geosense.DataReport.Values[Location][8].ToString(); txtZIP.Text = Geosense.DataReport.Values[Location][9].ToString(); } catch { } } void Geosense_StateChanged(Sensor sender, EventArgs e) { MessageBox.Show( “Geosense state changed to: “ + Geosense.State.ToString()); }
CH018.indd 389
12/23/10 4:08:12 PM
390
❘
CHAPTER 18 USING THE SENSOR AND LOCATION PLATFORM
The Geosense_DataReportChanged() event handler is the more important of the two event handlers for this example. In this case, the code begins by creating a Guid object, Location, which uses the GUID shown in Figure 18- 4 to access the location data values shown in Figure 18- 4. The output code begins by displaying the time of the data report using the TimeStamp property. It then displays all the data values listed in Table 18-2 on-screen by accessing each of the DataReport .Values[Location] entries in turn. Figure 18 - 6 shows typical output from this example. Of course, your display will show the data for your location. The Geosense_StateChanged() event handler responds to changes in the Geosense for Windows sensor state. You can use this event handler to ensure that the user doesn’t turn off the sensor between calls. In this case, the event handler simply displays a message box with the new sensor status, as shown in Figure 18-7. The only two states available appear to be Ready and AccessDenied.
FIGURE 18-6: Typical output data from Geosense for Windows
FIGURE 18-7: The application tells you when the sensor status changes.
Configuring Geosense for Windows Security It’s important to understand that not everyone on a system needs access to every sensor. You may, in fact, want to strictly limit access to some sensor types, depending on their function. For example, you’ll notice that the Geosense for Windows sensor comes with a privacy warning as described at http://www.google.com/privacy-lsf.html. In addition, Windows provides the privacy information shown in Figure 18-8 (click the How Is My Privacy Affected? link in the Location and Other Sensors applet to see it). Everyone can automatically access a sensor after you install it. In order to control access to the sensor, you must manually change its security settings or locate the appropriate entry in the registry. To accomplish this task, click the Geosense Location Sensor link in the Location and Other Sensors applet. You’ll see the Sensor Properties window shown in Figure 18-9. This window provides access to all the sensor settings. In this case, you can change the sensor description, modify the security settings, or uninstall the sensor.
CH018.indd 390
12/23/10 4:08:12 PM
Obtaining Specific Sensor Information
❘ 391
FIGURE 18-8: Sensors can incur privacy issues when you use them.
FIGURE 18- 9: All sensors provide properties that you can modify.
CH018.indd 391
12/23/10 4:08:13 PM
392
❘
CHAPTER 18 USING THE SENSOR AND LOCATION PLATFORM
Locating the appropriate entry in the registry can be a bit tricky. Begin by polling every numbered subkey of the HKEY_LOCAL_MACHINE\SYSTEM\ CurrentControlSet\Enum\Root\SENSOR key. Check the HardwareID value of each of these numbered subkeys for the name of the sensor you want to change (the Geosense for Windows sensor appears as a multi - string entry of Sensors\GeosenseSensor). You must then check the Device Parameters\ SensorPermissions subkey. For example, if the Geosense for Windows sensor is the only sensor installed on your system, you can see the security settings in the HKEY_LOCAL_MACHINE\SYSTEM\CurrentControlSet\Enum\Root\SENSOR\ 0000\Device Parameters\SensorPermissions key. When everyone has access to the sensor, you’ll see a DWORD value entry for the S -1-1- 0 well -known Security IDentifi er (SID) with a value of 1, which enables it (see the list of well -known SIDs at http://support.microsoft.com/kb/243330). When you clear the Everyone entry, this SID value entry will equal 0. Allowing services access to the sensor will add entries for the following SIDs: S -1-5 -18, S -1-5 -19, and S -1-5 -20. Theoretically, you can provide fi ner-grained security control by modifying the registry entries for the particular sensor, but then you need to worry about potential side effects. The sensor may not work correctly if all services can’t access it, but you’ll fi nd out only through experimentation.
Click the Change Who Can Access Sensors link and you’ll see the User Settings window shown in Figure 18-10. Make sure the correct sensor is selected (the Geosense Location Sensor in this case), then clear or check entries as needed to provide secure access to the sensor. The example shows that the Administrator, John, and three services accounts can access the Geosense for Windows sensor, but not the Guest account.
FIGURE 18-10: Configure the sensor to provide the level of security you
feel is necessary.
CH018.indd 392
12/23/10 4:08:13 PM
Obtaining Specific Sensor Information
❘ 393
An interesting thing will happen in the example application when you change access. You’ll actually see two messages. First, you’ll see a message box telling you that the sensor access is denied. Second, you’ll see another message box telling you that the sensor is ready. When you change the sensor access, Windows appears to remove permissions fi rst and then add them back in. The example application will also receive an update event, even though you haven’t clicked Get. You can verify this update by starting the application and making the security changes without clicking Get fi rst. The blanks will automatically fill with information after you clear the second message box telling you that the sensor is ready to use.
Viewing Location Sensor Activity Privacy is a concern when using sensors, including the Geosense for Windows sensor. You may be curious as to who is using the sensor on the system. Fortunately, there’s a quick way to fi nd out. Click the View Location Activity link in the Location and Other Sensors applet. Windows will display a message that it’s adding a snap -in for a few moments, and then you’ll see the Event Viewer applet displayed with the Location Activity entry highlighted, as shown in Figure 18 -11.
FIGURE 18-11: Windows keeps track of location sensor activity for you.
CH018.indd 393
12/23/10 4:08:18 PM
394
❘
CHAPTER 18 USING THE SENSOR AND LOCATION PLATFORM
The event viewer logs tell you everything you need to know about the location sensor access, including the name of the application performing the access and the account name used to run the application. Of course, you get all the normal event log entries, such as the time the access occurred. In addition, you can even determine details such as the Program IDentifier (PID) and Thread IDentifier (TID), which is helpful in deciding how often the application accessed the sensor during a single session. The event log entry won’t tell you precisely what kind of access was performed when working with sensors that have multiple functions, but at least you know about the sensor access.
DEVELOPING FOR OTHER SENSOR AND LOCATION DEVICES The example in this chapter shows how to work with one type of sensor — a location sensor. However, you can develop applications to work with any sort of sensor that Windows 7 supports, and there’s a host of them. It would be nice if Microsoft provided a sensor emulator for developers, but such an emulator isn’t available at the time of this writing. You may fi nd some third-party products online that will prove useful. For example, Validity provides a biometric sensor demo at http://www.validityinc.com/post.aspx?id=186. The Code Pack comes with two additional sample sensor applications in the \CodePack\Samples\ Sensors folder. The fi rst shows how to work with accelerometers and the second shows how to work with ambient light sensors. These two examples are a little more complex than the one in this chapter — they provide a good next step in learning how to work with sensors. Of course, you must have the required sensors installed on your system, with the requisite sensor-aware device drivers. Otherwise, you won’t see anything happen when you run the example code. As with all the other Code Pack examples, you need to convert the code for use with Visual Studio 2010. However, the code won’t compile in this particular case without error. You’ll see four errors appear on-screen that probably won’t make much sense. Fix the fi rst two errors by opening the Settings1.Designer.CS fi le in the AccelerationMeasurement project. Highlight all the functional code in that fi le and click Comment Out the Selected Lines. Perform the same task for the Settings1.Designer.CS fi le in the AmbientLightMeasurement project. The solution will now compile as expected.
MOVING YOUR APPLICATIONS TO WINDOWS 7 This chapter has taken you a bit into the future. Windows 7 supports a host of external devices today, and you probably have at least a few of them, but the day of the talking refrigerator is still in the future for most people. The idea is an interesting one, though. If you take nothing else away from this chapter, it should be that Windows 7 is the fi rst version of Windows to make it possible to attach a range of sensors and actually use them to develop practical applications. Just how you use this feature depends on your organization’s needs. The reality is that you might be tasked today with updating applications to use at least a few sensors. A monitor that automatically adjusts to the ambient light is probably going to be a specialty item today, but it will eventually hit the mainstream. Like anything else, monitoring sensors requires system resources. The more sensors your system monitors, the slower it will
CH018.indd 394
12/23/10 4:08:19 PM
Moving Your Applications to Windows 7
❘ 395
get. As part of your update planning, you need to consider where to obtain the resources used to monitor sensors, how often to monitor the sensors, and what to do with the data once you obtain it. Applications could become more efficient in some cases by partially relying on historical data instead of constantly monitoring sensors. It pays to plan the use of sensors carefully. For example, make sure you obtain spare sensors as future replacements, so that you don’t need to write new code to accommodate replacements. Chapter 19 moves in another direction, but it has something in common with this chapter — it also is working on the fringe of existing programming needs. In Chapter 19 you’ll discover how to work with Windows XP Mode effectively. Windows XP Mode is a special virtual environment for applications that just don’t work well with Windows 7, no matter how you configure them. Of course, Microsoft prefers that you update the application to work with Windows 7, but this isn’t always practical. Organizations often have a huge investment in existing code and can’t afford to simply throw that investment away. If you have a reliable application, but don’t own the source code, you might find that you absolutely must rely on Windows XP Mode — at least for the short term.
CH018.indd 395
12/23/10 4:08:19 PM