The Science behind Movement and Forces
NC Migrant Education: Science Curriculum
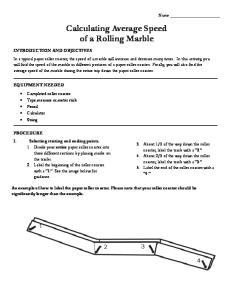
Lesson 3: Rolling: Learning about Speed and Distance LESSON DESCRIPTION: This lesson uses ramp explorations to learn about gravity, speed and distance. Students will learn how to create their own ramps, and understand that changing variables of the ramp will change the speed and distance that an object travels down the ramp. The variables manipulated will be slope, mass, and texture, to explore gravity and friction’s effects on speed and distance. Students will practice measuring skills in distance and time, and learn how to calculate speed. MAJOR CONCEPTS: Acceleration Definition: The rate of which an object changes it velocity Context: Acceleration can be positive or negative depending on whether the object is speeding up or slowing down. Force Definition: A push or a pull exerted on an object Context: The ball was hit with enough force to send it into the bleachers. Friction Definition: A force that resists motion between two bodies in contact Context: Rougher surfaces create more friction than smooth ones when an object comes in contact with them. Gravity Definition: The natural force that attracts any two objects with mass toward each other Context: Earth's gravity pulls on anything that is not held up by some other force. Speed Definition: The rate of motion Context: The speed of the ball is determined by measuring how far it travels in a certain amount of time. Velocity Definition: The speed of an object moving in a specific direction Context: The car's velocity was 55 miles per hour, eastbound. Teaching about gravity: o https://www.teachingchannel.org/videos/teaching-mass-weight-gravity o http://www.ehow.com/how_2100456_explain-gravity-child.html
ACTIVITIES: (This lesson does not include ALL ages activities) K-2 ACTIVITIES: Activity 1: Shapes in Motion o Push geometric shapes down a ramp to see how different shapes roll Activity 2: Falling for Gravity o Use different size marbles to explore the relationship between mass and gravity
1
The Science behind Movement and Forces
NC Migrant Education: Science Curriculum
Activity 3: Making Objects Move down a Ramp o Create ramps and explore how speed and distance changes based on ramp angles Activity 4: Ramp Races and Friction Changes o Use a toy car to explore how angles and friction affect the speed of an object.
3-5 ACTIVITIES: Activity 1: Learning about Speed: o Measure distance and time to calculate speed by walking around the classroom Activity 2: Identifying variables that change speed o Change ramp height to understand what a variable is and how it affects speed of a marble Activity 3: Rules of Forces and motion- Ramp exploration o Use toy cars and ramps to understand changes in speed and distance
Optional week-long activity: Students will keep a science journal throughout the week where they will write down observations and illustrations to show their learning
2
The Science behind Movement and Forces
NC Migrant Education: Science Curriculum
Lesson 3: Rolling: Learning about Speed and Distance
K-2 ACTIVITIES: Activity 1: Shapes in Motion (K-2) Duration: 10-15 min Student Objectives: To differentiate ease of rolling using different geometric shapes Key Vocabulary Push Speed Shape Size Faster Slower Smooth Edges Points Slide Roll Materials Needed: Geometric shapes
Lesson Plan: 1. Predicting how shapes will roll – Geometric shapes will be used to test how pushes and pulls work on various shapes. Sit in whole group with your class in a circle. Tell students to think about which shapes they think will be easiest to roll across the circle. Once students have had time to think, ask individuals to sort the shapes into “rolls well” or “doesn’t roll well” piles, one student at a time coming up to choose an object and put it in one of the piles. Encourage students that many scientists do not agree before testing something, but they don’t argue about it – they do scientific testing to find out what is true. Make sure to introduce vocabulary throughout the lesson. Ask students if an object slides or rolls. 2. Rolling shapes – Roll each object across the circle to a student, one at a time. Discuss if they were right – does it roll well or is it tricky to roll? Some shapes, like cubes, don’t roll well because you have to push so much harder, or use more force, to get them to move. Stress that you’re trying to make them all equal by pushing the same amount each time. 3. Note: Make sure to discuss why some objects rolled faster or more easily than others. What is it about their shape that made it easier to roll?
Lesson Plan Source: https://spweb.tbaisd.k12.mi.us/sites/home/instructionalresources/s cience/pk8resources/Kindergarten/Kindergarten%20Unit%202%20P ushes%20%20Pulls.pdf 3
The Science behind Movement and Forces
NC Migrant Education: Science Curriculum
Activity 2: Falling for Gravity (K-2) Duration: 20 min Student Objectives: To understand that gravity is the force involved in falling To explore how a change in object size affects the pull of gravity down a ramp Key Vocabulary: Gravity, slow, fast, force Materials Needed: a desk or table a ruler or pencil different-sized marbles a binder notebook, or books and a small table
Lesson Plan: 1. Introduction: Gravity is the force that pulls on every object on Earth. Have you ever wondered if the pull is always the same for every single thing? If you drop a penny and a pen from the same height, they'll hit the ground at the same time, too. But if you drop a pen and a piece of paper, the paper may drift and take a lot longer to fall than the pen does. Can you guess why? Let’s test gravity! 2. First make a ramp. You can use a binder notebook, or tilt a small desk or table by putting books under two of the legs. Make sure the ramp is tilted just a little bit, so the marbles will roll slowly -- then you'll be able to watch them better. The smoother the surface, the better it is! 3. Take two marbles, a big one and a small one. Line them up evenly at the top of the ramp. a. Use a ruler or meter stick as a gate. If you don't have a ruler or meter stick, use anything that is straight, like a pencil or a rolled up piece of paper. Hold the starting gate and lift it quickly so that both marbles start to roll at the same time. 4. Watch the finish line closely to see if one marble comes in first or if it's a tie. Keep a sharp eye out to see if there is a winner! 5. Do the race at least 3 or 4 times to check for accuracy. It doesn't hurt to try it even more times than that! a. Does one marble win the race, or is it a tie? Are the results the same for every race? 6. Here's more about gravity: Have you ever noticed the force of a magnet? If you put two magnets next to each other, they will either push or pull on one another. The push or pull is the force of magnetism. Gravity is a force, too. It makes all things attract each other. The bigger the object, the stronger the force is. The gravity of Earth has a really strong pull, because Earth is such a big planet. That's why things fall to the ground instead of floating around.
Lesson Plan Source:
http://www.sciencenetlinks.net/lessons.php?BenchmarkID=4& DocID=158 4
The Science behind Movement and Forces
NC Migrant Education: Science Curriculum
Activity 3: Making Objects Move down a Ramp (K-2) Duration: 45 min – 1 hour Student Objectives: To explore how the incline of a ramp affects the speed and distance an object moves down the ramp To think creatively by using an assortment of materials to create a ramp Key Vocabulary: Speed, distance, time, speed = distance/time, faster, slower Materials Needed: Ping-pong or other balls Assorted materials—string, glue, tape, drinking straws, cardboard, yardsticks, scrap wood, rubber bands, etc. Various kinds of cardboard tubes (from paper towels, aluminum foil, wrapping paper, toilet tissue, etc.) Cut most of the tubes in half lengthwise; leave some intact. Blocks Marbles or small balls Masking tape
Lesson Plan: 1. Tell students that they will try to build their own track for the ping-pong ball, marble, or toy car using cardboard tubes and masking tape. Have students work in pairs or small groups. 2. Give each group a ping-pong ball, marble, or toy car and a selection of cardboard tubes. 3. Ask students, "How could you make the objects move using the cardboard tubes and masking tape?" "Where do you think the object will go?" Write down students' answers on a large sheet of paper or a blackboard at the front of the room. 4. Now have students test their ideas. Students will create a track that will be used to stop the ball as close to an exact position as possible. Provide students with a measurable distance for which to aim, so that they can test and adjust their structures as needed. 5. Ask students to explore these questions by changing their ramps: a. How can you build the track to slow the ball down? b. Speed it up? c. Make it go further? d. Make it go a shorter distance? e. Turn a corner? 6. Pose new challenges, such as: a. Build the fastest track possible. b. Build the slowest track possible. c. Build a track that will allow the ball or car to dip down to a lower point and then go to a slightly higher point. 7. Ask students to draw a picture of the fastest track, the slowest track and the track that goes from a lower to a higher point (use a tri-fold piece of paper, by folding a sheet in 3. Have students draw each picture in a different fold of the paper). 8. As a class, ask students to make conclusions on the fastest and slowest ramps. Introduce the term “slope” or “angle”, to explain that the bigger the slope, the faster an object will move.
Lesson Plan Source: http://sciencenetlinks.com/lessons/making-
objects-move/ 5
The Science behind Movement and Forces
NC Migrant Education: Science Curriculum
Activity 4: Ramp Races and Friction Changes (K-2) Duration: 45 min-1 hour Student Objectives: To learn that speed is measured using distance and time. To predict speed differences based on the texture of a surface, using knowledge of friction Key Vocabulary: Hypothesis, speed, distance, time, friction, slope Materials Needed: 3 of the same toy cars Stacks of identical textbooks, cereal boxes, or DVDs Cardboard Aluminum foil Felt Scotch Tape Stapler Stopwatch Tape measure/measuring stick
Lesson Plan: 1. Using just a few basic materials, students build tracks and conduct race car experiments to test the effects of increasing the tracks' angle of incline and then the tracks' surface texture on the speed of the cars. Use three of the same toy cars from the dollar store, cardboard boxes, scissors, tape and a ruler. Students will also need something to prop up the tracks. In a classroom, stacks of identical textbooks are an obvious choice. (If you're conducting this experiment at a home, try stacked cereal boxes, DVDs or magazines). 2. After making their hypotheses about the outcome of the races, students should cut three equal tracks from cardboard (or teachers can cut cardboard in advance for the students). (Example cardboard size is 1 1/2 feet x 4 inches). 3. Then attach the tracks to the three stacks of different heights using a small piece of tape. 4. Line the cars up at the starting line, and observe which car finishes first, second and third. Repeat this test several times 5. After the test, discuss or have students write about the outcome of the races. Were their hypotheses correct? Did the slope of the tracks affect the speed of the cars? 6. When that's done, save all of your tracks, cars and stack-making materials for experiment number two: How does the texture of the tracks affect the speed of the cars? Based on their knowledge of friction, ask them to predict which will be the fastest or slowest texture to go down. 7. This time, you will also need two textured materials to cover the existing tracks. Leave one track alone, cover the second with aluminum foil and the third with felt. The foil is easy to attach with transparent tape. The felt had to be stapled around the edges. Once students predict the outcome of this test, they should attach the three different tracks to stacks of equal height. 8. Discuss how texture affected the speed of the cars.
Lesson Plan Source:
http://librarianismchronicles.blogspot.com/2010/01/forceand-motion-experiment.html 6
The Science behind Movement and Forces
NC Migrant Education: Science Curriculum
Lesson 3: Rolling: Learning about Speed and Distance
3-5 Activities
Activity 1: Learning about Speed (3-5) Duration: 20 min Student Objectives: To practice using a meter stick and a stopwatch to measure distance and time. To learn how speed is calculated. Key Vocabulary: Distance, time, speed, motion Materials Needed Stopwatch Meter stick Masking tape Learning About Speed Worksheet (appendix 3.1)
Lesson Plan: 1. Introduction: Tammie Turtle loves to go skating in the park. While Tammie doesn’t give much thought to her daily strolls, we can learn a lot about motion from Tammie. Motion is movement from one place to another in a certain amount of time. In this activity you will measure and describe your motion as you travel through the park. 2. Hand out “Learning About Speed Worksheet” (appendix 3.1) to students. Place a small piece of masking tape on the floor in an open area where you can walk freely. 3. Use a meter stick to measure 5 meters from the tape. Mark this spot with another small piece of masking tape. 4. Hold the stopwatch and stand at either piece of tape. Start the stopwatch as you begin to walk at a normal pace in a straight line to the other mark. 5. Stop the stopwatch when you reach the mark. Record the time it took you to walk 5 meters. Compare your motion to Tammie’s motion. 6. Repeat steps 3 and 4 walking more rapidly than your normal pace. Record your time. Compare your motion to Tammie. 7. Repeat steps 3 and 4 walking more slowly than your normal pace. How does your motion compare to Tammie?
Lesson Plan Source: http://scnces.ncdpi.wikispaces.net/file/view/Grade+5++Goal+4+Forc es+and+Motion_Sept+8.doc 7
The Science behind Movement and Forces
Duration: 30 min Student Objectives: To observe marbles rolling down a ramp. To identify variables that could be causing the marble to roll faster or farther. To test changing one variable to see what results it will have. To record appropriate data. To analyze the data to make a concluding statement about the changed variable. Key Vocabulary: Variables, constants, trial, fast, slow, Materials Needed: 10 books (each about 1 cm thick) Meter stick Marbles Ramp (made of a cardboard tube form wrapping paper)
NC Migrant Education: Science Curriculum
Activity 2: Identifying variables that change speed (3-5) Lesson Plan: 1. Explain that a variable is something in an experiment that changes, and a constant is something that stays the same. 2. Demonstrate a marble rolling down a ramp. Ask the students to make observations. Discuss what could make the marble roll faster? farther? List all possible variables (height of ramp, surface of ramp, etc). 3. Tell the students we will be using the height of the ramp as the variable. Discuss what measurement would be appropriate for the situation and tools available. Measuring how far the marble goes is an appropriate measurement. Constants size of marble weight of marble same ramp surface
Variable height of ramp
4. RAISE THE RAMP!! We want to see how far a marble will roll after coming down a ramp. We will try to change the height of the ramp to make it roll faster. Set up the ramp with 4 books on a flat surface. 5. Hold the marble at the top of the ramp and let it roll. 6. Use the meter stick to measure how far the marble rolls from the end of the ramp. 7. Record your results. 8. Raise the ramp to 7 books and repeat steps #2-#4 9. Raise the ramp to 10 books and repeat steps #2-#4. Ramp Trial #1 Trial #2 Trial #3 (distance) (distance) (distance) 4 books 7 books 10 books 10. CONCLUSION: The greater incline of the higher will cause the marble to roll faster, unless the incline becomes so steep that the smooth roll of the marble is interrupted). Lesson Plan Source: http://ofcn.org/cyber.serv/academy/ace/sci/cecsci/cecsci174.html
8
The Science behind Movement and Forces
Duration: 50-60 min Student Objectives: Demonstrate an understanding of the terms force, gravity, friction, and speed Experiment with the effects of mass and friction on speed and motion Understand that friction and other forces have an effect on speed and motion Key Vocabulary: Acceleration, Force, friction, gravity, speed, slope Materials Needed: Books, blocks, or other stacking materials 36" x 12" (1 m x 30.5 cm) pieces of smooth plywood or other sturdy, flat material, 1 per group Small toy cars with moving wheels, one per student group Pennies, washers, or other small uniform objects with weight, 6 per student group Tape (Materials continued in column below) 9
NC Migrant Education: Science Curriculum
Activity 3: Rules of Forces and motion- Ramp exploration (3-5) Lesson Plan: 1. Talk about the concept of motion. How do objects move? Ask students to describe examples of gravity and friction (review gravity and friction from Lesson 2) 2. Tell students that they will be conducting an experiment with motion and forces. Demonstrate making a ramp by placing one or more books under one end of the plywood. Show students how to gently push the toy car down the ramp and then measure the speed and distance it traveled with a meter stick and stopwatch. Talk about ways to make the car travel faster or go farther. Discuss the forces at work on the car. What makes it move toward the bottom of the ramp? (gravity) What keeps it from moving faster? (friction) Discuss the effects of gravity and friction on the toy car. 3. Divide the class into groups of 3-5. Give each group about 5 books, blocks, or other stacking materials, the plywood, and a toy car and ask them to find an open space in the classroom to set up their ramps. Allow the groups a few minutes to experiment with their ramps, rolling their cars down different height ramps to see what height allows the car to go the fastest and farthest. What does increasing or decreasing the slope (angle) of the ramp do for the motion of the car? 4. Tell them to gently push the car down the ramp three times, changing the slope of the ramp each time, and record the distance and speed at which it traveled each time. Tell students that speed is calculated by distance/time. Have them find the speed their cars traveled down the set ramp and record this in their journals for each of the three trials (or on the paper). They should calculate the speed of each trial so that they can see which travelled the fastest based on observation and calculation. Does a bigger slope (angle) of your ramp make the cars roll faster or slower? 5. Complete Chart 1 (appendix 3.2.1) 6. Next tell them to gently push the car down the ramp (DON’T change the angle of the ramp) and record the distance and speed at which it traveled. Have them find the speed their cars traveled down the set ramp and record this in their journals or on a piece of paper. Have them do this 3 times to ensure accuracy, and find the average speed (to find average, add up the 3 speeds and divide by 3) 7. Complete Chart 2 (appendix 3.2.1)
The Science behind Movement and Forces
(materials continued): 1-foot (30.5 cm) sheets of heavy duty sand paper, 3 per student group 3-foot (1 m) sheets of wax paper, 1 per student group 3-foot (1 m) sheets of bubble wrap, 1 per student group Pencils and erasers Science journals or writing paper Stop watch (or watch with second hand), 1 per student group Meter stick, 1 per student group Calculator (can use a phone calculator)
10
NC Migrant Education: Science Curriculum
8. Next give each group six pennies, washers, or other uniform metal objects. Have them all feel one and talk about the weight of it. Then, have them tape three pennies or washers onto the top of their toy car. Ask them to hypothesize whether they think this added weight would make the car move faster or slower. 9. Tell students to roll the car down the ramp three times, recording the speed and distance for each separately. Did the car move faster or slower with the added weight? Why do you think this is? Talk about mass and how it affects speed. 10. Complete Chart 3 (appendix 3.2.1) 11. Have students tape the remaining three metal objects to the top of the car. What will happen this time? Ask them to record their hypotheses before conducting three more trials, remembering to record the speed and distance from each trial and then find the average. What happened this time? Was the hypothesis correct? What forces are at work making the car move differently with the added weight? Ask them to explain the effect a greater mass had on the movement of the car and have an open discussion about gravity and friction. 12. Complete Chart 4 (appendix 3.2.1) 13. Give each group pieces of sand paper, wax paper, and bubble wrap. Tell the groups that they will now be experimenting with friction. Have them remove the metal objects taped to the car and tape the wax paper to the ramp. Ask them to refer back to their earlier recordings of the speed and distance their cars traveled down the ramp without the added weight. Do you think the car will move faster or slower on the waxy surface? Will it travel as far as or farther than on the plywood? After recording their hypotheses, have students conduct three trials on the wax paper ramp, recording the speed and distance their cars traveled each time. Then have them find the average speed and distance. Was the hypothesis correct? Did the waxy surface make a difference in the way the car traveled? Was more or less friction at work? 14. Have students remove the wax paper and attach the sand paper to the ramp. Ask them to hypothesize whether the rough surface will create more or less friction for the car. Will their car move faster or slower on the sand paper? Have students conduct three trials on the sand paper ramp, recording the speed and distance their cars traveled each time. Then have them find the average speed and distance. Was the hypothesis correct? Did the sand paper surface make a difference in the way the car traveled? Was more or less friction at work?
The Science behind Movement and Forces
NC Migrant Education: Science Curriculum
15. Repeat the tasks in Step 8, this time using bubble wrap instead of sand paper. Did the toy car move faster or slower when riding on the bubble wrap? Which of the four surfaces (wood, wax paper, sand paper, or bubble wrap) provided the most friction? Which provided the least? 16. Ask students provide examples of friction. How does rain affect the roads? How does the traction on different tires change how a car moves? Reexamine what they have learned about motion, mass, forces, speed and friction
Lesson plan Source: http://www.discoveryeducation.com/teachers/free-lessonplans/rules-of-forces-and-motion.cfm 11