IBM 4767 PCIe Cryptographic Coprocessor Smart Card User Guide
Note: Before using this information and the products it supports, be sure to read the general information under “Notices” on page 54.
First Edition (April 2016) This and other publications related to the IBM 4767 PCIe Cryptographic Coprocessor can be obtained in PDF format from the product website. Click on the HSM 4767 link at www.ibm.com/security/cryptocards, and then click on the Library link. Reader’s comments can be communicated to IBM by contacting the Crypto team at
[email protected].
© Copyright International Business Machines Corporation
2016. US Government Users Restricted Rights — Use, duplication or disclosure restricted by GSA ADP Schedule Contract with IBM Corp.
ii
Smart Card User Guide
Contents About this document.................................................................................................................................. vii Prerequisite knowledge......................................................................................................................... vii Typographic conventions...................................................................................................................... vii Related publications.............................................................................................................................. vii Summary of changes........................................................................................................................... viii Overview..................................................................................................................................................... 1 Supported software..................................................................................................................................... 2 SCUP/CNM setup....................................................................................................................................... 3 Installation steps..................................................................................................................................... 3 Build and install libusb-1 from source..................................................................................................... 3 Build and install pcsc-lite from source.................................................................................................... 4 Build and install CCID smart card drivers from source ..........................................................................4 Start smart card service.......................................................................................................................... 5 Error Handling.................................................................................................................................... 5 Initialize CCA ......................................................................................................................................... 6 Required access control points.......................................................................................................... 6 Smart card initialization with SCUP............................................................................................................. 7 Handling multiple adapters in SCUP...................................................................................................... 7 Launch SCUP......................................................................................................................................... 7 Initialize and personalize a CA smart card............................................................................................10 Initialize and enroll a TKE smart card................................................................................................... 16 Personalize a TKE smart card.............................................................................................................. 21 Enroll the crypto adapter in a zone....................................................................................................... 25 CNM smart card functions........................................................................................................................ 30 Handling multiple adapters in CNM...................................................................................................... 30 Generate a crypto logon key................................................................................................................. 30 CCA profiles using smart cards for authentication data........................................................................32 CCA logon with a smart card profile..................................................................................................... 35 Smart card master key parts................................................................................................................. 37 Change TKE smart card PIN................................................................................................................ 40 View smart card details........................................................................................................................ 42 Manage smart card contents................................................................................................................ 43 Copy smart card................................................................................................................................... 44 Group logon.......................................................................................................................................... 46 Smart card security................................................................................................................................... 49 Error codes............................................................................................................................................... 50 Troubleshooting........................................................................................................................................ 51 Notices...................................................................................................................................................... 53 Copying and distributing softcopy files................................................................................................. 53 Trademarks.......................................................................................................................................... 53 List of abbreviations.................................................................................................................................. 54 Index......................................................................................................................................................... 55
iii
Figures Figure 1 Crypto adapter logon..................................................................................................................... 8 Figure 2 Passphrase ................................................................................................................................... 8 Figure 3 TKE SCUP main window............................................................................................................... 9 Figure 4 OMNIKEY Card Readers ............................................................................................................ 10 Figure 5 Initialize and personalize CA smart card window.........................................................................11 Figure 6 Initialize CA smart card dialog..................................................................................................... 11 Figure 7 CA smart card zone key length dialog......................................................................................... 12 Figure 8 CA smart card initialization.......................................................................................................... 12 Figure 9 CA smart card PIN entry message..............................................................................................13 Figure 10 CA PIN entry ............................................................................................................................. 13 Figure 11 CA smart card second PIN message......................................................................................... 14 Figure 12 CA smart card zone dialog......................................................................................................... 14 Figure 13 CA smart card description dialog............................................................................................... 14 Figure 14 CA smart card build message.................................................................................................... 15 Figure 15 CA smart card success dialog................................................................................................... 15 Figure 16 TKE SCUP main window with CA smart card details.................................................................16 Figure 17 Initialize and enroll TKE smart card window..............................................................................17 Figure 18 CA smart card insertion dialog................................................................................................... 17 Figure 19 CA smart card PIN 1 message.................................................................................................. 18 Figure 20 CA PIN entry new picture........................................................................................................... 18 Figure 21 CA smart card PIN 2 message.................................................................................................. 19 Figure 22 TKE smart card insertion message............................................................................................19 Figure 23 TKE smart card initialization message.......................................................................................20 Figure 24 TKE smart card success dialog................................................................................................. 20 Figure 25 TKE SCUP main window with TKE smart card details...............................................................21 Figure 26 Personalize TKE smart card window......................................................................................... 22 Figure 27 TKE smart card insertion message............................................................................................22 Figure 28 TKE smart card PIN message................................................................................................... 23 Figure 29 TKE PIN entry .......................................................................................................................... 23 Figure 30 TKE smart card description dialog.............................................................................................24 Figure 31 TKE smart card success dialog................................................................................................. 24 Figure 32 TKE main window with smart card details..................................................................................25 Figure 33 Enroll adapter window............................................................................................................... 26 Figure 34 Enroll adapter dialog.................................................................................................................. 26 Figure 35 Enroll adapter insertion dialog................................................................................................... 27 Figure 36 Enroll adapter PIN 1 message................................................................................................... 27 Figure 37 Enroll adapter PIN 1 entry message .........................................................................................28 Figure 38 Enroll adapter PIN 2 entry message..........................................................................................28 Figure 39 Enroll adapter success dialog.................................................................................................... 29 Figure 40 CNM Generate Logon Key window............................................................................................31 Figure 41 Generate Logon Key insert dialog.............................................................................................31 Figure 42 Generate Logon Key PIN message...........................................................................................31 Figure 43 Generate Logon Key user ID dialog........................................................................................... 32 Figure 44 Generate Logon Key success dialog......................................................................................... 32 Figure 45 CNM Profiles window................................................................................................................. 33 Figure 46 Profile Management window...................................................................................................... 33 Figure 47 New profile dialog...................................................................................................................... 34 Figure 48 New profile insert dialog............................................................................................................. 34 Figure 49 New profile setup window.......................................................................................................... 35 Figure 50 New profile success dialog........................................................................................................ 35 Figure 51 CNM Smart Card Logon window............................................................................................... 36 Figure 52 TKE Smart Card insertion message..........................................................................................36 Figure 53 TKE PIN on card reader 2 ......................................................................................................... 37
iv
Smart Card User Guide
Figure 54 CNM Smart Card Parts window................................................................................................. 38 Figure 55 Insert TKE smart card reader 2 dialog.......................................................................................38 Figure 56 Master key parts window........................................................................................................... 39 Figure 57 Master key parts description dialog........................................................................................... 39 Figure 58 Master key parts window with results........................................................................................ 40 Figure 59 CNM Change PIN window......................................................................................................... 40 Figure 60 Change PIN dialog..................................................................................................................... 41 Figure 61 Change PIN message................................................................................................................ 41 Figure 62 TKE PIN on card reader 2.......................................................................................................... 41 Figure 63 New PIN entry message............................................................................................................ 42 Figure 64 Change PIN success dialog....................................................................................................... 42 Figure 65 CNM display details window...................................................................................................... 42 Figure 66 Smart card details window......................................................................................................... 43 Figure 67 CNM manage contents window................................................................................................. 43 Figure 68 Manage contents window.......................................................................................................... 44 Figure 69 CNM copy smart card window................................................................................................... 44 Figure 70 Source TKE smart card dialogs.................................................................................................45 Figure 71 Copy smart card dialog.............................................................................................................. 45 Figure 72 CNM create profile window........................................................................................................ 46 Figure 73 CNM select profile type dialog................................................................................................... 46 Figure 74 Profile management window...................................................................................................... 47 Figure 75 CNM profile success dialog....................................................................................................... 47 Figure 76 CNM profile window................................................................................................................... 48
v
Tables Table 1 Supported software......................................................................................................................... 2 Table 2 List of Required ACP's.................................................................................................................... 6 Table 3 CNM return/reason codes............................................................................................................. 50
vi
Smart Card User Guide
About this document This document contains information to help you use the Smart Card Utility Program (SCUP) and Cyptographic Node Management utility (CNM) to manage smart cards with the IBM 4767 PCIe Cryptographic Coprocessor. This manual should be used in conjunction with the manuals listed under “Related publications” in this section.
Prerequisite knowledge The reader of this manual should understand how to perform basic tasks (including editing, system configuration, file system navigation, and package installation) on the host machine and in the Linux® environment. Familiarity with IBM 4767 Cryptographic Common Architecture (CCA) and CNM is required. Knowledge of Trusted Key Entry (TKE) is also useful.
Typographic conventions This publication uses the following typographic conventions:
Commands entered verbatim onto the command line are presented in monospace type.
Variable information and parameters, such as file names, are presented in italic type. Variables in commands are enclosed in < > symbols. For example: command parameter1
Constants are presented in bold type.
The names of items that are displayed in graphical user interface (GUI) applications, such as pulldown menus, check boxes, radio buttons, and fields, are presented in bold type.
Items displayed within pull-down menus are presented in bold italic type.
Function names are presented in italic type.
System responses in a shell-based environment are presented in monospace type.
Web addresses and directory paths are presented in italic type.
Syntax diagrams follow these typographic conventions. Optional items appear in [ brackets ]. Lists from which a selection must be made appear in braces with a vertical bar separating each choice. For example: command firstarg [secondarg] {a | b} A value for firstarg must be specified. A value for secondarg may be omitted. Either a or b must be specified.
Related publications Publications about IBM’s family of cryptographic coprocessors are available at: www.ibm.com/security/cryptocards. Publications about the IBM 4767 PCIe Cryptographic Coprocessor and CCA are available at: www.ibm.com/security/cryptocards/pciecc2/library.shtml. The IBM CCA Basic Services Reference and Guide and the IBM 4767 PCIe Cryptographic Coprocessor CCA Support Program Installation Manual contain useful information about using CNM and CCA. These documents are available at: www.ibm.com/security/cryptocards/pciecc2/library.shtml.
vii
Summary of changes This edition of IBM 4767 PCIe Cryptographic Coprocessor Smart Card User Guide contains product information that is current with the IBM 4767 PCIe Cryptographic Coprocessor announcements.
viii
Smart Card User Guide
Overview CCA for the IBM 4767 for select x86 workstations includes support for smart card functionality. Specifically, it is possible to use smart cards to accomplish the following tasks:
Initialize smart cards for use with CNM.
Generate and store CCA DES and PKA master key parts on supported smart cards.
Load CCA master key parts stored on supported smart cards.
Log on to CCA using smart card CCA profiles tied to an RSA key pair associated with a particular smart card and user profile.
There are two GUI-based components for dealing with smart cards using the workstation release CCA and the IBM 4767 Cryptographic Coprocessor. The first component is named SCUP (Smart Card Utility Program) which is used to initialize smart cards and perform other smart card related administrative tasks. The second component is an expanded version of CNM which contains new functionality targeted for use with smart cards initialized by SCUP. Each of these components is described in the sections that follow. To obtain smart cards from IBM, or for additional assistance in setting up and configuring SCUP and CNM, please contact either the EMEA Crypto Competence Center at
[email protected] or IBM Crypto support at
[email protected].
Overview 1
Supported software Table 1 Shows the software that is supported by SCUP/CNM. Table 1 Supported software Software
Description
Operating systems
Novell® SUSE® Linux® Enterprise Server 12, Service Pack 1 (SLES 12 SP 1), 64-bit Red Hat® Enterprise Linux 6.7 (RHEL 6.7), 64-bit
CCA
Release 5.2
Java
Java version 7
Card readers (2)
Gemalto IDBridge CT700 http://www.gemalto.com/products/pc_link_readers/index.html
Smart card type
IBM part numbers 74Y0551 and FIPS-certified 00JA710
2 IBM 4767 Smart Card User Guide
SCUP/CNM setup The following steps describe how to set up the smart card readers for use with SCUP and CNM. This document assumes that the 4767 device driver and support program have been downloaded and installed from the IBM Crypto Web site: www.ibm.com/security/cryptocards/pciecc2/ordersoftware.shtml
Installation steps Complete these steps to set up the smart card readers and SCUP for use with CNM. The steps must be performed in the order listed in order to manage the interdependencies among the packages. 1. Build and install libusb-1 from source. 2. Build and install pcsc-lite from source. 3. Build and install the CCID smart card drivers from source. 4. Start the smart card service. 5. Initialize CCA. 6. Use SCUP and CNM to manage Certificate Authority (CA) and TKE smart cards. 7. Perform troubleshooting activities. Details for each step are in the following sections.
Build and install libusb-1 from source libusb-1 is a C library that gives applications access to USB devices that are necessary for smart card support. To download, build, and install libusb-1 from source, follow these steps: 1. Download libusb-1 version 1.0.20. Navigate to: sourceforge.net/projects/libusb/files/libusb-1.0/libusb-1.0.20/libusb-1.0.20.tar.bz2/download 2. When prompted, save the file. 3. For reference, the tested version is 1.0.20 and the MD5 sum is: 1d4eb194eaaa2bcfbba28102768c7dbf
libusb-1.0.20.tar.bz2
4. As a non-root user, unpackage and untar the libusb-1 source bundle: tar -xvjf libusb-1.0.20.tar.bz2 5. Build libusb-1 using the following commands: •
pushd libusb-1.0.20
•
CFLAGS="-m64" PKG_CONFIG_PATH="/usr/local/lib64/pkgconfig:/usr/local/lib/pkgconfig " ./configure --prefix=/usr/local/ --libdir=/usr/local/lib64
•
make
•
sudo make install
•
popd SCUP/CNM setup 3
Build and install pcsc-lite from source The pcsc-lite package provides a smart card interface for communicating with smart cards and readers. You can build the pcsc-lite package from source. Follow these steps: 1. Download pcsc-lite. Navigate to: alioth.debian.org/frs/?group_id=30105#title_pcsclite 2. For reference, pcsc-lite 1.8.14 was the officially tested version used in conjunction with CCA 5.2. The MD5 sum of the source bundle tested is: 439b2c8892f502e39e5b8997a7ae01ed
pcsc-lite-1.8.14.tar.bz2
3. To download pcsc-lite 1.8.14, click the link for pcsc-lite-1.8.14.tar.bz2 4. As a non-root user, unpackage and untar the pcsc-lite source bundle: tar -xvjf pcsc-lite-1.8.14.tar.bz2 5. Ensure that the libudev-devel rpm has been installed on your system. If it is not installed, it can be installed using the following command: (with root authority, where * indicates the complete version information for the RPM shipped with your Linux distribution.): rpm -ivh libudev-devel*.rpm 6. As a non-root user, build pcsc-lite: •
pushd pcsc-lite-1.8.14
•
CFLAGS="-m64" PKG_CONFIG_PATH="/usr/local/lib64/pkgconfig:/usr/local/lib/pkgconfig" ./configure --disable-static --prefix=/usr/local --execprefix=/usr/local --libdir=/usr/local/lib64 --datarootdir=/usr/local/share --includedir=/usr/local/include --enable-libusb --disable-libudev
•
make
•
sudo make install
•
popd
7. Configure pcscd: •
sudo mv /usr/sbin/pcscd /usr/sbin/pcscd.orig
•
sudo ln -s /usr/local/sbin/pcscd /usr/sbin/pcscd
Build and install CCID smart card drivers from source SCUP and smart card CNM require the Chip Card Interface Devices (CCID) drivers to be built from source and installed as part of the smart card configuration process. 1. Download version 1.4.20 of the CCID drivers from: alioth.debian.org/frs/?group_id=30105#title_ccid 2. For reference, the MD5 sum is a73c203cfe27e684850df73630065738 ccid-1.4.20.tar.bz2 4 IBM 4767 Smart Card User Guide
3. As a non-root user, build and install the CCID driver: •
tar -jxf ccid-1.4.20.tar.bz2
•
pushd ccid-1.4.20
•
CFLAGS="-m64" LDFLAGS="-m64" PKG_CONFIG_PATH="/usr/local/lib64/pkgconfig:/usr/local/lib/pkgcon fig" ./configure --disable-static --prefix=/usr/local --execprefix=/usr/local --libdir=/usr/local/lib64 --datarootdir=/usr/local/share --includedir=/usr/local/include
•
make
•
sudo make install
•
sudo cp ./src/92_pcscd_ccid.rules /etc/udev/rules.d
•
popd
Start smart card service After plugging both smart card readers into USB ports on the server, the smart card readers should blink. This verifies that the USB ports are active. Note: The smart card readers do not connect directly to the IBM 4767. Instead, they connect to the host computer in which the 4767 resides. The readers use session keys to establish encrypted communication channels with the IBM 4767. Once both smart card readers indicate that they are connected, start the smart card service. The mechanism used to enable and start the smart card service depends on your particular Linux distribution. Older distributions like RHEL 6.x still use Unix System V-style init scripts. On such a system, you can enable and start the smart card service using service. With root authority: •
service pcscd restart
You can enable the pcscd daemon to automatically start following a system reboot using chkconfig. •
chkconfig pcscd on
Many modern Linux distributions such as RHEL 7 and SLES 12 use systemd instead of System V init scripts so you must use the systemctl interface. With root authority: •
systemctl daemon-reload
•
systemctl restart pcscd.socket
•
systemctl restart pcscd.service
For systemd-based distributions you can enable pcscd to autostart as follows. With root authority: •
systemctl enable pcscd.socket
•
systemctl enable pcscd.service
Error Handling On both RHEL and SLES, if pcscd fails to start, you may get an error message in /var/log/messages stating that /var/run/pcscd/pcscd.comm already exists. If this happens, you need to remove /var/run/pcscd/pcscd.comm and restart the daemon (with root authority): rm /var/run/pcscd/pcscd.comm SCUP/CNM setup 5
systemctl restart pcscd
Initialize CCA This section contains a summary of a sample set of steps to initialize CCA to use SCUP. 1. Run the CCA initialization program that is shipped with the CCA installation package (with root authority): ./opt/ibm/4767/cnm/cca_test_init.e This program initializes a CCA profile named tester with a DEFAULT role that has all permissions turned on, and has a logon passphrase of tester. You need this to bootstrap CCA to get ready to enter the master keys. Refer to “Required access control points“ for details about the ACP's. Note: Your organization’s security policy may cause you to create and manage this initial setup role and profile yourself. For example, you may want the role to have its own name or you may want the profile to be active for only a short period of time. To create the role and profile yourself, use CNM as described in Chapter 5 of the CCA Support Program Installation Manual. 2. You may now use the tester profile to create the smart cards using SCUP. Refer to “Smart card initialization with SCUP” on page 7 for details.
Required access control points To use SCUP and SCUP-enabled CNM, you must enable certain access control points (ACP's) in CNM. For more information about enabling ACP's in roles in CNM, Refer to Chapter 5 of the CCA Support Program Installation Manual. Ensure that the ACP's in Table 2 are listed in Permitted Operations for the role(s) that need to run SCUP and SCUP-enabled CNM. Table 2 List of Required ACP's Offset
Command
X’0103’
PKA96 PKA Key Generate
X’0203’
Delete Retained Key
X’02A5’
CCA Device Cert Imp Auth
X’02A6’
TKE CA Cert Imp Auth
X’02A8’
Delete Retained Device Key
X’02A9’
CCA Device Cert Exp Auth
X’8002’
TKE User Login
6 IBM 4767 Smart Card User Guide
Smart card initialization with SCUP SCUP is used to initialize Certificate Authority (CA) and Trusted Key Entry (TKE) smart cards. This section contains an illustration of how to use SCUP to initialize and personalize smart cards for use with CNM. The steps involved in initializing and personalizing smart cards are: 1. If needed, initialize CCA using CNM with a temporary master key and temporary profile. 2. If needed, set the default adapter. 3. Launch SCUP. 4. Initialize and personalize a CA smart card. 5. Initialize and enroll a TKE smart card. 6. Personalize a TKE smart card. 7. Enroll the crypto adapter in a zone.
Handling multiple adapters in SCUP If your system has more than one IBM 4767 adapter installed, you must ensure that you are referring to the correct adapter when using both SCUP and CNM. Please note that CLU uses a zero-based adapter numbering system, and SCUP uses a one-based adapter numbering system. Specifically, CLU refers to the first adapter in the system as adapter 0 and SCUP uses the, the CCA environment variable specifying the default adapter for which to target commands refers to the first adapter as CRP01. The “first adapter” can change on system reboot; it merely indicates the first adapter that the host device driver finds upon reboot. Before launching SCUP, use the export command to set the CSU_DEFAULT_ADAPTER environment variable to indicate a certain adapter. For example: export CSU_DEFAULT_ADAPTER=CRP02 instructs SCUP to point to the second discovered adapter in the system, which is adapter 1 in CLU. If this environment variable is not set when you launch SCUP, coprocessor CRP01 is assumed to be the default adapter. If this environment variable is set to an invalid value, you will get an error until the environment variable is set to a valid value.
Launch SCUP To launch SCUP, run the scup shell script (/opt/ibm/4767/cnm/scup). Note: The scup script adds /usr/local/lib64 to your LD_LIBRARY_PATH because it assumes certain library files were installed there as specified by the build and installation instructions in this manual. If you chose an alternate location for these files, you must include this location in LD_LIBRARY_PATH before invoking SCUP. When SCUP is launched, it displays a login prompt that allows you to log in to a CCA profile to be used by SCUP. Refer to Figure 1 on page 8. Note: Both CNM and SCUP require Java 7. In addition, SCUP requires at least one CCA profile with the ACP's listed above enabled. Once SCUP is launched, do not disconnect the smart card reader(s). If a smart card reader is disconnected while SCUP is running, you must exit SCUP and launch it again. If no CCA profiles are displayed, you must create one to use for SCUP. Smart card initialization with SCUP 7
Figure 1 Crypto adapter logon Select an appropriate profile, and click Ok. Note: If the list of CCA profiles is empty, then you may not have any profiles that have a role that has the required ACP's enabled. Follow the instructions in Chapter 5 of the CCA Support Program Installation Manual to use CNM to enable ACP's in a role and define a user profile associated with that role. A dialog will appear allowing you to enter the passphrase for the selected profile. Refer to Figure 2. Enter the passphrase for the selected profile and click Ok. Note: If the profile is a smart card profile, you will be prompted to enter the PIN through one of the attached smart card readers.
Figure 2 Passphrase After login, the TKE SCUP main window is displayed. Refer to Figure 3 on page 9.
8 IBM 4767 Smart Card User Guide
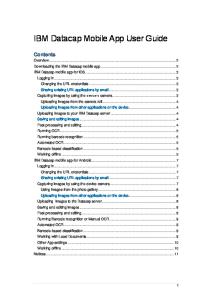
Figure 3 TKE SCUP main window Warning: Only one instance of SCUP or CNM can be running at any given time. Each of these programs must have exclusive use of the smart cards. Running two instances of SCUP, two instances of CNM, or one instance of SCUP and one instance of CNM at the same time will lead to errors. Two Gemalto IDBridge CT700 USB smart card readers have been attached to the test machine for this example walk-through. Initially both smart cards are empty. SCUP will be used to initialize one of the cards as a CA smart card and the other card as a TKE smart card. The card readers have small LCD screens that display prompts at appropriate times. An example setup would look like Figure 4 on page 10. In this setup, card reader 1 is the reader on the left, and card reader 2 is the reader on the right. This document will use these names to refer to the two card readers.
Smart card initialization with SCUP 9
Figure 4 OMNIKEY Card Readers
Initialize and personalize a CA smart card Refer to Figure 5 on page 11. To initialize and personalize a CA smart card, select Initialize and personalize CA smart card from the CA Smart Card menu item of the TKE SCUP main window.
10 IBM 4767 Smart Card User Guide
Figure 5 Initialize and personalize CA smart card window You (in the role of Security Officer) will be prompted to insert the smart card to be used as the CA smart card into smart card reader 1. Refer to Figure 6.
Figure 6 Initialize CA smart card dialog Insert an empty smart card into card reader 1. The gold symbol must be face up and must be inside the card reader. Once you have inserted the smart card, click Ok and SCUP prompts you to select a 1024-bit or 2048-bit zone key. Refer to Figure 7 on page 12.
Smart card initialization with SCUP 11
Figure 7 CA smart card zone key length dialog Select the radio button corresponding to the desired zone key length and click Ok. SCUP will then validate smart card communication and will warn you if you are trying to initialize a smart card that is not empty. SCUP proceeds to initialize the card. Refer to Figure 8. Once the smart card is initialized, SCUP prompts you to enter a 6-digit PIN twice which will be used as the first CA PIN as shown in Figure 9 on page 13. To enter the PIN twice, simply type the PIN, press the green Enter key on the reader, type the PIN again, and press Enter again. For example, if the PIN is 123456, type: 123456 Enter 123456 Enter Note: There is a timeout of around 30 seconds for entering information on the card reader. If the reader times out before you complete the PIN entry, you must start over on the TKE SCUP main window.
Figure 8 CA smart card initialization
12 IBM 4767 Smart Card User Guide
Figure 9 CA smart card PIN entry message The card reader's display will then change to indicate that input is required. Refer to Figure 10.
Figure 10 CA PIN entry Enter the first CA PIN on card reader 1, press Enter, then re-enter the PIN and press Enter again for confirmation. For example, if the PIN is 123456, type 123456 Enter 123456 Enter At this point, SCUP will have card reader 1 issue a prompt for you to enter the second 6-digit CA PIN twice. Refer to Figure 11 on page 14. Smart card initialization with SCUP 13
Figure 11 CA smart card second PIN message Enter the second CA PIN on card reader 1, then re-enter it for confirmation. Once the second CA PIN has been entered, the CA smart card can then be personalized by entering an optional zone description (Figure 12) and an optional smart card description (Figure 13).
Figure 12 CA smart card zone dialog
Figure 13 CA smart card description dialog After you input the optional zone description and the optional smart card description and click Ok on each dialog, a message will appear stating that the CA smart card is building. If you want to skip either description, simply click Ok. Refer to Figure 14 on page 15.
14 IBM 4767 Smart Card User Guide
Figure 14 CA smart card build message Once the smart card build successfully completes, the message shown in Figure 15 will be displayed.
Figure 15 CA smart card success dialog When you click Ok, the TKE SCUP main window will be displayed, and the details for the CA smart card will be visible. Refer to Figure 16 on page 16.
Smart card initialization with SCUP 15
Figure 16 TKE SCUP main window with CA smart card details Note: If you cancel the smart card initialization process before the card is completely initialized, the smart card you are initializing is left in an unusable state and must be re-initialized. You may have to re-initialize the smart card as a different type of smart card to force the partially-initialized state to be erased. For example, if you cancel the initialization of a CA smart card in the middle, you may need to initialize that card as a TKE smart card before you can initialize it as a CA smart card again.
Initialize and enroll a TKE smart card After the CA smart card has been initialized, the TKE smart card (which can contain the master key parts and crypto adapter logon keys) can be initialized and enrolled. To initialize and enroll a TKE smart card, select Initialize and enroll TKE smart card from the TKE Smart Card menu item of the TKE SCUP main window. Refer to Figure 17 on page 17.
16 IBM 4767 Smart Card User Guide
Figure 17 Initialize and enroll TKE smart card window You will be prompted to insert the CA smart card into card reader 1. Refer to Figure 18. Note: If a CA smart card is already in card reader 1, and if you previously entered the CA smart card PIN, you will not be prompted to go through the CA smart card verification process. Skip to Figure 22.
Figure 18 CA smart card insertion dialog Click Ok to continue. You will be prompted to enter the first CA PIN (as created above) on the smart card reader PIN pad. Refer to Figure 19 on page 18. Smart card initialization with SCUP 17
Figure 19 CA smart card PIN 1 message The PIN pad will then prompt for the PIN. Refer to Figure 20.
Figure 20 CA PIN entry new picture Enter the first CA PIN. After the first PIN is entered, the second CA PIN is also required for dual authentication. The smart card reader PIN pad will prompt for the second PIN. Refer to Figure 21 on page 19. Enter the second PIN.
18 IBM 4767 Smart Card User Guide
Figure 21 CA smart card PIN 2 message At this point, the CA smart card has authenticated you so that the TKE smart card can now be initialized. SCUP will prompt you to insert the smart card to be initialized as the TKE smart card into card reader 2. Refer to Figure 22. If the card is not empty, you will be warned and given the option to continue or stop. Note: If you remove the CA smart card before you initialize the TKE smart card, you will be prompted for the CA smart card PIN before you are allowed to continue. If you leave the CA smart card in the reader, you will not be prompted for the CA smart card PIN.
Figure 22 TKE smart card insertion message Once you insert the TKE smart card into reader 2 and click Ok, the smart card will be initialized, and a message will be displayed. Refer to Figure 23 on page 20.
Smart card initialization with SCUP 19
Figure 23 TKE smart card initialization message Once initialization successfully completes, the message shown in Figure 24 will be displayed.
Figure 24 TKE smart card success dialog At this point, the card is initialized and enrolled as a TKE smart card, and needs to be personalized with its own 6-digit PIN. When you click Ok, the TKE SCUP main window will be displayed, and the details for the TKE smart card will be visible. Refer to Figure 25 on page 21.
20 IBM 4767 Smart Card User Guide
Figure 25 TKE SCUP main window with TKE smart card details Note: If you do not complete the smart card initialization process, the smart card you are initializing is left in an unusable state and must be re-initialized to be made usable again. You may have to re-initialize the smart card as a different type of smart card to force the partially-initialized state to be erased. For example, if you cancel the initialization of a TKE smart card in the middle, you may need to initialize that card as a CA smart card before you can initialize it as a TKE smart card again.
Personalize a TKE smart card After the TKE smart card has been initialized and enrolled, it needs to be personalized. To personalize the TKE smart card, select Personalize TKE smart card from the TKE SCUP menu item of the TKE SCUP main window. Refer to Figure 26 on page 22.
Smart card initialization with SCUP 21
Figure 26 Personalize TKE smart card window You will be prompted to ensure that the TKE smart card to be personalized is inserted in card reader 2. Refer to Figure 27.
Figure 27 TKE smart card insertion message Click Ok, and you will be prompted to enter the 6-digit PIN twice that is to be used with the TKE smart card. This is not the CA smart card PIN, but is a new PIN for the TKE smart card. Refer to Figure 28 on page 23. 22 IBM 4767 Smart Card User Guide
Figure 28 TKE smart card PIN message Card reader 2 will then prompt twice for the PIN to be entered. Refer to Figure 29. To enter the PIN twice, simply type the PIN, press the green Enter key on the reader, type the PIN again, and press Enter again. For example, if the PIN is 123456, type: 123456 Enter 123456 Enter
Figure 29 TKE PIN entry Smart card initialization with SCUP 23
Once you have entered the 6-digit PIN twice, you can then personalize the smart card with a description. Refer to Figure 30.
Figure 30 TKE smart card description dialog After entering an optional description, click Ok. SCUP will personalize the TKE smart card and display a confirmation. Refer to Figure 31.
24 IBM 4767 Smart Card User Guide
Figure 31 TKE smart card success dialog Smart card initialization with SCUP 25
When you click Ok, the TKE SCUP main window will be displayed, and the details for the TKE smart card will be visible. Refer to Figure 32 on page 26.
Figure 32 TKE main window with smart card details
Enroll the crypto adapter in a zone The crypto adapter must be enrolled in a zone. To do so, select Enroll Crypto Adapter from the Crypto Adapter menu item of the TKE SCUP main window. Refer to Figure 33 on page 27.
26 IBM 4767 Smart Card User Guide
Figure 33 Enroll adapter window SCUP will prompt you to enroll the adapter as shown in Figure 34.
Figure 34 Enroll adapter dialog Click Ok. You will be prompted to insert the CA smart card into smart card reader 1. Refer to Figure 35 on page 28.
Smart card initialization with SCUP 27
Figure 35 Enroll adapter insertion dialog After inserting the CA smart card into card reader 1, you will be prompted to enter the first CA PIN. Refer to Figure 36.
Figure 36 Enroll adapter PIN 1 message Enter the first CA PIN on smart card reader 1. Refer to Figure 37 on page 29.
28 IBM 4767 Smart Card User Guide
Figure 37 Enroll adapter PIN 1 entry message You will then be prompted to enter the second CA PIN. Refer to Figure 38.
Figure 38 Enroll adapter PIN 2 entry message The reader will display the PIN input as shown above. Enter the second CA PIN. After the second CA PIN has been entered, SCUP will enroll the adapter. After the second CA PIN has been successfully entered, SCUP will enroll the adapter. Refer to Figure 39 on page 30.
Smart card initialization with SCUP 29
Figure 39 Enroll adapter success dialog
30 IBM 4767 Smart Card User Guide
CNM smart card functions To start CNM with smart card support enabled, you must specify the /SC input parameter: ./csulcnm /SC Alternatively, you can edit the cnm.ini file to enable smart card support. Once you have run CNM once, you can enable smart card support in CNM. To do this, edit the cnm.ini file to specify smart card enablement. By default, cnm.ini is located in /opt/ibm/4767/cnm. Change the line that reads ENABLE_SC=false to ENABLE_SC=true. After enabling smart card support, you can launch CNM without specifying /SC: ./opt/ibm/4767/cnm/csulcnm The following sections contain examples of smart card CNM functionality.
Handling multiple adapters in CNM If your system has more than one IBM 4767 adapter installed, you must ensure that you are referring to the correct adapter when using both SCUP and CNM. On one hand, CLU refers to the first adapter in the system as adapter 0. On the other hand, the CCA environment variable specifying the default adapter for which to target commands refers to the first adapter as CRP01. The “first adapter” can change on system reboot; it merely indicates the first adapter that the host device driver finds upon reboot. From the Crypto Node menu, select Select Adapter. Then choose adapter 1, 2, or 3, depending on which installed CCA adapter you want to be the default. Click Select using the buttons at the bottom of the window, and then click OK. These actions in CNM point to the desired adapter for the duration of the CNM session. Once you exit CNM, the default adapter designation is lost.
Generate a crypto logon key In order to log on to the adapter using a CCA profile and a TKE smart card, a logon key of type RSA must be generated. The following steps outline the procedure to generate a logon key. Note: To generate a crypto logon key and generate master key parts on smart cards, you must first enroll the adapter. Refer to “Enroll the crypto adapter in a zone” on page 26 for details. From the Smart Card menu item, select Generate Crypto Adapter Logon Key. Refer to Figure 40 on page 32.
CNM smart card functions 31
Figure 40 CNM Generate Logon Key window You will be prompted to insert a TKE smart card into card reader 2. Refer to Figure 41.
Figure 41 Generate Logon Key insert dialog Once the card has been inserted and you have pressed OK, you will be prompted to enter the PIN for the TKE card. Refer to Figure 42.
Figure 42 Generate Logon Key PIN message Enter the PIN for the TKE card, at which time you will be prompted to enter a new user ID to associate with the key pair. This user ID is a new ID that you will use in the future as the associated profile for this smart card. Refer to Figure 43 on page 33 for an example using user ID testkey.
32 IBM 4767 Smart Card User Guide
Figure 43 Generate Logon Key user ID dialog Note: User IDs must be unique and cannot be the same as other types of crypto profiles. In this example, user ID testkey was entered. After entering the user ID, click OK and a logon key will be generated. CNM will then display a pop-up dialog indicating the logon key was successfully generated. Refer to Figure 44.
Figure 44 Generate Logon Key success dialog
CCA profiles using smart cards for authentication data Smart card enabled CNM has the ability to store CCA profile authentication data on a smart card in the form of a public/private RSA key pair generated as described in “Generate a crypto logon key” on page 31. Note: Prior to setting up a CCA profile to use a smart card for authentication, make sure you set up a role that has full permissions and has the required ACP's permitted. For the following example, a role named TEST is used. The required ACP's are listed in Table 2 on page 6. Refer to Chapter 5 of the CCA Support Program Installation Manual for instructions about setting up roles. To set up a CCA profile that uses a smart card for its authentication data, perform the following steps. First, select Profiles from the Access Control menu. Refer to Figure 45 on page 34.
CNM smart card functions 33
Figure 45 CNM Profiles window CNM will then display the Profile Management window. Refer to Figure 46.
Figure 46 Profile Management window Click New, using the buttons on the bottom of the window, and a pop-up dialog will be displayed. Refer to Figure 47 on page 35.
34 IBM 4767 Smart Card User Guide
Figure 47 New profile dialog Select the Smart Card radio button and click Continue. You will then be prompted to insert a TKE smart card into card reader 2. Refer to Figure 48.
Figure 48 New profile insert dialog After you insert a TKE smart card and click OK, a panel will appear allowing you to set up a profile. Refer to Figure 49 on page 36.
CNM smart card functions 35
Figure 49 New profile setup window You can then set up the standard fields associated with a profile. Refer to Chapter 5 of the CCA Support Program Installation Manual for instructions about setting up roles and profiles using CNM. Note: The User ID on this window is not editable because it is populated from the Crypto Logon Key Identifer you specified when you generated a crypto logon key. Once the profile has been set up, click Load at the bottom of the window to load the profile, at which time a pop-up message will appear stating that the profile has been created successfully. Refer to Figure 50.
Figure 50 New profile success dialog
CCA logon with a smart card profile The smart card profile created above can be used later to log a user into CCA with that profile. To log into CCA using a profile whose authentication data is stored on a smart card, select Smart Card Logon... from the File menu of CNM. Refer to Figure 51 on page 37.
36 IBM 4767 Smart Card User Guide
Figure 51 CNM Smart Card Logon window You will then be prompted to insert a TKE smart card into card reader 2 and click OK. Refer to Figure 52.
Figure 52 TKE Smart Card insertion message You will then be prompted for the TKE PIN. Refer to Figure 53 on page 38. Enter it on the PIN pad. Note: There is a timeout of about 30 seconds for entering information on the card reader. If the reader times out before you complete the PIN entry, you must start over on the CCA main window.
CNM smart card functions 37
Figure 53 TKE PIN on card reader 2 Once you enter the TKE PIN, you will be logged on using the logon key and authentication data stored on the smart card.
Smart card master key parts Smart card enabled CNM provides functionality to store master key parts securely on smart cards. The following discussion illustrates how to generate and store a master key part on a smart card. Note: To generate a crypto logon key and generate master key parts on smart cards, you must first enroll the adapter. Refer to “Enroll the crypto adapter in a zone” on page 26 for details. From the DES/PKA Master Keys, AES Master Key, or APKA Master Key sub-menu of the Master Key menu, select Smart Card Parts. Refer to Figure 54 on page 39.
38 IBM 4767 Smart Card User Guide
Figure 54 CNM Smart Card Parts window You will then be prompted to insert a TKE smart card into card reader 2 and click OK. Refer to Figure 55.
Figure 55 Insert TKE smart card reader 2 dialog Once you insert the TKE smart card and click OK, the window shown in Figure 56 on page 40 will be displayed.
CNM smart card functions 39
Figure 56 Master key parts window For each master key part, select the appropriate radio button for the key part and then click Generate & Save at the bottom of the window to create and store the part of the master key. A dialog will ask for an optional description for each master key part. Refer to Figure 57.
Figure 57 Master key parts description dialog Enter a description for each key part and click OK. The dialog for entering a PIN on the second card reader will be displayed. Enter the TKE smart card PIN. CNM will generate and save the master key part on the smart card. If you want to load the key part, click the Load button. Note: As is standard with CNM, the master key (MK) must be set separately after all of the MK parts have been generated and saved. Generate & save does not load the MK part into the MK registers. It just generates the MK part and saves it on the smart card. If you also want to load the MK part, do so by pressing Load at the bottom of the window. Select it via the description that was entered when it was generated and saved. This can be done at the time the MK part is generated and saved or when needed later. Note: Any key parts that you generate and save can be deleted later if desired. Once CNM completes generating the master key parts on the smart card, the master key parts will appear in the list of Master Key Parts On Smart Card as shown in Figure 58 on page 41. 40 IBM 4767 Smart Card User Guide
Figure 58 Master key parts window with results
Change TKE smart card PIN To change the PIN of a TKE smart card using CNM, select Change PIN on the Smart Card menu. Refer to Figure 59.
Figure 59 CNM Change PIN window You will be prompted to enter a TKE smart card into card reader 2 and click OK as shown in Figure 60 on page 42. CNM smart card functions 41
Figure 60 Change PIN dialog After you click OK, you will be prompted to enter the current PIN on the smart card reader. Refer to Figure 61.
Figure 61 Change PIN message The smart card reader then prompts you to enter the old PIN as shown in Figure 62.
Figure 62 TKE PIN on card reader 2 Once you have entered the old PIN, CNM prompts for the new PIN to be entered twice. Refer to Figure 63.
42 IBM 4767 Smart Card User Guide
Figure 63 New PIN entry message Enter the new PIN twice. Once you have entered the new PIN twice and CNM has verified that the PINs match, the PIN will be changed, and the dialog shown in Figure 64 on page 43 will be displayed.
Figure 64 Change PIN success dialog
View smart card details Smart card enabled CNM allows you to display the basic details of what is present (and publicly available) on the card. To view this information, select Display Smart Card Details from the Smart Card menu. Refer to Figure 65.
Figure 65 CNM display details window Enter a TKE smart card in card reader 2 and click OK. The window shown in Figure 66 on page 44 will be displayed.
CNM smart card functions 43
Figure 66 Smart card details window
Manage smart card contents Smart card enabled CNM allows you to manage the contents of your TKE smart cards. Select Manage Smart Card Contents on the Smart Card menu. Refer to Figure 67.
Figure 67 CNM manage contents window You can delete items from the card after providing the appropriate PIN(s). Refer to Figure 68 on page 45.
44 IBM 4767 Smart Card User Guide
Figure 68 Manage contents window Note: This example shows a test card. For security reasons, you would normally have only one master key part on each TKE smart card.
Copy smart card Smart card enabled CNM allows you to copy a TKE smart card for backup or recovery purposes. Select Copy Smart Card on the Smart Card menu as shown in Figure 69.
Figure 69 CNM copy smart card window CNM smart card functions 45
You will be prompted to insert a source TKE smart card in card reader 1 and a target smart card in card reader 2. Refer to Figure 70.
Figure 70 Source TKE smart card dialogs A dialog similar to the one shown in Figure 71 will be displayed. The contents of the smart card may differ depending on the smart card you select to be copied. For example, if your smart card contains any master key parts, those will be displayed.
Figure 71 Copy smart card dialog Once you click OK, CNM copies the contents of the TKE smart card in reader 1 to the TKE smart card in reader 2.
46 IBM 4767 Smart Card User Guide
Group logon Group profiles are useful for n of m authentication. For example, you may want to require that three of your five security officers be present for certain authentication activities. You can create a group that contains smart card profiles. You can also create a group that contains smart card group profiles. To use group profiles, create one or more profiles. Then put them in a group. To add a profile to a group, select Profiles from the Access Control menu of CNM. Refer to Figure 72.
Figure 72 CNM create profile window Click New. The window in Figure 73 will be displayed.
Figure 73 CNM select profile type dialog CNM smart card functions 47
Select Group and then click Continue. The window shown in Figure 74 will be displayed.
Figure 74 Profile management window Fill in the entry fields for the group, including the group’s user ID, and optional comment, the activation and expiration dates, and an appropriate role. Choose the available profiles and add them to the group. Once your changes are complete, click Load. The dialog shown in Figure 75 will be displayed.
Figure 75 CNM profile success dialog Once you click OK, the window shown in Figure 76 on page 49 will be displayed.
48 IBM 4767 Smart Card User Guide
Figure 76 CNM profile window
CNM smart card functions 49
Smart card security The addition of smart cards to a cryptographic environment brings additional security considerations into play. Special considerations should be taken to ensure the security of the smart cards. Consult your organization’s security policy for guidelines. Some examples of smart card security considerations include, but are not limited to:
physical security of the smart cards, such as storing them in various locked cabinets,
storing only one master key part on each smart card,
assigning each smart card to a different individual,
ensuring that an accurate inventory of smart cards is kept current, and
other security practices that implement your organization’s security policy.
Consult with your security architect to ensure that you have the appropriate security guidelines in place. Please contact IBM if you have questions.
50 IBM 4767 Smart Card User Guide
Error codes This section contains a set of return/reason codes you may encounter when using SCUP-enabled CNM. Table 3 CNM return/reason codes Return code in decimal
Reason code in decimal
Meaning
8
2080
The group profile was not found.
8
2081
The group has duplicate elements.
8
2082
The group profile is not in the group.
8
2083
The group has the wrong user ID count.
8
2084
The group user ID failed.
8
2085
The profile is not in the specified group.
8
2086
The group role was not found.
8
2087
The group profile has not been activated.
8
2088
The expiration date of the group profile has been reached or exceeded.
8
2090
A required SRDI was not found.
8
2091
A required CA SRDI was not found.
For a complete list of CCA/CNM return and reason codes, refer to Appendix A of the CCA Basic Services Reference and Guide for the IBM 4767.
Error codes 51
Troubleshooting This section contains various troubleshooting tips and techniques that may be useful when working with SCUP and CNM.
When launching SCUP or CNM, if an error stating that smart card communications could not be initialized is encountered, this is sometimes caused by the smart card lock file. This file is used by SCUP/CNM to claim exclusive access to the smart card reader(s). After exiting SCUP/CNM, delete the /console/tke/common/smartCardLockFile file and try again.
When launching SCUP, if an error appears stating that smart card functions will not be available or that the number of terminals available is less than the expected count, this could be caused by another smart card management service already running. If this is the case, ensure that the other service is stopped. You must kill the process and remove it from the autostart list to prevent it from starting on a later login. For example, to kill esc and remove it from autostart (with root authority): /usr/bin/esc stop /etc/init.d/escd stop rm /etc/xdg/autostart/esc.desktop
When launching CNM, if a smart card reader error appears (similar to: ScardConnect PC/SC Error, the smart card cannot be accessed because of other connections outstanding), this could be caused by another smart card management service already running. Refer to the instructions above for killing and removing the smart card service for a possible solution.
When SCUP or CNM is not in use, depending on your operating system, the lights on the smart card readers may blink continuously, may blink intermittenly, or may not blink at all. Once SCUP or CNM is started, the lights on the smart card readers should be solid green. After exiting SCUP or CNM, the lights may stay green for a moment and then may go back to a form of blinking or may not blink at all.
If you experience connectivity problems with the smart card readers, or if SCUP or CNM indicates that two readers were not found, try these steps: •
Ensure that the readers are found by the operating system by using the lsusb command. A typical invocation and output from this command might look like this:
•
lsusb | grep -i Gemalto Bus 003 Device 002: ID 08e6:3478 Gemalto (was Gemplus) PinPad Smart Card Reader Bus 003 Device 003: ID 08e6:3478 Gemalto (was Gemplus) PinPad Smart Card Reader
•
If you do not see two readers from this command, please unplug and reseat the readers in the usb slot on the machine, try a different usb slot or slots, and reseat the connectors on the bottom of the readers.
If you disconnect a smart card reader while SCUP is running, you must exit and restart SCUP.
If you do not complete the smart card initialization process, the smart card you are initializing is left in an unusable state and must be re-initialized to be made usable again. You may have to reinitialize the smart card as a different type of smart card to force the partially-initialized state to be erased. For example, if you cancel the initialization of a CA smart card in the middle, you may need to initialize that card as a TKE smart card before you can initialize it as a CA smart card 52 IBM 4767 Smart Card User Guide
again.
If no CCA profiles suitable for login are displayed when launching SCUP, verify that ACP X’8002’ is enabled in the active role, as well as the other TKE-specific ACP's. Refer to Table 2 on page 6.
When entering PINs or any input through the smart card readers, a general timeout of around 30 seconds is imposed by SCUP and CNM.
If you insert an invalid smart card or the wrong type of smart card for what you are trying to do, an error dialog will be displayed. Insert the correct type of smart card and click Ok to continue.
If SCUP’s list of available CCA profiles is empty, then you do not have any profiles that have a role that has the required ACP's enabled. Follow the instructions in Chapter 5 of the CCA Support Program Installation Manual to use CNM to enable ACP's in a role and define a user profile with that role.
If SCUP’s list of available CCA profiles does not contain a profile that you are sure is attached to a role that has the correct ACP's enabled, make sure that the profile name contains only printable characters. It is possible to create a profile or role in CCA that contains unprintable characters in its name, but CNM and SCUP do not support profiles or roles with these characters in them.
If you are having trouble communicating with the smart cards, the smart card daemon can be started in debug mode that prints diagnostic messages. To do this, stop the daemon and then start it again with the pcscd –d –f command. Note: This is the actual daemon binary file, not the script that runs in the /etc/init.d directory.
If you cannot generate crypto logon keys or generate master key parts on smart cards, ensure that you have enrolled the adapter in a zone. Refer to “Enroll the crypto adapter in a zone” on page 26 for instructions.
If users encounter a permissions or access denied error when launching SCUP or CNM, it is likely that SCUP or CNM was run as root the first time it was launched. Running SCUP or CNM as root the first time prevents other users from running them. To fix this condition, you must manually change the permissions for all of the files in /opt/ibm/4767/console directory back to the permissions they had when the installer originally installed them.
If you have more than one IBM 4767 installed, set the CSU_DEFAULT_ADAPTER environment variable to point to the correct adapter before using SCUP. Refer to “Handling multiple adapters in SCUP” on page 7 for details. Also, set the CNM default adapter each time you use CNM. Refer to “Handling multiple adapters in CNM” on page 31 for details.
If SCUP or CNM encounters an error that is not explained by the other errors listed in this document, ensure that you have only one instance of SCUP or CNM running. Only one instance of SCUP or CNM can be running at any given time. Each of these programs must have exclusive use of the smart cards. Running more than one instance of SCUP, more than one instance of CNM, or one instance of SCUP and one instance of CNM at the same time will lead to errors.
Troubleshooting 53
Notices References in this publication to IBM products, programs, or services do not imply that IBM intends to make these available in all countries in which IBM operates. Any reference to an IBM product, program, or service is not intended to state or imply that only IBM’s product, program, or service may be used. Any functionally equivalent product, program, or service that does not infringe any of IBM’s intellectual property rights or other legally protectable rights may be used instead of the IBM product, program, or service. Evaluation and verification of operation in conjunction with other products, programs, or services, except those expressly designated by IBM, are the user’s responsibility. IBM may have patents or pending patent applications covering subject matter in this document. The furnishing of this document does not give you any license to these patents. You can send license inquiries, in writing, to the IBM Director of Licensing, IBM Corporation, 500 Columbus Avenue, Thornwood, NY, 10594, USA. Any references in this information to non-IBM Web sites are provided for convenience only and do not in any manner serve as an endorsement of those Web sites. The materials at those Web sites are not part of the materials for this IBM product and use of those Web sites is at your own risk.
Copying and distributing softcopy files For online versions of this document, we authorize you to: Copy, modify, and print the documentation contained on the media, for use within your enterprise, provided you reproduce the copyright notice, all warning statements, and other required statements on each copy or partial copy. Transfer the original unaltered copy of the documentation when you transfer the related IBM product (which may be either machines you own, or programs, if the program’s license terms permit a transfer). You must, at the same time, destroy all other copies of the documentation. You are responsible for payment of any taxes, including personal property taxes, resulting from this authorization. THERE ARE NO WARRANTIES, EXPRESS OR IMPLIED, INCLUDING THE WARRANTIES OF MERCHANTABILITY AND FITNESS FOR A PARTICULAR PURPOSE. Some jurisdictions do not allow the exclusion of implied warranties, so the above exclusion may not apply to you. Your failure to comply with the terms above terminates this authorization. Upon termination, you must destroy your machine readable documentation.
Trademarks IBM is a registered trademark of the IBM Corporation in the United States and/or other countries or both. Linux is a registered trademark of Linus Torvalds in the United States, other countries, or both. Gemalto is a registered trademark of Gemalto NV. Other company, product, and service names may be trademarks or service marks of others.
54
List of abbreviations ACP
Access Control Point
AES
Advanced Encryption Standard
CA
Certificate Authority
CCA
Common Cryptographic Architecture
CCA BR
CCA Backup/Restore
CCA HSM
CCA Hardware Security Module
CCA Init
CCA initialization utility
CNM
Cryptographic Node Management
DES
Data Encryption Standard
FCV
Function Control Vector
HSM
Hardware Security Module
IBM
International Business Machines
MK
Master Key
PCIe
Peripheral Component Interconnect Express
PCSCD
PC/SC Smart Card Daemon
PDF
Portable Document Format
PKA
Public Key Architecture
RHEL
Red Hat Enterprise Linux
RPM
RPM Package Manager
SLES
SUSE Linux Enterprise Server
SCUP
Smart Card Utility Program
SRDI
Security Relevant Data Item
TKE
Trusted Key Entry
55
Index abbreviations....................................................54 access control points, enabling required............6 building pcsc-lite................................................4 CCA profiles.....................................................32 changing a TKE smart card PIN.......................40 CNM setup.........................................................1 CNM smart card functions................................30 copying smart card contents............................44 crypto adapter, enrolling in a zone...................25 enrolling a TKE smart card...............................16 enrolling the crypto adapter in a zone..............25 error codes.......................................................50 functions, CNM smart card...............................30 generating a crypto logon key..........................30 group logon......................................................46 hardware and software, supported.....................2 initializing a CA smart card...............................10 initializing a TKE smart card.............................16
56
launching SCUP.................................................7 managing smart card contents.........................43 master key parts..............................................37 multiple adapters, handling in CNM.................30 multiple adapters, handling in SCUP.................7 overview.............................................................1 personalizing a TKE smart card.......................21 prerequisite knowledge.....................................vii related publications...........................................vii SCUP setup.......................................................1 smart card profile.............................................35 smart card security...........................................49 smart card, initializing with SCUP......................7 starting smart card service.................................5 TKE smart card, personalizing.........................21 viewing smart card details................................42 notices ...........................................................53