How to make perfect homemade bread!
A real bread oven in your own home! Do you know how to make a delicious loaf with a crispy crust? The secret lies in the baking, which requires a high level of carefully controlled humidity. The Emile Henry Bread Cloche recreates the same conditions that you find in a traditional bread oven. You can therefore create a delicious, crusty loaf that is light and airy inside.
Many kinds of beans, grains and rice are ground into flours that can be added to bread dough for additional taste or crunch. Cornmeal and rice flour, for example, sprinkled on the platter before baking keep breads from sticking. But none of these flours contain the protein that bakes into an airy loaf of bread. That is why such ingredients as barley flour or cornmeal, ground quinoa or millet are added to bread flour in small quantities, no more than 30% of the total flour in a recipe. For people who cannot digest the protein in wheat flours, these ingredients can be used to make satisfying bread. Starches, gums and eggs (among other ingredients) must be combined with these flours to produce satisfying bread. Ground nuts, such as hazelnuts, pecans and walnuts add tremendous pizzazz to bread. To bring out the flavor, toast the nuts lightly before adding them to the dough. Seeds can add nutrition and texture to bread. Add a few teaspoons to any bread dough for added texture and taste. YEAST The magical ingredient, yeast is a living organism responsible for making breads rise. Yeast works by consuming the sugars and starch in bread dough. Among the by products is carbon dioxide gas, which gets trapped in the elastic web of gluten in the dough. The gas causes the dough to rise up like a balloon. Before the advent of packaged yeast, bakers relied on wild yeasts they captured in the air around them. They would make a batch of moist dough that would attract yeast cells, which would feed on the dough. Soon the dough would begin to bubble then rise, indicating that the yeast was active. Many sourdough breads are still made using wild yeast.
EMILE HENRY BREAD CLOCHE The Emile Henry Bread Cloche replicates cooking in a brick oven. The clay dome even looks like the vaulted roof of a beehive oven once common in rural villages. The Emile Henry Bread Cloche works by trapping moisture that evaporates from bread dough. The moisture turns to steam, which keeps the bread dough moist during baking. The dough expands, swelling into a plump loaf of bread. Once the moisture evaporates the loaf develops a crisp, thin crust and an appealing golden color. The platter on which the bread is baked absorbs heat during baking. This heat is released back into the dough helping it rise into a lovely loaf. Ridges on the base keep the dough from sticking while it bakes. Whether this is your first time baking bread or you are an experienced home baker, the Emile Henry Bread Cloche brings the flavor and aroma of fresh-baked bread into your kitchen. BREAD BAKING BASICS The basic ingredients for making bread are flour, water, yeast and salt. Magic happens when they are combined. The type of flour used, the amount of water added to the dough and how long you let the dough rest and rise determine the kind of bread you will make. Add a little more water and your bread will rise more quickly, but it may take longer to bake in order for the extra moisture to evaporate. Add a little more flour and your dough will be firmer and less sticky. It will be easier to handle but it will take longer to rise. HERE ARE SOME HANDY TIPS ON THE ELEMENTAL INGREDIENTS USED IN TRADITIONAL BREAD MAKING... FLOUR Whether unbleached, stone ground or gluten-free, flour is the most important ingredient for making bread. Different types of flour will change the taste and appearance of your bread. Whole grain and rye flours, for example, make loaves that are denser and darker in color than those with basic wheat flour. Unbleached flour turns into bread with a creamy color. For the most satisfying results, we prefer unbleached flours. Wheat flour contains protein. When moistened, the protein turns into gluten, an elastic substance that gives bread its’ distinctive chewiness and rise. Chewy breads are made from flour with a high protein content such as bread flour. Many brands of all-purpose flour also work well for bread baking. Because all-purpose flour is widely available, we created many of our recipes using it. When substituting bread flour for all-purpose flour, you may need to add more water to your dough. Whole wheat flour is light brown in color. It is milled from the entire grain of wheat including the dark bran. Blending whole wheat with some white flour will help make a lighter loaf of bread. Many people appreciate the aromatic taste of rye flour. Because it contains very little protein, rye flour bakes into dense loaves. Blending it with some white flour will also help lighten the bread.
Now, there are several kinds of prepared yeast available for home baking.
FRESH OR CAKE YEAST is highly perishable and must be kept refrigerated. At its best, fresh yeast has a pale color and smooth texture. To use fresh yeast, it must be proofed before using to test that it is still active. First dissolve the fresh yeast and a small amount of sugar in some of the liquid in the recipe. Let it sit for 10 minutes at which time it should be foamy with a sweet yeasty aroma. ACTIVE DRY YEAST has a coarse granulated texture. It comes in foil packets or glass jars and has a long shelf life. To use active dry yeast, dissolve it in some of the liquid in the recipe. This activates it making the yeast ready to use. INSTANT YEAST is a concentrated form of dry yeast. It is finely granulated and can be added directly to the dry ingredients in a recipe. Yeast cells thrive in a warm environment, between 70°F and 100°F. In cooler temperatures the yeast becomes sluggish and inactive. In warmer temperatures the yeast is energized and bread will rise quickly. And at 130°F, the yeast will start to die off. When making yeast bread, kneading techniques, ingredients and room temperature affect how long it takes for bread dough to rise. This is why most yeast breads are mixed until the dough is warm. You accomplish this by using slightly warm water. The ideal temperature range for most bread dough after kneading is 75°F to 90°F. SALT Adds flavor to bread and also helps the dough develop its structure. You can use any type of salt when making bread. We prefer fine sea salt, a natural product that blends easily into bread dough. WATER dissolves the salt, sweeteners and yeast in bread dough. It moistens flour granules, releasing starches and proteins in the flour. Using slightly warm water speeds up yeast activity. You might consider using bottled spring water if you have excessively hard or treated water in your kitchen. FATS Butter, olive oil, nut butters and other fats give breads a softer texture and crust. They also add their distinctive flavors to bread dough. Bread dough with a large quantity of fat often calls for more yeast in the recipe. SWEETENERS Sugar, honey, maple syrup and other sweeteners give bread a deep, dark brown crust. They also feed the yeast, making dough rise rapidly. Bread dough with sweeteners often calls for more yeast in the recipe. When baking bread dough with more sugar or other sweeteners in the recipe, bake your bread at a slightly lower temperature. This will keep the bread from browning too quickly before the dough is baked through.
Yeast Conversions You can substitute one type of yeast for another. Active dry yeast is twice as powerful as fresh cake yeast. Instant yeast is even more potent than active dry yeast. As a rough guideline, use half as much active dry yeast in recipes that call for fresh cake yeast. (1:2) Use one third of the amount of instant yeast in recipes that call for fresh cake yeast. (1:3)
MIXING AND BAKING THE DOUGH Kneading bread dough develops the protein in the flour into gluten. This gives your bread a pleasing interior crumb and chewy texture. You can mix bread dough by hand, in a stand mixer or in a food processor. Each method achieves similar results. (The kneading process takes much less time in a food processor.) What is important is to end up with dough that is silky and smooth. Once mixed, bread dough is left to rise. Technically the dough rises because the yeast is expelling gasses trapped in the dough’s rubbery structure in the bread dough. Professional bakers call this fermentation, the scientific name for what is taking place. A long slow fermentation produces bread with the most flavor. We recommend letting the dough rise for 2 to 3 hours.
Before baking, bread dough is formed into its final shape whether that is a round loaf, a roll or a braid. Allowing the dough to rise again or proof helps ensure a pleasingly light loaf. As a rule of thumb, let the dough proof until it expands 1½ times in size. When you gently press the dough with your fingertip, it will barely spring back. The last step before baking bread is cutting or scoring the surface of the dough with a sharp blade or serrated knife. (Bakers use razor blades or a lame, a tool specially designed for this purpose.) These cuts allow the dough to expand evenly during baking. They also give a decorative appearance to the finished loaf. Dusting the top of the dough with flour, rice flour or seeds before scoring adds a rustic touch. USING YOUR EMILE HENRY BREAD CLOCHE This booklet includes several bread recipes customized for baking in your Emile Henry Bread Cloche, and it is also easy to bake a favorite recipe in your Bread Cloche. For best results, bake between 2 and 2 ¼ pounds of bread dough at one time. This is a batch of bread dough made from approximately 4 to 5 cups of flour. This amount of dough will expand to fill the bread base and brown beautifully. To make plump round loaves that hold their shape for baking, roll your dough tightly before the final rise. Or place the ball of dough into a bowl lined with a lightly floured cloth towel. French bakers use specially designed cloth lined baskets called bannetons for this purpose. This preserves the shape of the dough. We recommend to lightly sprinkle the base with flour and then you simply unmold the dough on to the base after it has proofed. (We do not recommend using your Bread Cloche for baking bread that is too soft to hold its shape, and would normally be baked in a loaf pan.) Before baking, adjust your rack so that it is in the bottom third of the oven. You want enough top space for the cloche to fit easily. Then preheat your oven. When the dough is ready to bake, simply place the cloche on the rack. Because all ovens behave differently, test the temperature the first few times you use the cloche. Set your timer for 10 to 15 minutes less than the time indicated in your recipe. Check your bread by carefully removing the cloche. If your bread is beginning to brown noticeably, you may want to reduce your oven temperature 25°F to 50°F. Conversely, if your loaf seems noticeably soft and pale, increase the oven temperature 25°F to 50°F. Then finish baking. For a darker and thicker crust, remove the cover during the last 5 to 10 minutes of baking. Did you forget to preheat your oven? Your cloche can be used in a cold oven! Simply place the cloche in the oven, turn on the oven to the desired temperature and bake. Your loaf may be somewhat flatter in appearance but will taste just as delicious. If you would like to bake several batches of bread in your cloche, mix the dough in stages staggered approximately 45 minutes apart. While one batch of dough is baking, proof the next loaf. You can proof the loaf in a lightly floured cloth-lined bowl or on a parchment-lined baking sheet. When it is time to bake, unmold the dough onto the heated base. Or slide the dough and parchment paper directly onto the platter when it becomes available. Trim the paper to fit under the cloche. If the cloche and base are still warm, your bread will bake more quickly. Just be careful when handling the cloche if it is very hot.
EMILE HENRY BREAD CLOCHE RECIPES Basic White Bread Yield: 1 Large Round Loaf • 2 ½ teaspoons active dry yeast • 1 ½ cups (12 fluid ounces) warm water, 90°F - 100°F • 4 ½ cups (1 ¼ pounds) unbleached all-purpose flour
• 2 ½ teaspoons fine sea salt • 2 Tablespoons unsalted butter, softened • 1 Tablespoon sugar
1. Dissolve the yeast in the water. Add the flour, sea salt, butter and sugar. Stir until the flour is just moistened. Knead by hand or in the bowl of a mixer fitted with the dough hook until the dough is smooth and silky, about 5 minutes. 2. Form the dough into a ball and place in a lightly oiled bowl. Cover tightly and let the dough ferment and rise until doubled in bulk, from 1 ½ to 3 hours, longer in very cold weather. 3. Scrape the dough out onto a lightly floured surface. Form it into a tight ball. 4. Lightly sprinkle the base with some flour. Place the dough in the center of the base. Cover with the cloche and let the dough proof and rise until expanded 1 ½ times in size, from 30 to 45 minutes. 5. Sift more flour on the top of the dough if desired. Using a serrated knife, make three parallel cuts on the surface of the dough. 6. Cover and bake in a preheated 450°F oven until well risen and golden brown, approximately 45 to 50 minutes. Remove the cover and continue baking, if desired, until the loaf is well browned and the crust thickens. 7. Cool the bread on a wire rack. Tip: For a more uniform shape, in Step 4 allow the dough to rise in a cloth-lined bowl. Line a mediumsized bowl with a clean dish towel. Sprinkle it with some flour then place the dough into the bowl. Cover with plastic wrap and let it proof as above. When fully proofed, lightly sprinkle the base with some flour. Place the dough in the center of the platter. Proceed with Step 5.
Artisan Style No Knead Bread The long slow fermentation gives this bread a complex flavor. Even though this bread dough is not kneaded, the gluten is developed. This no knead bread bakes into a loaf with irregular holes and a rugged crust. Yield: 1 Large Round Loaf • 1 teaspoon active dry yeast • 2 teaspoons fine sea salt
• 4 ½ cups (20 ounces) unbleached all-purpose flour • 1 ½ cups + 2 Tablespoons (13 fluid ounces) water
1. Dissolve the yeast in the water in a large bowl. Add the flour and sea salt to the bowl. Stir with a spoon just until all of the flour is moistened. 2. With wet hands, gather the dough up into a ball. Cover and let the dough rise for two hours at room temperature. 3. Refrigerate the dough, covered for 12 to 24 hours. 4. Scrape the dough out onto a lightly floured surface. Form it into a tight ball. 5. Lightly sprinkle the base with some flour. Place the dough in the center of the base. Cover with the cloche and let the dough proof and rise until expanded 1 ½ times in size, from 1 to 2 hours depending on the temperature in your kitchen. 6. Sift more flour on the top of the dough if desired. Using a serrated knife, make a cross hatch pattern of parallel cuts on the surface of the dough. 7. Cover and bake in a preheated 450°F oven until well risen and golden brown, approximately 50 minutes to an hour. Remove the cover and continue baking, if desired, until the loaf is well browned and the crust thickens. 8. Cool the bread on a wire rack. Tip: For a more uniform shape, in Step 4 allow the dough to rise in a cloth-lined bowl. Line a mediumsized bowl with a clean dish towel. Sprinkle it with some flour then place the dough into the bowl. Cover with plastic wrap and let it proof as above. When fully proofed, lightly sprinkle the base with some flour. Place the dough in the center of the platter. Proceed with Step 5.
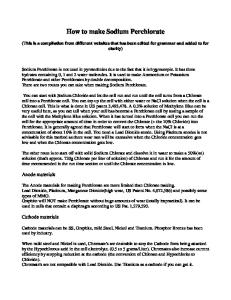
Rye Crown with Olives and Rosemary
Cinnamon Swirl Raisin Bread
Yield: 1 Large Round Loaf
Yield: 1 Large Turban Loaf
• 1 ½ cups (12 fluid ounces) warm water, 90°F - 100°F • 2 ½ teaspoons active dry yeast • 1 Tablespoons sugar • 1 Tablespoon olive oil • 3 cups (14 ounces) unbleached all-purpose flour • 1 ¼-cups (6 ounces) rye flour • 2 ½ teaspoons fine sea salt • 1 cup black, green or a combination of pitted olives, rinsed then dried • 2 Tablespoons chopped rosemary • Rosemary sprigs and coarse salt, for garnish
For the Dough:
For the Cinnamon Spread:
• 1 cup whole milk • 2 Tablespoons water • 2 Tablespoons honey • ½ stick (2 ounces) unsalted butter • 1 ½ teaspoons active dry yeast • 3 ½ to 4 cups (16 ounces) unbleached all-purpose flour • 1 Tablespoon wheat germ • 1 ½ teaspoons fine sea salt • 1 cup raisins
• ½ stick (4 ounces) unsalted butter • 3 Tablespoons light brown sugar • 2 Tablespoons ground cinnamon • 3 Tablespoons all-purpose flour
1. Combine the water, yeast, sugar and olive oil in a bowl to dissolve. 2. Add the flours and sea salt. Knead by hand or in the bowl of a mixer fitted with the dough hook into a uniform if slightly sticky dough, for about 6 to 8 minutes. Knead in the olives and chopped rosemary. 3. Form the dough into a ball and place in a lightly oiled bowl. Cover tightly and let the dough rise until doubled in bulk, from 1 ½ to 3 hours, longer in very cold weather. 4. On a lightly floured surface, form the dough into a tight ball. Using your fingertips, poke a hole in the center of the dough then stretch it out into a large doughnut shape. 5. Sprinkle the base with some flour. Place the dough on the base. Cover with the cloche and let proof until expanded 1 ½ times in size, about 30 to 45 minutes. 6. Brush the dough with water. Gently press several sprigs of rosemary into the dough. Scatter coarse salt on top of the dough. Using a serrated knife, make six or seven ¼-inch deep slashes across the top of the dough. 7. Cover with the cloche and bake in a preheated 450°F oven until the bread is well risen and golden brown, approximately 45 to 55 minutes. 8. Cool the bread on a wire rack.
Maple Walnut Whole Wheat and Oat Loaf Yield: 1 Large Round Loaf • 1 ½ cups (12 fluid ounces) warm water, 90°F - 100°F • 4 teaspoons active dry yeast • 2 Tablespoons maple syrup • 1 1/3 cups (6 ½ ounces) stone-ground whole wheat flour • 2 ¾ cups (12 ounces) unbleached all-purpose flour • 2/3 cup (2 ounces) old fashioned rolled oats • 2 teaspoons fine sea salt • 1 cup chopped walnuts • Additional rolled oats for garnish 1. Combine the water, yeast and maple syrup in a bowl. Stir to dissolve the yeast. 2. Add the flours, oats, sea salt and half of the walnuts. Knead by hand or in the bowl of a mixer fitted with the dough hook until the dough is smooth, about 5 minutes. Knead in the remaining walnuts. 3. Form the dough into a ball and place in a lightly oiled bowl. Cover tightly and let the dough ferment and rise until doubled in bulk, from 1 ½ to 3 hours, longer in very cold weather. 4. Scrape the dough out onto a lightly floured surface. Form it into a tight ball. 5. Line a medium sized bowl with a clean cloth dish towel. Sprinkle it with some flour and rolled oats. Place the dough into the bowl. Cover with plastic wrap . Let proof until expanded 1 ½ times in size, about 30 to 45 minutes. 6. Lightly sprinkle the base with more rolled oats. Transfer the ball of dough onto the base. Using a serrated knife, make several cuts on the surface of the dough in a cross hatch pattern. 7. Cover with the cloche and bake in a preheated 450°F oven for 30 minutes. Reduce the heat to 400°F and continue baking until the bread is evenly browned and crisp, about 25 to 30 more minutes. 8. Cool the bread on a wire rack.
1. For the Dough: Combine the milk, water, honey and butter in a small sauce pan. Heat until the milk is too hot to touch. Remove from the heat and let the mixture cool to lukewarm, 80°F to 90°F. Stir in the yeast. 2. Add the flour, wheat germ and sea salt. Knead by hand or in the bowl of a mixer fitted with the dough hook until the dough is smooth and silky, about 5 minutes. Knead in the raisins. 3. Form the dough into a ball and place in a lightly oiled bowl. Cover tightly and let the dough ferment and rise until doubled in bulk, from 1 ½ to 3 hours, longer in very cold weather. 4. While the dough rises, make the Cinnamon Spread: Blend together the butter, sugar, cinnamon and flour into a smooth paste. 5. Dump the dough out onto a lightly floured work surface. With a lightly floured rolling pin, flatten the dough into a rectangle that measures approximately 16 x 14 inches. 6. Using a spatula spread an even layer of the Cinnamon Spread across the center of the dough without touching the edges. Brush the edges of the dough with water. Fold in the shorter ends of the dough. Roll the dough into a tight tube. Pinch the edges to seal the dough then roll the tube gently. 7. Coil the tube of dough tightly into a snail shape. 8. Sprinkle the base lightly with flour. Transfer the formed dough onto the base. Cover with the cloche. Let the dough proof until it expands 1 ½ times its size, about 30 to 45 minutes. 9. Using a serrated knife, slash the surface of the dough with a series of parallel cuts. Cover with the cloche and bake in a preheated 400°F oven until well risen and golden brown, approximately 45 to 50 minutes.
Gluten-Free Flax Bread Yield: 1 Medium Round Loaf • 1 ¼ cups lukewarm water, 80°F to 90°F • 2 Tablespoons honey • 2 Tablespoons active dry yeast • 1 Tablespoon xanthan gum • 2 Tablespoons olive oil • 2 whole eggs
• 1 teaspoon vinegar • 1 cup (4 ½ ounces) white rice, millet or sorghum flour • 1 cup (4 ½ ounces) brown rice flour • 1 ½ cups (6 ounces) tapioca flour • 1 ½ teaspoons fine sea salt • 1 Tablespoon flax seeds, plus more to decorate the loaf
1. Beat together the water, honey, yeast, xanthan gum, oil, eggs and vinegar in a small bowl. 2. Combine the flours and sea salt in the bowl of a mixer fitted with the paddle attachment. Add the liquid to the dry ingredients in the mixer. Beat on high speed for three minutes. 3. Using a moistened spatula, scrape the dough into a ball. Dampen your hands under running water, then scoop the dough out of the bowl. Form it into a ball. 4. Dust the base lightly with rice flour. Transfer the ball of dough onto the platter. Using the spatula or your hands, smooth the surface of the dough. Brush the dough with water and sprinkle with more flax seeds. 5. Cover the dough with the cloche. Allow the dough to rise until visibly lightened, about 25 to 30 minutes. 6. Cover with the cloche and bake the loaf in a preheated 425°F oven until well browned and cooked through, approximately 35 to 45 minutes.
EMILE HENRY USA 802 Centerpoint Blvd. New Castle, DE 19720 Phone (302) 326-4800 Fax (302) 326-4810 Email:
[email protected]