HEALTH AND SAFETY IN THE WORKPLACE Construction Industry Curriculum Instructional Guide
Interfaith Worker Justice Arizona Interfaith Alliance for Worker Justice Houston Interfaith Worker Justice Center South Florida Interfaith Worker Justice Center
OSHA Susan Harwood Grant No. SH20850SHO
This curriculum was developed by Interfaith Worker Justice and its subgrantees, the Arizona Interfaith Alliance for Worker Justice, the Houston Interfaith Worker Justice Center, and the South Florida Interfaith Worker Justice Center. It was funded in whole or in part with federal funds the Occupational Safety and Health Administration, U.S. Department of Labor, under grant number SH20850SHO. These materials do not necessarily reflect the views or policies of the U.S. Department of Labor, nor does mention of trade names, commercial products, or organizations imply endorsement by the U.S. Government.
TABLE OF CONTENTS
CHAPTER 1 – INTRODUCTION TO HAZARDS IN THE CONSTRUCTION INDUSTRY CHAPTER 2 – ERGONOMICS FOR CONSTRUCTION WORKERS CHAPTER 3 – MAPPING AND CONTROLLING WORKPLACE HAZARDS CHAPTER 4 – OSHA BASICS CHAPTER 5 – NEGOTIATING FOR BETTER WORKING CONDITIONS
CHAPTER 1 INTRODUCTION TO HAZARDS IN THE CONSTRUCTION INDUSTRY
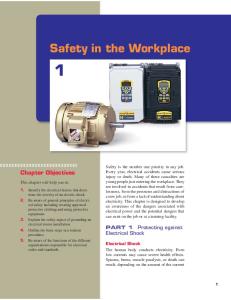
Chapter 1 Instructor Overview The purpose of this chapter is to provide an introduction to hazards specific to the construction industry and ways in which workers can adopt basic safety techniques that can help to prevent accidents. The hazards covered in this section are the following: ● Fall Hazards, including fall prevention, ladders, and scaffolding. ● Falling/Flying Objects ● Electrical Hazards ● Machine and Power Tool Hazards ● Sun and High Temperatures ● Traffic Hazards
Instructors should focus on the hazards that most affect their student population.
FALL HAZARDS
Falls are the leading cause of deaths in the construction industry. Falls from as little as 4 to 6 feet can cause serious accidents and sometimes death.
Three ways to PROTECT yourself against falls are:
Personal fall arrest system Guardrails Safety Net
These protections must be in place BEFORE you start work!
The personal fall arrest system includes a harness, anchorage, and line. YOUR EMPLOYER MUST PROVIDE THIS EQUIPMENT AND TRAINING ON HOW TO USE IT.
Always wear a helmet.
Guardrails
NO!
YES! What are the problems with using a guardrail like the one in the first picture?
Safety Net
Place as close as possible, but no more than 30 feet below where employees work.
WHERE FALL PROTECTION IS NEEDED • Walkways & ramps • Open sides & edges • Holes • Concrete forms & rebar • Excavations • Roofs • Wall openings • Bricklaying • Residential Construction
ROOFING If you work on roofs and can fall more than 6 feet, you must be protected.
Use roof jacks and planks to guard against falls.
Photo Sources: http://www.hammerzone.com/arcives/roof/maintenance/steep12/se2/shingl2x.htm http://www.doityourself.com/stry/skylightsafety
LADDERS
Ladders must be kept in a safe condition Keep the area around the top and bottom of a ladder clear Ensure rungs, cleats, and steps are level and uniformly spaced Keep ladders free from slipping hazards Don’t tie ladders together to make longer sections, unless designed for such use. Don’t load ladders beyond the maximum load for which they were built, nor beyond the manufacturer’s rated capacity
Make sure the ladder is on a stable, level surface.
NO!
NO!
NO!
NO!
NO! Do not use the top or top step of a stepladder as a step.
YES!
YES!
Source: http://www.houseofladders.com/ClimbingSafety.html
SCAFFOLD
A scaffold is an elevated, temporary work platform. Employees working on scaffolds are exposed to these hazards: • Falls from elevation – caused by slipping, unsafe access, and the lack of fall protection •
Struck by falling tools / debris
•
Electrocution – from overhead power lines
•
Scaffold collapse - caused by instability or overloading
•
Bad planking giving way
How can you protect yourself? Falls from elevation o If a worker can fall more than 10 feet, they should be protected by guardrails and/or a personal fall arrest system.
o Do not work on snow or ice covered platforms or during storms or high wind.
•
Struck by falling tools / debris • Wear hardhats to protect yourself against falling objects. • Build a canopy or erect a net below the scaffold that will contain or deflect falling objects
• Electrocution • The possibility of electrocution is a serious consideration when working near overhead power lines. Check the clearance distances listed in the OSHA standard.
•
Scaffold collapse - caused by instability or overloading • Make sure scaffold is properly supported. • Scaffold support examples:
NO! YES!
•
Bad planking giving way
NO! Platforms must: • be fully planked or decked with no more than 1 inch gaps • be able to support its weight & 4 times maximum load • be at least 18 inches wide • No large gaps in front edge of platforms • Each abutted end of plank must rest on a separate support surface • Overlap platforms at least 12 inches over supports, unless restrained to prevent movement
NO!
NO!
NO!
YES!
YES! Your employer must train you on scaffold hazards and procedures to control the hazards. The training must include: •
Nature of electrical, fall, and falling object hazards
•
How to deal with electrical hazards and fall protection systems
•
Proper use of the scaffold
•
Scaffold load capacities
How can you protect yourself against scaffolding hazards?
FALLING/FLYING OBJECTS Being struck by an object is one of the leading causes of workplace death for construction workers.
In general, make sure to : o Stack materials to prevent sliding, falling, or collapse. o Use protective measures such as toeboards and debris nets. o Wear hardhats. When Performing Overhead Work
Secure tools and materials to prevent them from falling on people below.
Barricade hazard areas and post warning signs.
Use toeboards, screens, or guardrails on scaffolds to prevent falling objects, or use debris nets, catch platforms, or canopies to catch or deflect falling objects.
Avoid working underneath loads being moved. When Using Power Tools, Machines, etc.
Use safety glasses, goggles, face shields, etc., where machines or tools may cause flying particles.
Inspect tools, such as saws and lathes, to insure that protective guards are in good condition.
Make sure you are trained in the proper operation of powder actuated tools.
Source: http://www.osha.gov/SLTC/etools/construction/struckby/falling_flying.html
ELECTRICAL HAZARDS Why is Electricity dangerous? Electric shocks can cause muscular spasms that can cause someone to fall resulting in fractures and other injuries. Electricity that travels through your body can cause imbalances or shaking of the heart (fibrillation) that can lead to a respiratory failure or a heart attack. In addition to physical harm, electricity can cause other dangers. High electrical arcs caused by short-circuits can destroy equipment and expel metal fragments. Low energy electrical arcs can cause fires and explosions in atmospheres that contain gas, vapors or flammable powders. Electrical arcs can also generate intense ultraviolet radiation which can cause eye injuries. Electrical Burns The most common injuries related to electric shock are severe burns at both the entry and exit points. The damage caused by the shock travels through your muscles and bones until reaching an exit point. Electricity causes three types of burns: Electrical Burns - Electrical currents that flow through your body generate heat and burn the skin, muscle and bone marrow. Electrical Arc Burns - An electrical arc can cause an explosion that can produce temperatures of up to 3,000°C and can burn anyone standing nearby. Contact Burns - Accidental contact with hot surfaces of electrical equipment and conductors can cause burns. Clothing can also catch fire.
How can you get an electrical shock? You can get an electrical shock when an electric current travels through your body. The current travels through your body in a variety of situations. For example: In the majority of electrical wiring in homes, black and red wires are 110 volts. White cables are 0 volts because they are wired to the ground. Often, connections to the ground are with a bar of earth that is pushed into the ground. The connection can also be established with a metallic tube of water buried in the ground. If you are in contact with black energized wires -- and are also in contact with white neutral wires -- the current will pass through your body, giving you an electric shock. If you come in contact with a ―live‖ wire or any other ―live‖ component and you are also in contact with a grounded object -- you can still receive an electric shock. If you are standing in a puddle of water and are close to an electrical source, you could get an electrical shock. But you don’t have to be standing in water to be at risk. You are also at risk of electric shock if your clothes are wet, there are high levels of humidity and sweat. You could receive an electric shock even when you’re not in contact with an electric device. Contacting two live wires from a cable of 220 volts can give you an electric shock. You can also receive an electric shock from electric components that are not correctly connected to the ground. Even contact with someone who is receiving an electric shock can cause you to also receive an electric shock.
How can you protect yourself? Always assume that all aerial cables are energized (live) at fatal voltages. Never think that you can safely touch a wire, even if it’s not being used or if it seems isolated. Never touch an electrical energy line that has fallen. Call an electrical service company to report fallen electrical energy lines. Stay at least 10 feet (3 meters) away from aerial cable during maintenance or other activities. If you are working high up on scaffolding or on a ladder or you are managing large objects, before starting your work you should check for the presence of aerial cables. Do not use an extension cord which has had the third (ground) plug cut off. ACTIVITY 1-1 Electrical Safety Quiz Instructions: Individually or as a group, answer whether the following are True or False. 1. Touching a wire to test if it’s live will only give me a small shock. True or False? 2. If a coworker is suffering electric shock, I should immediately run to his help. True or False? 3. Always assume all aerial cables are energized (live) at fatal voltages. True or False? Sources: OSHA ―Electrical Safety‖ Quick Facts; New Labor. ―El Manual de Trabajo de la Salud y Seguridad de los Jornaleros‖ First Edition Trainer’s Manual.
ELECTRICAL SAFETY QUIZ - ANSWERS:
1 False, touching a live wire can cause electric shock which can lead to heart fibrillation or cardiac arrest, electric burns and muscle spasms. False, you can receive an electric shock is you come into contact with someone who is receiving electric shock. It is best to cut the power source and call 911. 2.
True, protect yourself and others and always handle electricity with extreme caution. 3.
MACHINE AND POWER TOOL HAZARDS
Workers using hand and power tools may be exposed to these hazards: objects that fall, fly, are abrasive, or splash harmful dusts, fumes, mists, vapors, and gases frayed or damaged electrical cords, hazardous connections and improper grounding
Basic Machine Safety Maintain regularly Use right tool for the job Inspect before use Operate according to manufacturers’ instructions Use the right personal protective equipment (PPE) Use guards
Don't Get Caught in Moving Parts!
Observe these precautions to prevent being caught in the moving parts of your construction equipment. Keep both hands on the equipment at all times (if applicable). Machine Guarding:: Guard belts, gears, shafts, pulleys, sprockets, spindles, flywheels, chains, or other moving parts. The point of operation is where the work is actually performed on the materials – it must be guarded. Never use equipment without all shields and guards in place. Shields and guards protect you from being caught in moving parts and should always be in place and undamaged when operating equipment. Never remove a guard when a tool is in use. Never add parts not recommended by the manufacturer. Shut off the engine before attempting repairs. Make sure the machine is completely turned off and if, applicable, disconnected. Never work on the equipment while it is running.
Protective Equipment The following protective equipment should be worn to protect your body while using machinery in construction work. Close-Fitting Clothes and No Jewelry Wear close-fitting clothes. Loose sleeves, pant legs, scarves, and jewelry can get caught in machine parts Long pants and sturdy, non-slip boots. Long pants and boots protect your legs and feet from flying and falling objects. Safety glasses and a face shield. Safety glasses should be worn at all times unless operating equipment with an enclosed cab. In addition to safety glasses, a face shield should be used when your face could be hit by debris. Hearing protection Hearing protection, such as muffs or plugs, is necessary when operating noisy equipment.
THE SUN AND HIGH TEMPERATURES Protection against the Sun: The sun contains ultraviolet radiation (UV) that can cause premature aging of the skin, cataracts and skin cancer. The amount of harm that can be caused by UV exposure depends on the intensity of the sun’s rays, the duration of exposure and if the skin is protected. There is no such thing as safe UV rays or safe sun tans, so you should know how to protect yourself against the dangers caused by the sun. Cover yourself. Use tightly woven clothing to block sun rays. Try this trick: Place your hand between the layer of clothing and the light. If you can see you hand through the clothing, your clothing offers very little protection from the sun’s rays. Use Sun Block. The Sun Protection Factor (SPF) of at least 15 SPF blocks up to 93% of UV rays. You need to block both UVA and UVB rays to protect yourself from skin cancer. Make sure you follow the application directions on the bottle. Use a hat. A hat with a wide brim (this does not mean a baseball cap) is the best because it protects you neck, ears, eyes, forehead, nose and scalp. Use sunglasses that absorb UV rays. Sunglasses don’t have to be expensive but do have to block 99 to 100% of UVA and UVB radiation. Make sure the sunglasses you purchase protect you from both UVA and UVB radiation. Limit your exposure time. UV rays are at their most intense between 10 a.m. and 4 p.m. If you are not sure about the intensity of the sun, do the shadow test: If your shadow is shorter than you, the sun’s rays are too strong.
High Temperatures The combination of heat and humidity can cause serious harm to your health during the summer months. If you work outdoors you increase the possibility of suffering from heat exposure. The following are ways you can protect yourself from the heat: Frequently drink small amounts of water. Use light colored, loose clothing that breathes easily - cotton is a good example. Take many, short breaks in a fresh, shaded area. Eat small meals before working. Avoid caffeine and alcohol or large quantities of sugar. Work in the shade as much as possible. If you are taking medication, ask your doctor if your medication can cause a negative reaction with exposure to the sun. Be aware that equipment such as masks or work suits can increase heat stress.
HEAT-RELATED ILLNESSES The following illnesses are caused by over-exposure to heat: o HEAT CRAMPS o HEAT EXHAUSTION o HEAT STROKE It is important to know what causes these illnesses, how you can protect yourself and what precautions your employer should take to protect you. Heat cramps: These are muscle spasms that are caused when workers sweat without replacing the salt they have lost through sweating. Heat exhaustion: This results from prolonged sweating. Symptoms include: Headache, nausea or fainting Weakness and a cold sweat Irritation or confusion Thirst, nausea or vomit Heat Stroke: This is the most serious health problem. Some of the factors that can lead to a heat stroke include: High temperatures and humidity, direct exposure to the sun, no breeze or wind Low levels of water consumption; previously suffered heat stroke Heavy physical labor Water proof clothing Never before being exposed to high temperature workplaces Heat Stroke Symptoms: Sense of confusion, inability to think clearly, fainting, collapse or convulsions. You could completely stop sweating. If not treated properly, the worker can go into a coma and die. Have any of these happened to you or someone you know at your workplace?
What can your employer do to prevent heat-related illnesses? Provide training on the risks related to heat stress and how to prevent it. Provide plenty of fresh water for workers close to their places of work. You need at least one liter of water for every hour of work per worker. Allow workers to take breaks as needed. Provide shaded areas for worker breaks. How you can protect yourself and others? Know the signs and symptoms of sun and heat-related health risks; monitor yourself and use a Buddy System. Block direct sun and other sources of heat Drink enough water, drink often and before you get thirsty Avoid highly caffeinated or alcoholic beverages Take plenty of small breaks with water in shaded areas or with air conditioning. Wear clothing that is light-weight, light colored and loose fitting. Consider protective clothing that breathes and is fresher. Be aware that being out of shape, some health problems (such as high blood pressure and diabetes), pregnancy, colds and flus, as well as certain medication can increase you personal risk. If you are under treatment, speak to your doctor about the possible risks. Frequently check on your coworkers who have been exposed to the risks related to heat stroke.
What to do when a worker is suffering from heat stroke? Call a supervisor for help. If your supervisor is not available, call 911. Make sure someone stays with the affected worker until help arrives. Place the affected worker in a fresh, shaded area. Remove the worker’s outer-layer clothing. Fan and apply water on the worker’s skin; also apply ice (bags of ice or frozen towels). Provide fresh water to drink if the worker can drink.
ACTIVITITY 1-2 Understanding Heat Related Illnesses 1. You have just been contracted to do construction work at a house that’s being renovated in the month of August with temperatures in the 90’s Fahrenheit at 9 a.m. Explain how you should prepare yourself for work in the sun and heat: what clothes should you wear, what beverages you will have before during and after work and how often you will drink them, what protection you need and what type of breaks you will take. 2. Describe the differences in symptoms between Heat Stroke and Heat exhaustion. 3. Your coworker is complaining of nausea, feels like vomiting and has broken out in a cold sweat, all symptoms of Heat Exhaustion. What should you do to ensure your coworker is safe? Sources: OSHA ―Protecting Yourself in the Sun‖ Sun Exposure Quick Facts OSHA ―Protecting Workers from Heat Stress‖ Quic
VEHICLE HAZARDS Workers are more likely to be injured or killed in work incidents that include vehicles than in many other work-related incidents. The following are examples of the most documented injuries or deaths caused by automobiles in the workplace. Accident Reports: A worker dies at an intersection - A worker was working near a busy intersection when he was hit by a car. The driver of the car said he did not see the worker. The work site was not well lit or not properly signaled, and the worker was not using proper safety equipment or bright clothing. The worker died on the scene. A worker is run over by a truck - A worker was standing in a busy loading area with many trucks. A driver did not see him and backed up and ran the worker over. The worker was killed. A worker dies falling out of a truck - Two workers were on their way home in the back of a coworker’s pick-up truck. One of the workers that was riding in the back fell and hit his head on the floor. The worker was killed. A worker dies while working on a median - A worker was hit and killed by a car while he worked on a median. Police found safety vests, traffic signals and safety cones in the truck that the worker did not use.
How can I Protect Myself? When you’re working near a busy street, make sure to use bright clothing and safety vests warning signs Your employer should provide you with this equipment! Use traffic signs that are visible, command attention, clearly explain the work being done, command respect from drivers and provides enough time for drivers to react. When driving cars/trucks in loading areas, make sure there aren’t any workers nearby or behind the vehicle and make sure to warn others that you are moving. You should never transport workers in a pick-up truck’s cargo area. Avoid deaths by fall! When working in medians, make sure to protect yourself and your fellow workers. Use bright clothing, safety vests, warning signs and safety cones. All equipment, vehicles and materials should be well stored, far from traffic to avoid collision. If you’re going to do a big job, notify local police before starting a job that could intervene with traffic. If you have to leave work vehicles unattended, remember to close the windows, remove keys and make sure doors are locked. Remove all warning signs once you’ve finished the job for the day or when you’ve completed the project.
If you’re going to be working for 60 minutes, a vehicle with activated, highintensity lights can be used instead of warning signs, safety cones or barricades. Even though every work assignment is different, the goal for all should be to carry out your work in the safest manner with the most minimal interruption for traffic. ACTIVITY 1-3 Vehicle Safety Ask the students, ―How would you respond to these situations?‖ 1. Your supervisor sends you to perform a construction project that borders a busy street. He or she sends you to your truck with the necessary machinery to do your job. Are you prepared? 2. You get a job that requires 5 workers plus machinery. Your boss gives you
the keys for a truck that can only safely transport 3 workers. What should you do? Source: National AG Safety Database - Motor Vehicle Safety: http://nasdonline.org/document/1931/d001875/motor-vehicle-safety.html#3
CHAPTER 2 ERGONOMICS FOR CONSTRUCTION WORKERS
Chapter 2 Instructor Overview This chapter provides an introduction to ergonomics for construction workers and concludes with a body mapping exercise that will help workers pinpoint which workplace actions may be causing them ergonomic injuries.
WHAT IS ERGONOMICS?
Ergonomics is the science of designing the job to fit the needs of the worker, instead of having the worker fit the needs of the job.
For many workers, ergonomics may not be high on their list of priorities, but injuries caused by badly designed work conditions can lead to serious injuries over time. These injuries can occur in the hands, wrists, joints, the back, or other parts of the body. These injuries are called musculoskeletal disorders.
For employers, setting up a well-designed workplace can be expensive in the beginning because they may need to spend money on equipment or training. However, injuries from poor working conditions can end up costing the employer more money in the end. Employers lose money when workers miss days of work due to pain or injury, and it is expensive for employers to have to hire and train new workers when other workers leave due to injury or illness.
Ergonomics materials adapted from International Labor Organization’s Ergonomics Curriculum: http://actrav.itcilo.org/actrav-english/telearn/osh/ergo/ergoa.htm
Some examples of work conditions that can lead to injury are:
tools and tasks that require you to twist your hand or joints, such as the work many mechanics perform applying too much pressure on parts of the hand, back, wrists or joints working with the arms outstretched or over the head working with a bent back lifting or pushing heavy loads. Source: http://actrav.itcilo.org/actrav-english/telearn/osh/ergo/ergoa.htm
ACTIVITY 2-1 Ergonomics Exercise Have one or two workers come to the front of the class and demonstrate work activities that have caused them pain or injury. Ask the class to provide them with advice on how they can reduce the risk of injury or pain.
BEST AND PREFERRED WORK ZONES
Work is safest when lifting and reaching is performed in these zones. Working outside these work zones may increase the risk of injury. It is particularly important to perform heavy lifting tasks within the best work zone.
SAFE LIFTING TECHNIQUES
1. Get close to the object 2. Bend at your hips and knees. Gloves may improve your grip. 3. Lift smoothly and slowly, keeping the object close to your body. Keep the load between your knees and shoulders. 4. If you need to turn, pivot with your feet instead of twisting your back.
Source: http://www2.worksafebc.com/PDFs/SafetyBulletins/StartSafe/kitchen/rc_tip5.pdf
Photo Source: http://www.revolutionhealth.com/conditions/bones-joints-muscles/backpain/prevention/proper-lifting
Preventing back injuries
Keep heavy and frequently-used items in the ―Best‖ or ―Preferred‖ Zone between your waist and shoulders. Arrange storage areas in this manner to minimize excessive lifting, carrying, or awkward postures. This reduces the stress on the body caused by bending or reaching overhead. Use material handling devices, such as dollies and carts. Use ladders when reaching branches that are too high.
Don’t be afraid or embarrassed to ask a coworker for help. Avoid bending and reaching to get closer to your work. Avoid repetitive motions. Alternate tasks that use different muscle groups. Take time to stretch during breaks.
Source: Back Injury Prevention for the Landscaping and Horticultural Services Industry, Kansas State University.
BODY MAP
ACTIVITY 2-2 Body Mapping Hand out a sheet with a diagram of a human body, from the front and from the back (such as the diagram on the previous page) to each student. Have a large version of the same diagram on the chalkboard or flipchart at the front of the classroom. Ask the students to mark with an ―X‖ the parts of the body that they believe are being affected by their work. After they are done, have them come up to the front to mark the diagram at the front of the classroom. The final diagram can look something like the picture below. Explain to the students that they can speak with you individually if they do not want to share their injury or illness with the group. Ask students to explain why they put their marks on the body. Point out the injuries and illnesses that are common among workers in certain industries. Have the class participate in a discussion about this, with questions such as why they think these injuries occur, what can they do to reduce the chance of injury, etc.
Example of Body Map.
CHAPTER 3 MAPPING AND CONTROLLING WORKPLACE HAZARDS
Chapter 3 Instructor Overview This chapter will provide students with the basic tools for recognizing workplace hazards and methods by which those hazards can be controlled.
Ask students to think of the following questions: ● What hazards exist in your workplace? ● Are there working conditions that you suspect may be hazards but are not sure? ● What is the most dangerous task that you were ever asked to perform? ● Have you almost been seriously injured or killed? How? ● What is the most dangerous thing you ever saw another worker do? ● Have you ever been on a job where a worker was seriously injured? What was the hazard? Their answers will guide the next activity.
Distribute the fact sheets on the following pages to students, or, alternatively, highlight the information in the following pages with emphasis on hazards relevant to the construction industry in Chapter 1.
FACT SHEET #1 SAFETY HAZARDS Safety hazards are those which cause injury to the worker.
TYPES OF HAZARDS
EXAMPLES
Fall Hazards- Any situation where a person can slip or trip and fall from six feet or more.
Ladders, scaffolds without guardrails, open stairways.
Falls to Same Level– Conditions Cluttered workspaces, that cause a person to slip, trip, slippery surfaces, wet or fall, or hurt themselves. greasy floors. Falling Objects- Workers are at risk of falling objects when work is being done above them or when materials are not stacked properly. Electricity- Electrocution can occur when a person comes into contact with an electric current.
Working underneath cranes or scaffolds, object placed on a shelf that is too high.
Sharp Objects- Sharp objects can cause cuts or even amputations.
Knife, saw, meat cutter, box cutter.
Machine Hazards – Machine parts, both fast moving and slow parts, can cause accidents such as crushing or amputating parts of the body. Moving Objects- A person can be struck, run over or crushed by heavy machinery.
Motor parts, drills.
Electric equipment, electrical wires, lightning, batteries.
Tractors, trucks.
FACT SHEET #1 (Continued) SAFETY HAZARDS TYPES OF HAZARDS
EXAMPLES
Confined Spaces- Spaces with few openings and inadequate ventilation can cause harm due to lack of oxygen and inhalation of toxic gases. Fire Hazards- Fire hazards are conditions that increase the risk of a fire occurring in the workplace.
Underground pipes, granaries.
Bad wiring, improper use of stoves, failure to have fire safety equipment.
FACT SHEET #2 HEALTH HAZARDS -- PHYSICAL HAZARDS Physical hazards can cause illnesses when they transfer energy from the object to the person. Noises- Loud noises can cause hearing damage, either immediately or gradually over time.
Machinery, motors, explosions, loud music.
Heat- A hot surface or overexposure to the sun or heat can cause burning or dehydration. Cold- Exposure to cold or being trapped in a cold place can cause frostbite, hypothermia, and even death. Miscellaneous- Any other physical object that can cause injury or illness.
Working outside during summer, ovens, fryers, grills. Working outside during winter, refrigerators, freezers. Radiation, ill-fitting protective equipment.
Source: Work Safe, Work Smart, Minnesota Department of Health Curriculum.
FACT SHEET #3 HEALTH HAZARDS -- CHEMICAL HAZARDS Chemicals can enter the body in the following ways: o Inhalation (breathing) o Ingestion (swallowing) o Absorption (through the skin) o Through cuts or openings in the skin
TYPES OF HAZARDS
EXAMPLES
Solids- Chemicals in solid form.
Dry paint. (For example, dry paint can contain lead.) Cement bags, fiberglass, asbestos.
Dusts- Dusts are small particles of solids. You can be exposed to materials that are already in dust form, or through work processes that create these dusts. Liquids- These are chemicals that are found in liquid form at room temperature.
Pesticides, paints, cleaning products.
Vapors- Vapors are gases that have evaporated. Certain vapors can cause eye and skin irritation. Some can even cause brain damage over time.
Pesticides, paints, cleaning products.
Gases- Some chemicals exist as gases at room temperature. Other solid or liquid chemicals convert to gases when they are heated.
Aerosols, carbon monoxide, vehicle fumes, hydrogen sulfide.
Source: Work Safe, Work Smart, Minnesota Department of Health Curriculum.
FACT SHEET #4 HEALTH HAZARDS -- BIOLOGICAL HAZARDS Biological hazards are living things that can cause injury or illness to human beings.
TYPES OF HAZARDS
EXAMPLES
Animals- Many injuries and Insect bites, allergies, illnesses can be caused by manure. contact with animals or their waste. Insects and rodentsCertain animals may appear in filthy workplaces. They can bite and spread disease. Sick People- Illnesses can be transmitted from one person to another, though contact with a sick person or that person’s fluids.
Roaches, rats, mice.
Needles and syringes- A variety of illnesses can be transmitted through shared or contaminated needles. Plants- Many illnesses can be caused by contact with plants.
AIDS, Hepatitis.
Examples of fluids include saliva, blood, waste. Example of illnesses include the cold and the flu.
Pollen, mold, poison ivy.
Source: Work Safe, Work Smart, Minnesota Department of Health Curriculum.
FACT SHEET #5 ADDITIONAL HAZARDS Additional hazards are those which cannot be classified into the other categories but can cause health or safety problems for workers. This can include stress, violence, and ergonomic hazards.
TYPES OF HAZARDS
EXAMPLES
Violence- Violence in the workplace is violence which is directed to employees or employers. Recall that homicides are one of the leading causes of workplace deaths. Stress- This occurs when the demands of the job are greater than the capacity or resources of the worker. Repetitive Motions- Work that requires the same motion over and over is an ergonomic hazard that can cause pain or injuries over time. This can occur even if the motions are not difficult. Heavy Lifting- Objects that are too heavy or carried incorrectly can cause back problems or problems in other parts of the body. Back problems are the most common workplace injury.
Using weapons against coworkers, fights at work, employee abuse, robbery at work.
Angry clients, not enough time to complete a task.
Assembly lines, poultry and meat cutting, computer keyboards.
Boxes, people.
ACTIVITY 3-1 Hazard Mapping Students will work in their small groups to create maps of different types of workplaces. They can use butcher paper and markers. To begin, students should draw a floor plan of a workplace in the industry where they work. The plan should show rooms, work areas, equipment, windows and doors. The maps can be very basic. When they are finished, each group will decide where the hazards are located in their workplaces. Using the fact sheets as a reference, students should mark those places on the floor plan with their markers. Use the following codes: • Red for safety and physical hazards • Blue for chemical and biological hazards. • Green for additional hazards. You may use other color codes or symbols depending on the needs on your class. You may also, for example, use different colors each for safety hazards, physical hazards, chemical hazards, and biological hazards. **Keep in mind that the most important goal of this exercise is for students to identify the hazards in their workplace and not get hung up on which category it fits into or the fine points of whether it’s a dust, mist, or vapor.** If a student is not sure whether something is a hazard, they should mark it as a hazard and discuss it with the group. Students should take 15 minutes to prepare the maps, and then present them to the group. The final map can look like the map on the following page.
HAZARD MAP (Example)
Source: MassCosh.org
CONTROLLING WORKPLACE HAZARDS Employers should maintain conditions and adopt practices that protect workers.
HAZARD CONTROL MEASURES HIERARCY OF CONTROLS Most effective (best) ▲ | | | | | | | | ▼ Least effective (worst)
***** Elimination of hazard **** Substitution *** Engineering ** Labor Practices/ Administrative Controls (Training and Procedures) * Personal Protective Equipment
Source: UFCW, A Safety Committee Guide for the Workplace; National Labor College Health and Safety Curriculum
Elimination The best way to control a hazard is to eliminate it entirely. It is best to do this as early as possible. An example of elimination would be to use an electric forklift truck rather than a gas operated forklift truck to eliminate carbon monoxide in a warehouse. Another example would be to use a chain from the floor to open an elevated valve rather than using a ladder to climb up and open the valve. Substitution When a hazard cannot be eliminated completely, the second best alternative is substituting the dangerous condition. The idea is to substitute chemicals, equipment, or hazardous materials with ones that are less hazardous. An example of this would be using paint that does not contain lead-based pigments. A potential problem is when the product being used as a substitute is as dangerous as the original. For this reason, it is important to find out if the product is truly less hazardous than the original. Engineering controls Engineering controls are another way that technology can be used to change the work environment, a machine, or some equipment in order to reduce the hazard. For example, machine guards, backup alarms, guardrails, covers, slip resistant surfaces, and using machines to move heavy objects instead of carrying them.
Photo Source: http://actrav.itcilo.org/actrav-english/telearn/osh/ergo/ergoa.htm
Administrative controls Administrative Controls or changing labor practices means changing the way and the structure of how work is done. Example: Instead of one employee exposed to a particular hazard for eight hours a day, the employer could assign four workers to work for two hours each. This could be used for repetitive tasks or for any exposure to a chemical hazard. Personal Protective Equipment Personal protective equipment (PPE) can include respirators, and protective wear for the eyes, ears, and face, gloves, and protective rope. PPE is the least efficient way to protect workers because it does not get rid of the hazardous situation. If equipment fails, workers are still exposed to the risk. What is the purpose of the PPE in the picture below?
Photo Source: http://www.safework.sa.gov.au/contentPages/EducationAndTraining/TrainingKits/WHSTrainingResourceKit/whsKit/top5_10.htm
ACTIVITY 3-2 Applying Workplace Hazard Controls Ask the students to use the hazard maps that they developed in the previous exercise and to work with their same groups to choose one hazard from their maps that they believe is important. The students should then take 5-10 minutes to prepare a short skit where they as workers approach their employer to discuss ways that the employer can control the workplace hazard. Students should incorporate at least one of the hazard control methods listed in this chapter.
Depending on the needs and size of the classroom, some students can act as employers and others as employees, or the instructors and facilitators can act as employers. If possible, each student should have a speaking role.
REVIEW AND DISCUSSION
1. What is the best way to control a workplace hazard? What is the next best? What is the least reliable means of hazard control?
2. Name two forms of PPE for your industry. a. b. What is the danger of only using PPE as a way to control a workplace hazard?
REVIEW AND DISCUSSION– POSSIBLE ANSWERS 1. Elimination. Substitution. PPE. 2. Answers can include gloves, helmets, knee pads, respirators, goggles, etc. The danger of only using PPE is that it does not get rid of the hazardous situation.
CHAPTER 4 OSHA BASICS
Chapter 4 Instructor Overview This information contained in this chapter will provide students with an introduction to OSHA, their basic rights under the Act, and their employers’ responsibilities to provide them with a healthy and safe workplace.
WHAT IS OSHA? OSHA is the Occupational Safety and Health Administration, a federal agency of the United States government, part of the Department of Labor. This agency is responsible for workplace health and safety in the United States. OSHA’s mission is to prevent accidents and protect the health of workers.
OSHA’s functions include— Developing rules on workplace health and safety and enforcing these rules through workplace inspections. Tracking workplace accidents. Giving trainings on workplace health and safety.
Some states, including Arizona and California, have their own OSHA plans through their states. These programs must have regulations that are as protective as those of the federal government.
ALL WORKERS HAVE THE SAME RIGHTS UNDER OSHA REGARDLESS OF IMMIGRATION STATUS!! Source: http://www.osha.gov/dte/outreach/construction_generalindustry/materials/intro_to_osha/intro_to_osha_guide.pdf
YOUR RIGHTS UNDER OSHA CAN BE CATEGORIZED AS 5 BASIC RIGHTS
1. Right to a healthy and safe workplace. 2. Right to receive information. 3. Right to receive training. 4. Right to request that a dangerous situation be changed, to file complaints, and to participate in the process. 5. Right to be protected against retaliation.
REMEMBER THAT THESE RIGHTS EXIST REGARDLESS OF YOUR IMMIGRATION STATUS!
Have you seen the OSHA poster on the following page at your worksite?
WHAT ARE YOUR EMPLOYER’S RESPONSIBILITIES UNDER OSHA?
1. Provide a workplace that is free of known hazards and comply with OSHA regulations. 2. Provide training as required by OSHA. Many OSHA standards require your employer to train workers on certain health and safety topics issues in their workplaces. Other OSHA standards require that employers limit certain tasks to workers who are qualified or certified, meaning that they have already received training. 3. Keep records of injuries and illnesses. Employers with 11 or more employees are required to keep records of workplace injuries and illnesses. 4. Provide medical exams when required by OSHA regulations and provide workers Access to medical and exposure records. 5. Not discriminate against workers who assert their rights under the OSH act. 6. Post OSHA citations and inform workers what they have done to fix the problem. 7. Provide and pay for personal protective equipment (PPE.)
CHEMICAL HAZARDS COMMUNICATIONS OSHA requires your employer to provide you with written information about hazardous chemicals in your workplace. This is called OSHA’s hazard communication standard. Under the standard, your employer is required to do these things:
MSDS. Your employer is required to keep Material Safety Data Sheets (MSDS) related to each of the chemicals used in your workplace. The MSDS gives information about the hazards associated with the chemicals and ways for you to protect yourself from harm while using them. You have the right to request to read the MSDS of the chemical you must handle. (Note: Material Safety Data Sheets are not required to be in languages other than English.)
Labeling. Your employer must label containers of hazardous substances with the chemical name of the material and hazard warnings. (Note: Labels are not required to be in languages other than English.)
Hazard Communications Program. Employers must have a written hazard communication program, which must include a list of all hazardous materials at the worksite and an explanation of how the employer will comply with OSHA’s standard.
Training. Workers who are exposed to dangerous chemicals are required to be trained in a language they understand. This training should include the names and locations of hazardous chemicals at the worksite, the procedures that the employer has developed to protect workers from the chemicals, ways to measure hazardous chemicals at the worksite, as well as information about MSDS and where they are located, container labeling, OSHA’s standards, and the employer’s hazard communications program.
Filing an OSHA Complaint
Ways to File
You can download the form from OSHA’s website (www.osha.gov), fill it out, sign it, and mail or fax it in. These types of complaint are the ones that are most likely to result in an OSHA inspection of your workplace. You can file a complaint online. However, most online complaints are resolved informally over the phone. You can call or visit your local OSHA office. They can give you a complaint form if you wish to fill it out then or file it at a later time. You can call or visit your local worker centers. The worker center can be authorized to act as your representative in the complaint process. When you file your complaint, you can request OSHA not to reveal your name. OSHA will conduct an inspection without telling the employer who filed the complaint.
Food for Thought:
OSHA has over 1000 federal inspectors and 1400 state inspectors. BUT… There are over 8 MILLION workplaces in the United States! What does this mean for workers?
This will lead us into our next chapter on negotiations.
CHAPTER 5 NEGOTIATING FOR BETTER WORKING CONDITIONS
Chapter 5 Instructor Overview The purpose of this section is to identify the challenges of negotiating with employers, walk through steps to prepare for a conversation with an employer, and to practice a few scenarios of negotiations. Remind participants that OSHA has limited resources and can’t be everywhere. Therefore, it is important for them to be able to negotiate with their employers for better working conditions. It is not necessary to have a union or formal health and safety committee in order to negotiate improvements. Sometimes, two workers are enough if they discuss the hazards and prepare a plan in advance. There are two handouts that go along with this exercise and can be found at the conclusion of the exercise explanation. These are Handout #1 ―Values‖ and the handout entitled ―Steps, Planning, and Tips for Better Negotiations‖
1. Present a mini socio-drama to illustrate the need to negotiate and introduce the topic. The facilitators/ organizers should plan out the scene ahead of time with two actors, ensuring that the issues brought up in the dialogue are relevant to workshop participants. This skit can be exaggerated and funny. Props are really helpful. a. Example content: i. Construction workers: Employer approaches the worker on a residential construction jobsite and says, ―I’m gonna need you to secure the electric wires on the second floor because the electrician can’t make it today and we need to put in the sheetrock TODAY to stay on schedule. The only thing is the other workers are using all of our ladders right now, so you’ll have to use this one. It’s a little rickety, so just be careful. It’s already 4pm, and I need those lines tied back by 5pm.
Thanks, I know I can always count on you!‖ Employer walks away and the worker hesitates, and ends up just saying ok.
2. Brainstorm with the participants asking: a. What did you see in the skit? Do you and other workers face such challenges on the job? b. Why is it important to communicate and negotiate with your employer? i. Responses might include: to clarify expectations, to understand what risks I will be exposed to and minimize those risks by talking through the issues, set your own boundaries, understand the employer’s self interest c. Why is it difficult to negotiate? i. Responses might include: I am afraid to lose my job, I think I know already what the employer will say, none of my coworkers will say anything to back me up, the solution will cost money and I know my employer won’t want to pay for it 3. Discuss the values required to even start negotiating and pass out Handout #1 or simply write the three values listed below on a flipchart. Draw off of the comments given from the previous questions (#2 above) to connect these values in. After each value statement is read, ask the question: why do you think this is important? a. Values handout content: In order to negotiate, it’s necessary to hold these values:
i. As a human being, woman or man, as a worker, I have value. Commentary: we have to first begin by valuing ourselves. If we are going to advocate for improved safety and health protections, then we must place high importance on our own well-being. God only gives us one body! ii. I don’t always have to keep my mouth shut. Commentary: Many times we think to ourselves that in order to keep our jobs or maintain the favor of our employers, we have to accept their conditions and requests without objection or even discussion. We have to reject that notion, believing that dialogue can lead to new solutions. iii. There are other options aside from just accept it or walk away. Commentary: This is similar to the last value. As workers we don’t have to either just shut up or quit our jobs. 4. Discuss steps in planning a negotiation. Distribute the ―Steps, Planning, and Tips for Better Negotiations‖ handout. Ask different participants to read each section, and solicit feedback. For example: What do you think the hardest step of a negotiation is and why? 5. Tell participants we will now repeat the original socio-drama (or perhaps participants want to change the issues the employer and employee are talking about), but this time the worker, instead of stammering or keeping quiet, will initiate a negotiation. You can do this multiple times inviting different participants to play the roles. After each skit, ask participants who were watching the scenario to comment on how the worker did in the negotiation.
HANDOUT #1 VALUES
In order to negotiate, it is necessary to hold these values:
As a human being, woman or man, as a worker, I have value. 1.
2.
I don’t always have to keep my mouth shut.
3.There
away.
are other options aside from just accept it or walk
Steps, Planning, and Tips for BETTER NEGOTIATION Negotiation Steps: 1. Identify the Problem (what is the root of the problema and what do you want?) 2. Planning 3. Begin the Negotiation (there is never a perfect time!) 4. Come to an Agreement 5. Follow-up and evaluation 6. The struggle continues… How do we plan for Negotiation? 1. Plan what you want to negotiate about and what you want to ask for. 2. Think of why you have chosen that thing. Plan your message and look for “objective criteria” (ex. I want them to pay me $X.00 for X task) 3. Analyze the perspectives and interests of your opponent. 4. Know the bottom line of what you will accept. 5. Go for it!! Tips that can be used in negotiation: Separate the problema from the person. Have an attitude of confidence, firmness, and respect. Think of what your face and body language are saying. Find a solution “together.” Say what you want to happen – specifically. Do not attack the person, you do not have to respond to insults with insults. Say, “I feel that…” Talk about the employer’s interests, “you will want someone who can do a quality job and who is confident.” Instead of blocking a position, look for options Ask questions, “where does this number come from?” Speak about the value of your work Listen to the person and respond to what they say, “I hear what you are saying, _____” Use “objective criteria” if possible. Look to the future, not the past.