ELT TESTER 406 03 Technical description and operation manual
ELT TESTER 406 03 Technical description and operation manual
ELT TESTER 406 03 Technical description and operation manual
List of the actual pages
Item
Page
Date
List of the actual pages
2
29.01.10
Contents
3
29.01.10
Chapter 1 General description
4
Chapter 2 Main specifications
Page
Date
Chapter 6 Tester calibration
22
29.01.10
Chapter 7 General instructions
23
29.01.10
29.01.10
29.01.10
29.01.10
Chapter 8 Safety precautions
24
6
29.01.10
8
29.01.10
Chapter 9 Storage rules
25
Chapter 3 Complete set Chapter 4 Preparation for operation and operating procedures
10
29.01.10
Applications
26-27
29.01.10
Chapter 5 ELT test procedure
18
29.01.10
List of the actual pages
Item
page 2 29.01.2010
ELT TESTER 406 03 Technical description and operation manual
Contents Chapter, Devision, Subdevision
Page
List of actual pages
2
2
Contents
3
3
General description
4
4
Main specifications
6
6-7
Complete set
8
8
Preparation for operation and operating procedures
10
10-17
ELT test procedure
18
18-21
Tester calibration
22
22
General instructions
23
23
Safety precautions
24
24
Storage rules
25
25
Application 1. Tester menu
26
26
Application 2. Unit conversion (dBm to W).
27
27
Description
Applications:
Contents
page 3 29.01.2010
ELT TESTER 406 03 Technical description and operation manual
1. General description 1.1
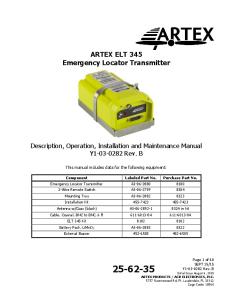
ELT TESTER 406 03 (further TESTER) is designed to check the avionics emergency locator transmitters (ELT) operating via COSPAS-SARSAT system. Tests can be carried out in volume of annual test requirements or in volume of maintenance requirements or for fast check after ELT’s encoding or installation. Tester can receive the messages from any 406 MHz COSPAS-SARSAT beacon transmitting either in test mode or in real alert emergency mode. The signal can be received through the broadcast by means of antenna or the tester can be connected directly by means of cable through a suitable attenuator. Radiated tests in real alert emergency mode should be carried out using screened room (or enclosure) only. Tester’s front view is shown on the fig. 1-1.
Fig.1-1. Tester’s front view
Chapter 1
General description
page 4 29.01.2010
ELT TESTER 406 03 Technical description and operation manual
1.2
This tester can be used for testing of personal locator beacons (ELTs).
1.3
The tester allows to perform: -
reception, demodulation and decoding of the emergency information transmitted on channel 406 MHz; frequency measurement of 406 MHz signal; audio-control of the sweep of 121,5 MHz signal presence; audio-control of the sweep of 243 MHz signal presence; level measurement on 406 MHz channel; level measurement on 121.5 MHz channel; level measurement on 243 MHz channel; estimation of the positive/negative phase deviation of modulated signal; measurement of total transmission time of 406 MHz signal; measurement of unmodulated carrier duration of 406 MHz signal; estimation of the equivalent radiated power of 406 MHz signal through broadcast.
1.4
The tester is designed to operate at the temperature range from 0 оС to + 45 оС and relative air humidity should be no more than 95%, which is determined by used LCD.
1.5
The tester power supply is performed by 4 AA batteries 1,5 V, as well as by external DC source with voltage 4,5…7 V and load current no less than 300 мА. The tester can power supplied by USB cable when connected to computer or net USB adapter.
Chapter 1
General description
page 5 29.01.2010
ELT TESTER 406 03 Technical description and operation manual
2. Main specifications 2.1
Tester provides carrier measurement on a frequency of 406 MHz with accuracy to ± 500 Hz. ATTENTION!!! The operation range of the tester is extended to 406020…406040 kHz and divided on 7 sub ranges (see item 5.4.1.1). The default range is 406028 kHz when the tester is turned on. The chosen channel should correspond to operation frequency of tested beacon.
2.2
The tester provides audio-control of the sweep signal presence on a frequency of 121500±10 kHz and 243000±10 kHz .
2.3
The tester provides demodulation and decoding of the emergency information and displays on your choice the НЕХ-code (15 Hex ID or the message 1-112 bit) as well as all decoded information in text view with all measured parameters. Besides, the BCH code is calculated and compared with received one, and the result is displayed.
2.4
The tester provides measurement of positive/negative phase deviation value with accuracy to ± 2,8 о.
2.5
The tester provides measurement of total transmission time of the message with accuracy to ± 0,2% and time of preamble duration with accuracy to ± 0,2 %.
2.6
The tester provides measurement of received signal level on a frequency of 406 MHz within the range 19 – 43 dBm or 0,08W - 20W with accuracy to ● ±3,0 dB by means of antenna; ● ±0,5 dB by means of attenuator.
2.7
The tester provides measurement of received signal level on a frequencies of 121,5 MHz and 243 MHz within the range 13 – 20 dBm или 20-100 m W with accuracy to ● ±3,0 dB by means of antenna; ● ±0,5 dB by means of attenuator.
2.8
The tester allows to perform the measurement of beacon parameters by means of standard external antenna (from 3 to 15 meters), as well as via high-frequency cable and attenuator connection. Calibration test of the power meter is performed for 5 meter distance.
2.9
Tester HF-input resistance is about 50 ± 1,5 Ohm.
Chapter 2
Main specifications
Page 6 29.01.2010
ELT TESTER 406 03 Technical description and operation manual
ATTENTION!!! Peak signal level which is supplied to the tester HF-input should be not more then 1,0W (mean square value) or 20 mW. Direct connection of the beacon to the tester’s input without attenuator leads to the irreparable DAMAGES of the tester! 2.10
Tester allows to save up to 10 measuring results in non-volatile memory (overall measurements in MEASURE/TEST CH406 MHz mode).
2.11
Single measurement circle time is not more than 2 min.
2.12
The tester can be power supplied by 4 AA batteries 1,5 V, as well as by external direct current source with approximate voltage 4,5…7 V and load current no less than 300mA connected to USB input of the tester by means of standard USB connector (of PC USB connector or network USB adaptor).
2.13
Tester’s current consumption: in standby mode with no LCD highlighting - no more than 130 mА; in standby mode with LCD highlighting - no more than 200 mА; in measure mode with LCD highlighting - no more than 300 mА.
2.14
Approximate continuous operation time of the tester from the internal power supply elements is about 6 hours.
2.15
Tester will be switched off automatically in 15 min. after the latest keystroke.
2.16
Tester generates the voltage of the internal power supply elements with accuracy ±5%.
Chapter 2
Main specifications
Page 7 29.01.2010
ELT TESTER 406 03 Technical description and operation manual
3.
COMPLETE SET
3.1.
Complete set of the tester corresponds to the following tab. 3-1. # 1 2 3 4 5 6 7 8
Item ELT Tester 406 03 Antenna PC cable (USB A – USB A 1.5m) Technical description and operation manual HF - attenuator HF cable TNC/TNC 0.5 m RG58 HF cable BNC/TNC 1 m RG58 Device packing Software and software user’s manual Power adapter (USB adapter)
Table 3-1 Notice.
q-ty 1 1 1 1 1 1 1 1 1
optional*
1
optional
*The software can be easily downloaded at our website under following links: The drivers can be downloaded here: http://gmdsstesters.com/downloads/drivers_FTDI.zip as well as software can be downloaded here: http://elttesters.com/download/ETS_BE_v1.zip
Chapter 3. Complete set
page 8 29.01.2010
ELT TESTER 406 03 Technical description and operation manual
4. PREPARATION FOR OPERATION AND OPERATING PROCEDURES
4.1
Control and connection tools.
4.1.1
On the front panel of the tester there are a graphic LCD indicator and keypad (Fig. 5-1).
4.1.2
Top right key ON is intended for turning on-off the tester. (Fig. 5-1).
4.1.3
MENU key is intended to open the main menu from any sub menu.
4.1.4
Up, Down, Left, Right keys (arrowed up, down, left, right) are intended for navigation in menu items.
4.1.5
ESC, ENT lower keys are intended for access, exit and perform menu functions.
4.1.6
F1, F2 keys are intended for performing some particular functions in some menu items. See the tips on the LCD.
Chapter 4. Preparation for operation and operating procedures
page 10 29.01.2010
ELT TESTER 406 03 Technical description and operation manual
Fig. 5-1 4.1.7
On the front side of the tester there is HF-slot for antenna connection. On the bottom panel there is USB-input for PC or USB-adapter connection. (fig. 5-1).
Chapter 4. Preparation for operation and operating procedures
page 11 29.01.2010
ELT TESTER 406 03 Technical description and operation manual
4.2
Switching on\off the tester Press ON button and hold it down until the logo of the manufacturer and the device identity is appeared on the LCD to turn on the tester. Switching of the tester is followed by the audio signal. Release ON button after hearing the alarming signal. Whereas at startup of the device the voltage of the internal power supply elements is lower than required one, battery low icon will appear in the top right corner of the display. If source voltage is lower than 4.1 V "REPLACE BATTERY!" note will appear on the display and the tester will be turned off automatically within 3 seconds.
4.2.1
The tester will be turned off by following operations: - hold the ON button until the tester is turned off; - source voltage is lower than 4.1 V ("REPLACE BATTERY!" will appear on the display and the tester will switch off automatically within 3 seconds);
4.3
Switching on\off the LCD highlighting Switching on\off the LCD highlighting can be performed by F1 and F2 buttons, when in MAIN MENU or startup logo is displayed.
4.4
MAIN MENU After turning on the tester the logo of the manufacturer and the device identity is appeared on the LCD.
To enter the main menu one should press the ENTER button or MENU button. Vertical navigation up and down the main menu one can perform by using Up and Down buttons. ENT button is used to enter the particular submenu, ESC button is used to quit the submenu. Use MENU button to return to the main menu.
Chapter 4. Preparation for operation and operating procedures
page 12 29.01.2010
ELT TESTER 406 03 Technical description and operation manual
Main menu has the following items: ===MAIN MENU=== MEASURE VIEW MESSAGES SETTINGS MANUFACT SETTINGS 4.4.1
MEASURE - beacon parameters measurement; VIEW MESSAGES - displaying measuring results saved in memory; SETTINGS - tester parameters settings; MANUFACT SETTINGS - tester service menu. Each item has subdivision. One can move through them in the same way as through the main menu. Press ESC button to return to the previous menu item. Press MENU button to return to main menu.
MEASURE menu item MEASURE menu contains following items: ----- MEASURE-----TEST CH 406 MHz TEST CH 121 MHz TEST CH 243 MHz
TEST CH 406 MHz - automatic mode for main beacon parameters measurement on 406MHz channel; TEST CH 121 MHz – 121.5 MHz channel audio monitoring and signal level measurement. TEST CH 243 MHz – 243 MHz channel audio monitoring and signal level measurement. Frequency 406 MHz - 406 MHz channel frequency measurement; Power 406 Mhz - measurement of signal power level on 406 MHz frequency;
After choosing any measurement mode the tester allows to select the measurement source/path: -----Measurer by ----Antenna Attenuator
Chapter 4. Preparation for operation and operating procedures
ANTENNA – the measurements will be carried out by means of ANTENNA through the broadcast. ATTENUATOR – the measurements will be carried out by means of attenuator through cables, i.e. the tested beacon should be connected to attenuator input and attenuator should be connected to tester RF-input by means of RF-cables. Attenuator included in standard delivery set is symmetrical input device, so any input can be used as input or output.
page 13 29.01.2010
ELT TESTER 406 03 Technical description and operation manual
4.4.1.1 TEST CH 406 MHz menu item – automatic measuring mode on 406MHz channel In TEST CH 406 MHz mode tester measure the following beacon parameters: -
demodulation and decoding of the received emergency signal; frequency measurement; signal level measurement; total time transmission measurement; time of preamble measurement; signal phase deviation measurement. -Choose channel CH: 406.022 CH: 406.025 CH: 406.028 CH: 406.031 CH: 406.034 CH: 406.037 CH: 406.040
After pressing ENT button while using TEST CH 406 MHz menu item the list of all the 406 MHz channel range is appeared on the screen. The last used channel or channel proper value measured with MEASURE / Frequency 406MHz mode will be highlighted. It is required to choose the channel that corresponds to the beacon! By pressing ENT button the tester will be turned to the beacon parameters measuring mode. The following title will appear on the screen: Waiting for signal
The measurement is attended by the audio alarm of the detected signal of the sweep tone. After receiving the message all parameters of the beacon will appear on the screen: Time and date of measurements; Mes#X : memory cell number, where test results will be saved by pressing F2 button (where X – value from 1 to 10); Test or Dist : message type (Test (testing mode), Dist (emergency mode)). Test message differs from the emergency one by the vertical synchrotiming negate log; such message is not processed by the satellite; Ok or BAD : BHC code comparison result (Ok – received code end corresponds to the calculated one, BAD – the BCH code does not correspond to the calculated one. This check allows to estimate the code accuracy calculation and the message errors absence. ID :15 byte hexadecimal beacon identifying code (15 Hex ID) ; ELT with beac. s/n (example): Protocol type; CC:211 S/N:524862(example): Country code and decoded data; Freq : 406 MHz channel frequency; P406 : 406 MHz signal power; 07:30 15/07/2010 Mes#1 Test Ok Ok ID: 9A6C6008F800245 ELT with beac. s/n CC:211 S/N:524862 Freq: 406028,50kHz P406: 37.8 dBm È Save-F2 D
Chapter 4. Preparation for operation and operating procedures
page 14 29.01.2010
ELT TESTER 406 03 Technical description and operation manual
Time and date of the measuring session are shown in the top line of the indicator; Tool tips with the possible further options are shown in the bottom line: ● È- Down button is used for extended view of measured results; ● Save - F2 - button is used for saving results in the non-volatile memory. The message is saved under number Mes# X.X – where X.X the meaning in range 1..10. The number is increased automatically by circle, and after Mes10 – the Mes1 will be used, new data will erase the old one automatically, so no any special function to free the memory is required. ● The B or BD symbols can appear in the bottom right corner! It is the quality estimation of signal reception. When no symbols are appeared it means the frequency is stable and it has insignificant fluctuation. The D symbol means the frequency fluctuated during the signal reception. By pressing F1 button the additional data of the beacon’s message will be displayed on the screen: - All message in hexadecimal view; - phase deviation value; - non-modulated preamble time; - total transmission time. Press ESC button to return to the previous menu to view beacon’s message parameters. By pressing F2 button user can save the message and test results to the memory cell with the particular number that is shown in the Mes# X line where X - value from 1 to 10. The number increased automatically in a circle mode – after Mes#10 is saved, the next test results will be saved in 1 cell Mes#1. It will erase all data saved previously in 1 cell. Due to only 10 cells are available It is recommended to save all test results on laptop or PC by means of software. Press ESC or MENU button to go to main menu. Also you can see the all saved data in VIEV MESSAGES item of the MAIN MENU. 4.4.1.2 F406 menu item The F406 mode is intended for the frequency measurement of impulse signal on the channel of 406 MHz. Also the frequency measurement in this mode is not depended on of the frequency range chosen in AUTO mode. Besides, the measured value allows select frequency range automatically for AUTO mode. Entering the menu the title «Start - ENT» will appear on the screen. To start up measurements press the ENTER button. Each keystroke of the ENTER activates new measurement session and its result will appear on the screen.
Chapter 4. Preparation for operation and operating procedures
page 15 29.01.2010
ELT TESTER 406 03 Technical description and operation manual
If the frequency channel of the tested beacon is unidentified the MEASURE / F406 mode is strongly recommended before make measurement of the beacon parameters in AUTO mode. 4.4.1.3 Power – 406 menu item Power – 406 mode is intended to measure the impulse signal level on the frequency of 406 MHz. To start up measurements press the ENTER button. Each keystroke of the ENTER activates new measurement session and its result will appear on the screen. The selected channel (MHz) is shown on the top line. Use Up and Down buttons to change the channel. The voltage applied to the HF-input is actually measured, but the meaning is converted to power level based on calibration factor which is determined experimental for 5 meter distance (the distance between the tested beacon and the testing device itself). 4.4.1.4 Test CH 121.5 menu item Test CH 121.5 mode is intended to measure the impulse signal level on the frequency of 121.5MHz and a auditory monitoring of the sweep tone presence in a channel of 121,5MHz. The following tool tip will appear on the screen: ● Save –F2 Mes#X ● Measure – ENT Each keystroke of the ENTER activates new signal level measurement session. On completing of the measuring session the power level (in dBm) will appear on the screen. Press F2 button to save data with the signal level. The memory cell number to which data is saved is shown in Mes#X line. X is the memory cell number which was saved in MEASURE / AUTO mode. This way one can add 121.5 MHz channel power level value to the X memory cell with 406 MHz channel parameters. 4.4.1.5 Test CH 243 menu item Test CH 243 mode is intended to measure the impulse signal level on the frequency of 243MHz and a auditory monitoring of the sweep tone presence in a channel of 243MHz. The following tool tip will appear on the screen: ● Save –F2 Mes#X ● Measure – ENT Each keystroke of the ENTER activates new signal level measurement session. On completing of the measuring session the power level (in dBm) will appear on the screen. Chapter 4. Preparation for operation and operating procedures
page 16 29.01.2010
ELT TESTER 406 03 Technical description and operation manual
Press F2 button to save data with the signal level. The memory cell number to which data is saved is shown in Mes#X line. X is the memory cell number which was saved in MEASURE / AUTO mode. This way one can add 243 MHz channel power level value to the X memory cell with 406 MHz channel parameters. 4.4.2
VIEW MESSAGES MENU – Saved data review Entering this part of the menu user can see the last saved data on the display. The information presented in the following way: -
measurement time and date (HH:MM;DD/MM/YY) ; memory cell number Mes#X, X – cell number from 1 to 10; Test or Dist - message type (Test or Dist - emergency) ; Ok or BAD – BCH code compare result; ID: 15 byte hexadecimal beacon identifying code (15 Hex ID); Freq : 406 MHz channel frequency; Power : 406 MHz power level; P121.5 : 121.5 MHz power level.
By pressing F1 button extended data with beacon and message parameters is shown on the screen: - all message in hexadecimal representation; - phase deviation value; - non-modulated preamble time; - total transmission time of the message on the frequency of 406MHz. Using Up, Down buttons user can view all of the 10 memory cells. 4.4.3
SETUP menu item – settings After entering this menu one can see the following menu items: U_BAT LCD contrast Set date/time Sound
-
tester’s power supply level indication; LCD contrast settings; time and date settings; audio alarm on-off.
All the set values are saved in the non-volatile memory after the turning off the tester. 4.4.3.1 U_BAT menu item - tester power supply indication. After entering this menu the meaning of voltage of the current power supply is shown on the screen: - internal battery elements (if there’s no connection to the USB);
Chapter 4. Preparation for operation and operating procedures
page 17 29.01.2010
ELT TESTER 406 03 Technical description and operation manual
- USB connection voltage, if there is network USB-adapter connection or PC connection. The tester will be switched to the USB power supply channel automatically after being connected to USB power source! Each keystroke on the ENTER button initiates one-shot measurement. 4.4.3.2 LCD contrast menu item - LCD contrast settings After entering this menu the current value of the LCD contrast is shown on the screen within the range from 10 to 32 and users tool tips as well: Right + - increase contrast; Left - decrease contrast; F1 - default - default settings (20). 4.4.3.3 Set date/time menu item - time and date settings: After entering this menu the current time and date are shown on the screen. Use Left, Right buttons for cursor movement. Use Up, Down buttons for time and date setting. Press F1 for setting to zero. Press ENTER for define value saving. After pressing ESC button to exit the menu current values will be saved. 4.4.3.4 Sound menu - audio alarm on-off After entering this menu one can see tool tips: “F1 – Enable ” - F1 – sound on; “F2 – Disable ” - F2 - sound off. 4.4.4
Service Menu: Service Menu is intended for manufacturer usage and device service maintenance. This menu items is used for tester service settings and calibration. Use Service Menu only in case of necessity.
Chapter 4. Preparation for operation and operating procedures
page 18 29.01.2010
ELT TESTER 406 03 Technical description and operation manual
5.
Beacon test procedure
5.1
General comment according to the beacon test procedure ATTENTION!!! On checking and technical maintenance of the emergency beacon pay the strong attention to avoid transmission of the false emergency signal! The test procedure via antenna in real operating mode of the beacon (with distress signal) should be carried out in shielded room which provides radio frequency signal attenuation not less than 80 dB (under recommendation of COSPAS-SARSAT Committee). The present tester has advanced receive path sensitivity comparing to the previous model. That’s why the required distance should be no less than 3 meters in order to avoid receiver damages! The power meter is calibrated within 5 meter distance.
5.2
Test procedure in BEACON test mode (Self test)
5.2.1
Prepare the beacon and the tester for the test procedure under this manual instructions and instruction of beacon operations manual for self test mode.
5.2.2
If the beacon is connected to the tester via the RF-cable - use the manufacturersupplied RF-attenuator (on the individual order). Direct output connection of the beacon to the tester’s input without attenuator leads to the irreparable damages of the testing device!
5.2.3
The measurement of the channel frequency of 406MHz in MEASURE / F406 mode is recommended before test procedure in case when operating frequency of the tested beacon is unknown. If the beacon operation frequency is identified the test procedure may be carried out in MEASURE / AUTO mode.
5.2.4
The common test procedure are as follows: ● choose MEASURE menu item, then F406 menu item, then press ENTER; ● the following title will appear on the screen: Start - ENT
Press ENTER - after that the tester goes to waiting mode of the beacon signal and the following title will appear on the screen: Waiting for signal
Chapter 5. Beacon test procedure
page 18 29.01.2010
ELT TESTER 406 03 Technical description and operation manual
● turn on the tested beacon to the Self Test mode according to the instructions on its case or use the operation manual. The distance between the tester and the beacon should be no less than 3 meters (5 meters is recommended). ● the frequency value will appear on the screen at the end of the measuring session; ● Press ESC to quit this mode and go to the AUTO mode by pressing ENTER button. The list of the operation channels with dedicated one (with frequency proper value received in F406 mode) will appear on the screen. . ● press ENTER to see the title: Waiting for signal and then one can hear audio signal of sweep modulation presence in the channel of 121.5 MHz; ● turn on the beacon again to the Self Test mode and wait for test message. After the message is received all beacon and message parameters will be displayed. See 4.4.1.1. ● in case if all the parameters are correct one can save the measurement results in the non-volatile memory by pressing F2 button. If the parameters are not correct, try to change relative position of the beacon and the tester and the distance between them.
5.2.4
TEST procedure of the home 121.5 MHz transmitter
121.5 MHz home transmitter can be tested in two ways: ● MEASURE / AUTO mode - 121.5 MHz channel audio monitoring of signal presence is working all time, because for the different beacon types this channel can be turned on only for short time before and after 406 MHz message sent; ● Test CH – 121.5 mode - in this mode the tester measures the level of a 121.5MHz signal allowing to check the channel not only by audio monitoring possibilities. Also measurement results can be stored in the same memory cell with X number where the other parameters received in MEASURE/AUTO mode were saved. Pay your attention that, for the signal level measurement in the channel 121.5 MHz the most types of the beacons should operate in real operation mode what can cause false distress signal emission on the frequency of 406 MHz as well as on 121.5 MHz. That’s why this test procedure must be carried out in sheltered room.
Chapter 5. Beacon test procedure
page 19 29.01.2010
ELT TESTER 406 03 Technical description and operation manual
5.3
Data transfer to the PC or laptop The tester can be easily connected to any personal computer or laptop by means of USB cable. PC tester connection is performed via USB – channel by means of integral circuit USB – UART (USB Serial Converter) manufactured by FTDI - FT232R. It is necessary to install FTDI drivers for normal operation of the tester. The driver can be downloaded at our website: http://gmdsstesters.com/downloads/drivers_FTDI.zip as well as software can be downloaded here: http://elttesters.com/download/ETS_BE_v1.zip The following software installation procedure is recommended: 1. unpack zip-file to the specified folder on your hard disk; 2. start up Beacon Tester software v1.0 (no installation required). 3. Use USB – cable (supplied) to connect device to the PC and turn the tester on. 4. You will see the message about the new USB-device detected by the PC. Then choose CDM 2.00.xx folder as the drivers setup resource from the software package. 5. turn the device off and disconnect it from PC; 6. connect the device to the PC, turn it on and enter the main menu. Further data transfer process is held by the terminal program. ATTENTION! Memory saved data transfer is performed by means of the MAIN MENU and PC software – one shouldn’t enter any tester menu item! PC software allows to request data of the certain single measurement determined by the cell number or all of the ten possible memory units.
5.4
Antenna measurement process special feature
5.4.1
Measurement of transmit power equivalence (TPE). TPE is a multiplication result for antenna power supply and antenna. It means that transmitted power is sufficiently depends on measurement carrying conditions and field density measurement set point. As in most cases it is hard to avoid HF-signal remirror (the operators or bottoming surface for instance) one has to know that TPE estimated value has rateable nature. Besides allowance for TPE according to the COSPASSARSAT C/S T.001 certification type approval taking into account allowance for transmitter power ±2 dB and antenna power gain = (+4/-3) dB is about: TPE min = 37 - 2 - 3 = 32 dBm or 1.6 W TPE max = 37+ 2+ 4 = 43 dBm or 20 W
Chapter 5. Beacon test procedure
page 20 29.01.2010
ELT TESTER 406 03 Technical description and operation manual
for 90% of space determined by 5° и and 60° degrees of elevation. For the rest part calculated TPE could be far less. 5.4.2
Measurement procedure in strong remirror condition. Quite often the beacon testing is carried out in space-limited environment ship condition, when the strong remirror of the radio signal takes a place. Remirror of the signal is possible even on the open area if there’s no particular landing area for the beacon – water-line close-bodied box with radius no less than 1,25 m. In this case the tester antenna receives two waves – direct and the surface remirrored. Under such conditions there’s appeared a complicated fringe pattern with deep amplitude level which lead to the errors in message transmitting and decoding on the frequency of 406MHz and wrong frequency and frequency deviation indication. That’s why 3-5 different points measuring sessions taking one's bearings for cause of received signal level with more signal level position are recommended.
5.4.3
Electric angle and frequency on the channel 406 MHz meter feature. Strict requirement for 406 MHz frequency short-term stability impose the necessity to use oven-controlled crystal oscillator in all the beacons with constituent response time. It provides the transformation of the oscillator frequency to the nominal value. As the frequency is an electric angle rate of change then frequency change at the time of process stabilization естественным directly affects the electric angle – it gets added phase incursion, which is lost when frequency is stabilized. In test mode time period between switching on the beacon 406 MHz message is about a few seconds that’s why the measuring result for phase and frequency or coded information may fall outside the tolerable limits. In this case one may need to repeat the measurements with changing relative position and distance between the tester and the beacon. Coded information integrity check, and 406 MHz frequency channel check, according to the MSC/Circ.1039 requirements one should held in sheltered room with switching the beacon to the work mode (after 15 min warming up)!
Chapter 5. Beacon test procedure
page 21 29.01.2010
ELT TESTER 406 03 Technical description and operation manual
6.
Tester calibration This tester – is a complex special-use electronic device. Thus it is should be calibrated only by manufacturer or approved representative by means of corresponding equipment.
Tester calibration should be done once in two years.
Chapter 6. Tester calibration
page 22 29.01.20108
ELT TESTER 406 03 Technical description and operation manual
7.
General instructions It is necessary to keep the device in package not less than for two hours at normal conditions when it was at high temperature deviation. Keep it the package in at normal condition within 12 hours after storage of the tester in conditions of high humidity.
Chapter 7.
General instructions
page 23 29.01.2010
ELT TESTER 406 03 Technical description and operation manual
8.
Safety precautions One can operate the tester only after detailed manual and technical description examination and also after particular safety inductions.
Chapter 8. page 24
Safety precautions 29.01.2010
ELT TESTER 406 03 Technical description and operation manual
9.
Storage rules This hardware product in manufacturer package is to storage in warehouse and should be protected from residue, acid fumes, alkalis and other corrodent additions influence. In a warehouse there should be appropriate temperature – from 278 К (5 (40 о С) and relative air humidity no more than 80%.
Chapter 9.
Storage rules
о
С) to 313 К
page 25 29.01.2010
ELT TESTER 406 03 Technical description and operation manual
Application – 1 Tester’s menu Application 1. Tester menu
page 26 29.01.2010
ELT TESTER 406 03 Technical description and operation manual
Application 2 Unit conversion (dBm to W).
dBm 30 31 32 33 34 35 36 37 38 39
0 1,00 1,26 1,58 2,00 2,51 3,16 3,98 5,01 6,31 7,94
0,1 1,02 1,29 1,62 2,04 2,57 3,24 4,07 5,13 6,46 8,13
0,2 1,05 1,32 1,66 2,09 2,63 3,31 4,17 5,25 6,61 8,32
0,3 1,07 1,35 1,70 2,14 2,69 3,39 4,27 5,37 6,76 8,51
0,4 1,10 1,38 1,74 2,19 2,75 3,47 4,37 5,50 6,92 8,71
0,5 1,12 1,41 1,78 2,24 2,82 3,55 4,47 5,62 7,08 8,91
0,6 1,15 1,45 1,82 2,29 2,88 3,63 4,57 5,75 7,24 9,12
0,7 1,17 1,48 1,86 2,34 2,95 3,72 4,68 5,89 7,41 9,33
0,8 1,20 1,51 1,91 2,40 3,02 3,80 4,79 6,03 7,59 9,55
0,9 1,23 1,55 1,95 2,45 3,09 3,89 4,90 6,17 7,76 9,77
40 41 42 43 44 45 46 47 48 49
10,0 12,6 15,8 20,0 25,1 31,6 39,8 50,1 63,1 79,4
10,2 12,9 16,2 20,4 25,7 32,4 40,7 51,3 64,6 81,3
10,5 13,2 16,6 20,9 26,3 33,1 41,7 52,5 66,1 83,2
10,7 13,5 17,0 21,4 26,9 33,9 42,7 53,7 67,6 85,1
11,0 13,8 17,4 21,9 27,5 34,7 43,7 55,0 69,2 87,1
11,2 14,1 17,8 22,4 28,2 35,5 44,7 56,2 70,8 89,1
11,5 14,5 18,2 22,9 28,8 36,3 45,7 57,5 72,4 91,2
11,7 14,8 18,6 23,4 29,5 37,2 46,8 58,9 74,1 93,3
12,0 15,1 19,1 24,0 30,2 38,0 47,9 60,3 75,9 95,5
12,3 15,5 19,5 24,5 30,9 38,9 49,0 61,7 77,6 97,7
50 51 52 53 54 55 56 57 58 59
100 126 158 200 251 316 398 501 631 794
102 129 162 204 257 324 407 513 646 813
105 132 166 209 263 331 417 525 661 832
107 135 170 214 269 339 427 537 676 851
110 138 174 219 275 347 437 550 692 871
112 141 178 224 282 355 447 562 708 891
115 145 182 229 288 363 457 575 724 912
117 148 186 234 295 372 468 589 741 933
120 151 191 240 302 380 479 603 759 955
123 155 195 245 309 389 490 617 776 977
Application 2. dBm to W conversion table
page 27 29.01.2010