LEAD-BASED PAINT Lead paint can be present in any house built before 1978. Lead-based paint can be a serious environmental hazard if disturbed. Any repair that cuts into or disturbs painted surfaces by producing dust or paint chips can create a hazard. Precautions MUST be taken. Please take a few minutes to read this. THE HAZARD Housing built before 1978 may have lead-based paint. Lead-based paint dust, chips and contaminated soil can poison young children, their parents, and workers. Safe practices can reduce the risk. The effects of lead poisoning in young children can include learning disabilities, hyperactivity, impaired hearing, decreased growth and even brain damage. THE SOLUTION - SAFE WORK PRACTICES EPA regulations require that Rebuilding Together volunteers follow safe work practices if lead paint may be present. There is a potential that lead is present in houses built prior to 1978. As a precaution, we suggest that volunteers follow the “Minimum Requirements” where little or no lead hazard is present to reduce the generation of dust and paint chips. See the section on these standards later in this document. Any work that will disturb 6 square feet or more of a lead-coated surface (i.e., paint, stain, shellac and varnish) per room inside a building, 20 square feet or more of lead painted surface of exterior building, 10 percent of the total surface area of any small surfaces such as a window sill or trim, or the replacement of windows must be supervised by a trained, Team Leader Certified Renovator. Safe practices emphasize reducing the amount of dust generated to prevent contamination of the property and ensuring proper clean up. This will protect the residents and your volunteers. As house captain, you are responsible to ensure that your volunteers understand how to protect themselves, homeowners and their families from lead paint dust, paint chips and contaminated soil. Safe work practices are set out on the following pages. Please read them carefully and follow fully. MORE INFORMATION The Lead Paint Safety Field Guide and Reducing Lead Hazards When Remodeling Your Home have a lot of good information on techniques and precautions to use when dealing the lead hazards. Visit www.epa.gov/lead or http://www.hud.gov/offices/lead/healthyhomes/lead.cfm or call 1-800-424-LEAD (5323), for more information.
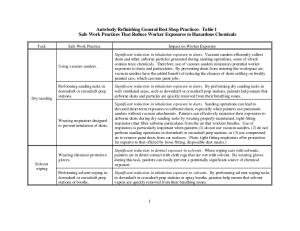
SAFE WORK PRACTICES FOR LEAD-BASED PAINT Safe work practices must be used by all volunteers working in areas where lead-based paint is being disturbed in houses built prior to 1978 exceeding the minimum standards. If you are just painting over old surfaces, there should be no hazard. If a lead hazard is identified as exceeding the minimum levels, the set up and clean up of the hazardous repair site must be supervised by a Certified Renovator (ask your Team Leader). SUPPLIES The following supplies are needed to comply with the safe work practices. 1
Signs
Masking tape
Barriers
Shoe coverings
6 mil plastic drop cloths
Coveralls
N-100 disposable respirators
Paper towels or disposal wipes
Spray bottles
Buckets
Heavy duty trash bags
Mops
Duct tape HEPA filters for Kenmore and Eureka vacuum cleaners are available at Sears. For other brands, look in yellow pages under Vacuum Cleaners-Household-Dealers. PREPARATION General Checklist Post signs clearly defining the work area and warning occupants and other persons not involved in renovation activities to remain outside of the work area. These signs should be in the language of the occupants. Barrier tape should cordon off the work area. Keep children and pregnant woman out of worksite area. Interior Renovation Checklist. Remove all objects from the work area, including furniture, rugs and window coverings, or cover them with plastic sheeting with all seams and edges taped or otherwise sealed. Close and cover all ducts opening in the work area with taped-down plastic sheeting. Close windows and doors in the work area. Doors used as an entrance to the work area must be covered with plastic sheeting in a manner that allows workers to pass through while confining dust and debris to work area. Cover the floor surface, including installed carpet, with taped-down plastic sheeting in the work area 6 feet beyond the perimeter of surfaces undergoing renovation or a sufficient distance to contain the dust, whichever is greater. Use precautions to ensure that all personnel, tools, and other items, including the exteriors of containers of waste, are free of dust and debris before leaving the work area. Exterior Renovation Checklist Close all doors and windows within 20 feet of the renovation. On multi-story buildings, close all doors and windows within 20 feet of the renovation on the same floor as the renovations, and close all doors and windows on all floors below that are the same horizontal distance from the renovation. Ensure that doors within the work area that will be used while the job is being performed are covered with plastic sheeting in a manner that allows workers to pass through while confining dust and debris to the work area.
2
Cover the ground with plastic sheeting or other disposable impermeable material extending 10 feet beyond the perimeter of surfaces undergoing renovation or a sufficient distance to collect falling paint debris, whichever is greater, unless the property line prevents 10 feet of such ground covering. In situations where work areas are in close proximity to other buildings, windy conditions etc. the renovation firm must take extra precautions in containing the work area, like vertical containment. WORKER PROTECTION Volunteers must be trained by the Certified Lead-Based Paint Renovator when performing this work. Wear disposable protective clothing covers. Disposable protective clothing covers can be stored in a plastic bag and reused if fairly clean and there are not rips. Small tears can be repaired with duct tape. At the end of the work period remove dusty cloths and/or vacuum off dust. Wash them separately. Use non-skid shoe coverings or wipe off shoes with damp paper towel when stepping off plastic covering. Wear a painter’s hat or cap. Protect your eyes. Wear safety goggles or safety glasses when scraping or hammering. When work creates dust or paint chips, workers should wear N-100, R-100 or P-100 HEPA disposable respirator. Wear disposable latex/rubber gloves. Wash hands frequently, especially before eating, smoking, and leaving at the end of the day. Do not eat or drink in the work area. Wash hands and face after leaving work area and before eating. PROJECT EXECUTION Wash areas to be scraped or sanded. Use soapy water, detergent, tri-sodium phosphate substitute or lead-specific cleaning agent. Dispose of wash water in toilet: do not pour onto ground or into storm drains. Use a spray bottle to mist surfaces that are being cut, sanded, or scored. Continue to mist while working. Use a utility knife to pre-score painted material being removed. Prohibited Practices – Certain methods of paint removal are prohibited because they release large amount of dangerous dust and fumes: Open flame burning and torching. Machine sanding or grinding without a high-efficiency particulate air (HEPA) exhaust control (this includes the use of belt sanders). Abrasive blasting or sand blasting. Heat guns operating above 1100 degrees Fahrenheit. Dry sanding or dry scraping, except dry scraping in conjunction with heat guns or within one foot of electrical outlets, or when treating defective paint 3
spots totaling no more than twenty square feet for exterior surfaces, two square feet for any one interior room or space or 10% of the total surface area. Paint stripping in a poorly ventilated space using volatile paint stripping chemicals. Do not use paint strippers containing methylene chloride. CLEAN UP General Checklist Waste from renovation activities must be contained to prevent releases of dust and debris before the waste is removed from the work area for storage or disposal. Clean dust and chips off covering (misting to prevent dust). Then pick up covering carefully and fold so as to keep all remaining paint chips and dust inside the covering. Dispose of all materials, e.g. plastic sheeting, sanding sponges, paper towels, etc., in a heavy-duty trash bag with a “gooseneck” seal, close securely, and place out for trash pickup. Waste transported from renovation activities must be contained to prevent release of dust and debris. The work area must be cleaned until no dust, debris or residue remains. Interior Renovation Checklist Collect all paint chips and debris, and seal it in a heavy-duty bag, “gooseneck” seal. Remove and dispose of protective sheeting as waste. Clean all objects and surfaces in the work area and within two feet of the work area in the following manner: Clean walls starting at the ceiling and working down to the floor by either vacuuming with a HEPA vacuum or wiping with a damp cloth. Thoroughly vacuum all remaining surfaces and objects in the work area, including furniture and fixtures, with a HEAP vacuum. Wipe all remaining surfaces and objects in the work area, except for carpeted or upholstered surfaces, with a damp cloth. Mop uncarpeted floors thoroughly using a mopping method that keeps the wash water separate from the rinse water (two bucket system), or using a wet mopping system. Replace wash water often. Wet wipe or mop, using water and detergent, all surfaces, such as floors, sills and counters. Waste water should not be poured down bathtub or sink drains (could contaminate) nor in the yard and down a storm drain. Best to pour into a toilet. Exterior Renovation Checklist Collect all paint chips and debris and seal it in a heavy-duty bag with a “gooseneck” seal. Remove and dispose of protective sheeting as waste. After plastic sheeting is removed from the outside of the home, place mulch at least 2 inches deep and 3 feet out from the base of the home. MINIMUM REQUIREMENTS WHERE LITTLE OR NO LEAD HAZARD IS PRESENT
4
Put down plastic at repair site to catch paint chips and dust. Minimize repair wherever possible. Keep any disturbance of existing paint under minimum requirements as indicated earlier. For small cracks, use a crack stop spray, like Goof-“Goodbye Cracks.” This is a spray-on elastic that flexes with the wall surface. Then, fill voids to repair. For larger repairs, lightly mist the area and only remove as much loose paint as necessary. Lightly wet sand. Do not attempt to feather the edges. Use fiberglass tape and drywall compound to repair. Always use wet sanding and wet scraping methods. Avoid tracking dust and paint chips through house or outside. Clean the repaired area before painting. Roll plastic to catch paint chips and dust. Dispose of plastic in sealed, heavy-duty trash bag. Damp mop floor under plastic and wipe any horizontal surfaces near the repair site. Lay drop cloths or new plastic for paint job. LEAD AND HEALTH Young children are at highest risk for lead poisoning because of activities that facilitate the ingestion of non-food items, but adults are also susceptible to the toxic effects of lead. The U.S. Public Health Service estimates one out of six children under age 6 has enough lead in his blood to place him in what scientists now consider high risk. Lead poisoning is the most common environmental disease of young children even though it is entirely preventable. SYMPTOMS OF LEAD POISONING Headaches Irritability Abdominal Pain Vomiting Anemia Weight Loss Poor Attention Span Noticeable Learning Difficulty Slowed Speech Development Hyperactivity
Long term exposure to small amounts of lead may cause brain damage in children who do not show any symptoms.
EFFECTS OF LEAD POISONING Reading and Learning Disabilities Speech and Language Handicaps Lowered I.Q. Neurological Deficits Behavior Problems Mental Retardation Kidney Disease Heart Disease Stroke Death 5