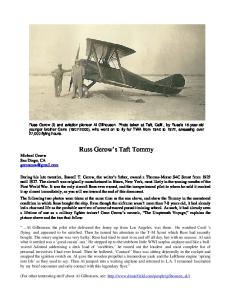
Tommy Atkinson Clayton Renth
Components Fuel Tank Water/Fuel Separator Injection Pump o Cascade Overflow Valve o Fuel Quantity Solenoid Common Rail o Fuel Pressure Transducer o Fuel Pressure Regulator Transfer Tubes Injectors Fuel Return Line
Courtesy: www.greencar.com
Description/Location Fuel Tank – Reservoir for diesel fuel; located at rear underside of vehicle Water Separator/Fuel Filter – Separates the water content from the diesel fuel and also filters the diesel fuel (3 microns). Integrated into the water/fuel separator also is the fuel temperature sensor, water-in-fuel (WIF) sensor, fuel heater, air bleed screw, and priming button. Only the WIF sensor and fuel filter canister may be serviced separately; located on the driver’s side bulkhead Fuel Quantity Solenoid
Injection Pump – A radial 3-piston high-pressure pump is supplied fuel by the gear type lift pump that is incorporated into the injection pump assembly; located in front of engine, inside timing cover
Lift Pump
High-Pressure Pump Courtesy: CarTech Books
Cascade Overflow Valve – Used in conjunction with the high-pressure pump assembly. Has two main functions: 1. Regulation of lubrication fuel to the moving parts of the high-pressure pump 2. Mechanically regulate fuel pressure, which is being supplied to the fuel quantity solenoid
Fuel Quantity Solenoid – Electric solenoid that is pulse width modulated by the ECM to control fuel flow to the 3 piston high-pressure pump; located on the side of the high pressure pump assembly Common Rail – A cylindrical chamber that contains highly pressurized diesel fuel; located on top of engine cam cover Fuel Pressure Transducer – Fuel pressure sensor used as an input for fuel pressure regulator and fuel quantity solenoid control
Fuel Pressure Regulator (FPR) – Regulates the maximum pressure in the common rail by relieving excess pressure back to the fuel tank. It is pulse width modulated by the ECM; located on the back end of the common rail
Fuel Pressure Regulator
Fuel Pressure Transducer
Transfer Tubes – Steel lines connecting the common rail to the fuel injectors; located between the common rail and fuel injectors, on top of engine air intake manifold Injectors – Solenoid valves controlled by the ECM to spray high-pressure diesel fuel directly into the combustion chamber. When energized, the solenoid forces a plunger down and the high-pressure diesel fuel is given a path to the combustion chamber; one injector per cylinder; each injector has 7 fuel spray holes in the nozzle needle; located in the cylinder head, pointing directly downward
Common Rail Transfer Tube
Fuel Return Line – Low-pressure fuel line delivering excess fuel from the injectors and fuel pressure regulator back to the fuel tank
Operation
Diesel fuel is pulled from the fuel tank by Injector the gear driven lift pump portion of the high-pressure pump assembly. Before fuel enters the fuel pump assembly, it must pass through the water separator/fuel filter assembly. At this point, the following occur: 1. The diesel fuel is filtered by a 3-micron filter element. 2. Moisture is removed, and the water concentration in the fuel is evaluated.
3. The fuel temperature is sampled and it may be heated if necessary. The measurements taken regarding fuel condition are important inputs needed for the ECM to command the correct fuel injection strategies. The filtering procedures are essential to maintaining the integrity of the internal engine mechanical components and also the high-pressure pump. The lift pump section of the fuel injection pump continually pulls the diesel fuel through the water separator/fuel filter and into the cascade overflow valve. A cascade overflow valve is used in conjunction with the high-pressure pump assembly. The cascade overflow valve has two main functions: regulation of lubrication fuel to the moving parts of the high-pressure pump, and to mechanically regulate fuel pressure that is being supplied to the fuel quantity solenoid. The cascade overflow valve operation will go through 3 phases: 1. During cranking, when fuel pressure can be less than 44 PSI, the fuel is only allowed to flow through a center drilling in the valve. This small amount of fuel is used to lubricate the pump bushings and internal moving parts. This phase also allows any possible air contamination to bleed back into the tank through the fuel return line. 2. When fuel pressure is 44-73 PSI, which may occur during cranking and initial start-up, the center piece of the valve moves against the spring pressure to provide another passage for extra fuel flow for more lubrication. 3. Above 73 PSI, the center piece of the valve is pushed against the spring pressure with enough force to line up another fuel passage. Once this occurs, fuel is given a path back to the inlet side of the lift pump and is limited to a fuel pressure maximum of 73 PSI.
Blue – Fuel Pressure Transducer Green – CKP Red – Fuel Pressure Regulator Gold – Fuel Quantity Solenoid
Normal Operating Condition
The fuel quantity solenoid is ultimately responsible for the amount of pressure being applied to the 3 piston radial pump. The ECM pulse width modulates the fuel quantity solenoid to control pressure regulation. This solenoid is normally open and an increased duty cycle will cause the valve to restrict flow. The high-pressure pump, which is driven by the timing belt, pressurizes the diesel fuel at a 1:1 ratio to DRB III data retrieved during Wide Open Throttle Acceleration engine speed and provides up to 23,000 PSI (as shown in the screenshot to the right) to the common rail through a steel fuel line. Once fuel reaches the common rail, the fuel pressure transducer monitors the pressure in the rail. This information is interpreted by the ECM and used for correct fuel delivery. The fuel pressure regulator maintains a desired common rail pressure by relieving excess fuel pressure through a line back to the fuel tank. The fuel pressure regulator is normally closed and must be energized in order to allow fuel to flow back to the fuel tank. The transfer tubes that are attached to the common rail supply the same pressure to each individual fuel injector. The injectors are high side controlled in pairs and low side controlled independently. When commanded, the injectors are given a 40+ volt supply and ground circuit by the ECM to allow the solenoid to quickly and precisely overcome the valve spring when opening Green – Cylinder #1 Injector Amperage the pintle (as shown Red – Cylinder #1 Injector High Side Voltage Blue – Cylinder #1 Injector Low Side Voltage Gold – Cylinder #4 Injector Amperage
by the screenshot to the left). The ECM
will adjust injector pulse widths to optimum strategies based off of many different ECM inputs. Diesel common rail systems use multiple injector pulses during the power stroke. The Jeep Liberty 2.8 liter CRD strategy uses 3 injector pulses, 2 pilot and 1 main: 1. Pilot Injection – quick fuel injector pulse before or at TDC to initiate the burn process in order to reduce diesel “clatter.” DRB III data retrieved during deceleration 2. Main Injection – continues the fuel burn during the power stroke; also referred to as the “power pulse.” Any extra fuel that is not sprayed out of the injector is then pushed out of the top of the injector into the return line. The return line allows leftover fuel to flow back to the fuel tank.
Red – Cylinder #1 Pressure Green – Cylinder #1 Injector High Side Voltage (2 Pilot Injection & 1 Main Injection)
Diagnostics Fuel Injector Leak Quantity Test
WARNING: Review the high pressure fuel system warning before beginning service (Refer to 14 - Fuel System/Fuel Delivery - Warning) .
NOTE: If an injector is found to be out of specification, repeat the test procedure after the injector replacement. Hydraulic flow will take the path of least resistance and multiple failures may be identified. Perform this test with the engine at operating temperature. This test will assist in determining a defective or internally leaking injector(s) is present by measuring the amount of fuel return.
Cranking Test 1. Turn the ignition off. 2. Remove the engine cover.
NOTE: DO NOT remove the return fuel line clips retaining the return line to the injector. Push IN on the clip to release the hose and then again to install the test vials. 3. Disconnect the return fuel hose at the top of each of the injectors.
NOTE: Care must be taken not to damage the return line check valve between cylinder number four injector and the fuel rail.
4. Block off the disconnected return fuel hose before the fuel return junction on the left rear of the cylinder head cover . 5. Disconnect the camshaft position sensor (CMP).
NOTE: Attach special tool adaptor #9686 to the #4 injector and fill with clean diesel fuel to purge the air from the adaptor, then install the test vial onto the adaptor. 6. Install the test vials onto the injectors and secure with the return hose clips . 7. Crank the engine for ten seconds while monitoring each inner test vial. 8. Evaluate the individual return quantities. The maximum permissible difference between the return quantity of the individual injectors and the injector with the highest return quantity is 3 graduation marks in the small vial.
EXAMPLE Injector
Graduated Vial Mark
Content
1
4 marks, small vial
4 ml
2
1 mark, small vial
1 ml
3
1 mark, small vial
1 ml
4
1/2 mark, small vial
0.5 ml
Evaluation Injector #1 has excessive fuel return quantity, replace the injector. Injectors #2, #3, #4 are OK. 9. Perform the cranking test after the repair to assure no other injectors are identified.
Engine Running 1. Start the engine with the test vials in place . 2. Run the engine until the top mark on one of the large graduated vials is obtained. 3. Turn engine off immediately. 4. Evaluate the individual return quantities. The maximum permissible difference between return quantities of the individual injectors, and the injector with the highest return quantity, is 3 graduation marks.
EXAMPLE Injector
Graduated Vial Mark
Content
1
5 marks, large vial
42 ml
2
2 mark, large vial
21 ml
3
2 mark, large vial
21 ml
4
Surround, large vial
8 ml
Evaluation Injector #1 has excessive return quantity, replace the injector. Injectors #2, #3, #4 are OK. 5. Perform the running test again after the repair to assure no other injectors are identified.
Resistance Specifications Component
Specification .2-.3 ohms 4.0 ohms
Injector Fuel Pressure Regulator
System Related Diagnostic Trouble Codes DTC P0087
Description Fuel Rail Pressure Too Low
P0088
Fuel Rail Pressure Too High
P0089
Fuel Pressure Regulator 1 Performance
Possible Causes Air in Fuel System Fuel Delivery System Concern Fuel injectors Fuel Pressure Solenoid Fuel Pump Fuel System Contamination Fuel System Leak Air in Fuel System Fuel Delivery System Concern Fuel injectors Fuel Pressure Solenoid Fuel Pump Fuel System Contamination Fuel System Leak Intermittent DTC (K369) Fuel Pressure Solenoid Supply Circuit Open or High Resistance (K370) Fuel Pressure Solenoid Control Shorted
P0090
Fuel Pressure Regulator 1 Control Circuit
P0091
Fuel Pressure Regulator 1 Control Circuit Low
P0092
Fuel Pressure Regulator 1 Control Circuit High
P0093
Fuel System Large Leak Detected
P0190
Fuel Pressure Sensor Circuit Malfunction Signal Voltage Too High
to Voltage (K370) Fuel Pressure Solenoid Control Circuit Shorted to Ground (K370) Fuel Pressure Solenoid Control Circuit Open or High Resistance Fuel Pressure Solenoid Engine Control Module (ECM) Fuel Quantity Solenoid Circuits Shorted to Ground Fuel Quantity Solenoid Circuits Shorted to Voltage Fuel Quantity Solenoid Circuits Shorted Together Fuel Quantity Solenoid Open Circuits Fuel Quantity Solenoid Engine Control Module (ECM) Fuel Quantity Solenoid Circuits Shorted to Ground Fuel Quantity Solenoid Circuits Shorted to Voltage Fuel Quantity Solenoid Circuits Shorted Together Fuel Quantity Solenoid Open Circuits Fuel Quantity Solenoid Engine Control Module (ECM) Fuel Quantity Solenoid Circuits Shorted to Ground Fuel Quantity Solenoid Circuits Shorted to Voltage Fuel Quantity Solenoid Circuits Shorted Together Fuel Quantity Solenoid Open Circuits Fuel Quantity Solenoid Engine Control Module (ECM) Air in Fuel System Fuel Delivery System Concern Fuel injectors Fuel Pressure Solenoid Fuel Pump Fuel System Contamination Fuel System Leak ECM – Fuel Pressure Sensor Signal Circuit Shorted to Voltage ECM – Fuel Pressure Sensor Signal Open Fuel Pressure Sensor Signal Circuit Open Fuel Pressure Sensor Signal Circuit Shorted to Voltage Sensor Ground Circuit Open Fuel Pressure Sensor 5-volt Supply Circuit Open Fuel Pressure Sensor Ground Circuit Shorted to Voltage Fuel Pressure Sensor Engine Control Module (ECM)
P0190
Fuel Pressure Sensor Circuit Malfunction Signal Voltage Too Low
P0191
Fuel Rail Pressure Sensor Circuit Performance Cylinder #1 – Injector Circuit Load Drop
P0201
P1202
Fuel System Over Pressure – Stuck Regulator
P2146
Injector Group 1 Supply Circuit Open Load
P2146
Injector Group 1 Supply Circuit Short Circuit
P2149
Injector Group 2 Supply Circuit Open Load
P2149
Injector Group 2 Supply Circuit Short Circuit
Fuel Pressure Sensor Fuel Pressure Sensor Signal Circuit Shorted to Ground Fuel Pressure Sensor Signal Circuit Shorted to Sensor Ground ECM – Fuel Pressure Sensor Signal Circuit Shorted to Ground Fuel Pressure Sensor Intermittent Condition Engine Control Module (ECM) Intermittent Condition Fuel Injector Control Circuit Shorted to Voltage Fuel Injector Control Circuit Shorted to Ground Fuel Injector Circuits Shorted Together Fuel Injector Control Circuit Open Fuel Injector Air in Fuel System Fuel Delivery System Concern Fuel injectors Fuel Pressure Solenoid Fuel Pump Fuel System Contamination Fuel System Leak Engine Control Module (ECM) Intermittent Condition Fuel Injector Control Circuit Shorted to Voltage Fuel Injector Control Circuit Shorted to Ground Fuel Injector Circuits Shorted Together Fuel Injector Control Circuit Open Fuel Injector Engine Control Module (ECM) Intermittent Condition Fuel Injector Control Circuit Shorted to Voltage Fuel Injector Control Circuit Shorted to Ground Fuel Injector Circuits Shorted Together Fuel Injector Control Circuit Open Fuel Injector Engine Control Module (ECM) Intermittent Condition Fuel Injector Control Circuit Shorted to Voltage Fuel Injector Control Circuit Shorted to Ground Fuel Injector Circuits Shorted Together Fuel Injector Control Circuit Open Fuel Injector Engine Control Module (ECM) Intermittent Condition Fuel Injector Control Circuit Shorted to Voltage Fuel Injector Control Circuit Shorted to Ground Fuel Injector Circuits Shorted Together Fuel Injector Control Circuit Open Fuel Injector
P2264
Water-in-Fuel Sensor Circuit Voltage Above Upper Limit
P2264
Water-in-Fuel Sensor Circuit Voltage Below Lower Limit Fuel Pressure Regulator 2 Control Circuit Open
P2294
P2295
Fuel Pressure Regulator 2 Control Circuit Low
P2296
Fuel Pressure Regulator 2 Control Circuit High
Intermittent Condition Water-in-Fuel Sensor Signal Circuit Shorted to Voltage Water-in-Fuel Sensor Signal Circuit Open Water-in-Fuel Sensor Ground Circuit Open Water-in-Fuel Sensor Front Control Module Water-in-Fuel Sensor Water-in-Fuel Sensor Signal Circuit Shorted to Chassis Ground Water-in-Fuel Sensor Signal Circuit Shorted to the Water-in-Fuel Sensor Ground Fuel Pressure Solenoid Circuits Shorted to Ground Fuel Pressure Solenoid Circuits Shorted to Voltage Fuel Pressure Solenoid Circuits Shorted Together Fuel Pressure Solenoid Open Circuits Fuel Pressure Solenoid Engine Control Module (ECM) Fuel Pressure Solenoid Circuits Shorted to Ground Fuel Pressure Solenoid Circuits Shorted to Voltage Fuel Pressure Solenoid Circuits Shorted Together Fuel Pressure Solenoid Open Circuits Fuel Pressure Solenoid Engine Control Module (ECM) Fuel Pressure Solenoid Circuits Shorted to Ground Fuel Pressure Solenoid Circuits Shorted to Voltage Fuel Pressure Solenoid Circuits Shorted Together Fuel Pressure Solenoid Open Circuits Fuel Pressure Solenoid Engine Control Module (ECM)
Information Courtesy of Chrysler Dealer Connect