CodeCrafter User Guide Version 0.2
Documentation for: CodeCrafter User Guide
© DataCraft Software .
Contents CODECRAFTER LICENCE ............................................................................................................ 4 INTRODUCTION ............................................................................................................................ 5 Overview .......................................................................................................................................................... 5 INSTALLING CODECRAFTER ...................................................................................................... 6 Where to get CodeCrafter from .................................................................................................................... 6 What do I need to run CodeCrafter .............................................................................................................. 6 Installing CodeCrafter ................................................................................................................................... 6 Customising CodeCrafter .............................................................................................................................. 7 3.1.1.Configuration File ................................................................................................................................ 7 3.1.2.Application Configuration File ........................................................................................................... 7 USING CODECRAFTER ................................................................................................................ 9 Overview .......................................................................................................................................................... 9 Starting CodeCrafter ...................................................................................................................................... 9 Lesson 1: Your first application .................................................................................................................... 9 Step 1: Start up CodeCrafter ...................................................................................................................... 10 Step 2: Fill in your database account values .............................................................................................. 10 Step 3: Generate your code ........................................................................................................................ 11 Step 4: You're done! ................................................................................................................................... 11 Lesson 2: Let's do that again ....................................................................................................................... 12 Lesson 3: Accessing the advanced function ................................................................................................ 13 Step 1: Start up CodeCrafter ...................................................................................................................... 13 Step 2: Fill in your database account values .............................................................................................. 13 Step 3: Generate your code ........................................................................................................................ 14 Step 4: You're done! ................................................................................................................................... 14
Lesson 4: Generate source for one table. ...................................................................................14 Step 1: Start up CodeCrafter ...................................................................................................................... 15 Step 2: Fill in your database account values .............................................................................................. 15 Step 3: Generate your code ........................................................................................................................ 16
Step 4: You're done! ................................................................................................................................... 16 Lesson 5: Generate code to disk, screen, or both. ...................................................................................... 16 Step 1: Start up CodeCrafter ...................................................................................................................... 16 Step 2: Fill in your database account values .............................................................................................. 16 Step 3: Generate your code ........................................................................................................................ 17 Step 4: You're done! ................................................................................................................................... 17 USING THE CODECRAFTER DATABASE BROWSER ............................................................... 18 Overview ........................................................................................................................................................ 18 Invoking the Database Browser ................................................................................................................... 18 Lesson 6: Selecting the database. ................................................................................................................ 19 Lesson 7: Selecting the table. ....................................................................................................................... 20 Lesson 7: Customising field information. .................................................................................................. 21 Step 1: Start up CodeCrafter ...................................................................................................................... 21 Step 2: Fill in your database account values .............................................................................................. 21 Step 3: Browse to your selected table ........................................................................................................ 22 Step 4: Customise your fields .................................................................................................................... 22 Step 5: Generate your code! ....................................................................................................................... 23 Step 6: You're done! ................................................................................................................................... 23 USING THE GENERATED CODE ................................................................................................ 24 Overview ........................................................................................................................................................ 24 Accessing the Generated Code ..................................................................................................................... 24
CodeCrafter Licence Copyright (c) 2006, DataCraft Software Consulting CC. All rights reserved. This license is a legal agreement between you and DataCraft Software Consulting CC. for the use of the Code Crafter Software (the "Software"). By obtaining the Software you agree to comply with the terms and conditions of this license. PERMITTED USE You are permitted to use, copy, modify, and distribute the Software and its documentation, with or without modification, for any purpose, provided that the following conditions are met: 1.
A copy of this license agreement must be included with the distribution.
2.
Redistributions of source code must retain the above copyright notice in all source code files.
3.
Redistributions in binary form must reproduce the above copyright notice in the documentation and/or other materials provided with the distribution.
4.
Any files that have been modified must carry notices stating the nature of the change and the names of those who changed them.
5.
Products derived from the Software must include an acknowledgment that they are derived from Code Crafter in their documentation and/or other materials provided with the distribution.
6.
Products derived from the Software may not be called "Code Crafter", nor may "Code Crafter" appear in their name, without prior written permission from DataCraft Software Consulting CC.
INDEMNITY You agree to indemnify and hold harmless the authors of the Software and any contributors for any direct, indirect, incidental, or consequential thirdparty claims, actions or suits, as well as any related expenses, liabilities, damages, settlements or fees arising from your use or misuse of the Software, or a violation of any terms of this license. DISCLAIMER OF WARRANTY THE SOFTWARE IS PROVIDED "AS IS", WITHOUT WARRANTY OF ANY KIND, EXPRESSED OR IMPLIED, INCLUDING, BUT NOT LIMITED TO, WARRANTIES OF QUALITY, PERFORMANCE, NONINFRINGEMENT, MERCHANTABILITY, OR FITNESS FOR A PARTICULAR PURPOSE. LIMITATIONS OF LIABILITY YOU ASSUME ALL RISK ASSOCIATED WITH THE INSTALLATION AND USE OF THE SOFTWARE. IN NO EVENT SHALL THE AUTHORS OR COPYRIGHT HOLDERS OF THE SOFTWARE BE LIABLE FOR CLAIMS, DAMAGES OR OTHER LIABILITY ARISING FROM, OUT OF, OR IN CONNECTION WITH THE SOFTWARE. LICENSE HOLDERS ARE SOLELY RESPONSIBLE FOR DETERMINING THE APPROPRIATENESS OF USE AND ASSUME ALL RISKS ASSOCIATED WITH ITS USE, INCLUDING BUT NOT LIMITED TO THE RISKS OF PROGRAM ERRORS, DAMAGE TO EQUIPMENT, LOSS OF DATA OR SOFTWARE PROGRAMS, OR UNAVAILABILITY OR INTERRUPTION OF OPERATIONS.
Introduction Overview The CodeCrafter application is a source code generator for Codeigniter. Codeigniter is a PHP application framework that allows PHP developers to build operational webcentric applications in a short space of time using an ModelControllerView (MVC) appriach to application coding. CodeCrafter enhances the Codeigniter framework by providing an easytouse, simple method of generating source code from a given database schema. CodeCrafter is simple enough to use so that an entire, working application can be generated in seconds, thus saving the developer hours, or even days of coding work. It is also an ideal bridging tool to help developers starting off with the Codeigniter framework (or PHP) quickly reach a point where they are able to develop production quality source code. This manual is a users guide to the CodeCrafter application. It is intended for developers that use the Codeigniter application framework to develop webbased applications.
Installing CodeCrafter Where to get CodeCrafter from The most recent version of CodeCrafter can always be obtained from the project homepage at the application sponsors.
http://www.datacraft.co.za
You can also obtain information on CodeCrafter at the following sites:
http://www.codeigniter.com/wiki/ http://www.ciforge.com/codecrafter/
What do I need to run CodeCrafter The CodeCrafter application is built to run as a web server application that allows CGI or SSI. CodeCrafter itself is written in Codeigniter. You can implement CodeCrafter on any platform that contains at least the following components : • An HTTP 1.1 compliant server (Apache recommended) • PHP (Version 4 and upwards) processor • Codeigniter (www.codeigniter.com)
•
Prototype JavaScript library ( )
Installing CodeCrafter To get it working 1.
CodeCrafter is written to work with the Codeigniter application framework, and must therefore be capable of being installed into the framework. You must ensure that you have a correct working copy of Codeigniter . Obtain the Codeigniter software from the Codeigniter web site and extract your Codeigniter framework somewhere in your web server paths.
Refer to the Codeigniter documentation on how to install and configure Codeigniter 2.
Download the latest copy of CodeCrafter.
3.
Extract the CodeCrafter application in your home directory or somewhere temporary. The file is in a compressed tar archive. If you download and save the file to your home directory, you can run: $ tar xzvf codecrafter_xxx.tgz or use your favourite archive tool to extract the source code. This will create the following directories in your current directory. > assets > system > application 4.
Replace the Codeigniter 'application' directory in (1) with the CodeCrafter 'application' directory. The step above will replace your current Codeigniter application so be sure to save your old application directory if you can't afford to lose the data. If you wish, you can install CodeCrafter together with your existing application. Just make sure the file from the download archive are placed in their corresponding directories in your current application. You are on your own here!
5.
You are now ready to use CodeCrafter!
Customising CodeCrafter After installing, you'd probably want to customise your CodeCrafter system at least once. However, you don't have to.
3.1.1.
Configuration File
Change the Codeigniter's configuration file to customise the application according to your own site's requirements.
3.1.2.
Application Configuration File
CodeCrafter uses its own configuration file to store options and default values. You can change some of these values to suit your own preferences. CodeCrafter loads the 'application.php' file in your applications config directory:
ci_system_directory]/application/config.php
The config contains three items that you can customise:
Configuration Option $config['path_separator']
$config['output_base']
$config['suffix']
Meaning 'path_separator' indicates how paths are separated on your OS. (I think that PHP converts '/' to '\' on DOS and Windows systems. DOS gurus, anyone?) 'output_base' indicates where the output directory will reside. This is indicated as an offset off the CI application directory. For the example below, this will be: [ci_system_directory]/application/crud_ouput/ 'suffix' allows you to specify a suffix for your generated files eg xxxxxxx.php5
An example of the application.php file supplied with CodeCrafter is:
$config['path_separator'] = '/'; $config['output_base'] = 'crud_output/'; $config['suffix'] = 'php';
Using CodeCrafter Overview CodeCrafter is designed to be very easy to use. At the same time, it allows for varying levels of users to work with CodeCrafter to customise the application according their needs. This section explains how to use CodeCrafter to generate your Codeigniter application. It is recommended that you follow the tutorial exactly as laid out in this section. You are welcome to change the details of the database, table or fields that you would be generating code for to suit your own configuration.
Starting CodeCrafter CodeCrafter is started by invoking the codecrafter controller. The default method for the controller will be sufficient to start the application. In your favourite browser, enter the URL of the CodeCrafter controller as you have configured the system. Invoke the codecrafter method by typing the ffg url in your browser.
http://www.mydomain.com/codecrafter/ or
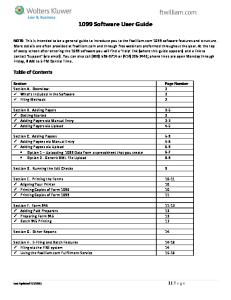
http://www.mydomain.com/codecrafter/codecrafter/ You will be presented with a screen similar to figure 1.
Lesson 1: Your first application To guide you through CodeCrafter, we will take a step by step tour of creating an application based on an existing database.
NOTE: CodeCrafter will not create database tables for you. There are many wonderful applications that do a fantastic job of doing this. CodeCrafter requires that your database be created and you have the necessary access to the database.
For this application, we want to create a “Getting Things Done” database application that will will allow us to manage our lives better.
Figure 1: The CodeCrafter welcome screen.
Step 1: Start up CodeCrafter Start up CodeCrafter as described earlier in this section. You will be presented with a screen as in figure 1.
Step 2: Fill in your database account values The screen you are presented with requires you to enter certain information before the code is generated. Your database account is created by a database administrator. You can obtain the relevant account details the database administrators. The following items must be filled in:
Configuration Option Database Server Database Username Database Password Database Name
Meaning The database server address, which may be an IP address or valid host name entry. Obtain this from your database administrator. The account name of your database user, which must have been created beforehand. Obtain this value from your administrator. The password for the account name of your database user, Obtain this information from your database administrator. The name of the database that you want to generate source code for. The user account supplied must have the necessary permissions to access the database..
Figure 2: Minimal information required for CodeCrafter to operate. For our tutorial, the required Getting Things Done database is called “gtd”. we fill the values that was provided to us by the database administrator as show in figure 2. NOTE: If you are following along with the tutorial, you probably won't have the gtd database that we show with the tutorial. You are free to create the database for any other database that you have access to.
Step 3: Generate your code Once you have entered the values required as in figure 2, click the button that says: “Go ahead! Make my code”.
Step 4: You're done! That's it. CodeCrafter has just generated your entire application for your specified database, saving you hours, or maybe even days of code. You'll see output being generated on the screen telling you of the progress that is being made. For our gtd database, an example of the output is shown in figure 3. Don't worry about the output for now. You'd probably only need to look at it if you encounter problems.
Figure 3. CodeCrafter showing its progress as it creates your application.
Lesson 2: Let's do that again If you missed the trick, then we can try this again. To guide you through CodeCrafter, we will take a step by step tour of creating an application based on an existing database. Follow steps 13 from Lessen 1 again. Ensure you try and generate the application for exactly the same database that you did in Lesson 1. This time, when clicking the button that says: “Go ahead! Make my code”, you will be presented with a screen similar to the one in figure 4.
Figure 4: CodeCrafter trying to generate the application again. What's happening here? CodeCrafter is careful not to delete existing directory structures. It therefore checks that a directory exists before generating its code and storing it onto disk. That's it for lesson 2. The aim of this lesson was to show that CodeCrafter writes its code into its own directory structure, but that there is a builtin safely mechanism to prevent overwriting existing directories.
Lesson 2 also serves an important purpose. That's to introduce us to some advanced features of CodeCrafter.
Lesson 3: Accessing the advanced function In this lesson we will be introduced to the advanced functions of CodeCrafter. We will use one of those features to overcome the problem we encountered in Lesson 2.
Step 1: Start up CodeCrafter Start up CodeCrafter as described earlier in this section. You will be presented with a screen as in figure 1.
Step 2: Fill in your database account values You will be presented with a screen similar to figure 2. Fill in your database account details as you've done before. If you look again at figure 2, you'll notice the last field is a checkbox that says 'Advanced'. The advanced option uncovers a whole host of options that are available with CodeCrafter. Click the Advanced' checkbox now. You will see a screen that looks similar to figure 5. The advanced options are:
Configuration Option Database Table
Overwrite protection
Output To Navigation
Meaning By default, CodeCrafter will generate an entire application with code to manipulate all tables in your selected database. This option allows you to generate code for a single table only. We've seen in lesson 2 that CodeCrafter protects existing directories from being overwritten. This option allows you to change this feature. By default, CodeCrafter will write its generated code to disk. You can use this option to select the output to disk, screen, or both! Selecting this option creates a basic navigational menu so that you are able to use all of your selected code immediately after being generated.
Figure 5. The CodeCrafter Advanced functions We will cover these options in later tutorials. For this lesson, we will select the option to overwrite directory structures. This will allow us to overcome the problem in lesson two.
Step 3: Generate your code Once you have entered the values required as in figure 5, click the button that says: “Go ahead! Make my code”. CodeCrafter will now happily create your code and generate output similar to figure 3.
Step 4: You're done! That's it. CodeCrafter has just generated your entire application again, overwriting your existing code. That concludes lesson 3, where you have been exposed to the advanced features list for CodeCrafter and learned how to create source code, overwriting any existing files in the output path,
Lesson 4: Generate source for one table. Sometimes you have made changes to an already existing application. Your change may be restricted to a single table. Regenerating the source code for the entire database is overkill in this case. In this lesson we will use the Database table field in the advanced section to generate your Codeigniter code for just a single table instead of the entire database.
be introduced to the advanced functions of CodeCrafter. We will use one of those features to overcome the problem we encountered in Lesson 2.
Step 1: Start up CodeCrafter Start up CodeCrafter as described earlier in this section. You will be presented with a screen as in figure 1.
Step 2: Fill in your database account values You will be presented with a screen similar to figure 2. Fill in your database account details as you've done before. Now click on the advanced option. This will cause the advanced features list to be displayed. If you look again at figure 2, you'll notice the first field in the advanced section is labeled “Database table”. Filling in a valid table name here will cause CodeCrafter to generate source code just for the selected table.
NOTE: If you have already generated code for this database, did you remember to specify that existing code must be overwritten.
You screen should look like figure 6.
Figure 6 : Specifying code generation for a single table
Figure 6 : The resulting output.
Step 3: Generate your code Once you have entered the values required as in figure 6, click the button that says: “Go ahead! Make my code”. CodeCrafter will now happily create the code for only the table you specified. You output should be similar to figure 7
Step 4: You're done! That's it. CodeCrafter has just generated code for just a single table that you specified.
Lesson 5: Generate code to disk, screen, or both. By default, CodeCrafter generates the resulting Codeigniter source code to disk. Sometimes you wish to have code generated that you can quickly access on the screen, for example if you need just a small portion of your entire application, or if you have the file open in an editor. In this lesson we will show you how to generate the Codeigniter source code to disk, screen, or both,
Step 1: Start up CodeCrafter Start up CodeCrafter as described earlier in this section. You will be presented with a screen as in figure 1.
Step 2: Fill in your database account values You will be presented with a screen similar to figure 2. Fill in your database account details as you've done before. Now click on the advanced option. This will cause the advanced features list to be displayed. An example of your screen is shown in figure 8. If you look again at figure 8, you'll notice some fields asking you to select Screen or Disk. Using these options you can cause CodeCrafter to generate your source code to disk, or screen, or both.
In earlier lessons we have generated source code to disk only. As an exercise now, click the output options so that only screen is selected. NOTE: If you select to generate your source code to screen only, the Overwrite option is ignored.
Step 3: Generate your code Once you have entered the values required as in figure 6, click the button that says: “Go ahead! Make my code”. CodeCrafter will now display the resulting outout onto your browser screen, where you can read, copy or save the source code. Figure 9 shows an example of the resulting source code.
Figure 8: The Output options
Figure 9: The resulting output
Step 4: You're done! That's it. CodeCrafter has just generated its resulting code on screen for you to do as you please with it,
Using the CodeCrafter Database Browser Overview We lead busy lives, ad carry around with us lots of information. Sometimes though, we just need to be able to quickly access information that already there without having to remember. So far, we have generated source code for databases and tables that we remembered from memory. CodeCrafter has a built in database browser to help you select the database and tables you want. The database browser goes a step further so that you can customise each field of the table for which you wish to generate source code. This section explains how to use CodeCrafter's database browser to simplify use of CodeCrafter and customise your output further.
Invoking the Database Browser The database browser is visible when you invoke the Advanced features options in CodeCrafter. Start CodeCrafter now, and fill in your database host, user name and password. Now select the Advanced Option. In the advanced options section, you will see a button labeled 'Fetch tables for me”. Click this button. (You couldn't wait, and you've done this already, in lesson 1, haven't you? Naughty!) CodeCrafter will now bring up a list of tables that you have access to. Your output will look similar to figure 10.
Figure 10: The Database browser showing the list of database you can access. A little panel appears on the right hand side of the database information panel, showing a list of all databases that you have access to. Scroll through the list until you can locate the database you wish to generate source code for.
DID THIS WORK FOR YOU? : Only tables that can be accessed using the database server, user name and password supplied by you will be accessed. Ensure that you have proper access to the tables for this to work properly.
Lesson 6: Selecting the database. If you click on the selected database in the Database Listing Panel, you will see the database expand to show you a list of fields for the database. Ignore the table listing panel for now. Now look again to the database information panel. You will see that the database name has been automatically populated for you. If you have more than one database displayed, try selecting another database and watch what happens to the database information panel.
Figure 11: Selecting a database automatically fills in the database name. When you are ready to generate your source code, just click the button that says: “Go ahead! Make my code”. CodeCrafter will generate the code as you've done in your previous lessons.
DID THIS WORK FOR YOU? : Did you remember to set the output and overwrite options to suite your requirements.
Lesson 7: Selecting the table. To select a specific table to generate code for, follow the instructions so that you end with with the situation as show in figure 11. At this stage, your table information will be displayed to the right of the database information. Select a table you require code generation for. Now look again to the database information panel and the field name in the advanced section. You will see that the table name has been automatically populated for you. If you have more than one table displayed, try selecting another table and watch what happens to the database information panel and field.
Figure 11: The Database browser autmatically fills in the values for you. When you are ready to generate your source code, just click the button that says: “Go ahead! Make my code”. CodeCrafter will generate the code as you've done in your previous lessons.
DID THIS WORK FOR YOU? : Did you remember to set the output and overwrite options to suite your requirements.
Lesson 7: Customising field information. If you've studied the code generated so far, you may have noticed that CodeCrafter generated all fields in the views as text fields. This meant that you needed some customisation of the code to suit you r own purposes. Since version 0.2.2, CodeCrafter now reads your table description from the database and tries to guess what the field should look like on the form. It allows you a chance to change this to suit your purposes exactly. In this lesson, we will use CodeCrafter to customise the generated code down to view level.
Step 1: Start up CodeCrafter Start up CodeCrafter as described earlier in this section. You will be presented with a screen as in figure 1.
Step 2: Fill in your database account values You will be presented with a screen similar to figure 2. Fill in your database account details as you've done before.
Step 3: Browse to your selected table In the previous lesson, we have selected the gtd database and the goals table from the database browser. The SQL code to create the goals table is shown below. You can see that the table consists of field of different types. You would therefore expect the resultant view to accommodate the field types.
CREATE TABLE goals ( id int(11) NOT NULL auto_increment, goal longtext, description longtext, created date default NULL, deadline date default NULL, completed date default NULL, type enum('weekly','quarterly') default NULL, projectId int(11) default NULL, PRIMARY KEY (id) ) TYPE=MyISAM;
Step 4: Customise your fields If you have selected the gaols table (or a similar table if you have decided to choose a different one), then you would have noticed the field information appear in a panel below the database and table panels. Your screen should appear similar to figure 12.
Figure 12: The field information shown in the database browser
You can now customise each field in the specified table. Figure 13 shows the customisation field in more detail.
Figure 13: Field customisation options. The type field allows you to select the form field type. Figure 13 shows the possible options. You can select not to display the field by selecting the 'Ignore' option. The 'Size/Options' field provides additional information to the field type. The table below shows how the field types and options work together.
Form Type Ignore, Display Only, Checkbox, Textarea Dropdown, Multiple Select, Radio Button Text. Password
Size/Options values Not used Form options is a commaseparated list. Form option indicates the display size of the text or password field
Step 5: Generate your code! Once you have entered the values required as in figure 6, click the button that says: “Go ahead! Make my code”. CodeCrafter will now happily create the code for only the table you specified. You output should be similar to figure 7
Step 6: You're done! That's it. CodeCrafter has just generated code with customisable fields that you specified. You have now learned how to customise CodeCrafter to generate code exactly how how you need it, down to field level.
Using the Generated Code Overview So far, we have been generating code to disk or screen, using the various options available to us by CodeCrafter. In this section we look more closely at the output generated by CodeCrafter, and learn how to implement this in our our applications, and how we could customise the code.
Accessing the Generated Code So far, we have been generating code to disk or screen, using the various options available to us by CodeCrafter. When configuring CodeCrafter initially, you specified an output directory where source code will be generated. In this section we look more closely at the output generated by CodeCrafter, and learn how to implement this in our our applications, and how we could customise the code. An example of the application.php file supplied with CodeCrafter is:
$config['path_separator'] = '/'; $config['output_base'] = 'crud_output/'; $config['suffix'] = 'php'; The exact path of the crud_ouput directory will depend on your $config['base_ur'] value specified in your Codeigniter configuration file. The generated code can be found as follows. (obviously the directory names are configurable). [ci_system_directory]/application/crud_ouput/ [ci_system_directory]/application/crud_ouput/table_name/ [ci_system_directory]/application/crud_ouput/table_name/controllers/ [ci_system_directory]/application/crud_ouput/table_name/views/[[table_name]] [ci_system_directory]/application/crud_ouput/table_name/models/
To install the generated code in your own application: 1. Copy the contents of the controllers directory to your own controllers directory.
2. Copy the contents of the models directory to your own models directory. 3. Copy the contents of the views directory to your own views directory. 4. Configure you own application's config.php, routing.php and database.php to suite your setup and preferences.
NOTE? : The views directory contains files and subdirectories, Be sure to keep the file and
directory structure the same as you copy them.
You are now ready to see the generated code in action. Start up your browser and invoke the controller methods for one of the tables you have generated code for, In our example, we will enter the following in our browser address bar. http://www.mydomain.com/goals/ The goals screen will now be displayed.
Figure 14. The goals table browser
Figure 15. The goals table edit screen