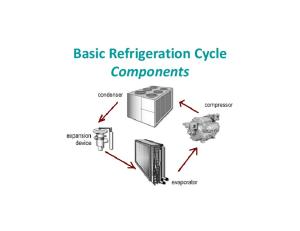
Basic Electric Brewery System Kit Components 1 Mini-Brew Hot Liquor Tank 1 Mini-Brew Mash Tun 1 March Pump 2 BrewMometer Thermometers 1 EBC Module 5 Quick Connector 1/2" MPT 3 Quick Connector Barbed 2 Quick Connector Barbed Elbow 1 Input manifold (Tee) 2 1/2" Ball-Valves 1 Copper Heat Exchanger 10 ft of 1/2" Braided Hose (ft.) 2 Sets of SS Hose Clamps (4 per Set) 1 Heating Element w/ cord and plug With the basic setup you control the system manually by monitoring temperatures and controlling the heat and pump as needed with the EBC. The system can be automated by adding Ranco controllers to automatically control the heating element in the hot liquor tank, and/or maintain mash tun temperature by controlling the pump based on the settings that you input. The system can be further enhanced by adding an electric Brewpot and/or a plate chiller. You can choose between the Shirron and Blichmann Engineering’s Therminator. The input manifold of the pump and the plumbing in and out of the heat exchanger are both pre-assembled. The remaining plumbing connections are left unassembled to provide flexibility in locating the vessels with respect to each other. Many configurations are possible. All plumbing and electrical connections are quick-disconnect to allow for ease of disassembly for cleaning and maintenance.
General Configuration Install the ball-valves in the mash-tun and hot liquor tank using the pipe nipples. Wrap at least a few layers of Teflon tape around the threads to provide a tight seal. Terminate the ball-valves with the ½ in. MPT polysulphone quick-disconnects.
Determine locations of vessels and the pump with respect to each other. Many configurations are possible. We prefer to have the liquid flow from the mash-tun to the kettle via gravity, and use the pump for all other transfers and recirculation. This configuration cleans up after itself as the last step of the process is to pump hot sparge water through the system. Mash-tun must be elevated enough to allow gravity flow into kettle, for 10 gallon batches elevation must be high enough to allow liquid fill the kettle to the desired level. Vessels located to accommodate a 10 gallon batch. Notice hoses are in recirculate (mash) configuration.
Determine required lengths of interconnection hoses, and custom cut as desired. Terminate connections with barbed quick-disconnects and hose clamps.
Make all plumbing connections as desired. Output of pump connects to input of heat exchanger, output of heat exchanger connects to return port of mash-tun when mashing or transferring strike water. Determine physical locations for Electric Brewery Control Unit, (and Ranco Controller(s) if included). Locate the pump where it will not get dripped on. Make electrical connections as desired (see Electric Brewery Control Unit documentation for more detailed information). Hoses shown in sparge configuration.
Operation Notes Never allow heating elements to be powered on unless completely submerged. Fill hot liquor tank to 15 gallon mark (even when brewing a 5 gallon batch). Maintain hot liquor temperature at 180 – 185 deg F while mashing. We recommend 1 gallon of strike water for every 3 lb of grain in the recipe be transferred to the mash-tun. Recirculate through heat-exchanger if necessary to bring water temperature up to 164 before adding grains. With a few minutes of stirring the temperature should settle in at 153. It may be necessary to top up hot liquor tank after mashing in to have enough water to sparge with, especially with larger batches. The heating element will make the water hot again fast. The mash-tun can be insulated or left as it is. We like for the wort to recirculate during the mash more often, and have left our mash-tun un-insulated so that this happens. During mash-out, raise temperature of mash-tun up to 168 deg F by recirculating wort through heat-exchanger. This is accomplished with the Ranco controller by simply moving the setpoint up to 168. We like to turn off the heating element in the hot liquor tank when the mash reaches 165 degrees. Raising the temperature the rest of the way up to 168 draws enough heat out of the hot liquor tank to keep the sparge water in the normal lauter temperature range. Quick disconnects allow easy plumbing reconfigurations. To prepare for sparging, the output of the mash-tun is connected to the kettle, and the output of the heat-exchanger is connected to the sprinkler head of the mash-tun. When quick-disconnects are disconnected, some liquid will drip out. Your old brewpot may come in handy as a tending vessel for your new brewery. Notice our old brewpot underneath the brewery in the pictures. When sparging, simply adjust the flow rate in and out of the mash-tun to maintain the liquid level at the top of the grains. Try to shut off sparge water when the amount of liquid remaining in the mash-tun will get you to your target boil volume. This may take a bit of practice. The electric kettle plugs into the same receptacle as the hot liquor tank. The heat switch then controls the boil. If a Ranco controller is setup to control the heating, it will have no effect on the boil because the probe is not in the kettle.
With the 4500W element in the electric kettle, the boil is going to be more active than anything you’ve seen before; 30% evaporation in 60 minutes. This will require careful attention to the heat switch. When the kettle shows signs of starting to boil over, simply shut off the heat for a moment and resume. This may occur a few times until it settles down. Any time something is added to the boil; more hops, whirlfloc, or irish moss, there is a chance of boiling over. Watch the kettle carefully. Be careful not to hit the heating element with your spoon or mash paddle when stirring the kettle. We find that a whirlpool is very effective at causing the hop debris and protein to mound up in the center of the kettle. At the end of the boil, we allow the wort to stand for a few minutes (especially with any “flame-out hop additions”). We also keep our hops contained in a muslin or nylon bag. With finishing hops removed, stir the pot carefully to obtain a nice whirlpool spin. Let spin and settle for 20 minutes or so. We sanitize our plate chiller by opening the kettle valve enough to allow wort to start flowing out of the chiller, and shut immediately. This 200+ degree wort effectively kills any microorganisms that may be present. We let stand for at least 2 minutes before turning on the cooling water. Drain wort into sanitized fermenter at a rate that results in desired cooled temperature. We find that a “pencil thick” stream falling into the fermenter results in a good level of aeration of the wort with no extra effort required. It is a good practice to unplug any heating elements after they are no longer expected to be used. This will eliminate the chance of accidentally powering on a heating element that is not submerged.
Caution Large volumes of boiling liquid are inherently dangerous, and extreme care is recommended. Adding high-energy electricity to the equation increases the potential of danger. The heating elements must always be completely immersed when energized. Careless operation can result in serious injury or death. This equipment is sold as an experimental kit, to be assembled by the user. It is not a UL approved consumer electronic device. High Gravity assumes no responsibility for any damages caused by operation of this system.


![5. [Bib] 6. KIT COMPONENTS](https://kipdf.com/img/300x300/5-bib-6-kit-components_5ab11d941723dd389ca425ff.jpg)
![5. [Bib] 6. KIT COMPONENTS](https://kipdf.com/img/300x300/5-bib-6-kit-components_5ae399a57f8b9aa10a8b45dc.jpg)


