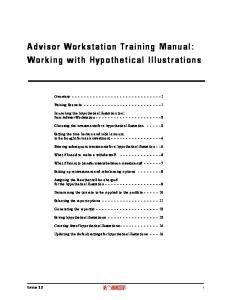
ADVISOR Training Manual
Introduction
3
ADVISOR 2.0: DIARY 2.1: DIARY VIEWS 2.2 SHARED DIARY VIEWS 2.3: CALENDAR VIEWS 2.4: APPOINTMENTS 2.4.1: EDITING/MOVING/DELETING AN APPOINTMENT 2.5: BLOCKING TIME & DAILY NOTES 2.6: DIARY INTEGRATION 3.0: HOTBOX 3.1: YOUR HOTBOX 3.2: CREATING HOTBOX OPPORTUNITIES 3.3: SYSTEM GENEATED OPPORTUNITIES 3.4: MANAGING YOUR HOTBOX 3.5: YOUR POSTPONED HOTBOX 3.6: YOUR REFERRALS 4.0: MANAGING YOUR CLIENTS CASE RECORD 4.1: CLIENT SEARCH 4.1.1: 360 ADVISOR CASE SEARCH 4.1.2: 360 OFFICE CASE SEARCH 4.2: ADDING DOCUMENTS 4.3: PORTFOLIO REPORT 4.4: ADDING CLIENT ASSETS AS PORTFOLIO ITEM 4.5: ADDNG CLIENT PROTECTION AS PORTFOLIO ITEM 4.6: ADDING CLIENT FINANCIAL COMMITMENTS AS PORTFOLIO ITEM 5.0: CLIENT COMMUNICATION 5.1: SENDING A LETTER 5.2: SENDING AN SMS 5.3: SENDING AN EMAIL 5.3.1: EMAIL TRACKING 360 OFFICE 6.0: MANUALLY ADDING A CASE 6.1: ADDING A SALE EVENT 6.2: ADDING A MORTGAGE 6.3: ADDING A B&C POLICY 6.4: ADDING A LIFE POLICY 6.5: ADDING AN INCOME PROTECTION POLICY 6.6: ADDING A PENSION POLICY 6.7: ADDING AN INVESTMENT POLICY 7.0: DELETING A SALE EVENT/CASE RECORD 8.0: CASE MERGE 9.0 LETTER TEMPLATES 10.0: CAMPAIGN SENDER 11.0: DEFAULT PORTFOLIO REPORT HEADERS
Page |2
4 4 5 5 5 8 10 12 19 20 20 22 23 23 24 25 25 26 27 28 29 34 37 43 43 44 44 45
48 50 54 56 58 60 61 63 65 67 70 73 78
1.0 Introduction 360 Lifecycle allows advisers to efficiently and effectively drive increased sales and manage activity resulting in new business. Comprised of tools and features that allow you to fully utilise your existing and prospect client bank, 360 Lifecycle enhances your ability to run a successful business and deliver great customer services. 360 Lifecycle comes in 2 separate links/applications, ‘360 Advisor’ and ‘360 Office’. This guide will cover the core functionality available in both applications and show you how to make best use of the tools including:
Calendar navigation with integrated external diary system (360 Advisor) HotBox for lead and referral management (360 Advisor) Basic case handling and building (360 Advisor & 360 Office)
Page |3
2.0 Diary To access your diary you need to log into your ‘360 Advisor’ application. Your diary is split into 2 types of views; diary views and calendar views.
2.1 Diary Views You can view your diary as one day, five working days, or even seven consecutive days, one week view to a month view by simply clicking on the appropriate tabs.
Page |4
2.2 Shared Diary Views You can also see shared diary views. This access is set in Diary Views, held within 360 Lifecycle System Office.
1
Select the diary view name you wish to see at once. This is a great feature that will work as a huge advantage for administrators, personal assistants, etc. who can add appointments directly into advisors diaries. You can access another individual’s diary or a whole diary team which will show all diaries within the group.
2.3 Calendar Views You can navigate forwards and backwards through your diary by using the arrow signs to the left and right of the month or year. Any historical data entered on the calendar will remain on the calendar. Days and weeks can also be highlighted so that you can view all on one page. If anything has been saved into your diary, the day it has been saved on will be emboldened on your calendar views so you can easily navigate through days where you are free and days where you have time blocked.
2.4 Adding Appointments It is very easy to add an appointment into your Advisor Diary. First, find the time and date that your appointment will be booked in for and select it by clicking in the relevant place and making sure it is highlighted. Right click and a menu will appear with a list of options.
Page |5
Select ‘New Appointment’ and a screen will open for you to enter the details of the appointment. In the first screen you will enter as much detail about the client as possible. A name is mandatory. Click ‘Next’ once you have done this.
The system will then trawl your client base looking for a matching client. If a match is found you can select it from the list options and then click ‘Next’. If there is no match you will tick the ‘No Match Found – Create New Client’ and then click ‘Next’.
In this screen you are able to enter more details about the client. A contact number and email address is highly recommended as being saved at this point. You can add an address by clicking on the ‘Address’ button. If there is more than one client attended the appointment you can add another attendee by clicking on the yellow ‘+’ sign.
Page |6
Here you add the details of the appointment; what time it is due to start and finish, the date and where the appointment is to take place. By selecting ‘Other’ you are able to manually add a location in the ‘Location’ field. Click ‘Next’.
Next you select the Opportunity details. All appointments with clients that you add are saved with sales opportunities. If you do not want them saving in this way please see Adding Blocked Time Tick the ‘Create New Sales Opportunity’ box, filling in the ‘Lead Source’ (where the opportunity has come from, ‘Referring Advisor’ (if there is one) and ‘Introducer’ details. Add any notes in the ‘Notes’ section. If you would like to send your client a text message confirming the appointment details tick the ‘Notify the client via SMS text message’ box. This sms message is editable and can be amended before sending. NB: Notes entered into the notes section will not be sent to the client if you choose to send a text.
Page |7
Once you have selected ‘Finish’, this would have carried out a number of things; 1. A new client record would have been created if this was a new client. 2. You will notice the client appointment has now be added and saved into your diary. 3. If applicable the client(s) would have been notified of the booked appointment by an automatic SMS message. 4. If diary integration is enabled this would have sent a meeting request to your external calendar. For a guide on diary integration please refer to Diary Integration. 5. An opportunity dropped into your HotBox. For a guide on the HotBox please refer to Your HotBox.
2.4.1 Editing/Moving/Cancelling Appointments To edit the appointment details simply double click on the appointment in your diary. This will bring up a screen where you can edit the clients details, the appointment details as well as the lead source details. You can also change an appointment time by dragging it to another place in your diary. Simply click on the appointment, dragging it up or down depending on the time needed. If the appointment is to take place on another day you can drag the appointment over to your calendar, hovering over the day needed and then dropping the appointment here. If there is a client in your HotBox you wish to create an appointment for you can drag the opportunity from the HotBox over into your diary, dropping onto the specified date and time. This will not remove it from your HotBox, it will just create the appointment in your diary.
Page |8
Another way you can edit the appointment is by right clicking on the appointment in your diary and selecting the ‘Edit Appointment’ option.
Using the right click menu option you can also cancel the appointment. Selecting this will turn the appointment in your diary lilac but for audit reasons the appointment will remain in your diary.
If you have cancelled the appointment by accident or have been able to rebook it for the same date and time you can click the ‘Reinstate Appointment’ option from the right click menu. The appointment will turn back from lilac to blue in your diary. If your client did not turn up to the appointment, using the right click menu options you can select the ‘DTU Appointment’ option. This will turn the appointment in your diary an olive green colour.
Page |9
2.5 Blocking Time & Daily Notes Blocking Time To block time out of your diary, eg, for a meeting or to schedule time in for administration, etc, simply right click in your diary on the day and time you wish to block the time out and choose ‘Block Time’.
Select the reason for the blocked time from the drop down menu, along with the start time and date and any notes you may wish to add. Click on ‘OK’ and the blocked time will be saved into your diary.
In the same way as an appointment you are able to drag and drop this blocked time to other times and dates in your diary. You can also right click on the blocked to edit it further or add notes, etc, or you can remove it completely.
P a g e | 10
Adding a Daily Note To add a daily note right click in your diary and choose ‘New Daily Note’. A menu will appear where you will have many options included to add a ‘New Daily Note’. Click on this. A screen will appear where you are able to enter and save the details of the note.
Click ‘OK’. The daily note will appear at the top of your diary on the day you have saved it. Please note that a maximum of 10 daily notes can be added against any particular day.
P a g e | 11
2.6 Diary Integration The 360 System now enables you to integrate your Advisor diary with your personal diary. Compatible diaries are:
Outlook 2007 & 2010 Outlook Web Access Gmail iPhone & iPad Windows Phone Yahoo Mail
NB: Diary integration may work with other alternative email diaries but we are not able to guarantee this. Also, when integrating your diaries to your phone you may need to undertake a few more steps that listed here in this guide. If you are unable to integrate your smartphone or email in general, please call the Support Team on 0845 659 2360. 1) Login to Office. Click on the ‘User Settings’ tab under the Tools menu.
Once you have clicked on the ‘User Settings’ icon a screen will appear.
P a g e | 12
You will see a tick box at the bottom of the screen ‘Enable Diary Integration’. Tick this, double checking that you have entered your email address in the relevant field and checking that all fields with a * next to them have also been filled in before clicking ‘Ok’.
Your Advisor Diary is now integrated with your personal diary.
How do I make a new appointment/block out time in 360 Advisor appear in my existing diary? Create an appointment/block out time in your diary as shown in Appointments and Blocking Time & Adding Daily Notes. With diary integration enabled you will receive an invitation email from
[email protected] to your personal (external) email account (the account you have integrated with) notifying you of the new appointment/blocked time in your diary. When you have received this you will have the options to ‘Accept’, ‘Maybe’ or ‘Decline’ the appointment.
Accepting the invitation will put the time into your external email calendar while declining will mean it will not enter your external calendar.
P a g e | 13
An example of an accepted invitation
NB: You cannot edit an appointment/blocked time/daily note through your external email calendar if it has been sent through from 360 Advisor. Amendments have to be done through the 360 Advisor diary. Note: For the purposes of this user guide the above screen shots comes from Microsoft Outlook 2010. Double clicking on the appointment within your diary you can access any notes or information about the appointment. If it is a client appointment and the client is already saved onto the system, the clients contact details will also be displayed in the appointment message.
How do I make an appointment/blocked time in my existing diary appear in my 360 Advisor diary? Within your existing external email calendar right click on the day and time that you would like to set up an appointment, as you would usually. Select ‘New Appointment’, or your external calendar equivalent. Enter, as asked for, the details of the appointment. Before clicking on ‘Save and Close’, or ‘Send’, you need to invite
[email protected] as an attendee. For the purpose of this guide the following instructions on how to do this are done through Microsoft Outlook 2010 but if you are unsure how to go about this with another email calendar (one that is compatible with calendar and diary integration) please ring our support desk on 0845 659 2360. In Microsoft Office 2010, add your appointment as usual. Below will show how to use both ‘Scheduling Assistant’ and ‘Invite Attendees’ to schedule your external appointment invitation to 360 Advisor.
P a g e | 14
Scheduling Assistant Click on ‘Scheduling Assistant’ in your appointment invitation.
In the screen that comes up you will need to add
[email protected] in the attendees bar.
P a g e | 15
Once you have added this, along with any other attendees you wish to invite, click back onto ‘Appointment’ to send your email invitations.
Click on ‘Send’. NB: It may take a few moments for the appointment to appear in your 360 Advisor diary.
NOTE: For the purpose of this user guide the above screenshots have been taken from Microsoft Office 2010. Invite Attendees Click on ‘Invite Attendees’ in your appointment invitation.
P a g e | 16
In the ‘To’ field, add
[email protected]
Click on ‘Send’. NB: It may take a few moments for the appointment to appear in your 360 Advisor diary.
NOTE: For the purpose of this user guide the above screenshots have been taken from Microsoft Office 2010. If you are already logged into 360 Advisor, click on ‘Refresh Diary’ to update your diary with the incoming appointments you have just created.
P a g e | 17
Your appointment will appear in your diary as shown above. You cannot edit this appointment in 360 Advisor as it was created through an external email calendar. To edit you will need to do so through the calendar you created the appointment in.
P a g e | 18
3.0 HotBox Your HotBox is a unique feature that offers you a focused window into your client bank. Sales Opportunities can be entered manually and automated system generated leads/opportunities will appear here. It acts as a time management system enabling advisors to concentrate on timely productive opportunities.
Drag and drop column headings to the grey bar to organise the screen as you wish. The HotBox above is grouped by opportunity status. To ungroup simply drag and drop the header back into the header bar. If you right click on the column headings a menu will appear with a choice of different actions.
P a g e | 19
‘Sort Ascending’ will sort all opportunities in your HotBox alphabetically from A-Z. ‘Sort Descending’ will sort all opportunities in your HotBox alphabetically from A-Z ‘Clear Sorting’ will clear any search/grouping parameters you have added to your HotBox. ‘Group By This Column’ will group all opportunities in your HotBox by the column you have right clicked on. ‘Hide Group By Box’ will hide the grey bar where you can drag column headers to group by. ‘Remove This Column’ will remove the column you have just right clicked on. ‘Column Chooser’ will bring up a customization box where you can drag and drop headings in which you wish/do not wish your HotBox to be filtered by.
3.0.1 Column Chooser Column chooser is a feature that allows you to tailor your HotBox in a way that suits you. Right click on your HotBox column headings and select ‘Column Chooser’ from the menu options. A Customization box will appear. From here you are able to drag and drop over to your HotBox headings. A new feature to 360 Advisor is to see Fullnames in the HotBox as opposed to just surnames. Drag and drop the option ‘Fullnames’ from the customization box to your HotBox headings and a fullnames column will appear.
3.1 Your HotBox Below will show you how to create and manage your HotBox. There are primarily 3 ways that an opportunity will arrive in your hotbox. These are; when making a diary appointment in Advisor, manually adding an opportunity and the system automatically creating opportunities for you
3.2 Adding a Manual Opportunity to Your HotBox To add a manual opportunity to your HotBox click on the ‘Add Opportunity’ icon under the Home tab.
A screen will open for you to add your client’s details.
P a g e | 20
The system will trawl your client base looking for existing client records. If an existing and matching record is pulled up select it and then click ‘Next’. If no matches are found click on ‘No Match Found – Create New Client’ and then click ‘Next’.
In this screen you can enter more specific details for your client. It is recommended that you enter a telephone number, address and email address. These details will allow you to contact the client through the system. If there is more than one client you would like to add to the sales opportunity click on the yellow ‘+’ sign and repeat the process. Click ‘Next’
In this part of the screen you will enter the lead details of the opportunity. The ‘Lead Source’ refers to how the opportunity came about. ‘Referring Advisor’ would be selected if another advisor had referred the opportunity to you. Click ‘Next’
P a g e | 21
Here you can enter any other notes you may need. These will be saved into the Notes section of the case record. Click ‘Finish’
Your new sales opportunity is now in your HotBox.
3.3 System Generated Opportunities 360 Lifecycle automatically generates opportunities based on the data you add into the system. Simply, the reviews are generated from the following criteria: -
Annual Reviews are created 11 months after the last completed bit of business on a case record. They are then generated every 12 months thereafter. Mortgage Reviews are created 3 months before the End Date of the mortgage. If no End Date is entered then the review is created 2 years after the completed date. Life Reviews are created 30 days before the end of the clawback period. This is calculated from the authorised date plus the length of the clawback period in months. Buildings and Contents Reviews are created 10 months after the start date of the policy. Pension Reviews/Income Protection/Investment Reviews are all created 11 months after the start date and then every 12 months thereafter.
Please refer the separate Automatic Review Generation document for more details on system generated opportunities and how you can set your own review criteria.
P a g e | 22
3.4 Managing Your HotBox You can right click on the opportunity in your HotBox, which will bring up a menu of options.
View Case’ will take you into the client’s case record.
‘Change Status’ will give you options that you can apply to the opportunity such as Signed up’, ‘In Progress’, ‘Action Complete’, ‘NPW’ (Not Proceeding With).
‘Record Action’ allows you to select the method of communication used. This is displayed in last action and automatically updates the notes section with any action recorded.
Postpone Sales Opportunity – will postpone the opportunity for the desired time as set by you. You will be able to see this in your Postponed HotBox.
‘Transfer To’ updates the Servicing Advisor and transfers ownership of the client.
‘Refer To’ refers the opportunity directly to another advisors hotbox but retains the original servicing advisor.
‘Attach Document’ will allow you to add a document to the sales opportunity. These will be saved into the Documents section of the sales opportunity in the case record.
‘Sale Opportunity Value’ is where you enter the cost of the lead for you along with the potential business value they may bring to you.
NB: Some change statuses will remove an opportunity from your HotBox. These are ‘Action Complete’, all the ‘NPW’ statuses and the ‘Signed Up’ status.
3.5 Postponed HotBox Your postponed HotBox works similar to your HotBox but is populated by postponed opportunities that are due to be reinstated in the next 30 days. This makes it much easier for you to see which opportunities are to be coming back into your HotBox.
P a g e | 23
You can arrange your postponed HotBox in the same way as you can your opportunity HotBox. Right click on a postponed opportunity. You still have the same options as you do when you right click on an opportunity in your HotBox. This makes it easier for you to reinstate the opportunity at an earlier period or to locate it to add notes or documents to.
Here you can reinstate the sales opportunity. This will move it back into your opportunity HotBox.
3.6 Your Referrals Click on ‘My Referrals’ located at the bottom of the screen. This will list the clients that you have passed into another advisers hotbox, providing full transparency. The drag and drop screens enable you to sort the column headings in the order that you want to prioritise. For example it may be useful to see the information displayed by client and filtered by status and last action allowing the referring Advisor to view and keep track of the referred lead. Example: A mortgage Advisor refers a Wealth lead to a qualified Financial Advisor. Referring the opportunity allows both the referring and the referred Advisor to earn commission whilst allowing the original Advisor to keep the client and offer a full financial service.
P a g e | 24
4.0 Managing Your Clients Case Record You can maintain your clients’ information and details through 360 Advisor keeping their portfolio constantly up to date. You can access a clients’ record from 360 Advisor through either the Client Search option, see below, or by right clicking against a sales opportunity in your hotbox and choosing ‘View Case’. Please note that you can also maintain your clients information and carry out the below functions when accessing the client record in 360 Office.
4.1.1 Client Search – 360 Advisor Client search is located alongside your HotBox, postponed HotBox and your referrals.
Simply click on the button and enter in the name or part of the address and click ‘Search’. The system will look for the search parameters selected and will identify the client or appointment. You may need to identify which address is relevant for popular names such as Smith or Jones where the search may show more than one result. Double clicking on one of the returned results will bring up the case record.
P a g e | 25
4.1.2 Case Search – 360 Office Case search is found in 360 Office along the left hand side toolbar.
You can search by surname, forename, DOB, or CaseID to bring up a specific case. If you wish to search for all cases belonging to a certain advisor, select the advisors name from the ‘Advisor’ drop down menu. You can also search by mortgage ref, solis no, life policy no or GI policy no. Clicking on the ‘Search’ button will open up the case search results screen where you can double click and open the relevant case record. Clicking on the ‘Clear’ button will clear all information contained in any of the search fields.
P a g e | 26
4.2 Adding Documents To add documents to the top level of the case record you will need to have the case in question open. The top-level part of the case record is at the top of the case tree and will say Case ID – (followed by ID). Documents added here are usually in regards to a client’s proof of address or income, etc.
To add a document click on the ‘Documents’ tab and select the ‘Add Document’ button. Browse for the document file from your documents. Click on ‘Open’ once you have selected the correct file. The system will now upload this to the case record. Click on the ‘Save’ icon to save your changes
Removing/Renaming/Saving Documents. You have the ability to remove, rename and save documents easily and quickly. Right click on the document in question. A menu will appear where you can ‘Save As’, ‘Delete’, or ‘Rename’. Remember to save your changes before coming out of the case record.
P a g e | 27
4.3 Creating Your Clients Portfolio On accessing a case record you can manually enter the client’s other existing arrangements/full portfolio outside of any sale(s) & recommendation(s) which would have been captured. Entering any further Assets, Protection or Financial Commitments within the Portfolio section will then appear on the client Portfolio Report and you can also set review dates against these Portfolio items to then appear in your HotBox at the required time.
This is an example of how your Portfolio screen will look after a sale event and mortgage policy has been created. You can see that the system is already compiling the data and allowing you to have a holistic view of your client. The Portfolio screen will automatically update throughout when new Portfolio items are manually added. Please refer below on how to manually add Assets, Protection & Commitments. This screen will automatically update throughout the whole case progression, keeping it up to date and easily viewable.
P a g e | 28
4.4 Assets This is where you will compile a detailed portfolio of your client’s assets, from properties to a family heirloom. They do not have to be assets sold to them by you; this is about getting the best picture you can to understand your client, making sure that they are getting information and products that are as tailored as possible to their needs.
4.4.1 Adding a property as an asset
To add a property as an asset you need to click on ‘Asset’ underneath ‘Portfolio’ and click on ‘Add Property’ underneath the Properties tab.
Begin by selecting the ‘Owner’ from the drop down menu. The clients you have added at the top level of the Case Record populate this field. Select ‘Property Type’ from the drop down menu. Select ‘Property Usage’ from the drop menu. Input the ‘Date Acquired’. This is referring to the date that the owner established ownership of the property in question. The ‘Current Value’ is the current value of the property. You are able to add the date that this valuation was passed in the ‘Valuation Date’ field below. To add the address of the property you need to click on the ‘Address’ button, input the address, clicking ok once complete. From the drop down menus select the ‘Roof Construction’ and the ‘Wall Construction’. Finally finish by selecting the amount of bedrooms in the property and the year that it was built remembering to click on the ‘Save’ icon
NB: If you have a client with a mortgage, you will need to fill in this part of the Portfolio to be able to add a mortgage. Please refer to adding a mortgage for a guide on how to add a mortgage.
P a g e | 29
4.4.2 Adding savings as an asset
To add a savings click on the ‘Add Savings’ button underneath the ‘Savings’ tab.
Begin by selecting the ‘Owner’ of the savings. The clients you have added at the top level of the Case Record populate this field. Select the ‘Savings Type’, eg shares, from the drop down menu. Choose the savings ‘Provider’. From the drop down menu select the savings ‘Objective’. Input the ‘Saving Balance’ (how much the saving is worth, etc) along with the ‘Balance Date’. This date is referring to the date that the balance was accounted for. Enter a ‘Maturity Date’ (if there is one) along with the ‘Interest Rate’ of the savings. Add the ‘Account Number’ for the savings. If the savings are added to on a regular basis you can tick the ‘Regular Savings’ box. Input the frequency of payment along with the amount that is added at each time. If, for example, you had not sold this product to your client but between you had agreed that you would review it in the future, you are able to tick the box next to ‘Agreed Review Date’, entering in the date in the field next to it. This product will then enter your HotBox on the date specified as a new opportunity for review.
P a g e | 30
4.4.3 Adding an investment as an asset
To add an investment click on the ‘Add Investment’ button underneath the ‘Investments’ tab.
Begin by selecting the ‘Owner’ of the investment. The clients you have added at the top level of the case record populate this field. Select the ‘Investment Type’ from the drop down menu. Choose the investments ‘Provider’ from the drop down menu. Select the ‘Objective’ of the investment. Input the ‘Commencement Date’ of the investment. This is the date that the investment began. Enter the ‘Maturity Date’ (if there is one) and the policy number for the Investment in question. You will need to enter in the ‘Initial Investment’ (how much your client first invested) along with the ‘Interest Rate’ of the investment. If your client pays regularly into their investment you are able to check the ‘Regular Investment’ box. o Select the ‘Frequency’ of the payment o Select the ‘Amount’ that is paid in at each frequent payment. Enter the ‘Valuation’ of the investment (this is the present day investment valuation) along with the date that this valuation was made. If you have agreed with your client that you are both going to review this investment, you can tick the box ‘Review Agreed’, entering in a ‘Review Date’. This is the date you wish for the review to enter your HotBox. Any further details can be added into the ‘Details’ box.
P a g e | 31
4.4.4 Adding a company pension
To add a company pension click on the ‘Add Company Pension’ button underneath the ‘Company Pensions’ tab.
Begin by selecting the owner of the pension. The clients you have added at the top level of the case record populate this field. Select the ‘Scheme Type’ from the drop down menu. Type in the ‘Scheme Name’ of the pension policy along with the ‘Plan/Scheme Number’. Type in the ‘Date Joined’. This is referring the date that the client took out the company pension. Select the clients ‘Retirement Age’ Tick the boxes if either ‘Income Drawdown is Allowed’ or ‘Phased Retirement is Allowed’ Enter the ‘Lump Sum Percentage’ Tick the box if the pension is ‘Preserved’ In the box provided enter in the ‘Valuation Date’ along with the ‘Current Value’ of the pension. This is how much the client’s pension is currently worth. From the drop down menu select the ‘Contribution Frequency’. Enter the ‘Fixed Contribution’ (the premium the client pays into their pension each time) If a review on this policy has been agreed between you and your client you can tick the ‘Review Agreed’ box, entering in a date you wish for this to drop into your HotBox as a review.
P a g e | 32
4.4.5 Adding a personal pension
To add a personal pension click on the ‘Add Personal Pension’ underneath the ‘Personal Pensions’ tab.
Begin by selecting the ‘Owner’ of the pension from the drop down menu Select the ‘Pension Type’ from the drop down menu. Select the ‘Provider’ from the drop down menu. Select the ‘Contribution Frequency’ from the options available. Type in the ‘Plan/Scheme Number’. Enter the ‘Valuation Date’. This is the date in which the pension was last valued. Enter the ‘Commencement Date’. This is the date the client started their pension scheme. The ‘Current Value’ is the total amount that the client has in their pension fund. Select the ‘Retirement Age’. Enter the ‘Fixed Contribution’ amount (the amount the client pays regularly into their pension, along with their ‘Employers Contribution’ (if any). Select the ‘Lump Sum Percentage’. Tick the relevant boxes if the pension meets any of the following: o Income Drawdown Allowed o Phased Retirement Allowed o Preserved If a review has been agreed between you and your client for this product tick the ‘Review Agreed’ box, entering in a ‘Review Date’ (the date you wish for this to pop into your HotBox as a review.
P a g e | 33
4.4.6 Adding any other assets
To add any further assets your client may have, eg Antiques, Works of Art, etc click the ‘Add Asset’ button underneath the ‘Other Assets’ tab. Select the ‘Owner’ from the drop down menu. The clients you have saved at the top level of the case record populate these options. Select the ‘Asset Type’ from the drop down menu. Type in a ‘Description’ (if needed) for the asset. Select the ‘Purchase Price’ of the asset (how much the client first paid for the asset) Enter in the ‘Date Asset Required’ along with the ‘Current Value’ and ‘Valuation Date’
4.5 Protection This is where you will collect information from your clients of any protection policies they may have, whether these have been taken out with you or not. Protection here ranges from protection of their health to protection to the salary, house, belongings, etc.
4.5.1 Adding a life policy
To add a life policy for your client (one that has not necessarily been taken out by you – if you are looking at adding a life policy which you yourself have sold a client please refer to Adding a Life Policy) click on the ‘Add Policy’ button underneath the ‘Life Policies’ tab.
P a g e | 34
Select the ‘Owner’ of the life policy from the drop down menu. (Whose name the policy has been taken out in) The clients you have saved at the top level of the case record populate this menu. Select the ‘Provider’ from the drop down menu. Choose from the drop down menus the ‘Policy Type’. Select the ‘Life Assured’ (who the policy covers). Enter the ‘Policy Number’. Select the ‘Sum Assured’ (the total amount of cover that will provided) along with the ‘Premium’ that is to be paid accordingly with the payment frequency. Select the ‘Premium Frequency’. Enter the ‘Start Date’. This is the date the life policy went live. Select the ‘Term’ of the policy. Tick (if applicable), whether the policy is ‘Guaranteed’ or ‘Reviewable’. If ‘Waiver of Premium’ is included please tick this box. Select the ‘Purpose’ of the life insurance from the drop down menu. Tick the box if the policy is written ‘In Trust’. If a review date has been agreed tick the ‘Review Agreed’ box and enter in the date you wish for this to drop into your HotBox as a review in the ‘Review Date’
4.5.2 Adding an income protection policy
To add an income protection policy (one which has not been sold by you) click on the ‘Add Policy’ button underneath the ‘Income Protection’ tab.
Select the ‘Owner’ from the drop down menu. (Whose name the policy has been taken out in) The clients you have saved at the top level of the case record populate this menu. Select from the drop down menu which client(s) this policy ‘Assures’. It can be one client or more than one, just click the relevant check boxes From the drop down menu select the ‘Provider’.
P a g e | 35
Enter the ‘Policy Number’ (if known at the time) along with the ‘Start Date’ of the protection. Select the ‘Term’ of the policy. From the drop down menu select the ‘Policy Type’. Enter the ‘Benefit’ of the income protection policy (how much the provider is prepared to pay the client a month). Enter the ‘Premium’ of the policy, selecting the ‘Premium Frequency’ from the drop down menu. If ‘Waiver of Premium’ is included please tick this box. From the drop down menu select the ‘Deferred Period’ of the policy. If a review has been agreed between you and your client tick the ‘Review Agreed’ check box, entering in the date you wish for this review to drop into your HotBox in the ‘Review Date’ field.
4.5.3 Adding a buildings and contents policy
To add a buildings and contents policy (one which has not been sold by you) click on the ‘Add Policy’ button underneath the ‘Building and Contents’ tab.
Select the ‘Owner’ from the drop down menu. (Whose name the policy has been taken out in) The clients you have saved at the top level of the case record populate this menu. Select the provider of the policy from the drop down menu. From the drop down menu select the ‘Type’ of insurance given, eg, contents only. Select from the drop down menu the property covered (if applicable). If the property here is not available you will need to refer back to adding a property. Remember to save your changes.
P a g e | 36
Select the ‘No Claims Discount’ from the drop down menu. Enter the ‘Premium’ of the policy. You are able to enter in the boxes any ‘Specified Items’ to be covered and also details of the clients ‘Claim History’. Enter the amount of ‘Building Cover’ and/or ‘Contents Cover’, ticking whether ‘Accidental Damage’ is included. Tick the box if ‘Personal Possessions’ are included in the policy terms. Enter the ‘Renewal Date’ of the policy in the field provided. If a review has been agreed between you and your client you can tick the ‘Review Agreed’ box, entering the ‘Review Date’ in the field provided.
4.6 Financial Commitments This is where you will collect information from your clients of any financial commitments they are tied to. The purpose here is to establish a fuller picture of your clients’ needs and demands by taking into account any commitments they have that have not been sold by you. Financial Commitments here range from your client having a mortgage, a credit card, a personal loan, even a store card in credit.
4.6.1 Adding a mortgage
To add a mortgage (one which has not been sold by you) click on the ‘Add Mortgage’ button underneath the ‘Mortgages’ tab.
Select the ‘Owner’ of the policy from the drop down menu. The owner here refers to whose name(s) is on the policy terms. The clients you have saved at the top level of the case record populate this menu.
P a g e | 37
Choose from the options available in the drop down menu the ‘Lender’ of the mortgage. Select the ‘Scheme’ of the mortgage from the drop down menu. Enter the ‘Reference’ of the mortgage (if known). Enter the ‘Start Date’. This is the date that it was agreed the mortgage would begin. Input the ‘End Date’ of the mortgage. This is the date that the mortgage will expire. Enter the ‘Term’ of the mortgage in years. If a review has been agreed by you and your client you can tick the ‘Review Agreed’ box and enter the date that you wish for this review to enter your HotBox in the ‘Review Date’ field You are able to enter any details about the mortgage in the ‘Penalties’ and ‘Details’ boxes. Input the ‘Repayment Amount’. This is how much in total the client will need to repay. Enter the ‘Interest Only Amount’ of the mortgage along with the ‘Interest Rate’. Select the ‘Property’ that the mortgage relates to from the drop down menu. If the property in question does not appear here you will need to add it as a property in assets. Please refer to adding a property Select the ‘Repayment Method’ from the drop down menu. Enter the ‘MMP’ (Monthly Mortgage Payment). If the mortgage is part of an ‘ERP’ (Emergency Repair Program), tick the ‘ERP Payable’ box, entering in the ‘ERP End Date’.
4.6.2 Adding any other financial commitments
To add any other financial commitments your client may have click on the ‘Add Commitment’ button underneath the ‘Financial Commitments’ tab.
P a g e | 38
Select the ‘Owner’ from the drop down menu. The owner here refers to whose name(s) is on the policy terms. The clients you have saved at the top level of the case record populate this menu. Select the ‘Provider’ from the drop down menu. Enter the ‘Reference’ number of the commitment along with the ‘Start Date’ of the commitment in question. Type the ‘Term’ of the commitment; how long the client is to be held to this commitment. Select the ‘Type’ of the commitment from the drop down menu. Input the amount that the client still has outstanding to pay on the commitment. There is a box where you can enter any further necessary ‘Details’ of the commitment. Select the ‘Interest Rate’ and tick the check box if the commitment is ‘Secured’ If the client has a property tied into their loan you can select this from the ‘Property’ drop down menu.
P a g e | 39
Portfolio Report The Portfolio Report is located under the home tab and provides a complete summary of everything entered in the Portfolio section of a case record. As you’re adding and updating the portfolio file, the portfolio report will also update keeping it up to date. It provides a form of documentation to give to clients or to keep for your own records. When you are inside any case record the Portfolio Report Button shown below will be enabled.
Clicking this button will show you the Portfolio Report Headers Screen. You can edit these headers and their corresponding paragraphs to personalise the report to suit your client.
The remainder of the header pages work in exactly the same way except they also allow you to enter a title for the section.
P a g e | 40
Each section can be customised in this way. Although you can use each section as you see fit, one use for the conclusion may be for you to remind your client of all your products and services. Once you are happy with your Portfolio Report headers select ‘Ok’. This will open your portfolio report.
P a g e | 41
The report contains a headed title page with your company logo, your name and the clients name and address. The report is automatically time date and stamped. The below section of the portfolio gives a breakdown of the clients assets and liabilities in a graph.
The assets and liabilities are then further broken down to include policy specific information. You are able to customize your report by adding a watermark (by clicking on the ‘Watermark’ icon on the tools bar), adjust the background colour as well as the scale of the report. The Portfolio Report can be printed, saved or exported in various file formats including PDF, HTML and CSV. Once printed/saved or exported, when you come to close the report the system will prompt you as to whether you would like to automatically save a copy of the report into the case document library where it will be saved as a PDF document –
P a g e | 42
5.0 Client Communication There are three methods by which you are able to communicate with your client through the system: sending a letter, sending an SMS and sending an email. All communication is added to the documents/contact history of the case record.
5.1 Sending a Letter To send a letter to your client, open their case record and click on the ‘Send Letter’ icon under the home tab.
A screen will appear for you to select the letter you wish to send from the ‘Letter Template’ drop down menu. To create your own letter template please refer to Creating A Letter Template. Simply select the letter to send. If the letter corresponds to a product, eg a mortgage, you will use the ‘Mortgage’ drop down menu to select the correct sale. (NB: Not all letters will require you to do this), Click ‘OK’. A screen will appear with your letter. Here you are able to make amendments before clicking on the ‘Print’ button to print out your letter.
Remember to click ‘Save’ or ‘Save & Close’ for the letter to be saved into the ‘Documents’ of the case record.
P a g e | 43
5.2 Sending an SMS To send an SMS to your client click on the ‘Send SMS’ icon under the home tab. You will need to have the case record open.
A screen will appear for you to select the correct clients phone number along with the ‘SMS Message’ you wish to send. The ‘SMS Message’ is populated from the SMS templates. You can edit the message when it falls into the box or write your own message. NB: There is a character limit of 160 characters alloweed per text message.
5.3 Sending an Email To send an email to your client click on the ‘Send Email’ icon under the home tab. You will need to have the case record open.
The system will open a blank email through your default email client e.g. Outlook where you are able to add to the message body. Click on ‘Send’ once you have composed the email. This will be sent to your client and a copy of the email will be audited in the documents section of the case record (provided Email integration is enabled).
P a g e | 44
5.3.1 Email Integration Email integration allows you to send emails from the system to your clients and that email to then be saved as a document to your clients case record. To enable Email Integration you will need to log into 360 Office, click on the Tools menu and then on User Settings.
The User Settings screen will appear. Make sure that all the fields with an ‘*’ are populated and tick the ‘Enable Email Integration’ tick box. Click on the ‘Ok’ button.
When you send an email (see Sending an Email for instructions on how to do this) a copy of this email is saved into the documents section as an audit trail. The Email Tracking part of the system means that when your client replies to the email sent a copy of that email will also save into the documents section of the case record providing further audit.
P a g e | 45
When you click on ‘Send Email’ the system will open a new email through your default email client, eg MS Outlook.
You will notice that the email address ‘
[email protected]’ has automatically populated the ‘CC’ field. For a copy of your clients reply to be added to the case record this address needs to be kept here and the client will need to ‘Reply To All’ when replying to your email. In the ‘Subject’ field of the email you will see ‘TRACKING ID’ followed by a long ID number. Again, this tracking ID needs to remain in the subject field for the system to be able to attach it back to the relevant case. Once your message is composed simply click on the ‘Send’ button. A link will be created in the system between you and the case record and your client. When your client replies to the email they will need to click on the ‘Reply All’ button. This will ‘CC’
[email protected] which will then allow for the reply to be saved back into the case record.
What happens if the client doesn’t click on ‘Reply all’? As long as your client sends the email to your correct email address you can then forward it on to
[email protected] to attach it to the case record. (Provided that the TRACKING ID is still in the subject field).
P a g e | 46
What happens if the client doesn’t reply with the TRACKING ID number or the correct message subject? If the client changes the email subject or removes the TRACKING ID the email will then be put into ‘Untracked Emails’.
‘Untracked Emails’ is a feature which will show you any emails which the system is unable to save to a case record. Once an email is in here you will then be able to match it up to the relevant case.
P a g e | 47
6.0 Manually Adding a Case The below will show you how to manually add a client/case record for any new business which you have carried out for a client.
To add a case manually you need to be logged into 360 Office. Once logged in you will need to navigate to the Home tab, clicking on the ‘Add New Case’ icon.
This will bring up a screen where you will add routine client information:
Populate the ‘Mailing Name’ and ‘Salutation’ fields by clicking on the ‘…’ buttons
Enter in as much information that is asked as you can. It is highly recommended that a ‘Servicing Advisor’ also be selected. To enter the address click on the ‘Change Address’ button at the top right hand section of the case screen. The following box will appear:
P a g e | 48
Here all you need to add is the house or flat number in ‘Address Line 1’ along with the postcode. Click on ‘Find Address’ and the system will search and populate the rest of the address fields. Click ‘Ok’ and the address will populate the case record. Once you are happy that you have entered in all information, click on the save icon underneath the Home tab:
6.0.1 Adding more than one client: To add another client to the same case simply click on the ‘Add’ button underneath the email field. This will bring up a new blank record where you repeat the same steps you went through with the first client. NB: Remember to update the ‘Salutation’ and ‘Mailing Name’ by clicking on the ‘…’ buttons. This will ensure that the case record is kept up to date but will also update the Portfolio Report (discussed further here) to reflect the additional client. To remove a client click on the ‘Remove’ button to the right of the ‘Add’ button remembering to click save. NB: You cannot remove a client if there is only one left on the case record. Remember to click the ‘Save’ icon next to the ‘Add New Case’ icon to save your information and changes.
P a g e | 49
6.1 Adding a Sale Event Once you have completed the above you will be able to add the sale event folder. It is here that you will save details of the advisor and administrator of the case along with details of the event type.
To add the sale folder, click on the ‘Sale’ icon. This will take you to the event screen.
Case Ownership Details refer to the Advisor responsible for the case. Case Owner is the administrator who handles the case. This may be the same person as the Advisor in some cases. Lead Details contains Event Type (eg, Purchase, re-mortgage), Lead Type (eg, Purchaser, Vendor, Applicant) and Lead Source (eg, Website, Yellow pages). Introducer Details can be selected if the sale has been introduced to the advisor. RAG Status (Red Amber Green) indicates the urgency of the case. Priority is High, Medium or Low.
P a g e | 50
Complexity is Simple or Complex. Check List is a tick list of what has been gathered for the sale so far. Fee Waived – tick this box if you have an agreement for this sale to be exempt from fees. Using the drop down menu select the Manager who has authorized the exemption and then complete the text box with a reason for the exception. Estimated Date of Completion. Whilst this is simple to know for a re-mortgage, if at the time of creating the case you do not know an estimated date of completion it will need to be updated or filled in when known.
NB: Many fields trigger reports or reviews. EG, when a date of completion is entered this will appear on the Completed Business Report.
6.1.1 Sale Details and History When you click on the sale folder there are a number of tabs you can use; Event Details (which has been detailed on the previous pages), Notes, Reviews, Documents and Commission & Payments. Notes are used as an audit trail/sequence of events for the sale within the case. They can be added at any time during the sale progression.
Select the ‘Notes’ tab and click ‘Add Note’ Type the details of the note and check the relevant box(es) to which the note applies to, clicking the ‘OK’ button when you have done so
You can filter notes using the drop down menu. Notes are also colour coded; Red=Mortgage, Green=Life, Purple=GI, Black=Pension, Investment and IP.
P a g e | 51
Documents are uploaded and saved to 360 Lifecycle System from your document folder. You can use the facility to scan documents to your computer and eliminate paper copies.
Select the ‘Documents’ tab and select ‘Add Document’
Locate the document from your system Once you have selected the document select the ‘Document Type’ from the drop down menu, typing in an alternative name should you wish. Tick a box to attach the document to the relevant sale event Click ‘OK’. Your document has now been uploaded You can also upload documents in bulk. Simply select the documents you wish to upload and select ok as before.
NB: Some larger documents can take longer to upload than others. Before exiting a case make sure the document is fully uploaded by checking the status of the upload in the bottom right hand corner of the screen. (The upload status is a blue bar, when the document has fully uploaded this bar will disappear) For more information on adding documents please refer to the Adding Documents Section. Commission and Payments can be added manually as shown below. They are updated automatically by the loading process used by accounts when payments are received and checked off against statements.
Select the ‘Commission and Payments’ tab and click the ‘Add’ button Select the ‘Commission Type’ from the drop down menu and the ‘Amount Due’ Tick the appropriate event the commission belongs to (if you attach a commission to the sale event, eg client review, this commission will not be shown in product specific commission reports, eg a mortgage commission report. To achieve this you need to tick the box next to the mortgage product to pull over into the mortgage commission report)
P a g e | 52
P a g e | 53
6.2 Adding a Mortgage Policy Click on the ‘Mortgage’ icon. A product will fall in the case tree under the sale event folder and a mortgage detail screen will open for you to add the details. You need to have added a sale event to be able to add a mortgage. Please refer to adding a sale for a guide on how to do this.
The ‘Advisor’ and ‘Referrer’ fields are automatically populated from the names selected in the sale event screen. You cannot edit these names from a mortgage screen, you will need to refer back to the sale event screen and edit them from here. If there is a referrer for the sale you can edit the commission expectations by changing the percentages next to their name in the mortgage screen.
Select ‘Lender’ by clicking on the ‘…’ button and selecting the appropriate option from the drop down menus.
P a g e | 54
Ensure ‘Network’ is correctly selected. This will assist accounts without any delay should there be any need to chase up payments. Select the ‘Product’ from the drop down menu. Select the ‘Packager’ of the mortgage from the drop down menu. Select the ‘Owner’ of the mortgage. This drop down menu is populated from the clients entered and saved in the top level part of the case record. The owner itself refers to the name(s) on the mortgage agreement Select the ‘Scheme’ from the drop down menu. Enter the interest ‘Rate’ as a percentage Tick ‘AIP’ if the mortgage is agreed in principle and check the correct box for the type of mortgage it is. ‘Deal & Penalties’ can contain information regarding redemption penalties, how much and when. ‘End Date’ and ‘Penalties End’ dates need to be entered when known as these trigger the re-mortgage campaign report and activate Hot Box entries. Select the ‘RAG Status’ from the drop menu. This indicates the urgency of the case. Choose the ‘Status’ of the application, eg ‘In Progress’ from the drop down menu. It is important that you keep this status updated as the case progresses so it appears on the relevant reports. Acknowledged/Offered/Exchanged/Completed. Enter the correct dates for the corresponding options. Once a Mortgage Sale has a completed date it will no longer appear in the Admin Pipeline. NB: The completed date on a mortgage will trigger the annual review of the case. You can enter the details of the solicitor (if there is one) using the drop down menu to select the appropriate Solicitor company and filling in the ‘Selling Agent’ and their ‘Phone’ and ‘Email’ Complete the mortgage ‘Reference Number’ and the ‘URN’ (Unique Reference Number) if relevant. Select the method of ‘Repayment’ along with the ‘Repayment Amount’ (The whole amount the client has to pay back) as well as the ‘Mortgage and Survey Type’ eg, ‘Full Structural, Basic, Home buyers. The ‘Balance’ is the amount left outstanding on the mortgage with the ‘Date’ field being the date that this figure was taken Input the property ‘Price’ and the ‘LTV’ (Loan to Value ratio). Add in the ‘Terms, Lender Fee and MMP (Monthly Mortgage Payment). If the fee is to be added to the loan tick the ‘Added to Loan’ box.
To add the property the clients are purchasing (same procedure for re-mortgage) click on the ‘Change Address’ button at the top right of the screen and enter the address in the same way as their correspondence address. Once the case has been completed, click on ‘Update Correspondence Address’ button and this will automatically correct the system. On completion of the move, simply click on ‘Update Correspondence Address’ and this will notify the system where the client can be contacted. If it is a buy to let case then you will not need to update the correspondence address.
P a g e | 55
6.3 Adding a Buildings and Contents Policy To add a buildings and contents policy click on the ‘B&C’ icon under the home bar. To be able to add a buildings and contents policy you first will have needed to add the case record and the sale event folder. Please see above for a guide on how to do this.
The ‘GI Sale’ is the advisor selling the policy. This field is pre-populated by the advisor selected in the sale event folder. It is here that you can edit the advisor selected. Select the ‘Provider’ by clicking on the ‘…’ button. Select the ‘Owner’ of the policy (the client whose name is written on the terms of the buildings and contents policy) from the drop down menu Enter the ‘Policy No’ (if known) Select the ‘Policy Type’ from the drop down menu. ‘Buildings’ and ‘Contents’ refers to the amount of cover given for each. In some cases only one of these need be filling in
P a g e | 56
Tick the boxes next to these fields if ‘Accidental Cover is Included’ Enter the ‘Premium’ the client is to pay each time, ticking the box if ‘FLP is Included’ in this. Select the ‘Source’ of the policy from the drop down menu. Eg, is the property a main residence, or a buy to let, etc The ‘Received Date’ is the date that … and the ‘Submitted Date’ is the date that the policy was submitted to the provider. ‘RAG Status’ indicates the urgency of the case with green being not urgent and red being extremely urgent Select the ‘Status’ of the policy application from the drop down menu. It is important that you keep this as up to date as possible so that the policy appears on the correct reports and in the correct categories in Performance Explorer. The ‘Accepted’ date is the date the provider accepted the policy. The ‘Start’ date is the date the policy goes live with the ‘End Date’ being the date the policy is due to expire. If the policy is a buy to let you may need to add a new address to reflect this. You can do so by clicking on the ‘Add Address’ button If ‘Personal Possessions Cover’ is included tick the check box and in the details box list any items the client has asked for in particular to be covered. Detail any information regarding claims in the ‘Claims History’ box Select the construction of the house using the drop down menus. Remember to save the policy as you go to avoid any loss of details.
P a g e | 57
6.4 Adding a Life Policy To add a life policy, click on the Life Policy icon under the home tab, you will have first needed to add the case record and the sale event folder. Please see above for a guide on how to do this. Once you have clicked on the icon a screen will appear for you to add the relevant details.
The ‘Advisor’ and ‘Referrer’ fields are pre populated from the details entered and selected in the sale event part of the case record. It is here that you will need to change or amend any details. Select the ‘Provider’ of the policy by clicking on the ‘…’ button. Select the ‘Owner’ of the policy (the name of the client taking out the policy Select the ‘Policy Type’ from the drop down menu. Select the ‘Purpose’ of the life policy from the drop down menu.
P a g e | 58
If applicable enter the ‘Solis Number’. Select the ‘Premium’ the client is to pay choosing the ‘Frequency’ from the drop down menu. Enter the ‘Sum Assured’. This is the whole amount the client is covered by Depending on the type of the policy you may need to enter a term. You can do this by selecting the ‘Term’ from the drop down menu Select the ‘RAG Status’. By default the system puts this as green but you may need to change it. Select the ‘Status’ of the application. It is important that you keep this as up to date as possible so it appears on the correct reports and in the correct columns in performance explorer. The ‘Received Date’ is the date that the client first came to you. The ‘Submitted’ date is the date you have submitted the policy application to the provider. Select the ‘OnLife’ from the drop down menu. This refers to the clients who are covered by this policy If the policy has been rated you will need to enter the extra premium that the policy has been rated by within ‘L1/L2 Rated’. This can be done for either client. Please ensure that the premium and relevant commissions are updated. The ‘Accepted’ date is the date the policy is accepted by the provider and the ‘Expires’ date is when the acceptance terms for the policy may expire The ‘Start Date’ is the date the policy is due to go live Select from the ‘Authorised’ drop down menu… Enter the ‘Auth Date’ along with the ‘Clawback Period’ Tick the box for replacing previous policy if it is relevant with a brief explanation along with the policy number of the plan which needs to be cancelled. Tick the box if the policy is written ‘In Trust’, filling in the ‘Trustee Details’ If this is a first policy then doctor’s details need to be entered.
P a g e | 59
6.5 Adding an Income Protection Policy To add an income protection policy click on the ‘Income Protection’ icon under the home tab. This will bring up a screen for you to enter the details of the policy.
The ‘Advisor’ and ‘Referrer’ fields are pre populated from the details selected and saved in the sale event part of the case record. Select the ‘Provider’ from the drop down menu. Select the ‘Owner’ of the policy from the drop down menu. This is pre populated from the clients you have entered and saved at the top level part of the case record. The owner here is referring to the name written on the policy terms. Select the ‘Life Assured’. This refers to the clients who are to be protected by this policy Enter the ‘Received Date’ (the date the clients came to you to take out the policy) The ‘Submitted Date’ is the date you sent the application to the provider ‘RAG Status’ indicates the urgency of the case, green being that the case is progressing in good time, red being that the case needs to be pushed through quickly Select the ‘Status’ of the application. It is important that you keep updating this as the policy progresses so that it appears in the correct reports and in the correct fields in performance explorer, etc Select the policy ‘Type’ from the drop down menu.
P a g e | 60
Enter the ‘Policy Number’ along with the ‘Term’ of the policy in years Select the ‘Source’ of the policy from the drop down menu. Select the ‘Frequency’ of the premium from the drop down menu If there is a deferred period you can specify this using the options in the drop down menu Enter the ‘Premium’ the client is to pay to keep this policy If ‘Waiver of Premium’ is included please tick this box For any ‘Benefits’ you can add this as an amount in the benefit field The ‘Start Date’ is the date the policy goes live and the ‘End Date’ is the date that the policy will expire. It is important that these dates are entered as they trigger the reviews for the case.
6.6 Adding a Pension To add a pension policy click on the Pension icon under the home tab. This will bring up a screen for you to enter the policy details.
The ‘Advisor’ and ‘Referrer’ fields are pre populated from the names you have selected in the sale event folder of the case record. It is here that you are able to make any amendments to the names entered. Select the ‘Provider’ of the policy by clicking on the ‘…’ button. Select the ‘Owner’ (the client whose name the policy is in) from the drop down menu. This field is populated by the clients you have entered in the top level part of the case record. Enter the ‘Policy Number’ in the field provided. Select the ‘Client(s)’ who the pension is to cover
P a g e | 61
The ‘Received Date’ is the date that the clients came to you to start their pension application The ‘Submitted’ date is the date you submitted the policy to the provider ‘RAG Status’ indicates the urgency of the case, green being that the case is progressing in good time, red being that the case needs to be pushed through quickly Select the ‘Status’ of the policy. It is important that you keep this status updated as the case progresses so that it appears on the relevant reports and in the correct columns in performance explorer Select the ‘Type’ of the pension from the drop down menu. Select the ‘Source’ of the pension (why has the client(s) come to you wishing for a pension? Is it a new pension, a pension transfer, etc) Input the ‘Initial Investment’ of the pension The ‘Start Date’ is the date the pension goes live. It is important that this date is entered as it triggers reviews of the policy in the future to fall into your HotBox If the pension is to be ‘Regularly Invested’ into tick the box, selecting the ‘Frequency’ from the drop down menu along with the ‘Amount’ that is paid per time If you need to enter any valuation details you can do so by entering the ‘Valuation’ (how much is held in the pension) along with the ‘Valuation Date’ (the date that this figure was taken) Enter the ‘Retirement Age’ (the age that the client wishes to retire) Remember to save your progress.
P a g e | 62
6.7 Adding an Investment Policy To add an investment policy click on the investment icon under the home tab. This will bring up a screen for you to enter the policy details.
The ‘Advisor’ and ‘Referrer’ fields are pre populated from the names you have selected in the sale event folder of the case record. It is here that you are able to make any amendments to the names entered. Select the ‘Insurer’ by clicking on the ‘…’ button. Select the ‘Owner’ of the policy from the drop down menu. This is the client(s) whose name is written on the policy terms. Tick the box if the policy is the ‘Default Fund’ Enter the ‘Policy Number’ along with the ‘Term’ of the policy The ‘Received’ date is the date the clients have come to you wishing to take out this policy The ‘Submitted’ date is the date you have sent the policy application to the provider/insurer ‘RAG Status’ indicates the urgency of the case, green being that the case is progressing in good time, red being that the case needs to be pushed through quickly
P a g e | 63
Select the ‘Status’ of the application from the drop down menu. It is important that you keep this field updated as the case progresses so that it appears in the correct reports and the correct performance explorer fields. Select the ‘Objective’ of the investment from the drop down menu. Select the ‘Type’ of investment. Select the ‘Source’ of the investment. Why has the client come to you wishing for an investment? Is it a new investment? Is it a change of agency? Enter the amount of the ‘Initial Investment’ along with the ‘Interest Rate’ Enter the ‘Start Date’ (the date the policy goes live) Enter the ‘Maturity Date’ If the investment is regularly added to tick the ‘Regular Investment’ box, along with the ‘Frequency’ of the payments and the payment ‘Amount’ that is added each time If the investment has been valued you can enter the details in the ‘Valuation Details’ section of the policy record
P a g e | 64
7.0 Deleting There are two delete buttons in 360 Office. One is for deleting specific case policies and one is for deleting entire case records. We strongly recommend that you’re careful using the following tools. Accidental deletion is both time consuming and costly which is why being able to delete is permission based.
7.1 Deleting Sale Events/Products To delete a sale event you need to have open the case record. Make sure that you have selected the correct policy to delete. Click on the ‘Delete’ button located under the Home tab.
When you have selected the policy a dotted square will appear around it. Click the ‘Delete’ button indicated above.
A prompt will appear asking you to confirm your deletion.
Once you have clicked yes remember to save the deletion. If you are wishing to delete a sale event folder you do so using the same steps as above but be aware that deleting a sale folder will delete all the policies attached to that sale event.
P a g e | 65
7.2 Deleting a Case Record To delete a whole case record you need to log into 360 Office and select ‘Case Delete Tool’ under the Tools menu. Please note you may not have the ‘Case Delete Tool’ option as this is permission based. If not please speak to your system administrator. Selecting ‘Case Delete Tool’ will bring up the Case Delete Tool Box.
Simply enter the caseID of the record you wish to delete into the field and select ‘check caseID’. Once you are happy that the correct case is selected for deletion select ‘Delete’. You will then be able to exit the Case Delete Tool.
P a g e | 66
8.0 Case Merge The ‘Case Merge Tool’ can be found within ‘Tools’ in 360 Office. This allows you to merge multiple cases together where the client(s) exist on more than one case. If duplicate clients have been created for any reason, through Case Merge you can create one record with all of your client information within and resulting in no loss of data. NOTE: The Case Merge Tool CANNOT be used if the client’s marital status has changed from single to married. Client names also have to match on both records to be merged before merging is allowed.
How to use the Case Merge Tool 1. Open both cases which you would like to merge by simply searching for the cases and select the case.
P a g e | 67
2. Go to ‘Tools’ within the tabs at the top, then click on ‘Case Merge Tool’ and the screen below will appear.
3. Enter the ‘Case ID, Forename, Surname or Address’ within the ‘Case Search’ Section and click on ‘Search’ button, then the case will be displayed in the ‘Search Results’ section as displayed on the next page.
P a g e | 68
4. Tick the ‘Selected’ tick box and click on ‘Add Selected Cases to Merge List’, then click on ‘Clear’ button and enter the other ‘Case ID, Forename, Surname or Address’ within the ‘Case Search’ Section again. 5. Click on ‘Search’ button, then the case will be displayed in the ‘Search Results’ section as displayed above and tick the ‘Selected’ tick box and click on ‘Add Selected Cases to Merge List’ and both cases will be displayed in the ‘Case Merge List’ section as shown below.
6. Tick the case you would like to keep the contact details for by ticking on ‘Current Contact Details’ tick box as shown on the next page. 7. Once happy with the cases you wish to merge select ‘Merge Now’. Cases will be automatically deleted when the new case record is created.
P a g e | 69
9.0 Letter Templates Letter templates are found in 360 Office under the ‘Maintenance’ ‘General’ tab in ‘Standard Letters’. Letter templates are used when sending a letter from a case record. Please refer to Sending a Letter to see how this is done. Please note you may not have the ‘Maintenance’ option as this is permission based. If not please speak to your system administrator. 9.1 Adding a new letter template To add a new letter template click on ‘Standard Letters’ under the general tab in 360 Office.
Select … from the drop down menu and then click on Ok. This will open up the letter template editor screen. Simply type out and format your letter into the template. By navigating through the Home, Page Layout, Insert, Design and Format tabs, you can tailor the letter template specifically to your needs. You can add a variety of mail merge fields into your template by right clicking on the document and selecting ‘Insert Merge Field’ from the menu.
P a g e | 70
Once you are happy with your template click on the ‘Save and Close’ icon under the File menu.
You will be prompted to add a template name. Enter a title and click on ‘Ok’. The template has now been added to your database letter templates.
If you wish to save the template to your local documents on your computer select ‘Save As’ under the file menu.
Select where on your computer you wish to save the document and click ‘Ok’.
P a g e | 71
9.2 Amending an existing letter template To amend an existing letter template navigate to ‘Standard Letters’ under the ‘Maintenance’ ‘General tab’ in 360 Office. Select the letter you wish to amend from the drop down menu and click ‘Ok’.
This will open up the letter template editor. Simply add your amendments to the letter and select the ‘Save’ from the file menu.
Exit the template editor.
P a g e | 72
10.0 Campaign Sender Important Note Before you send any pre-approved campaigns it is vital that you check your personal information held within your 360 database which will appear within the pre-approved campaign material. To do so after logging into 360 Office please choose Tools & User Settings. This will display a screen similar to the below where you can check/amend your personal information which will directly impact the pre-approved campaign material. Please add/amend SMS ID, Phone, Mobile, Email & Email Disclaimer before processing any campaigns.
SMS ID. This will be the number/id displayed from on the recipient’s phone for SMS campaigns.
Email. This will be used as your contact email address within preapproved material and the email address shown ‘From’ for your email campaigns.
Mobile/Phone. The mobile number will be used as your primary contact number within the pre-approved material. If mobile is blank then the Phone number will be used.
Email Disclaimer. This is your disclaimer which will show at the bottom of email campaigns. You can copy and paste into this field.
If you have amended either your SMS ID, Phone, Mobile, Email & Email Disclaimer please choose OK and fully log off/back into 360 Office before proceeding.
P a g e | 73
To Begin Assuming you have checked your details held within ‘User Settings’ then from within 360 Office please choose Tools & Campaign Sender.
You will then be taken to a screen where any pre-approved ‘Prepared Campaigns’ can be processed. This will identify the Name / Description of the pre-approved campaign and ‘Campaign Type’ i.e. whether this will be delivered by Letter, Email or SMS.
P a g e | 74
To continue with the campaign select Process Campaign. Your clients which meet the pre-approved campaign criteria will then be displayed with a number of other options as per the below screenshot.
Your clients which meet the preapproved campaign criteria will be listed. You can double click to enter the case record and amend any client information before sending e.g. address, email address & mobile number. You can also de-select clients to be included within the campaign by unticking the selection box and choosing Save.
P a g e | 75
Close – Will close the preview window of clients included in the campaign. Preview – Preview the campaign material to be sent to your clients selected for inclusion. This will pull through information from your 360 User Settings as per page 2. If needed, you can amend your User Settings, log off/on for these changes to then take effect which will alter the Preview and material content to be sent. Save Changes – If you deselect clients to be included in the campaign please then Save Changes so those clients will not receive the material. Export To XLSX – This will allow you to export the listed clients to an Excel CSV file and save to your PC. Ignore Campaign – This will remove the campaign from showing within Proposed Campaigns and the campaign will not be sent. Process Campaign – This will allow you to finalise & despatch the campaign to your selected clients. Please see below for further information.
Process Campaign On selecting Process Campaign you will be asked to finalise the campaign for those clients who are selected before the material is sent. It is strongly recommended you Preview the campaign before processing. Please note that for SMS & email campaigns any duplicate mobile numbers or email addresses within the campaign will be detected so only one SMS or email will be sent to each mobile number or email address included within the campaign. Before sending the campaign, you have the option to create a new opportunity against each client included within the campaign. If Yes is selected this will create a sales opportunity in the servicing advisor’s hotbox for each of their clients included within the campaign. Creating a sales opportunity as part of the campaign process is a great way of using as a follow up reminder and seeing how successful the campaign has been. Please note that either option creates an audit trail against each client/case record included within the campaign, whether or not a sales opportunity is created as part of the process. If a sales opportunity has been created, the SMS will show in the notes section of the sales opportunity and the Letter & Email will show in the ‘Sales Opportunity Document’ section. Otherwise, if an opportunity has NOT been created an audit trail will show within ‘Contact History’ for SMS and the ‘Documents’ tab for Emails & Letters.
Choosing ‘Send Now’ will immediately distribute the campaign. For SMS & email campaigns you will receive an automatic email once the campaign has been sent confirming the number of recipients and any duplicate mobile phone numbers or email addresses detected. For a Letter Campaign you will be taken to your usual Printer Options where you can then print to your selected printer.
Show Completed Campaigns This will show you all previously processed or ignored campaigns confirming who the campaign was sent to, a copy of the material and you can Re-Print Letter campaigns if required.
Change the nominated Campaign Sender By default the nominated Campaign Sender has been set to each staff member. If you are wishing for a staff member to send campaigns on your behalf you can amend the Nominated Campaign Sender by going to Staff Members in 360 Office, selecting the appropriate staff member record and clicking onto the ‘Roles’ tab.
P a g e | 76
Here you will see a drop down menu ‘Nominated Campaign Sender’. Select the person who will be sending campaigns for the selected staff member from this list, saving your changes.
Note: If you are a Nominated Campaign Sender for an advisor, please ensure that the advisor has checked their user settings as illustrated in page 2 of this guide.
Disclaimer It is vital that before committing to send a pre-approved campaign you check the results produced as part of the campaign query, ensuring that communications are sent only to those clients who you wish to be contacted and that contact information held for your clients is up to date.
P a g e | 77
11.0 Creating Default Portfolio Report Headers To create your default portfolio report headers you need to log into 360 Office. Under the Maintenance tab select ‘Portfolio Report Headers’ from the General icon. Please note you may not have the ‘Maintenance’ option as this is permission based. If not please speak to your system administrator. Clicking this button will show you the Portfolio Report Headers Screen. Select your company from the drop down menu. If you have more than one company set up on your 360 database you can create differing default portfolio headers to tailor the portfolio report to your own company needs.
As shown above you can tailor and format your portfolio report headers with different fonts, bullet points or even copy and paste from a word document.
P a g e | 78
The remainder of the header pages work in exactly the same way except they also allow you to enter a title for the section.
Each section can be customised in this way. Although you can use each section as you see fit, one use for the conclusion may be for you to remind your client of all your products and services. Once you are happy with your Portfolio Report headers select ‘Ok’. This will save the headers and default them to all future portfolio reports that you create.
P a g e | 79